Wstęp
Welcome to your new Reloop Turn 7 Premium HiFi Turntable. This manual provides essential information for setup, operation, and maintenance to ensure optimal performance and longevity of your device. Please read these instructions carefully before using your turntable.
Co jest w pudełku
- Turn 7 Turntable Unit
- Osłona przeciwpyłowa
- 2x zawiasy
- Mata filcowa
- International Power Supply (UK/EU/US)
- Kabel RCA
- Headshell z Ortofonem 2M Red (preinstalowany)
- 7" Aluminium Adapter
- Acrylic Turntable Platter
- Klucz imbusowy
- Kabel USB
- Instrukcja obsługi
- Przeciwwaga
Instrukcje konfiguracji
1. Rozpakowanie i ustawienie
Ostrożnie wyjmij wszystkie elementy z opakowania. Ustaw gramofon na stabilnej, równej powierzchni, z dala od bezpośredniego światła słonecznego, źródeł ciepła i silnych wibracji. Zapewnij odpowiednią wentylację wokół urządzenia.
2. Platter Installation
Place the acrylic platter onto the spindle. The precision-manufactured 20 mm thick acrylic platter is designed for excellent evenness and antistatic characteristics, eliminating the need for a platter mat.

Image: The solid acrylic platter, a key component for stable record playback.
3. Montaż paska
Locate the external drive belt. Carefully loop the belt around the platter and the motor pulley. The decentralized, low-vibration DC motor drives the platter via this external flat belt.

Image: Close-up of the external motor and drive belt mechanism.
4. Tonearm and Cartridge Setup
The Ortofon 2M Red cartridge system comes pre-installed on the headshell. Ensure it is securely attached to the high-quality carbon tonearm. Adjust the counterweight for proper tracking force. Refer to the Ortofon 2M Red cartridge manual for specific tracking force recommendations. The tonearm features height adjustment (Vertical Tracking Angle - VTA) and anti-skating adjustment for maximum precision. Adjust these settings for optimal sound reproduction.
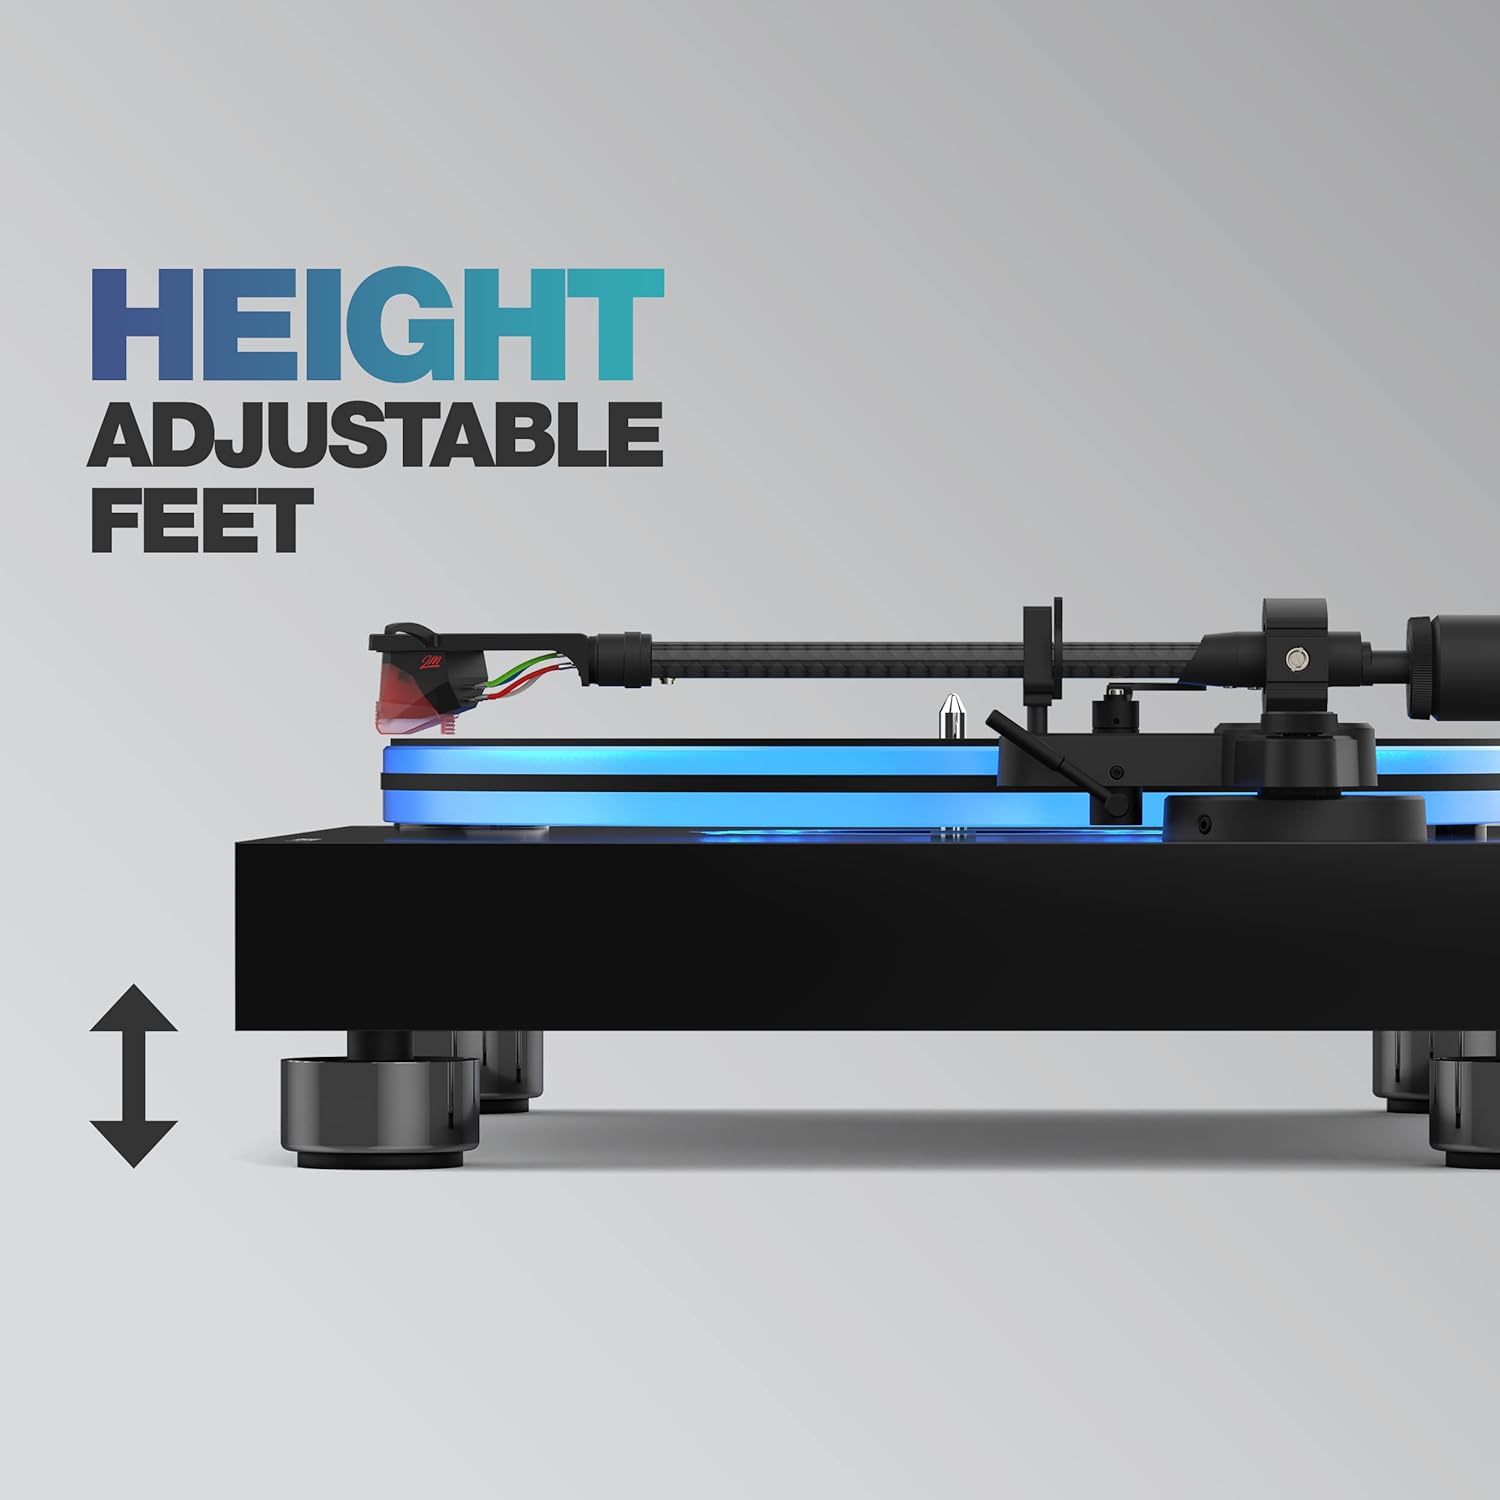
Image: The carbon tonearm with the pre-installed Ortofon 2M Red cartridge.

Obraz: Szczegółowy view of the Ortofon 2M Red cartridge.
5. Podłączanie do systemu audio
Connect the RCA cables from the turntable's audio output to your amplifier or receiver. The Turn 7 features a high-quality preamplifier, allowing switching between line and phono signals. If your amplifier has a dedicated phono input, set the turntable's pre-amp switch to OFF. If connecting to a line-level input (AUX, CD), set the pre-amp switch to ON. Connect the ground wire (if applicable) to your amplifier's ground terminal to minimize hum. For digitizing vinyl records, connect the USB output to your computer.

Image: Rear panel showing RCA and USB outputs, and pre-amp przełącznik.
6. Podłączenie zasilania
Connect the international power supply to the turntable and a suitable power outlet.
7. Montaż osłony przeciwpyłowej
Attach the dust cover using the provided hinges to protect the turntable from dust when not in use.

Image: The Reloop Turn 7 turntable with its protective dust cover.
Instrukcja obsługi
1. Włączanie/wyłączanie zasilania
Use the power switch to turn the turntable on or off.
2. Wybór prędkości
The start/stop rotary switch allows selection between 33 and 45 RPM. For 78 RPM records, an appropriate stylus and cartridge may be required, and the speed can be selected via the rotary switch.

Image: Close-up of the speed selection dial (33, 45 RPM).
3. Odtwarzanie płyty
Place a record on the platter. Select the appropriate speed. Carefully lift the tonearm using the cueing lever and position it over the desired track. Lower the tonearm gently onto the record using the cueing lever.
4. Platter Illumination
The Turn 7 features optional blue platter illumination. This can be activated or deactivated via a switch, creating a warm and inviting ambiance.

Image: The Reloop Turn 7 turntable showcasing its blue LED platter illumination.
5. Digitizing Records (USB)
Connect the USB cable to your computer. Use appropriate recording software to capture the audio from your vinyl records.
Główne cechy
- Belt-driven HiFi turntable with pre-installed Ortofon 2M Red cartridge.
- 20 mm thick acrylic platter with optional blue LED illumination.
- Decentralized, low-vibration DC motor with external flat belt drive.
- High-quality carbon tonearm with adjustable height (VTA) and anti-skating.
- Zintegrowany przedwzmacniacz gramofonowyamplifier with switchable line/phono output.
- USB output for digitizing vinyl records.
- Sturdy MDF wooden plinth with high-gloss piano lacquer finish.
- Height-adjustable isolator feet for effective decoupling.
- Universal headshell connection (SME) for cartridge versatility.

Image: Height-adjustable insulator feet for optimal stability and vibration damping.
Dane techniczne
| Funkcja | Specyfikacja |
|---|---|
| Marka | Przepętlić |
| Funkcja specjalna | Blue Platter Illumination |
| Tworzywo | Drewno inżynieryjne, Plastik |
| Waga przedmiotu | 8.2 kilograma |
| Styl | Nowoczesny |
| Kolor | Czarny |
| Nazwa modelu | Tura 7 |
| Kompatybilne urządzenia | Głośnik |
| Typ silnika | Silnik prądu stałego |
| Format sygnału | Analogowy, Cyfrowy |
| Tomtage | 12 V (prąd stały) |
| Źródło zasilania | Elektryczny przewodowy |
| Stosunek sygnału do szumu | 60dB |
| Technologia łączności | USB |
| Producent | Przepętlić |
| Numer modelu | 245435 |
Konserwacja
1. Czyszczenie gramofonu
Use a soft, dry cloth to clean the plinth and dust cover. Avoid abrasive cleaners. For the acrylic platter, use a specialized acrylic cleaner and a microfiber cloth to prevent scratches.
2. Pielęgnacja rysika
Regularly clean the stylus using a soft brush designed for stylus cleaning, brushing from back to front. Inspect the stylus for wear or damage periodically. A worn stylus can damage records and degrade sound quality.
3. Belt Care
Check the drive belt for signs of wear or stretching. Replace if necessary to maintain consistent playback speed.
Rozwiązywanie problemów
Brak dźwięku lub niska głośność
- Check all cable connections (RCA, power).
- Ensure the pre-amp switch is set correctly (ON for line input, OFF for phono input).
- Zweryfikuj amplifier input selection.
- Check stylus condition and ensure it is properly seated.
Szum brzęczenia
- Ensure the ground wire is properly connected.
- Check for interference from other electronic devices. Move the turntable if necessary.
- Verify RCA cable shielding.
Niespójna prędkość
- Check the drive belt for proper placement and tension. Replace if worn.
- Ensure the platter is clean and free of debris.
- Verify the speed selection switch is set correctly.
Skipping or Distortion
- Clean the record and stylus.
- Adjust tracking force and anti-skating settings.
- Ensure the turntable is on a level and stable surface.
Gwarancja i wsparcie
The Reloop Turn 7 Premium HiFi Turntable comes with a 2-year manufacturer's warranty. For warranty claims or technical support, please contact Reloop customer service or visit the official Reloop webstrona.
Official Reloop Webstrona: www.reloop-hifi.com