
LFF LWC150
LFF Atomic Clock User Manual
Model: LWC150
Marka: LFF
1. Wprowadzenie
The LFF Atomic Clock (Model LWC150) is a versatile digital wall or desk clock designed for accurate timekeeping and environmental monitoring. It automatically synchronizes with the WWVB radio broadcast for precise time and features a large, easy-to-read LCD display showing time, date, day of the week, alarm status, and both indoor and outdoor temperature and humidity.
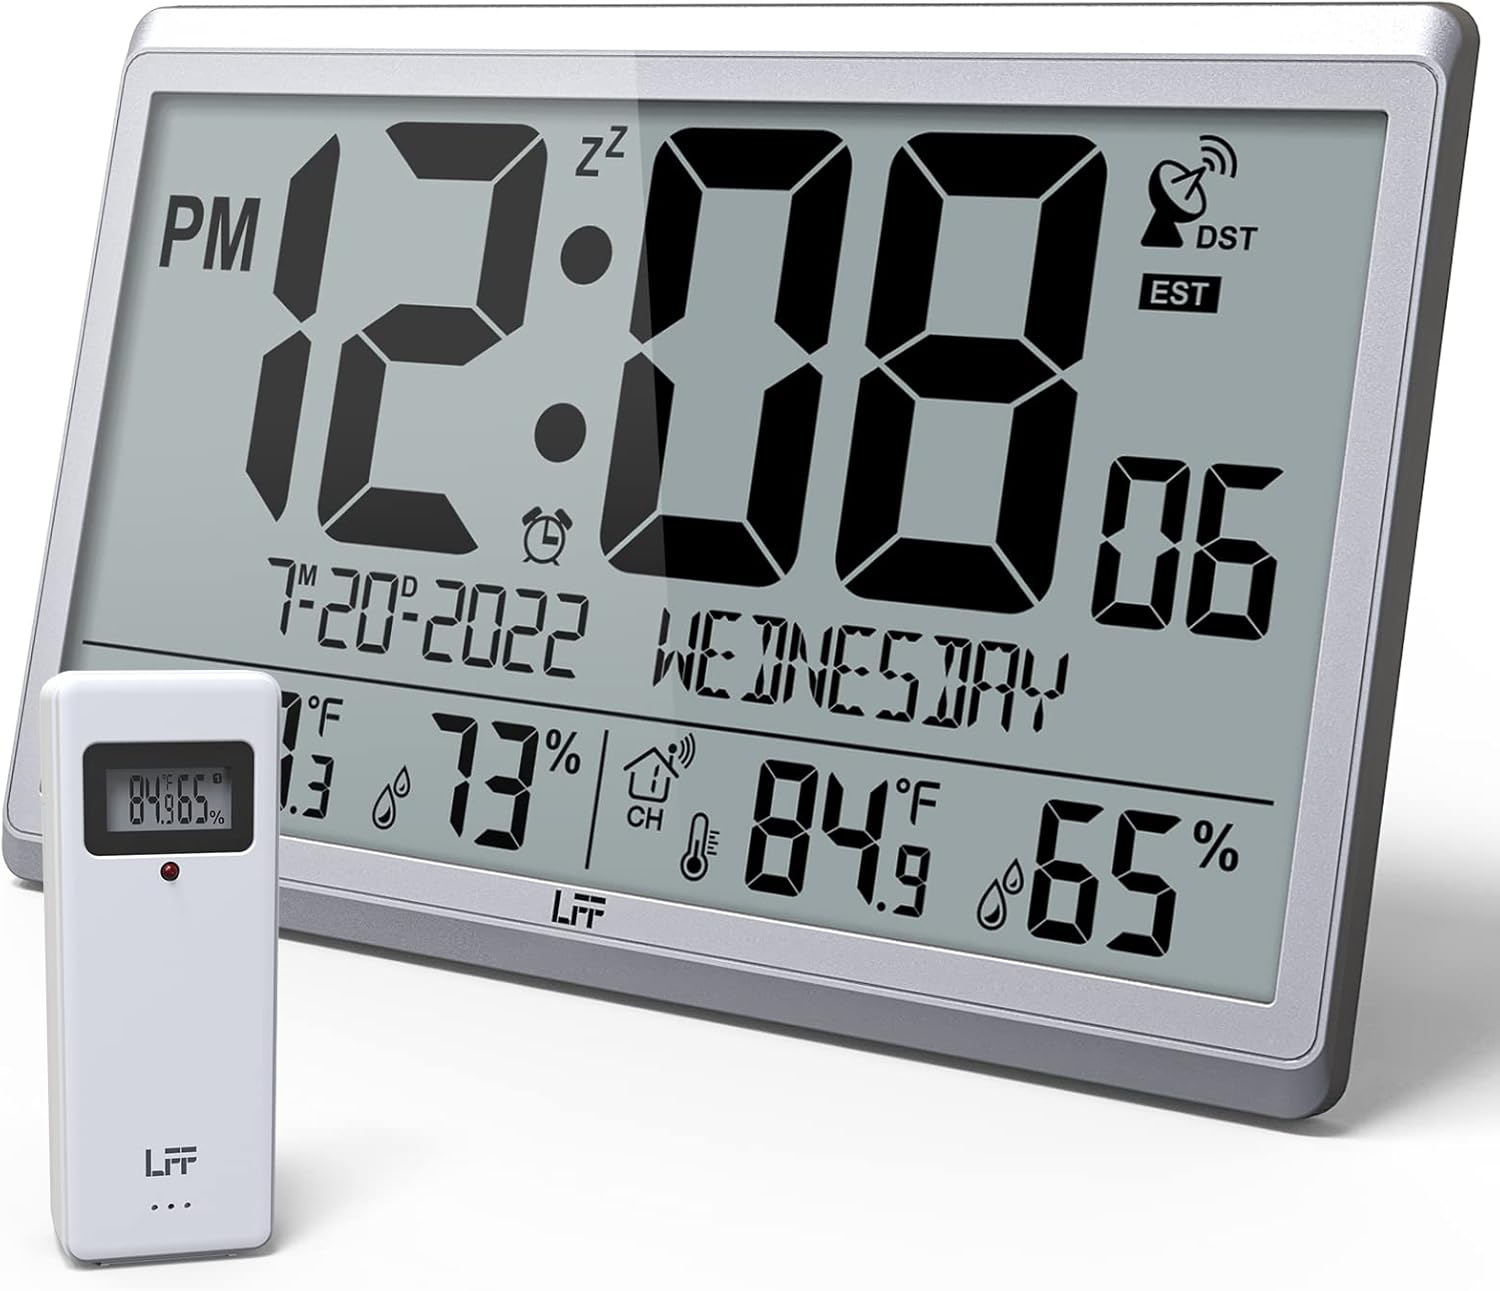
Figure 1.1: LFF Atomic Clock with its wireless outdoor sensor.
2. Funkcje
- Accurate Atomic Clock: Built-in receiver automatically synchronizes with the WWVB radio broadcast from NIST in Fort Collins, Colorado, ensuring precise time and calendar adjustments.
- Large LCD High-Definition Display: 9.4-inch tall display with large numbers for easy readability. Displays time (12/24H), calendar, day of the week, alarm, indoor/outdoor temperature (°C/°F), and humidity simultaneously.
- Bezprzewodowy czujnik zewnętrzny: Transmits accurate outdoor temperature and humidity measurements up to 328 feet (100 meters). The sensor has an IPX4 splash-proof rating.
- Zasilany bateryjnie: Main clock requires 4 AA batteries (not included), and the outdoor sensor requires 2 AAA batteries (not included). No backlight display.
- Wiele stref czasowych: Supports 8 time zones including EST, CST, MST, PST, AKT, HST, AST, NST.
- Elastyczne rozmieszczenie: Can be used as a wall clock (3 hanging holes) or a desk clock (integrated bracket).
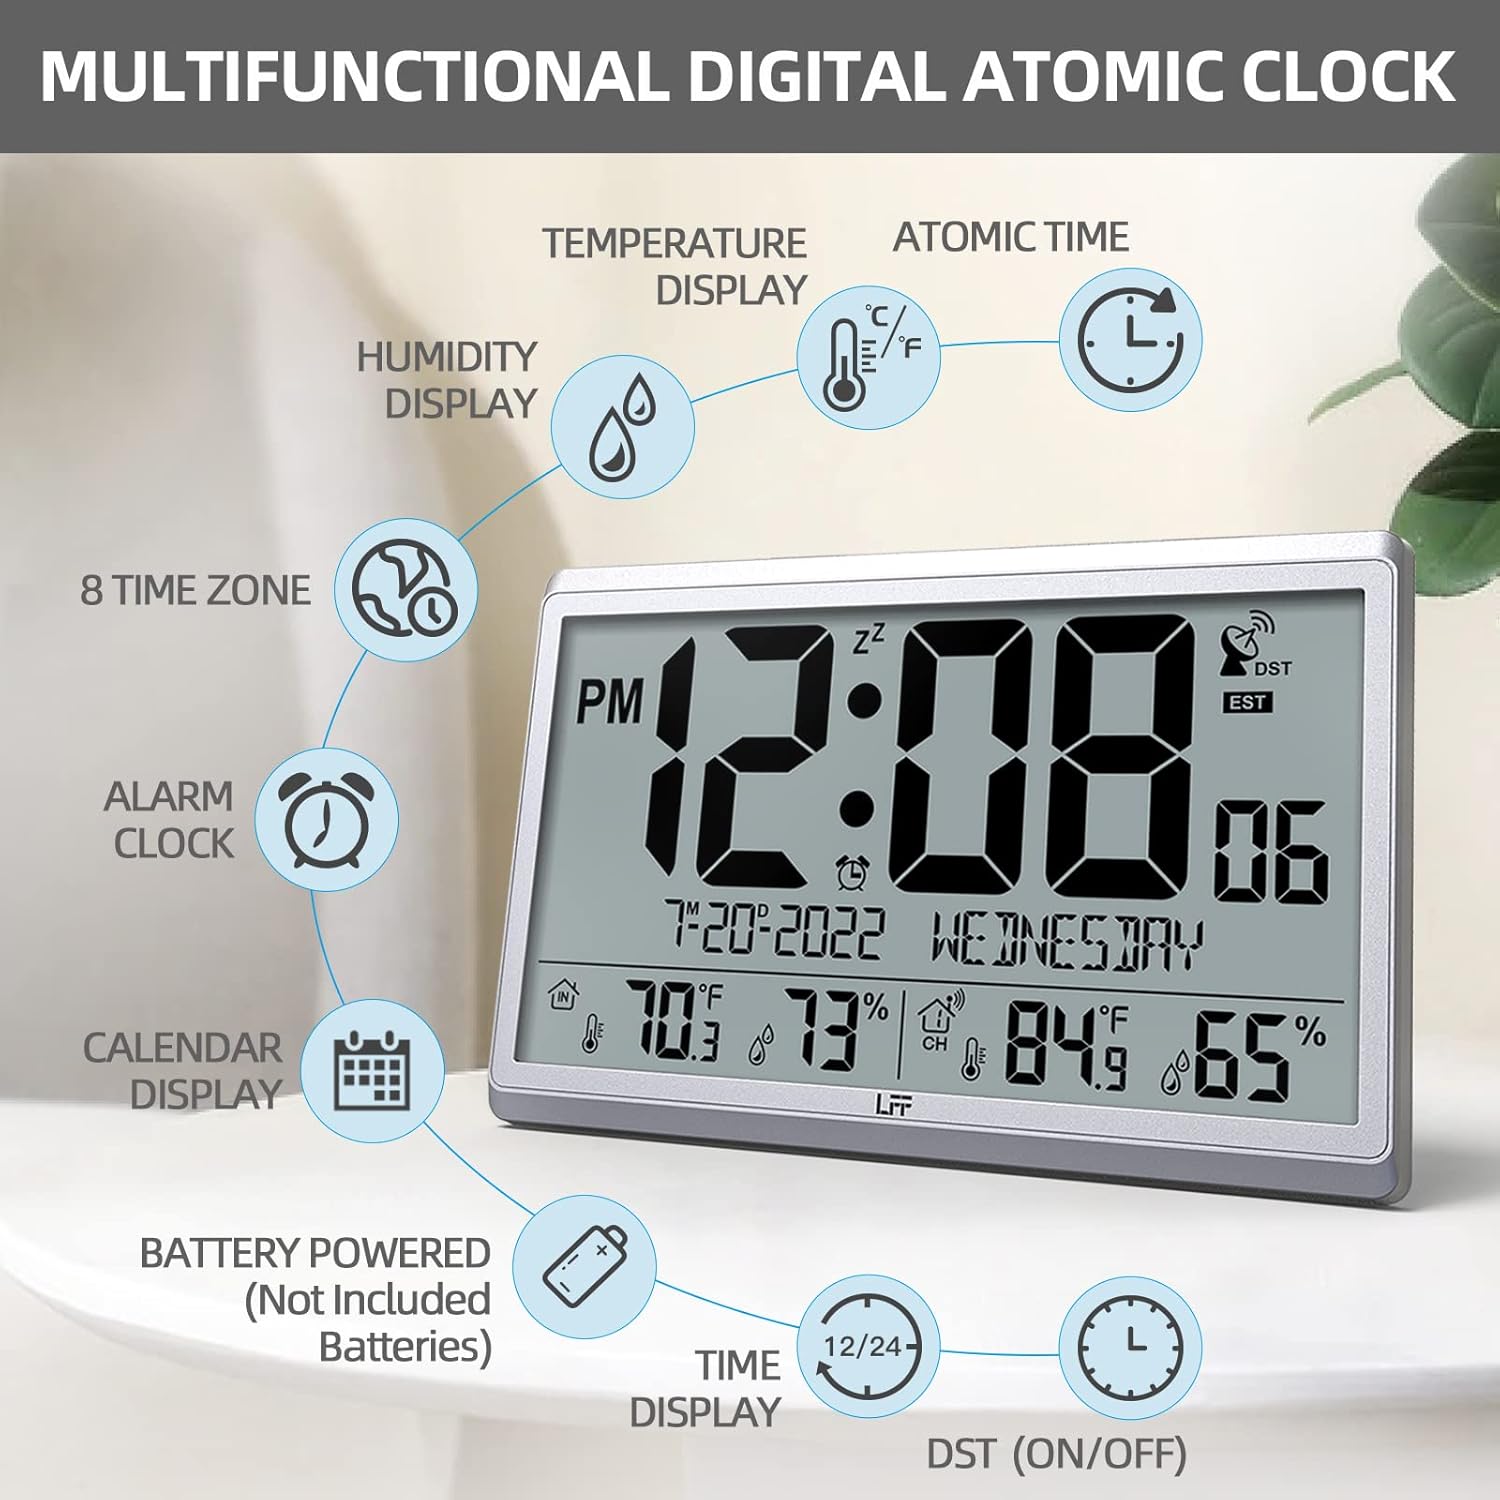
Rysunek 2.1: Koniecview of the clock's multifunctional display and features.
3. Zawartość opakowania
Po rozpakowaniu należy sprawdzić zawartość opakowania, aby upewnić się, że znajdują się w nim wszystkie elementy:
- 1 x LFF Atomic Clock (Main Unit)
- 1 x bezprzewodowy czujnik zewnętrzny
- 1 x Instrukcja obsługi
4. Konfiguracja
4.1 Instalacja baterii
The main clock unit and the outdoor sensor are battery-powered. Batteries are not included.
- For the Main Clock Unit: Open the battery compartment on the back of the clock. Insert 4 new AA batteries, ensuring correct polarity (+/-).
- W przypadku bezprzewodowego czujnika zewnętrznego: Open the battery compartment on the back of the sensor. Insert 2 new AAA batteries, ensuring correct polarity (+/-).

Figure 4.1: Battery installation and button layout on the main clock unit.
4.2 Umiejscowienie czujnika zewnętrznego
For accurate temperature and humidity readings, place the outdoor sensor in a location that is:
- Out of direct sunlight and rain.
- Away from any heat sources (e.g., vents, exhaust fans) or extreme cold sources.
- Within the wireless transmission range of 328 feet (100 meters) from the main clock unit.

Figure 4.2: Optimal placement for the wireless outdoor sensor.
4.3 Początkowa synchronizacja czasu atomowego
After battery installation, the clock will automatically attempt to synchronize with the WWVB atomic time signal. This process may take several minutes to several hours, depending on your location and signal strength. Ensure the clock is placed in an area where it can receive a clear signal, ideally near a window and away from electronic interference.

Figure 4.3: The clock synchronizes with the atomic time signal broadcast from Fort Collins, Colorado.
5. Instrukcja obsługi
5.1 Ręczne ustawianie czasu i daty
While the clock primarily relies on atomic synchronization, you can manually set the time and date if needed (e.g., during initial setup before signal acquisition or in areas with poor reception).
- Naciśnij i przytrzymaj USTAWIĆ button on the back of the clock until the display flashes.
- Użyj UP or DOWN/RCC przyciski umożliwiające regulację migającej wartości (np. godziny, minut, roku, miesiąca, dnia).
- Naciskać USTAWIĆ again to confirm the setting and move to the next value.
- Powtarzaj, aż skonfigurujesz wszystkie żądane ustawienia.
5.2 Wybór strefy czasowej
The clock supports 8 time zones. After atomic synchronization, you may need to select your local time zone.
- Naciśnij USTAWIĆ button repeatedly until the time zone setting flashes.
- Użyj UP or DOWN/RCC buttons to cycle through the available time zones (EST, CST, MST, PST, AKT, HST, AST, NST).
- Naciskać USTAWIĆ aby potwierdzić swój wybór.
5.3 Wybór jednostki temperatury (°C/°F)
To switch between Celsius and Fahrenheit for temperature display:
- Naciśnij krótko DOWN/RCC button. The temperature unit will toggle between °C and °F.
5.4 Funkcja budzika
The clock includes an alarm function.
- Naciśnij ALARM przycisk do view aktualny czas alarmu.
- Naciśnij i przytrzymaj ALARM Naciskaj przycisk, aż zacznie migać godzina alarmu.
- Użyj UP or DOWN/RCC przyciski umożliwiające ustawienie żądanej godziny i minut alarmu.
- Naciskać ALARM aby potwierdzić każde ustawienie.
- Aby włączyć/wyłączyć alarm, naciśnij krótko przycisk ALARM Naciśnij przycisk, gdy wyświetlana jest godzina alarmu. Ikona alarmu pojawi się/zniknie na ekranie.
5.5 Wyświetlanie informacji
Duży wyświetlacz LCD zapewnia szybki dostęp do kompleksowych informacji:
- Sekcja górna: Current time (with AM/PM indicator), atomic signal strength, DST indicator, and time zone.
- Część środkowa: Date (Month-Day-Year) and Day of the Week.
- Dolna sekcja: Indoor temperature and humidity, and outdoor temperature and humidity (from wireless sensor).

Figure 5.1: The LFF Atomic Clock can be placed on a desk or mounted on a wall.
6. Konserwacja
6.1 Wymiana baterii
Replace batteries in both the main unit and the outdoor sensor when the display becomes dim or readings become erratic. Always replace all batteries at the same time with new ones of the same type. For temperatures below -4°F, lithium batteries are recommended for the outdoor sensor.
6.2 Czyszczenie
Wipe the clock and sensor with a soft, dry cloth. Do not use abrasive cleaners or solvents, as they may damage the display or casing. Avoid getting moisture into the battery compartments or electronic components.
6.3 Pielęgnacja czujnika
Periodically check the outdoor sensor for any debris or obstructions that might affect its readings. Ensure it remains in a sheltered location to protect it from extreme weather conditions, despite its splash-proof design.
7. Rozwiązywanie Problemów
| Problem | Możliwa przyczyna | Rozwiązanie |
|---|---|---|
| Zegar nie jest zsynchronizowany z czasem atomowym. | Słaby sygnał, zakłócenia, nieprawidłowa strefa czasowa. | Relocate the clock closer to a window or away from electronic devices. Ensure correct time zone is selected. Allow up to 24 hours for initial synchronization. |
| Temperatura/wilgotność zewnętrzna nie jest wyświetlana lub jest niedokładna. | Sensor out of range, low sensor batteries, sensor exposed to direct elements. | Ensure sensor is within 328 feet of the main unit. Replace sensor batteries. Reposition sensor in a shaded, dry area. Press the KANAŁ button on the main unit to re-establish connection. |
| Wyświetlacz jest ciemny lub pusty. | Niski poziom baterii w jednostce głównej. | Replace all 4 AA batteries in the main clock unit. |
| Time is incorrect after synchronization. | Wybrano nieprawidłową strefę czasową. | Verify and adjust the time zone setting as described in Section 5.2. |
8. Specyfikacje
| Funkcja | Szczegół |
|---|---|
| Numer modelu | LWC150 |
| Typ wyświetlacza | Cyfrowy LCD |
| Wymiary produktu | 14.2" szer. x 9.4" wys. x 1.2" gł. |
| Źródło zasilania (jednostka główna) | 4 baterie AA (brak w zestawie) |
| Źródło zasilania (czujnik zewnętrzny) | Baterie 2 x AAA (brak w zestawie) |
| Zakres temperatury wewnętrznej | od -14.1°C do 122.0°C (od 9.9°F do 50.0°F) |
| Zakres temperatury zewnętrznej | -58.0°F do 158.0°F (-50.0°C do 70.0°C) |
| Zakres wilgotności w pomieszczeniu | od 1% do 99% |
| Zakres wilgotności na zewnątrz | od 1% do 99% |
| Zasięg transmisji bezprzewodowej | Do 100 metrów (328 stóp) w terenie otwartym |
| Ocena wodoodporności czujnika zewnętrznego | IPX4 (bryzgoszczelny) |
| Tworzywo | Plastic (Acrylonitrile Butadiene Styrene frame) |
| Waga przedmiotu | 2.7 funta (1.23 kilograma) |
9. Gwarancja i wsparcie
LFF products are designed for reliability and performance. For any questions, technical support, or warranty claims, please contact LFF customer service through the retailer's platform or the official LFF webStrona. Zachowaj dowód zakupu w celach gwarancyjnych.
Powiązane dokumentyLWC150


Ask a question about this manual
Ask about setup, troubleshooting, compatibility, parts, safety, or missing instructions. Manuals+ will review the question and use this page’s manual context to help answer it.