
1. Wprowadzenie
Dziękujemy za zakupasing the LFF LDR113-EU Kitchen Radio. This manual provides essential information for the safe and efficient operation of your device. Please read it thoroughly before use and retain it for future reference.
The LFF LDR113-EU is a versatile kitchen radio featuring DAB+, FM, and Bluetooth connectivity. It includes dual alarms, a sleep timer, and 60 station presets, designed for both tabletop use and under-cabinet mounting.
2. Informacje dotyczące bezpieczeństwa
- Źródło zasilania: Używaj wyłącznie dostarczonego zasilacza. Upewnij się, że napięcietage pasuje do lokalnego źródła zasilania.
- Woda i wilgoć: Do not expose the device to water, rain, or excessive moisture. Avoid placing liquids near the radio.
- Wentylacja: Zapewnij odpowiednią wentylację wokół urządzenia. Nie blokuj otworów wentylacyjnych.
- Ciepło: Trzymaj urządzenie z dala od źródeł ciepła, takich jak grzejniki, kratki wentylacyjne, piece i inne urządzenia wytwarzające ciepło.
- Czyszczenie: Przed czyszczeniem odłącz urządzenie od zasilania. Użyj miękkiej, suchej ściereczki. Nie używaj środków czyszczących w płynie ani w aerozolu.
- Serwisowanie: Nie próbuj samodzielnie naprawiać tego produktu. Wszelkie czynności serwisowe należy powierzyć wykwalifikowanemu personelowi serwisowemu.
- Umieszczenie: Place the radio on a stable, level surface or mount it securely according to the instructions.
3. Zawartość opakowania
Sprawdź, czy w przesyłce znajdują się wszystkie elementy:
- LFF LDR113-EU Kitchen Radio
- Zasilacz
- Mounting Kit (screws, spacers, mounting template)
- Instrukcja obsługi (ten dokument)
4. Koniec produktuview
Zapoznaj się z podzespołami i elementami sterowania radia.

Rysunek 4.1: Przód view of the LFF LDR113-EU Kitchen Radio, showing the LCD display on the left, control buttons in the center, and a large rotary knob on the right. The buttons include power, mode, menu, info, preset, timer/sleep, and navigation arrows. The rotary knob is for volume and selection.

Rysunek 4.2: Diagram illustrating the key features of the LFF Kitchen Radio, including DAB/DAB+ radio, FM radio, two alarms, sleep timer, Bluetooth connectivity, and 60 station presets.
4.1. Sterowanie i wyświetlacz
- Kolorowy wyświetlacz LCD: Pokazuje aktualny tryb, informacje o stacji, czas i ustawienia.
- Przycisk zasilania: Włącza/wyłącza radio.
- Przycisk trybu: Przełącza między trybami DAB+, FM i Bluetooth.
- Przycisk Menu/Informacje: Accesses menu options or displays station information.
- Przyciski ustawień wstępnych (1-5): Szybki dostęp do zapisanych stacji.
- Timer/Sleep Button: Sets sleep timer or alarm functions.
- Przyciski nawigacyjne (góra/dół/lewo/prawo): Navigates through menus and station lists.
- Rotary Knob (Volume/Enter): Adjusts volume, scrolls through options, and confirms selections.
5. Konfiguracja
5.1. Podłączenie zasilania
- Podłącz zasilacz do portu DC IN z tyłu radia.
- Podłącz zasilacz do gniazdka ściennego.
- Radio włączy się lub przejdzie w tryb czuwania.
5.2. Initial Scan (DAB+ and FM)
Upon first power-on, the radio will typically perform an automatic scan for DAB+ and FM stations. If not, follow these steps:
- Naciśnij Tryb przycisk umożliwiający wybór trybu DAB+ lub FM.
- For DAB+, the radio will usually initiate a full scan automatically. If not, navigate to the 'Full Scan' option in the DAB+ menu and press the rotary knob to confirm.
- For FM, navigate to the 'Auto Scan' option in the FM menu and press the rotary knob to confirm.
- The radio will search for available stations and store them.

Rysunek 5.1: The LFF Kitchen Radio's LCD color screen displaying the main menu with icons for Digital Radio (DAB+), FM Radio, and Bluetooth, indicating available modes.
6. Instrukcja obsługi
6.1. Włączanie/wyłączanie zasilania
Naciśnij Moc button to turn the radio on or off (standby mode).
6.2. Wybór trybu
Naciśnij Tryb Naciskaj przycisk wielokrotnie, aby przełączać się między trybami DAB+, FM i Bluetooth.
6.3. Obsługa radia DAB+
- In DAB+ mode, use the W górę/w dół navigation buttons or the rotary knob to browse available stations.
- Press the rotary knob to select a station.
- Naciskać Menu/Informacje Do view informacje o stacji (np. typ programu, siła sygnału).
6.4. Obsługa radia FM
- W trybie FM użyj W górę/w dół navigation buttons to tune to stations manually.
- Naciśnij i przytrzymaj W górę/w dół buttons for automatic station seeking.
- Naciskać Menu/Informacje Do view informacje o stacji.
6.5. Łączność Bluetooth
Connect your smartphone or other Bluetooth-enabled device to the radio.
- Naciśnij Tryb button to select Bluetooth mode. The display will show 'Bluetooth Pairing'.
- Na swoim urządzeniu mobilnym włącz Bluetooth i wyszukaj dostępne urządzenia.
- Select 'LFF LDR113-EU' from the list of devices.
- Once connected, the radio display will show 'Bluetooth Connected'. You can now play audio from your device through the radio.
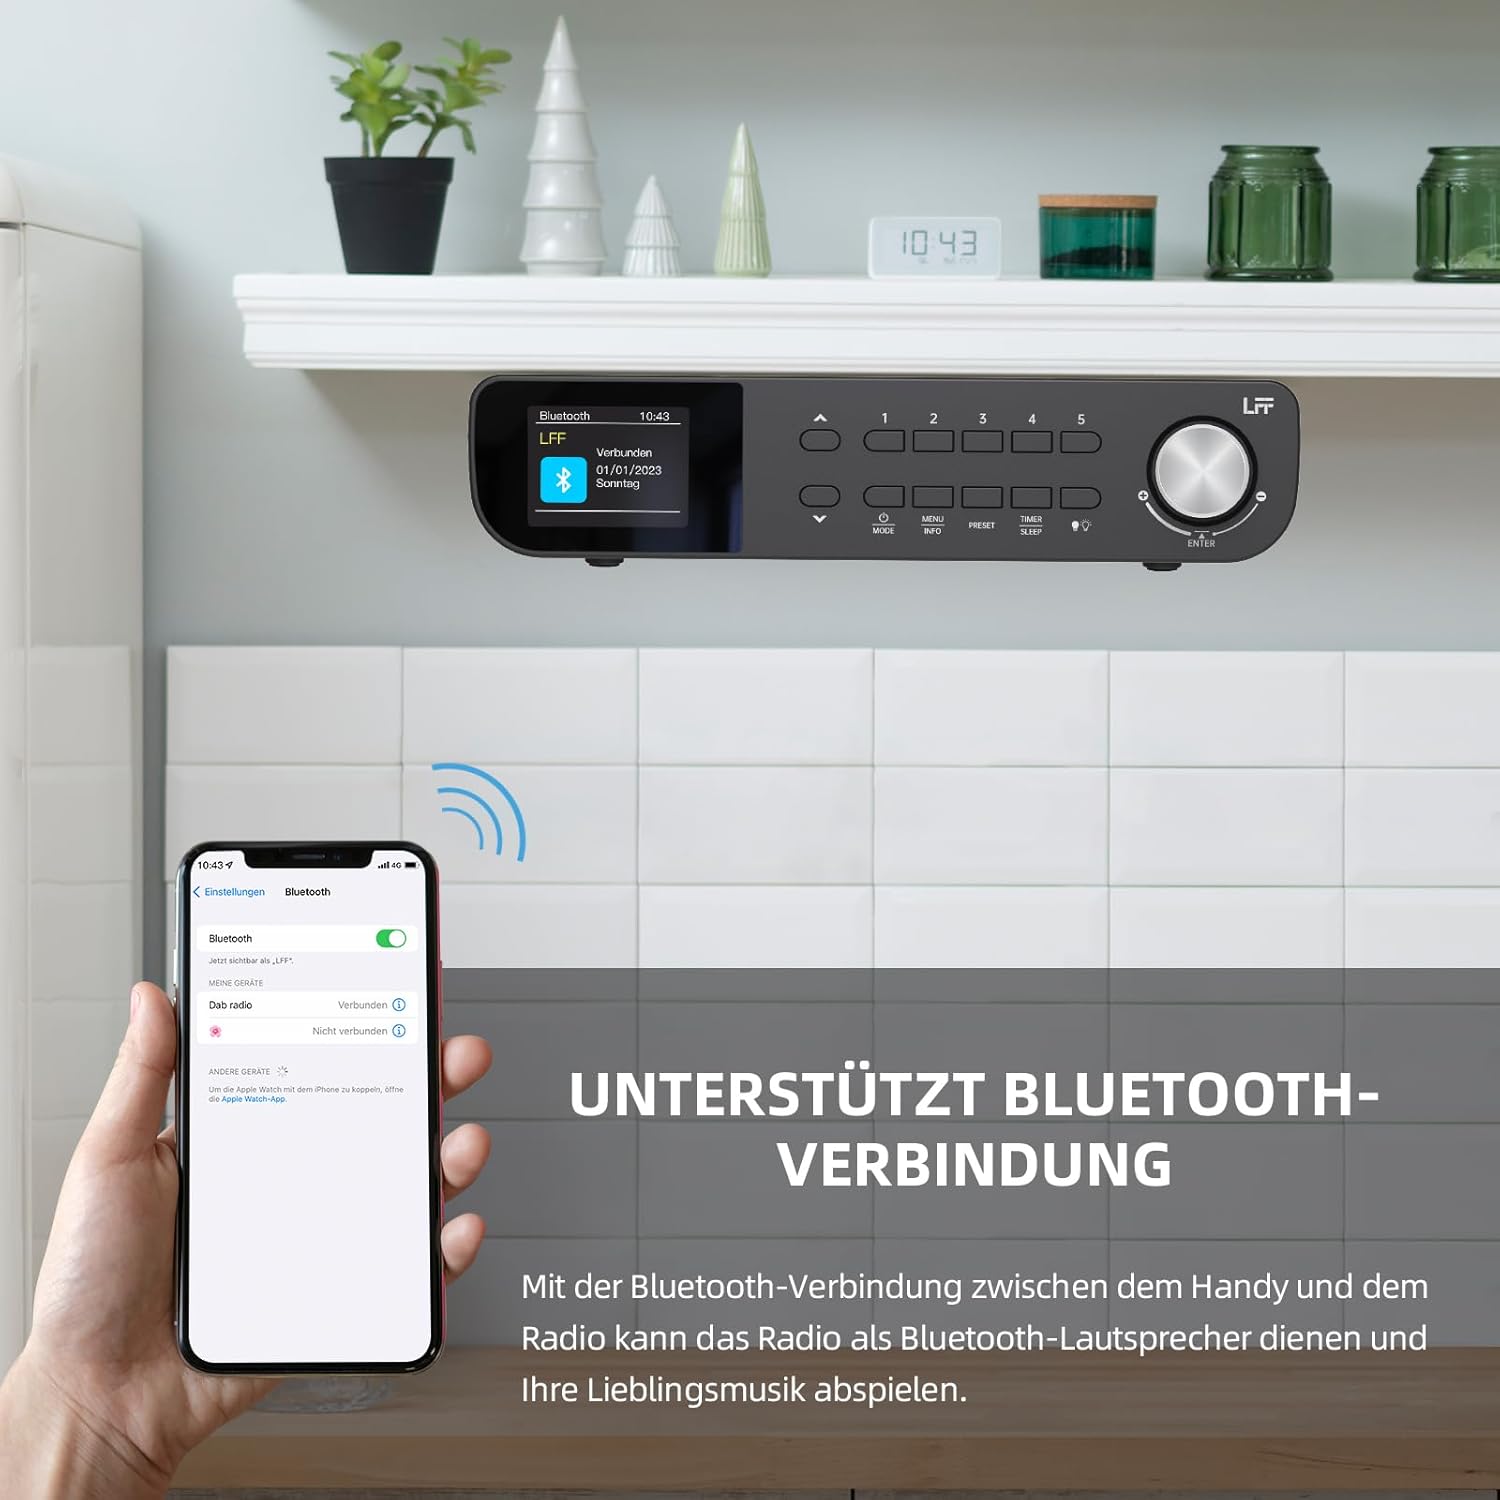
Rysunek 6.1: The LFF Kitchen Radio displaying a successful Bluetooth connection, with a smartphone screen showing the radio as a connected device.

Rysunek 6.2: Z bliska view of the radio's display indicating 'LFF' and 'Connected' under the Bluetooth menu, confirming a successful pairing.
6.6. Ustawianie alarmów
The radio features two independent alarms.
- Naciśnij Zegar/Uśpienie button repeatedly until 'Alarm 1' or 'Alarm 2' appears.
- Use the navigation buttons and rotary knob to set the alarm time, source (DAB+, FM, or Buzzer), and frequency (daily, weekdays, weekends, once).
- Confirm settings by pressing the rotary knob.

Rysunek 6.3: Close-up of the radio's display showing the current time and options to activate or deactivate Alarm 1 and Alarm 2.
6.7. Wyłącznik czasowy
Timer uśpienia umożliwia automatyczne wyłączenie radia po upływie ustawionego czasu.
- Naciśnij Zegar/Uśpienie button repeatedly until 'Sleep Timer' appears.
- Use the navigation buttons or rotary knob to select the desired sleep duration (e.g., 15, 30, 60 minutes).
- Potwierdź naciskając pokrętło obrotowe.

Rysunek 6.4: Close-up of the radio's display showing the 'Sleep Timer' setting, with an option to set the duration, for example, to 30 minutes.
6.8. Ustawienia wstępne
Save up to 60 favorite stations for quick access.
- Aby zapisać ustawienie wstępne: Dostrój się do żądanej stacji. Naciśnij i przytrzymaj jeden z przycisków. Ustawienia wstępne (1-5) buttons until 'Preset Saved' appears. For additional presets, use the 'Preset Store' option in the menu.
- Aby przywołać ustawienie wstępne: Krótko naciśnij jeden z Ustawienia wstępne (1-5) buttons. For other presets, navigate to 'Preset Recall' in the menu.
6.9. Światło LED
The radio includes an integrated LED light, useful for illuminating the area below if mounted under a cabinet.
- Naciśnij Światło button (if available, or navigate through menu) to turn the LED light on or off.

Rysunek 6.5: The LFF Kitchen Radio mounted under a kitchen cabinet, with its integrated LED light providing illumination to the countertop below.
6.10. Jasność wyświetlacza
Adjust the display backlight brightness to suit your environment.
- Access the 'Display' or 'Settings' menu.
- Select 'Brightness' and choose from High, Medium, or Low settings.

Rysunek 6.6: A visual comparison of the LFF Kitchen Radio's display at three different backlight brightness levels: High, Medium, and Low, demonstrating the adjustable visibility.
7. Instrukcje montażu
The LFF LDR113-EU Kitchen Radio offers flexible placement options: tabletop or under-cabinet mounting.
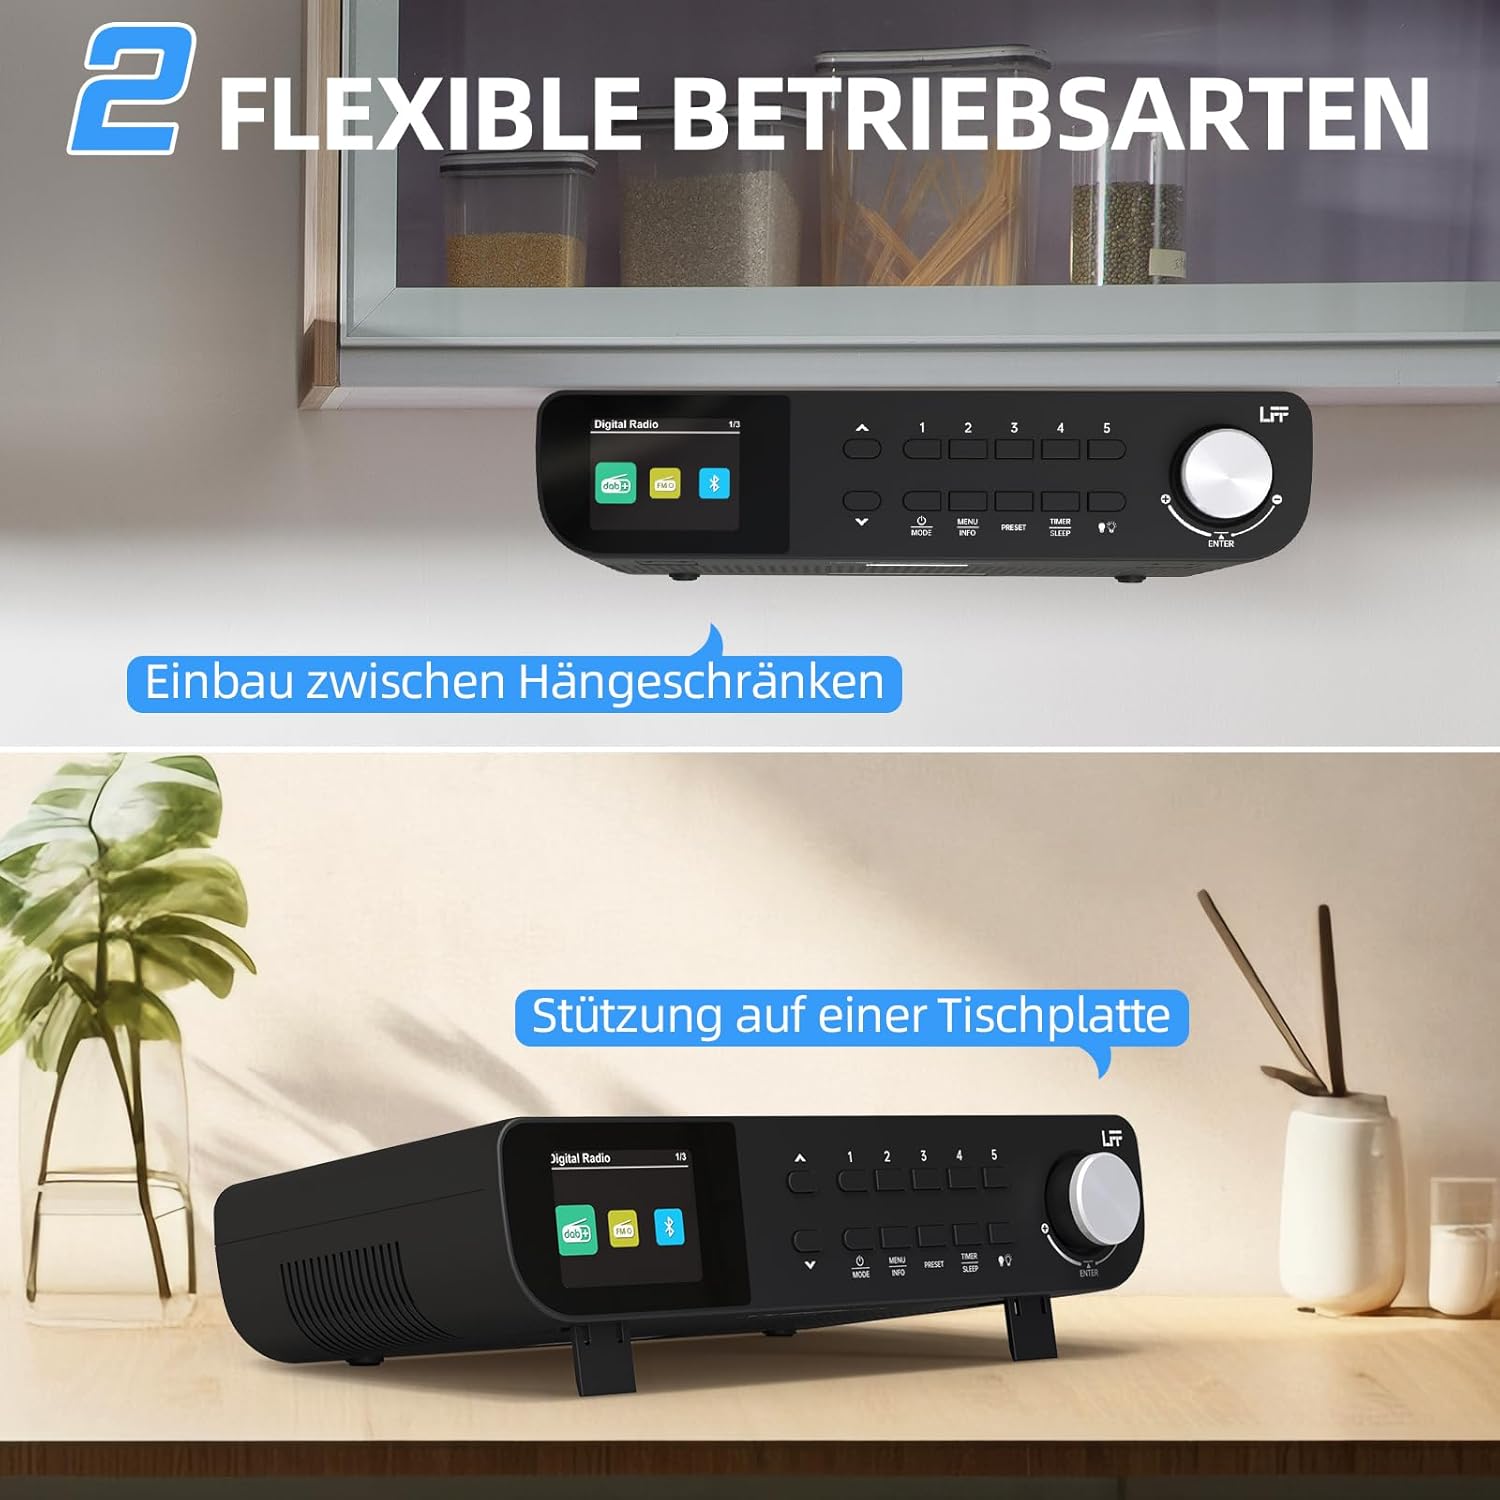
Rysunek 7.1: The LFF Kitchen Radio displayed in two common installation scenarios: mounted underneath a kitchen cabinet and placed freestanding on a tabletop.
7.1. Tabletop Placement
Simply place the radio on a stable, flat surface. Ensure it is not near the edge to prevent accidental falls.
7.2. Under-Cabinet Mounting
For under-cabinet installation, use the provided mounting kit.
- Przygotuj lokalizację: Choose a suitable location under a kitchen cabinet, ensuring there is enough space and access to a power outlet.
- Zaznacz otwory wiertnicze: Use the provided mounting template to mark the drill holes on the underside of the cabinet.
- Wywierć otwory pilotażowe: Wywierć otwory pilotujące w zaznaczonych miejscach.
- Attach Mounting Plate (if applicable): Some models may include a separate mounting plate. Attach this to the cabinet using the screws.
- Zabezpiecz radio: Align the radio with the mounting holes or plate and secure it using the provided screws. Ensure it is firmly attached.
- Podłącz zasilanie: Podłącz zasilacz.

Rysunek 7.2: Detailed diagram showing the steps for under-cabinet mounting, including measuring distances (e.g., 58mm) and securing the radio with screws.
8. Konserwacja
- Czyszczenie: To clean the radio, disconnect it from the power supply. Use a soft, dry, lint-free cloth. Do not use abrasive cleaners, waxes, or solvents.
- Antena: Ensure the antenna is extended for optimal reception in DAB+ and FM modes. Handle it gently to avoid damage.
- Składowanie: Jeśli radio będzie przechowywane przez dłuższy czas, należy odłączyć je od zasilania i przechowywać w chłodnym, suchym miejscu.
9. Rozwiązywanie Problemów
| Problem | Możliwa przyczyna | Rozwiązanie |
|---|---|---|
| Brak zasilania | Zasilacz nie jest podłączony lub gniazdko jest uszkodzone. | Sprawdź podłączenie do zasilania. Spróbuj użyć innego gniazdka. |
| Słaby odbiór DAB+/FM | Antena nie jest wysunięta, sygnał jest słaby lub występują zakłócenia. | Fully extend the antenna. Reposition the radio. Perform a full scan. |
| Bluetooth nie łączy się | Radio nie jest w trybie parowania, urządzenie jest za daleko lub jest już połączone z innym urządzeniem. | Upewnij się, że radio jest w trybie Bluetooth. Przybliż urządzenie. Odłącz je od innych urządzeń. |
| Brak dźwięku | Volume too low, mute activated, or incorrect mode. | Increase volume. Check if mute is active. Ensure correct mode (DAB+, FM, Bluetooth). |
| Wyświetlacz nie działa | Brightness too low or device malfunction. | Adjust display brightness. If problem persists, contact support. |
10. Specyfikacje

Rysunek 10.1: Diagram showing the dimensions of the LFF Kitchen Radio: 250mm length, 146mm width, and 55mm height.
| Funkcja | Szczegół |
|---|---|
| Marka | LFF |
| Numer modelu | LDR113-EU |
| Kolor | Czarny |
| Łączność | Bluetooth |
| Technologia strojenia | DAB Plus, FM |
| Źródło zasilania | Kabel elektryczny |
| Częstotliwość | 108 MHz (maks. FM) |
| Wymiary (dł. x szer. x wys.) | 250mm x 146mm x 55mm |
| Ustawienia wstępne | 60 |
| Wyświetlacz | Kolorowy ekran LCD |
| Cechy specjalne | Dual Alarms, Sleep Timer, Under-cabinet mounting option, LED Light |
11. Gwarancja i wsparcie
This product comes with a standard manufacturer's warranty. Please refer to the warranty card included in your package for specific terms and conditions. For technical support, troubleshooting assistance, or warranty claims, please contact your retailer or the LFF customer service department.