
1. Wprowadzenie
The HOGA W10 Advanced Window Cleaning Robot is designed to provide intelligent and efficient automatic cleaning for various smooth surfaces, including windows, doors, walls, and mirrors. This manual provides essential information for the safe and effective operation, maintenance, and troubleshooting of your device.
2. Instrukcje bezpieczeństwa
Read all safety instructions carefully before using the HOGA W10 Window Cleaning Robot. Failure to follow these instructions may result in electric shock, fire, or serious injury.
- Podłączenie zasilania: Always ensure the robot is connected to a power source during operation. The internal battery is for backup during power outages only, allowing the robot to remain on the glass for at least 30 minutes.
- Lina bezpieczeństwa: Always attach the safety rope to a secure anchor point before placing the robot on any window, especially for high-rise cleaning. This prevents the robot from falling in case of power loss or suction failure.
- Stan powierzchni: Do not use the robot on cracked, damaged, or uneven glass surfaces. Ensure the surface is free from large debris that could scratch the glass or damage the robot.
- Warunki atmosferyczne: Avoid using the robot in rainy, windy, or extremely cold conditions.
- Dzieci i zwierzęta: Trzymaj dzieci i zwierzęta domowe z dala od pracującego robota.
- Roztwór czyszczący: Use only recommended cleaning solutions. Do not spray flammable liquids near the robot.
- Konserwacja: Aby zapewnić optymalną wydajność i bezpieczeństwo, należy regularnie przeprowadzać konserwację zgodnie z opisem zawartym w niniejszej instrukcji.
3. Zawartość opakowania
Carefully unpack your HOGA W10 Window Cleaning Robot and check that all items are present and in good condition. If any items are missing or damaged, contact customer support.

Image: The HOGA W10 Window Cleaning Robot and its accessories, including the main unit, power cord, cleaning cloths, spray bottle, remote control, safety rope, and user manual.
- Główna jednostka robota
- Przewód zasilający i adapter
- 5 x ściereczki czyszczące z mikrofibry
- Spray Bottle (empty)
- Zdalne sterowanie
- Safety Rope with Carabiner
- Instrukcja obsługi
- Ultrasonic Nozzle Replacement Kit (if applicable)
4. Koniec produktuview
The HOGA W10 features advanced technology for efficient window cleaning.
Główne cechy:
- Inteligentne automatyczne czyszczenie: Designed for both indoor and outdoor glass, high windows, and tiled walls.
- Wysoka moc ssania: 3000 PA suction ensures secure attachment to surfaces.
- Smart Frame Detection: Automatically detects window frames to prevent collisions.
- Automatic Path Planning: Optimizes cleaning routes for thorough coverage.
- Zdalne sterowanie: Wygodna obsługa na odległość.
- Bateria zapasowa: Internal battery provides power for up to 30 minutes during power interruptions.
- Lina bezpieczeństwa: Additional safety measure for high-altitude cleaning.

Image: Illustration of the HOGA W10 robot's features including remote control, backup battery, smart frame detection, and automatic path planning.

Image: The HOGA W10 robot illustrating its strong suction power, indicated by arrows pulling it towards the glass surface.
5. Konfiguracja
- Załóż ściereczki czyszczące: Securely attach two clean microfiber cleaning cloths to the bottom of the robot. Ensure they cover the cleaning pads completely.
- Podłącz zasilanie: Plug the power adapter into the robot and then into a power outlet. Ensure the connection is secure.
- Zamocuj linę bezpieczeństwa: Fasten the safety rope's carabiner to a sturdy object indoors, such as a heavy piece of furniture or a window frame anchor. Ensure the rope is long enough to reach the entire cleaning area but not excessively loose.
- Przygotuj roztwór czyszczący: Fill the provided spray bottle with your preferred window cleaning solution.
- Przygotuj powierzchnię: For heavily soiled windows, it is recommended to pre-clean the surface to remove large dirt particles. Lightly spray the window surface or the cleaning cloths with cleaning solution.
6. Instrukcja obsługi
Follow these steps to operate your HOGA W10 Window Cleaning Robot.
Uruchomienie robota:
- Umieść robota: Hold the robot firmly against the glass surface. Press the power button on the robot or the remote control to activate suction. The robot will adhere to the glass.
- Zacznij sprzątać: Once the robot is securely attached, press the 'Start' button on the remote control. The robot will begin its automatic cleaning path.
Tryby czyszczenia:
The robot features automatic path planning. You can also manually control its direction using the remote control's arrow buttons.
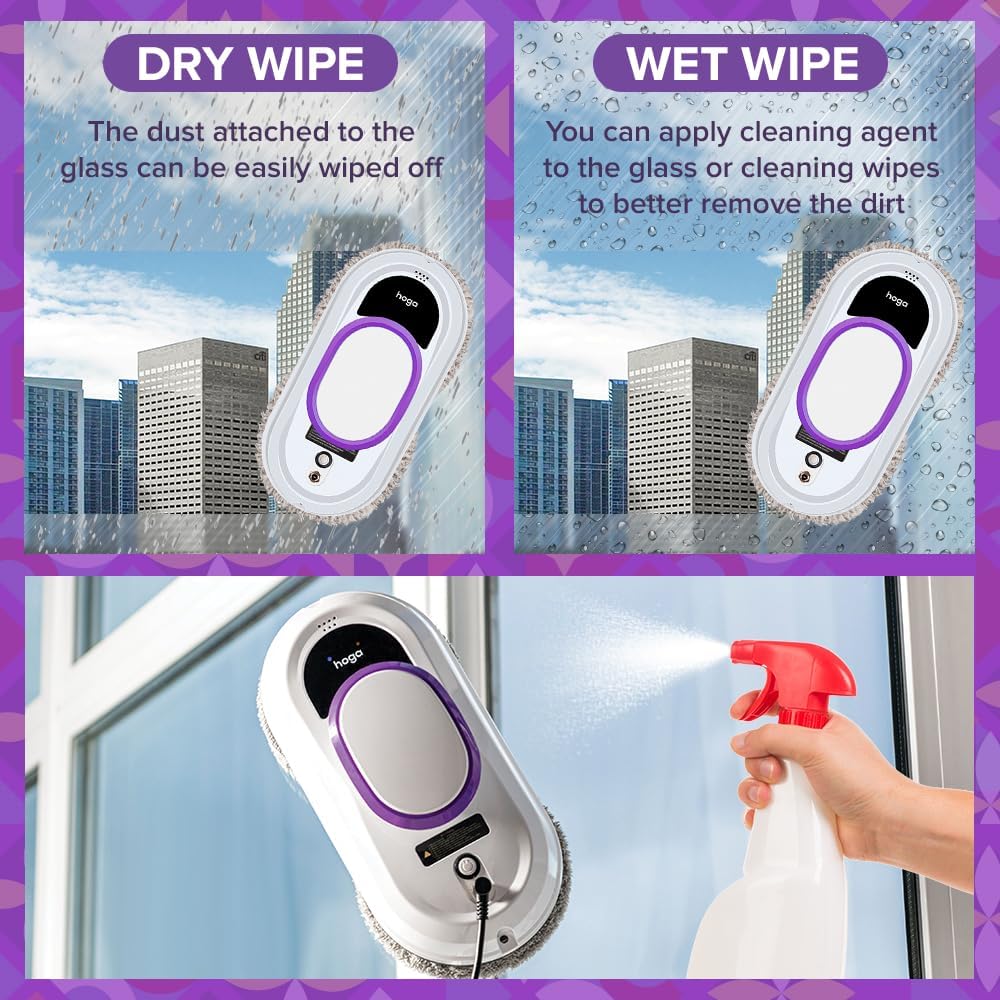
Image: The HOGA W10 robot illustrating two cleaning methods: dry wiping for dust and wet wiping with cleaning agent for dirt removal.
- Wycieranie na sucho: For light dust, the robot can be used with dry cloths.
- Wet Wipe: For heavier dirt, lightly spray the cleaning cloths or the window surface with cleaning solution before operation.
Zatrzymanie robota:
Press the 'Stop' button on the remote control or the robot's power button. The robot will stop and remain attached to the surface. Carefully remove it by holding it firmly and detaching it from the glass.
7. Konserwacja
Regular maintenance ensures the longevity and optimal performance of your HOGA W10 Window Cleaning Robot.
Ściereczki czyszczące:

Obraz: Zbliżenie view of the HOGA W10 robot's microfiber cleaning pads, which are essential for effective cleaning.
- After each use, remove the microfiber cleaning cloths.
- Wash the cloths by hand or machine wash with mild detergent. Do not use bleach or fabric softener.
- Allow cloths to air dry completely before reuse or storage.
Robot Body and Sensors:
- Wipe the robot's body with a soft, dry cloth to remove any dust or residue.
- Clean the edge detection sensors and suction vents with a dry cotton swab to ensure proper function.
Składowanie:
Przechowuj robota i jego akcesoria w chłodnym, suchym miejscu, z dala od bezpośredniego światła słonecznego i ekstremalnych temperatur.
8. Rozwiązywanie Problemów
If you encounter issues with your HOGA W10, refer to the following troubleshooting guide:
| Problem | Możliwa przyczyna | Rozwiązanie |
|---|---|---|
| Robot does not stick to glass | Insufficient power; Surface too dirty or wet; Suction vents blocked; Robot not placed flat. | Ensure power cord is securely connected. Clean the window surface. Clear any obstructions from suction vents. Place the robot flat against the glass. |
| Robot zostawia smugi | Dirty cleaning cloths; Too much cleaning solution; Incorrect cleaning solution. | Replace or wash cleaning cloths. Use less cleaning solution. Use a suitable window cleaning solution. |
| Robot zatrzymuje się niespodziewanie | Power interruption; Edge sensor error; Internal battery low. | Check power connection. Ensure edge sensors are clean. Allow robot to charge fully before use. |
| Pilot nie działa | Dead batteries in remote; Obstruction between remote and robot. | Replace remote control batteries. Ensure clear line of sight to the robot. |
9. Specyfikacje
| Producent | Hoga |
| Numer modelu | HGRWC01 |
| Wymiary produktu (dł. x szer. x wys.) | Wymiary 29.5 x 12 x 14.8 cm |
| Waga | 2.26 kilogramów |
| Typ baterii | 1 litowo-polimerowy (w zestawie) |
| Skład baterii | Litowo-jonowy |
| Typ zasilania | AC |
| Cechy specjalne | Lightweight, Professional |
| Dostępność części zamiennych | 2 lat |
10. Gwarancja i wsparcie
HOGA provides a 2-year availability for spare parts for the W10 Window Cleaning Robot. For any product inquiries, technical support, or warranty claims, please refer to the contact information provided with your purchase or visit the official HOGA webstrona.