
1. Wprowadzenie
This manual provides detailed instructions for the installation, operation, and maintenance of your MONDAWE 9-Inch Wall Mounted Shower Faucet Set with Tub Spout. Please read this manual thoroughly before installation and keep it for future reference. Proper installation and care will ensure optimal performance and longevity of your shower system.
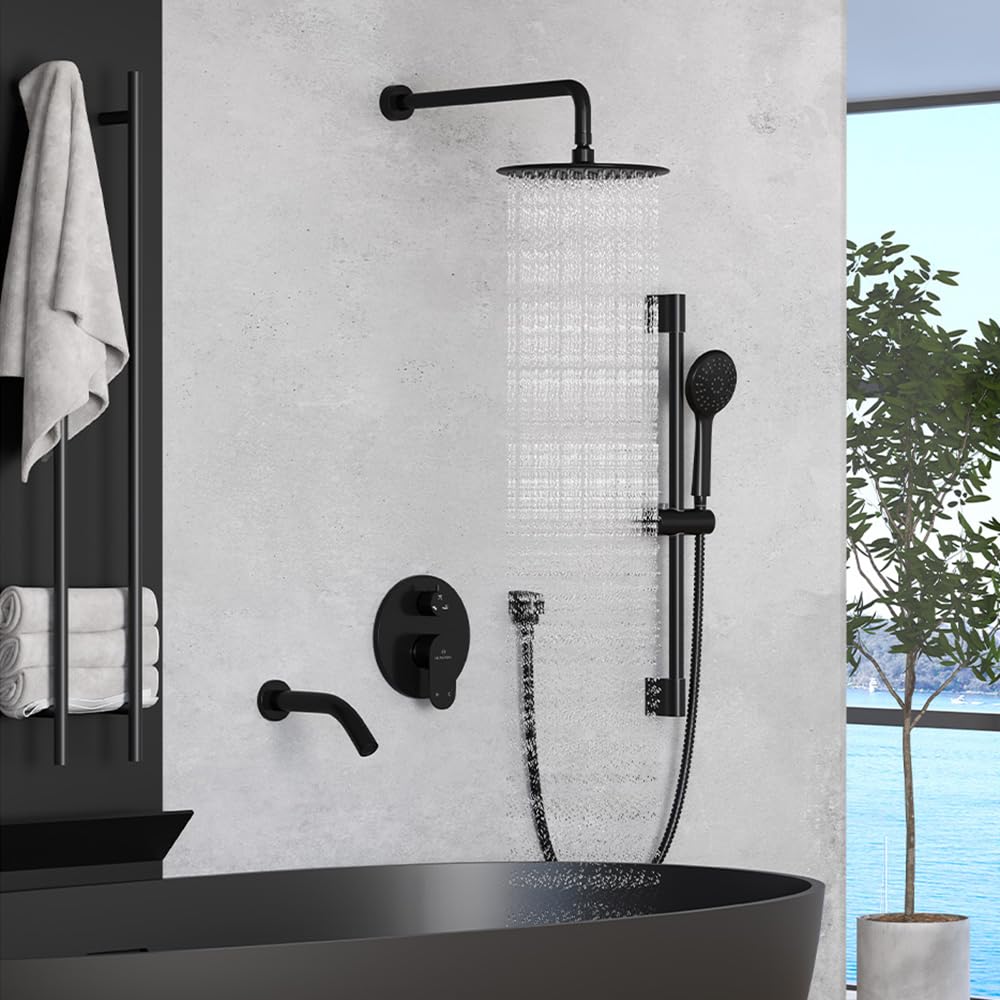
Nadview of the MONDAWE 9-Inch Wall Mounted Shower Faucet Set with Tub Spout.
2. Informacje dotyczące bezpieczeństwa
WARNING: Failure to follow these instructions could result in personal injury or property damage.
- Przed rozpoczęciem jakichkolwiek prac hydraulicznych należy zawsze zakręcić główny dopływ wody.
- Nosić odpowiedni sprzęt ochrony osobistej, taki jak okulary i rękawice ochronne.
- Jeśli masz wątpliwości co do jakiegokolwiek etapu instalacji, skonsultuj się z wykwalifikowanym hydraulikiem.
- Upewnij się, że wszystkie połączenia są solidne i wodoszczelne, aby zapobiec przeciekom.
- The pressure balance valve is designed to protect against sudden changes in water temperature. Do not tampz tym komponentem.
3. Zawartość opakowania
Verify that all components are present and undamaged before beginning installation. If any parts are missing or damaged, please contact MONDAWE customer service.

All components included in the MONDAWE 9-Inch Wall Mounted Shower Faucet Set with Tub Spout.
- Głowica prysznicowa z opadami deszczu
- Ramię prysznicowe
- Ręczny prysznic
- Wąż prysznicowy
- Slide Bar with Holder
- Wylewka do wanny
- Pressure Balance Valve (with trim and handle)
- Sprzęt montażowy (śruby, kotwy)
- Installation Manual / Service Card
4. Specyfikacje
| Funkcja | Szczegół |
|---|---|
| Marka | PONIEDZIAŁEK |
| Numer modelu | MD-A3816-MB3 |
| Kolor | Matowa czerń |
| Tworzywo | Acrylonitrile Butadiene Styrene (ABS) for certain components, Brass for handle and valve |
| Rodzaj wykończenia | Matowy |
| Liczba uchwytów | 1 |
| Typ montażu | Montaż ścienny |
| Rozmiar głowy | 9 inches (Rainfall Shower Head) |
| Zawarte komponenty | Valve, Shower Head, Handheld Spray, Tub Spout, Slide Bar |
| Standard połączenia | American Standard 1/2 inch NPT thread |
5. Instalacja
5.1. Wymagane narzędzia i materiały
- Kit hydrauliczny
- Klucz
- Śrubokręt płaski
- Wiertarka elektryczna
- Taśma miernicza
- Ołówek
- Caulking Gun with Silicone Sealant
5.2. Kroki instalacji
Refer to the following video for a general installation guide. Note that the specific model shown may differ, but the connection types and installation steps are similar. Always refer to the actual product and the installation instructions included in your package for precise details.
Official MONDAWE installation video for a similar shower panel. This video demonstrates the general process for installing the valve and trim.
- Przygotuj ścianę: Ensure the rough-in valve is securely installed within the wall according to standard plumbing practices. The finished wall should be ready for trim installation.
- Outline the Panel: Place the decorative panel over the installed valve. Use a pencil to draw an outline of the panel along its edge on the wall tile. This helps in precise cutting if needed.
- Usuń istniejące wykończenie (jeśli dotyczy): If replacing an existing fixture, carefully remove the old handle, diverter knob, and panel.
- Cut for Panel Recess: Use a suitable cutter to carefully cut along the marked lines on the wall tile. This allows the panel to sit flush or be slightly recessed into the wall. Exercise caution to avoid damaging internal pipes or the valve body.
- Install Panel and Knobs: Position the new decorative panel. Install the water distribution knob (diverter) and the main handle onto the valve stem. Ensure they are properly aligned and secured.
- Uszczelnij szczeliny: After the panel is embedded, apply silicone sealant or glass glue around the edges of the panel where it meets the wall to create a watertight seal.
- Install Shower Arm and Rainfall Head: Thread the shower arm into the wall connection. Apply plumber's tape to the threads for a secure seal. Attach the rainfall shower head to the shower arm. Ensure the adjustable angle connector is tightened for desired positioning.
- Install Tub Spout: Secure the tub spout to its wall connection. Ensure it is level and tightly sealed to prevent leaks.
- Install Slide Bar and Handheld Shower: Mount the slide bar to the wall using the provided hardware. Attach the handheld shower hose to the valve outlet and the handheld shower spray. Place the handheld shower in its adjustable holder on the slide bar.
- Test szczelności: Turn on the main water supply and check all connections for leaks. Operate the shower system to ensure all functions work correctly.

The rainfall shower head features an adjustable angle connector and easy-clean silicone nozzles for consistent water flow.

The bathtub spout provides high flow and is designed to be splashproof.

The height-adjustable slide bar accommodates users of different heights.
5.3. Wymiary

Detailed dimensions of the shower system components for accurate installation planning.
6. Działanie
Your MONDAWE shower system is designed for ease of use with a single handle for temperature and flow control, and a diverter knob for selecting spray functions.

The control panel allows easy adjustment of water temperature, flow, and selection of shower functions.
- Przepływ i temperatura wody: The main handle controls both water flow and temperature. Lift the handle to turn on the water and adjust the flow. Rotate the handle left for hot water and right for cold water.
- Wybór funkcji: The diverter knob allows you to switch between the rainfall shower head, handheld shower, and bathtub spout. Only one function can be active at a time. Rotate the knob to select your desired water outlet.
- Ustawienia prysznica ręcznego: The handheld shower features three spray patterns: rainfall, massage, and mixed mode. Adjust the spray by rotating the shower head face or a selector on the head itself.

The handheld shower offers three distinct spray patterns for a personalized experience.
7. Konserwacja
Regular cleaning and maintenance will help preserve the finish and functionality of your MONDAWE shower system.
- Czyszczenie wykończenia: Wyczyść matowoczarną powierzchnię miękką,amp Ściereczka i delikatne mydło. Unikaj szorstkich środków czyszczących, silnych środków chemicznych i gąbek do szorowania, ponieważ mogą one uszkodzić wykończenie.
- Cleaning Silicone Nozzles: The rainfall shower head and handheld shower feature easy-clean silicone nozzles. To remove mineral buildup, gently rub the nozzles with your finger or a soft brush.
- Sprawdź, czy nie ma wycieków: Periodically inspect all connections for any signs of leaks. Tighten connections as needed.
- Konserwacja zaworów: The pressure balance cartridge is designed for long-term reliability. If you experience issues with temperature regulation, consult a professional plumber.
8. Rozwiązywanie Problemów
If you encounter any issues with your shower system, refer to the following common problems and solutions:
| Problem | Możliwa przyczyna | Rozwiązanie |
|---|---|---|
| Niskie ciśnienie wody | Clogged shower head nozzles; partially closed shut-off valves; low household water pressure. | Clean silicone nozzles by rubbing them. Ensure shut-off valves are fully open. Check household water pressure. |
| Wycieki wody z połączeń | Loose connections; worn out O-rings or seals; insufficient plumber's tape. | Turn off water supply. Tighten connections. Replace O-rings/seals if damaged. Reapply plumber's tape. |
| Wahania temperatury | Pressure balance cartridge issue; insufficient hot water supply. | Ensure hot water heater is functioning correctly. If problem persists, the pressure balance cartridge may need inspection by a professional. |
| Funkcje przełączania przełącznika nie są przełączane | Zanieczyszczenia w mechanizmie odwracającym; zużyty wkład odwracający. | Flush the system. If the issue continues, the diverter cartridge may need to be replaced by a professional. |
9. Gwarancja i wsparcie
MONDAWE products are manufactured to high-quality standards. While specific warranty details are not provided in this document, MONDAWE typically offers a limited warranty against manufacturing defects. Please retain your proof of purchase for warranty claims.
For technical assistance, missing parts, or warranty inquiries, please contact MONDAWE customer service through the retailer where you purchased the product or visit the official MONDAWE webwitryna zawierająca informacje kontaktowe pomocy technicznej.
We are committed to providing a satisfactory experience with your MONDAWE shower system.


