
1. Wprowadzenie
Dziękujemy za zakupasing the Klipsch Reference Premiere RP-1400SW 14-inch High Excursion Subwoofer. This subwoofer is designed to deliver powerful and accurate low-frequency sound, enhancing your home theater or music listening experience. This manual provides essential information for proper setup, operation, and care of your new subwoofer.

Figure 1.1: Klipsch Reference Premiere RP-1400SW Subwoofer (Grille Removed)
2. Ważne informacje dotyczące bezpieczeństwa
Please read all safety instructions before operating this product. Keep these instructions for future reference.
- Źródło zasilania: Connect the subwoofer only to a power supply of the type described in the operating instructions or as marked on the appliance.
- Wentylacja: Zapewnij odpowiednią wentylację. Nie blokuj otworów wentylacyjnych. Montaż należy wykonać zgodnie z instrukcją producenta.
- Ciepło: Nie należy instalować w pobliżu źródeł ciepła, takich jak grzejniki, kratki wentylacyjne, piece lub inne urządzenia (w tym amp(lifiers) wytwarzające ciepło.
- Woda i wilgoć: Nie należy używać urządzenia w pobliżu wody lub wilgoci.
- Czyszczenie: Czyścić wyłącznie suchą szmatką.
- Serwisowanie: Wszelkie prace serwisowe należy zlecać wykwalifikowanemu personelowi serwisowemu. Serwisowanie jest wymagane, gdy urządzenie zostało w jakikolwiek sposób uszkodzone, np. przewód zasilający lub wtyczka są uszkodzone, płyn został wylany lub przedmioty wpadły do urządzenia, urządzenie zostało wystawione na działanie deszczu lub wilgoci, nie działa normalnie lub zostało upuszczone.
- Ciężki obiekt: This subwoofer is heavy (85 lbs). Exercise caution when moving to prevent injury.
3. Co znajduje się w pudełku
Sprawdź, czy wszystkie komponenty są obecne:
- Klipsch Reference Premiere RP-1400SW Subwoofer
- Przewód zasilający
- Instrukcja obsługi (ten dokument)
4. Konfiguracja
4.1 Umieszczenie subwoofera
The Klipsch RP-1400SW features a front-firing driver and Aerofoil front slot port, allowing for flexible placement within your room. Experiment with different locations to find the optimal bass response for your listening environment. Generally, corner placement can enhance bass output, while placement along a wall can provide a more balanced sound. The shock-absorbing rubber feet help isolate the subwoofer from the floor.

Figure 4.1: Front-Firing Driver and Aerofoil Front Slot Port

Figure 4.2: Subwoofer Design Features (Rounded Corners, Shock-Absorbing Feet)
4.2 Połączenia
Your RP-1400SW subwoofer offers both wired and wireless connectivity options.

Figure 4.3: Subwoofer Rear Panel Connections and Controls
- Wired Connection (RCA/LFE):
Connect an RCA cable from the LFE output of your AV receiver to the LFE input on the subwoofer's rear panel. If your receiver does not have an LFE output, use a standard RCA stereo cable to connect the receiver's pre-out (subwoofer output) to both the left and right RCA inputs on the subwoofer.
- Wireless Connection (Optional WA-2 Kit):
For wireless operation, you can connect your subwoofer with a Klipsch WA-2 Wireless Subwoofer Kit (sold separately). This allows for flexible placement without the need for long RCA cables. Refer to the WA-2 kit's instructions for pairing and setup.

Figure 4.4: Wireless Connectivity with Optional WA-2 Kit
- Podłączenie zasilania:
Once audio connections are made, plug the supplied power cord into the subwoofer's power inlet and then into a suitable wall outlet.
5. Obsługa subwoofera
5.1 kontroli nadview
The rear panel of your subwoofer features several controls to fine-tune its performance:

Figure 5.1: Easy-to-Use Controls on Rear Panel
- GAIN (Volume): Reguluje poziom wyjściowy subwoofera. Zacznij od niskiego ustawienia i stopniowo zwiększaj, aż bas będzie płynnie współgrał z brzmieniem głównych głośników.
- LOW-PASS (Crossover): This control sets the upper frequency limit for the subwoofer. If using an AV receiver with LFE output, set this to LFE (or bypass if available on your receiver). If connecting via stereo RCA, adjust this to blend with your main speakers' low-frequency cutoff.
- FAZA (0°/180°): Dostosowuje fazę wyjścia subwoofera względem głośników głównych. Poeksperymentuj z obydwoma ustawieniami, aby znaleźć to, które zapewnia najbardziej wyrazisty i spójny bas.
- POWER (ON/AUTO/OFF):
- NA: Subwoofer remains continuously on.
- AUTOMATYCZNY: Subwoofer automatically turns on when an audio signal is detected and enters a low-power standby mode after a period of inactivity.
- OFF: Subwoofer jest wyłączony.
The 1/2-watt standby mode in AUTO setting ensures exceptional efficiency and reduces energy costs.
5.2 Pierwsze włączenie i regulacja
- Sprawdź, czy wszystkie połączenia są bezpieczne.
- Set the GAIN control to its minimum position.
- Set the LOW-PASS control to LFE if using an AV receiver, or to a suitable frequency (e.g., 80Hz) if connecting via stereo RCA.
- Set the PHASE switch to 0°.
- Set the POWER switch to AUTO.
- Play some audio with significant bass content. Gradually increase the GAIN control until the subwoofer output blends with your main speakers.
- Experiment with the PHASE switch (0° vs. 180°) to determine which setting provides the most impactful and seamless bass response in your listening position.
For optimal performance, consider using your AV receiver's automatic room correction system (if available) after initial setup.
5.3 Product Video: Reference Premiere Subwoofers
Video 5.1: An official Klipsch video showcasing the features and design of the Reference Premiere Subwoofers, including the RP-1400SW. This video highlights advanced acoustics, balanced performance, front-firing Cerametallic woofers, high-efficiency Class D amplifier, front-firing slot port, detailed design, and easy-to-use controls.
6. Konserwacja
To ensure the longevity and optimal performance of your Klipsch RP-1400SW subwoofer, follow these simple maintenance guidelines:
- Czyszczenie: Dust the cabinet regularly with a dry, soft cloth. Avoid using abrasive cleaners, solvents, or strong detergents, as these can damage the ebony vinyl finish.
- Umieszczenie: Avoid placing the subwoofer in direct sunlight or near heat sources, which can cause discoloration or damage to the cabinet.
- Wentylacja: Upewnij się, że tył amplifier panel has adequate airflow. Do not block the heat sink.
- Krata: The durable woven cloth grille can be gently cleaned with a soft brush or vacuum cleaner attachment to remove dust.
7. Rozwiązywanie Problemów
If you experience issues with your subwoofer, consult the following table for common problems and solutions:
| Problem | Możliwa przyczyna | Rozwiązanie |
|---|---|---|
| Brak dźwięku z subwoofera |
|
|
| Słaby lub zniekształcony bas |
|
|
| Subwoofer buczy lub brzęczy |
|
|
If the problem persists after trying these solutions, please contact Klipsch customer support.
8. Specyfikacje
Key technical specifications for the Klipsch Reference Premiere RP-1400SW Subwoofer:
| Funkcja | Szczegół |
|---|---|
| Numer modelu | RP-1400SW |
| Marka | Klipsch |
| Typ głośnika | Subwoofer |
| Średnica głośnika niskotonowego | 14 cali |
| Typ sterownika audio | Dynamic Driver (Cerametallic) |
| Maksymalna moc wyjściowa głośnika | 600 watów |
| Moc skuteczna | 500 watów |
| Odpowiedź częstotliwościowa | 20Hz - 1kHz (approximate, based on A+ content) |
| Technologia łączności | Wired RCA, LFE, and WA-2 Wireless Port |
| Tryb wyjścia audio | Stereo, dźwięk przestrzenny |
| Typ montażu | Stały podłogowe |
| Materiał obudowy | Drewno |
| Kolor | Heban |
| Źródło zasilania | Elektryczny przewodowy |
| Wymiary przedmiotu (gł. x szer. x wys.) | 25.67" gł. x 20" szer. x 21.34" wys. |
| Waga przedmiotu | 85 funtów |
| UPC | 743878047424 |
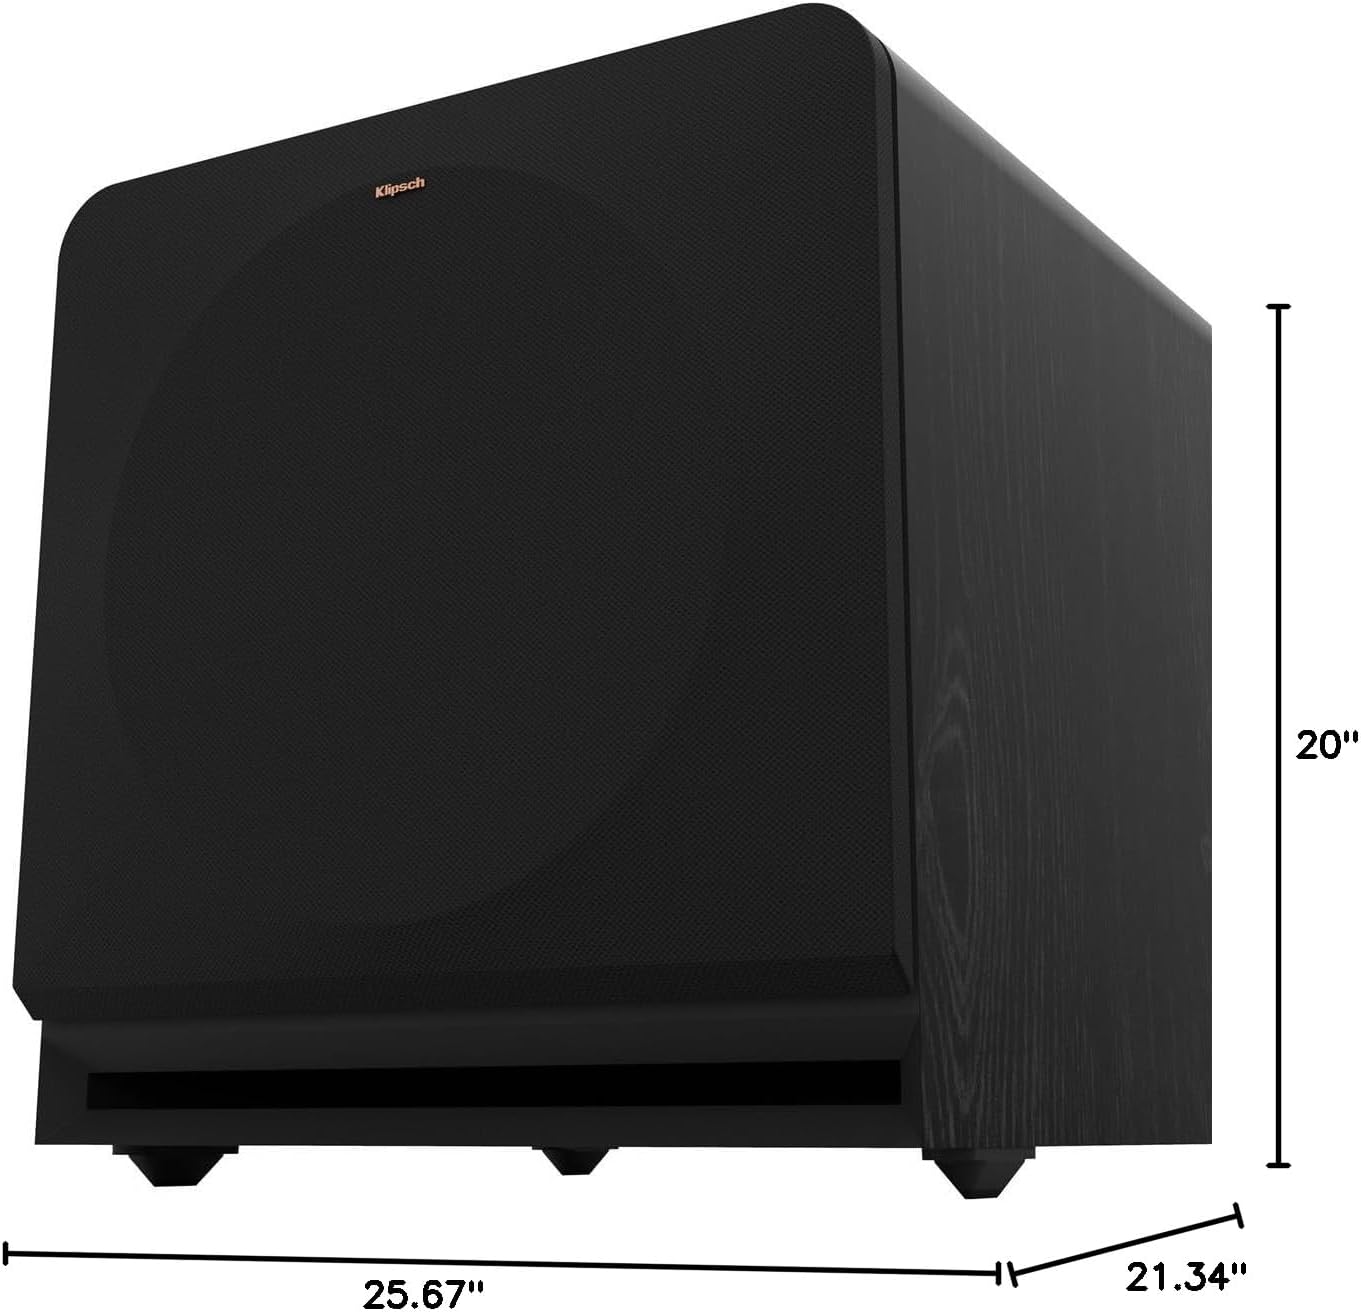
Figure 8.1: Subwoofer Dimensions
9. Gwarancja i pomoc techniczna
9.1 Informacje o gwarancji
The Klipsch Reference Premiere RP-1400SW Subwoofer comes with a limited warranty:
- Elektronika: Dwa (2) lata
- Woofer, Cabinet, and Non-Electrical Mechanics: Pięć (5) lat
Please retain your proof of purchase for warranty claims. For full warranty terms and conditions, refer to the official Klipsch webodwiedź witrynę lub skontaktuj się z działem obsługi klienta.
9.2 Obsługa klienta
For further assistance, technical support, or warranty inquiries, please visit the official Klipsch website or contact their customer service department. Contact details can typically be found on the Klipsch website under the "Support" or "Contact Us" section.


