
1. Wprowadzenie
This manual provides detailed instructions for the installation, operation, and maintenance of your ECHOGEAR 6U Network Rack. This enclosed wall-mount rack is designed to organize and protect networking, AV, and DVR equipment in home or small office environments.
Główne cechy:
- Projekt typu „wszystko w jednym”: Includes two 1U shelves, pre-mounted fans, a lockable front door, and necessary hardware for a complete setup.
- Solidna konstrukcja: Manufactured from heavy-duty alloy steel, capable of holding up to 132 lbs of equipment.
- Wydajne chłodzenie: Features a vented design and two pre-mounted fans to maintain optimal operating temperatures for your gear.
- Compact and Spacious: Offers 6U of rack space with a 600mm depth, suitable for various standard rack-mountable devices while maintaining a small footprint.
- Łatwy dostęp: Side panels are removable without tools for convenient access to equipment and cabling.
2. Konfiguracja i instalacja
Follow these steps for proper assembly and wall mounting of your ECHOGEAR 6U Network Rack. It is recommended to have two people for the wall mounting step due to the weight of the unit.
2.1 Zawarte komponenty
Przed rozpoczęciem montażu należy sprawdzić, czy wszystkie elementy są obecne:
- 6U Rack Frame (top, bottom, side frames)
- 2x 1U Shelves
- 2x Pre-mounted Fans (integrated into top/bottom panels)
- Lockable Front Door
- Sprzęt do montażu ściennego (śruby, podkładki)
- Cage Nuts + Screws
- Hook + Loop Straps for cable management
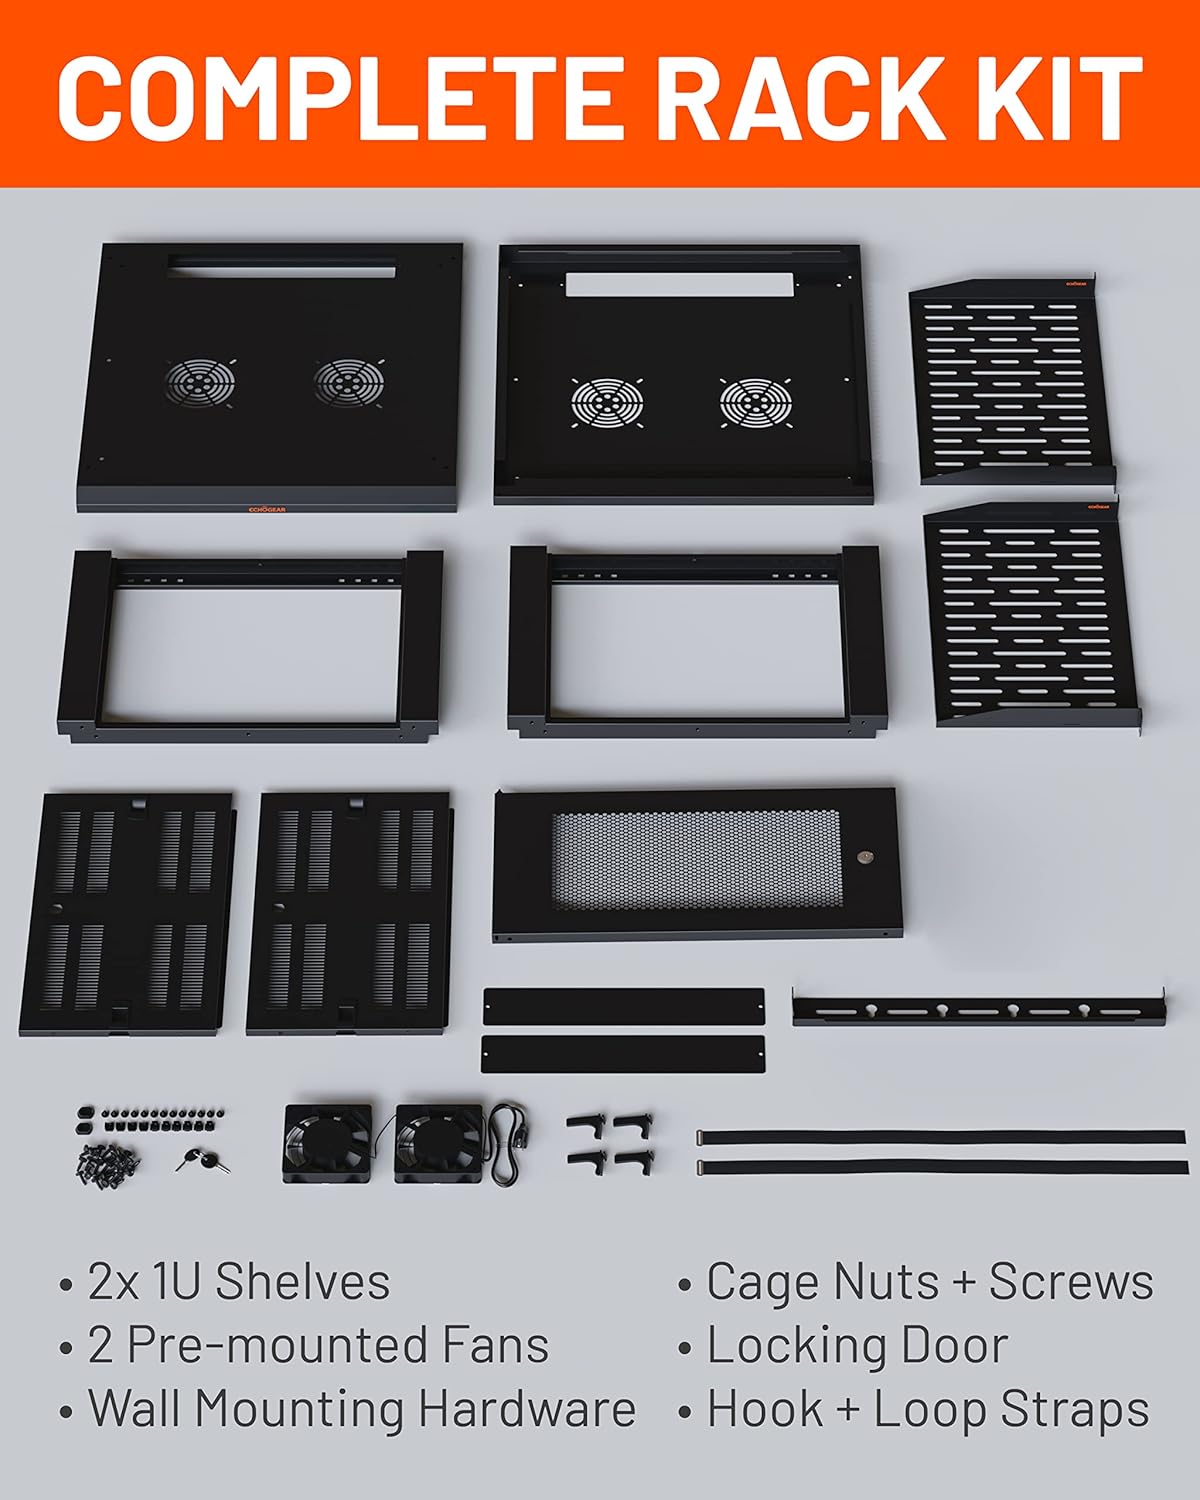
Figure 2.1: All components included in the ECHOGEAR 6U Network Rack kit.
2.2 Wymagane narzędzia
- Taśma miernicza
- Ołówek
- Śrubokręt Phillipsa
- Poziom
- Wiertarka elektryczna
- 1/2 inch (13 mm) Socket Wrench
- For Wood Stud Installation: Stud Finder, Awl, 7/32 inch (5.5 mm) Drill Bit for wood
- For Concrete Installation: 3/8 inch (10 mm) Drill Bit for concrete, Hammer
2.3 Etapy montażu
- Złóż ramę: Sit the side frames onto the bottom panel. Place the top panel onto the assembled side frames. Secure all connections with the provided hex bolts.
- Attach Wall Bracket: Secure the wall mounting bracket to the rear of the rack using the provided screws.
- Zaznacz ścianę do montażu: Use a stud finder to locate and mark the center of two adjacent wood studs. Ensure marks are level. For concrete, mark desired drill points.
- Wywierć otwory pilotażowe: Drill pilot holes at the marked locations. Use a 7/32 inch (5.5 mm) drill bit for wood studs or a 3/8 inch (10 mm) drill bit for concrete.
- Montaż stojaka: With assistance, lift the rack and align the wall bracket with the drilled holes. Secure the rack to the wall using the provided lag bolts and a socket wrench.
- Włóż nakrętki klatkowe: Determine the desired height for your shelves and equipment. Insert cage nuts into the square holes on the rack rails at these positions.
- Zainstaluj półki: Slide the 1U shelves into place and secure them using the cage nuts and screws.
- Zamontuj panele boczne: Align and attach the removable side panels to the rack.
- Zamontuj drzwi przednie: The front door can be attached to either the left or right side of the rack. Align the hinges and secure the door.
Video 2.1: Detailed assembly and installation guide for the ECHOGEAR Enclosed Network Rack.

Figure 2.2: Visual guide for the quick installation process, including frame assembly, wall mounting, and shelf installation.

Figure 2.3: The rack can be securely mounted on either wood studs or concrete walls.
3. Instrukcja obsługi
Once installed, the ECHOGEAR 6U Network Rack provides a secure and organized environment for your equipment.
3.1 Equipment Placement
- Utilize the two 1U shelves for non-rack-mountable devices such as modems, routers, or small servers.
- Mount rack-mountable equipment directly to the vertical rails using appropriate rack screws and cage nuts.
- Ensure even weight distribution to maintain stability. The rack supports up to 132 lbs.
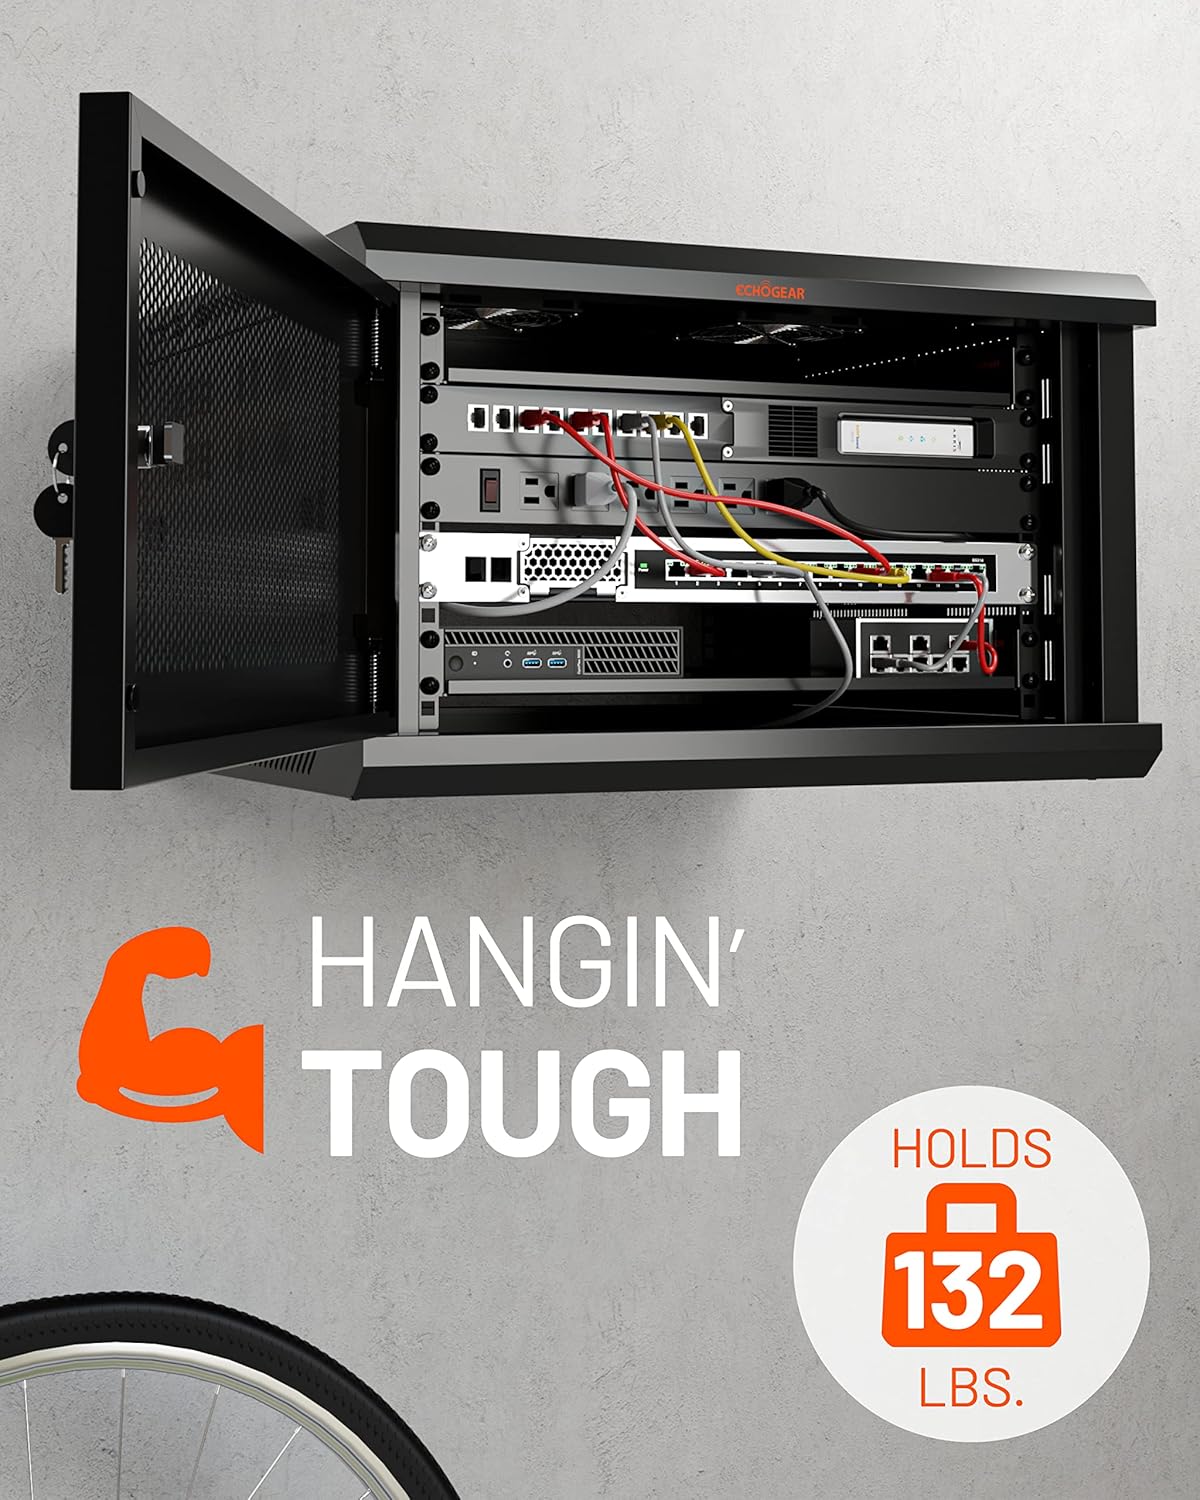
Figure 3.1: The rack accommodates various networking, AV, and DVR equipment.
3.2 Zarządzanie kablami
- Use the included hook and loop straps to bundle and secure cables, preventing clutter and improving airflow.
- Route cables through designated openings to maintain a clean and organized setup.
- The optional cover on the top panel can be left off to facilitate cable routing.
3.3 Układ chłodzenia
- The rack includes two pre-mounted fans to ensure adequate airflow and prevent equipment overheating.
- Ensure the fans are connected to a power source for continuous operation.
- The vented design of the rack further aids in heat dissipation.

Figure 3.2: The rack features two pre-mounted fans for optimal cooling.
3.4 Bezpieczeństwo
- The front door is lockable to secure your valuable equipment. Use the provided keys to lock and unlock the door.
- The door hinge can be mounted on either the left or right side to suit your installation needs.
- Side panels are removable for access but should be secured when not actively working inside the rack.
Wideo 3.1: Ponadview of the ECHOGEAR Enclosed Rack, highlighting features like removable side panels and security.
4. Konserwacja
Regular maintenance ensures the longevity and optimal performance of your ECHOGEAR 6U Network Rack and the equipment housed within it.
4.1 Czyszczenie
- Periodically wipe down the exterior surfaces of the rack with a soft, damp płótno. Unikaj ściernych środków czyszczących.
- Ensure the fan grilles and ventilation openings are free from dust and debris to maintain proper airflow. Use compressed air if necessary.
4.2 Kontrola
- Regularly check all mounting bolts and screws to ensure they remain tight.
- Sprawdź kable pod kątem oznak zużycia, przetarcia lub uszkodzeń. Uszkodzone kable należy natychmiast wymienić.
- Verify that the fans are operating correctly and quietly.
5. Rozwiązywanie Problemów
This section addresses common issues you might encounter with your network rack.
5.1 Overheating Equipment
- Wydanie: Equipment inside the rack is running hot.
- Rozwiązanie: Ensure both pre-mounted fans are powered on and functioning. Check for any obstructions to airflow within the rack or at the ventilation points. Verify that cables are neatly managed and not blocking vents.
5.2 Rack Instability
- Wydanie: The wall-mounted rack feels unstable or wobbly.
- Rozwiązanie: Re-check all lag bolts securing the rack to the wall to ensure they are tightened properly. Confirm that the rack was mounted into solid wood studs or concrete as per installation instructions. Redistribute equipment weight evenly if possible.
5.3 Difficulty with Side Panels/Door
- Wydanie: Side panels or the front door are difficult to open or close.
- Rozwiązanie: Check for any physical obstructions or misalignments. Ensure the rack frame is square and level. Lubricate hinges if necessary.
6. Specyfikacje
| Funkcja | Szczegół |
|---|---|
| Marka | ECHOBIEG |
| Numer modelu | B0BS755RDD |
| Kolor | Czarny |
| Wymiary produktu (szer. x wys.) | 23.6" x 14.6" |
| Głębokość | 600mm |
| Rack Units (U) | 6U |
| Tworzywo | Stal stopowa |
| Waga przedmiotu | 23.36 kilograma |
| Nośność | 132 funtów (60 kg) |
| Typ montażu | Montaż ścienny |
| Wymagany montaż | No (refers to pre-assembled main components, but user assembly is required) |
| UPC | 793795538260 |

Figure 6.1: Key dimensions of the ECHOGEAR 6U Network Rack.
7. Gwarancja i pomoc techniczna
7.1 Gwarancja na produkt
The ECHOGEAR 6U Network Rack is covered by a 5-roczna ograniczona gwarancja od daty zakupu. Niniejsza gwarancja obejmuje wady materiałowe i wykonawcze wynikające z normalnego użytkowania. Prosimy zachować dowód zakupu na wypadek roszczeń gwarancyjnych.
7.2 Obsługa klienta
For any questions regarding installation, troubleshooting, or accessorizing your ECHOGEAR network rack, please contact our customer support team. Our Minnesota-based product specialists are available 7 days a week to assist you.
Contact information can be found on the official ECHOGEAR webna stronie internetowej lub za pośrednictwem kanałów pomocy technicznej sprzedawcy.