1. Wprowadzenie
Thank you for choosing the WORKPRO Cordless Grass Shear & Shrubbery Trimmer. This 2-in-1 tool is designed for efficient and precise trimming of grass and shrubs, offering cordless convenience and ease of use. Please read this manual thoroughly before operation to ensure safe and optimal performance.

Figure 1: WORKPRO 2-in-1 Cordless Grass Shear & Shrubbery Trimmer (Green model)
2. Funkcje produktu
- Upgraded Power Motor: Equipped with a powerful 1100rpm motor for efficient cutting, making it suitable for both beginners and experienced users.
- Lekki i łatwy w użyciu: Weighing only 0.82 lbs (approximately 0.37 kg), this handheld trimmer can be operated with one hand, reducing fatigue. The safety button is conveniently located at the top of the handle for user-friendly access.
- USB-C Charging Convenience: Features a Type-C charging port, allowing charging from various USB power sources (5V/2A mobile phone chargers, laptops/PCs, car chargers, power banks). The 2000mAh high-capacity Lithium-Ion battery provides extended use and fully charges in approximately 2-3 hours.
- Better Cutting Ability: Includes two sharp blades: a 4.65-inch (118mm) long shrub shear and a 2.95-inch (75mm) wide grass shear. Ideal for lawn edges, small potted plants, garden edges, and small landscape trees. Shrub blades are suitable for branches less than 7.8mm thick. Blade replacement is simple, fast, and tool-free.
- Bezpieczne i niezawodne: Designed with a dual lock mechanism to ensure safety during operation and storage, protecting both children and adults.

Figure 2: Upgraded Power Motor and Long-Lasting Battery

Figure 3: Ergonomic Safety Lock for Easy Control
3. Konfiguracja
3.1. Rozpakowanie i kontrola
Carefully remove all components from the packaging. Inspect the trimmer and its accessories for any signs of damage. If any parts are damaged or missing, do not use the product and contact customer support.
3.2. Ładowanie akumulatora
Before first use, fully charge the trimmer's battery. Connect the provided Type-C USB cable to the charging socket on the trimmer and plug the other end into a compatible USB power source (e.g., 5V/2A phone charger, laptop, power bank). The Charger LED Indicator will show charging status. Charging typically takes 2-3 hours.
Attention: For safety, it is not supposed to be used while charging.
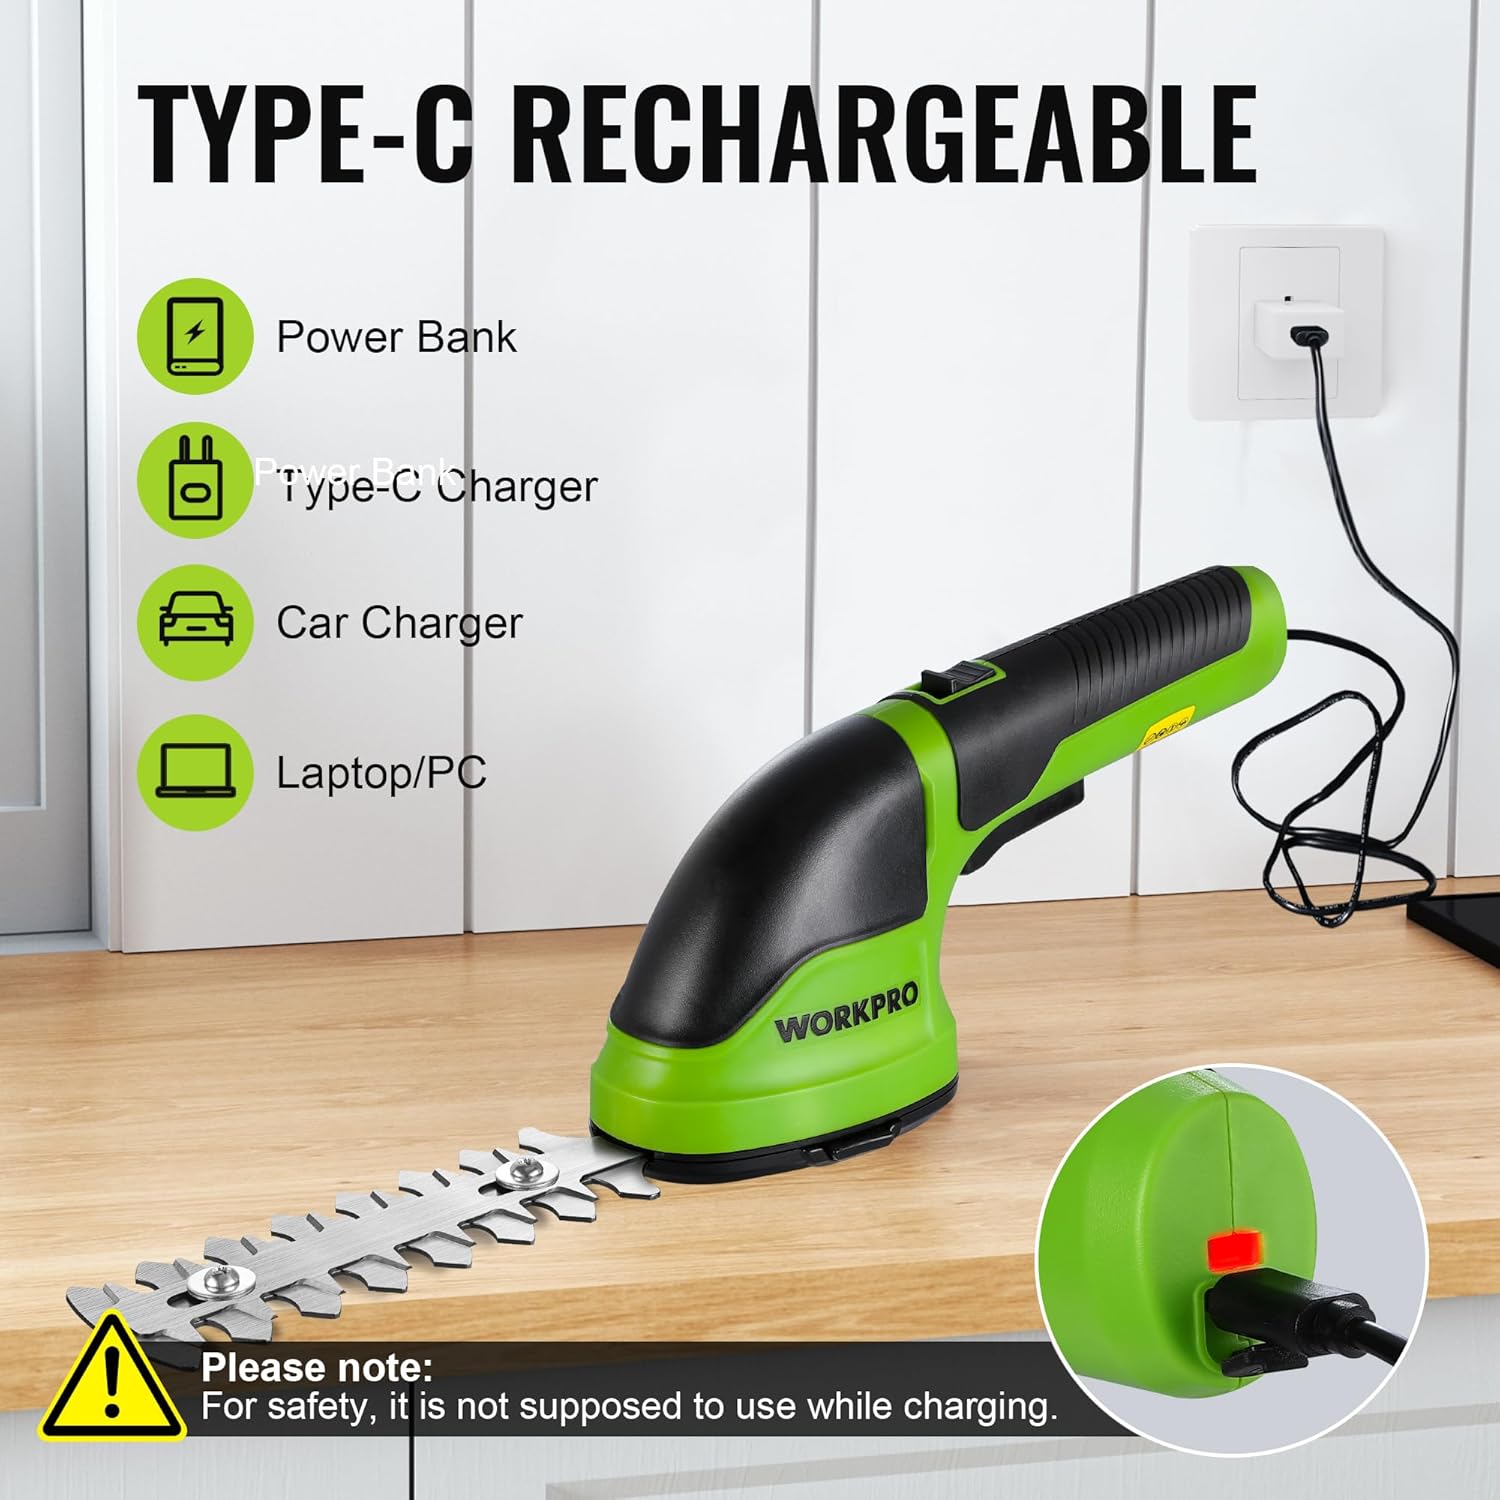
Rysunek 4: Opcje ładowania USB-C
3.3. Attaching/Detaching Blades
The trimmer comes with two interchangeable blades: a grass shear blade and a shrub blade. To attach a blade:
- Ensure the trimmer is turned OFF and the safety lock is engaged.
- Align the desired blade attachment with the main unit's connection point.
- Press the blade release button (if a blade is already attached) and gently push the new blade into place until it clicks securely.
- To detach, press the blade release button and pull the blade away from the unit.
Always use the provided protective covers when storing blades or when the trimmer is not in use.

Figure 5: Trimmer Components and Blade Attachment Points
4. Instrukcja obsługi
4.1. Ogólne zasady działania
To operate the trimmer, first slide the Safety Lock-off Button forward. While holding the safety button, press the ON/OFF Switch (trigger) to start the blades. Release the ON/OFF Switch to stop the blades. Always ensure a firm grip on the TPR Anti-Slip Handle during operation.
4.2. Using the Grass Shear Blade
Attach the wider grass shear blade. This blade is ideal for trimming lawn edges, around flower beds, or in areas where a lawnmower cannot reach. Hold the trimmer with the blade parallel to the ground and move it steadily along the desired cutting line.

Figure 6: Grass Shear Blade in Action (Max Cutting Width: 2.95 inches / 75mm)
4.3. Using the Shrub Blade
Attach the longer shrub blade. This blade is designed for shaping and trimming small shrubs, hedges, and ornamental plants. Hold the trimmer firmly and guide the blade along the contours of the shrub. Avoid cutting branches thicker than 7.8mm to prevent damage to the blade or motor.

Figure 7: Shrub Blade in Action (Max Cutting Length: 4.65 inches / 118mm, Max Cutting Thickness: 0.31 inches / 7.8mm)
5. Konserwacja
Regularna konserwacja zapewnia długowieczność i optymalną wydajność Twojej maszynki do strzyżenia.
- Czyszczenie ostrza: After each use, clean the blades with a dry cloth to remove sap, dirt, and debris. For stubborn residue, use a mild detergent solution and dry thoroughly.
- Smarowanie ostrzy: Periodically apply a light machine oil to the blades to prevent rust and ensure smooth operation.
- Składowanie: Store the trimmer in a dry, cool place, away from direct sunlight and moisture. Always attach the protective blade covers before storage.
- Pielęgnacja baterii: If the trimmer is not used often, recharge the battery every 3-6 months to prolong its life.
6. Informacje dotyczące bezpieczeństwa
Aby zapobiec obrażeniom lub uszkodzeniom, zawsze należy przestrzegać poniższych zasad bezpieczeństwa:
- Wear appropriate personal protective equipment (PPE) such as safety glasses and gloves during operation.
- Keep hands, hair, and loose clothing away from moving blades.
- Do not operate the trimmer in wet conditions or near flammable liquids or gases.
- Ensure the safety lock is engaged when attaching/detaching blades or when the trimmer is not in use.
- Trzymaj dzieci i zwierzęta domowe z dala od miejsca pracy.
- Do not attempt to modify or repair the trimmer yourself. Contact qualified service personnel for assistance.
7. Rozwiązywanie Problemów
| Problem | Możliwa przyczyna | Rozwiązanie |
|---|---|---|
| Trymer nie uruchamia się | Bateria jest słaba lub rozładowana. Safety lock not disengaged. Ostrze nie zostało prawidłowo zamocowane. | Naładuj baterię. Slide the safety lock-off button forward. Re-attach the blade securely until it clicks. |
| Ostrza nie tną skutecznie | Ostrza są tępe lub brudne. Materiał do cięcia jest zbyt gruby. | Clean and lubricate blades. Consider replacing dull blades. Do not attempt to cut branches thicker than 7.8mm. |
| Krótki czas pracy baterii | Akumulator nie jest w pełni naładowany. Degradacja baterii w miarę upływu czasu. | Przed użyciem sprawdź, czy akumulator jest całkowicie naładowany. Recharge battery every 3-6 months if not used regularly. Consider battery replacement if severe degradation occurs. |
8. Specyfikacje
| Funkcja | Specyfikacja |
|---|---|
| Marka | WORKPRO |
| Numer modelu | W159020AE |
| Źródło zasilania | Zasilanie bateryjne (litowo-jonowe) |
| Pojemność baterii | 2000mAh |
| Typ ładowania | USB typu C (5 V/2 A) |
| Prędkość bez obciążenia | 1100 obr./min |
| Waga przedmiotu | 1.85 funtów (0.84 kg) |
| Wymiary produktu | 10.24" dł. x 2.36" szer. x 4.13" wys. (26 cm x 6 cm x 10.5 cm) |
| Materiał ostrza | Stal wysokowęglowa |
| Długość ostrza krzewu | 4.65 cala (118 mm) |
| Grass Shear Width | 2.95 cala (75 mm) |
| Max Cutting Thickness (Shrub) | 0.31 cala (7.8 mm) |
| UPC | 820909687368 |
9. Gwarancja i wsparcie
For warranty information, technical support, or replacement parts, please refer to the official WORKPRO website or contact their customer service directly. You may also find additional resources and a downloadable PDF user guide on the product's Amazon listing page under the "Documents" section.
Oficjalny podręcznik użytkownika (PDF): https://manuals.plus/m/c840d8bbeb2f7664f13b29279e4f42a3ab4231b35b9facfabc38e97f500d0251