
1. Koniec produktuview
The Dangbei DBX3 Pro is an infrared remote control designed for seamless interaction with compatible Dangbei devices, primarily televisions. It features an ergonomic design for comfortable handling and intuitive button placement for easy navigation and control.
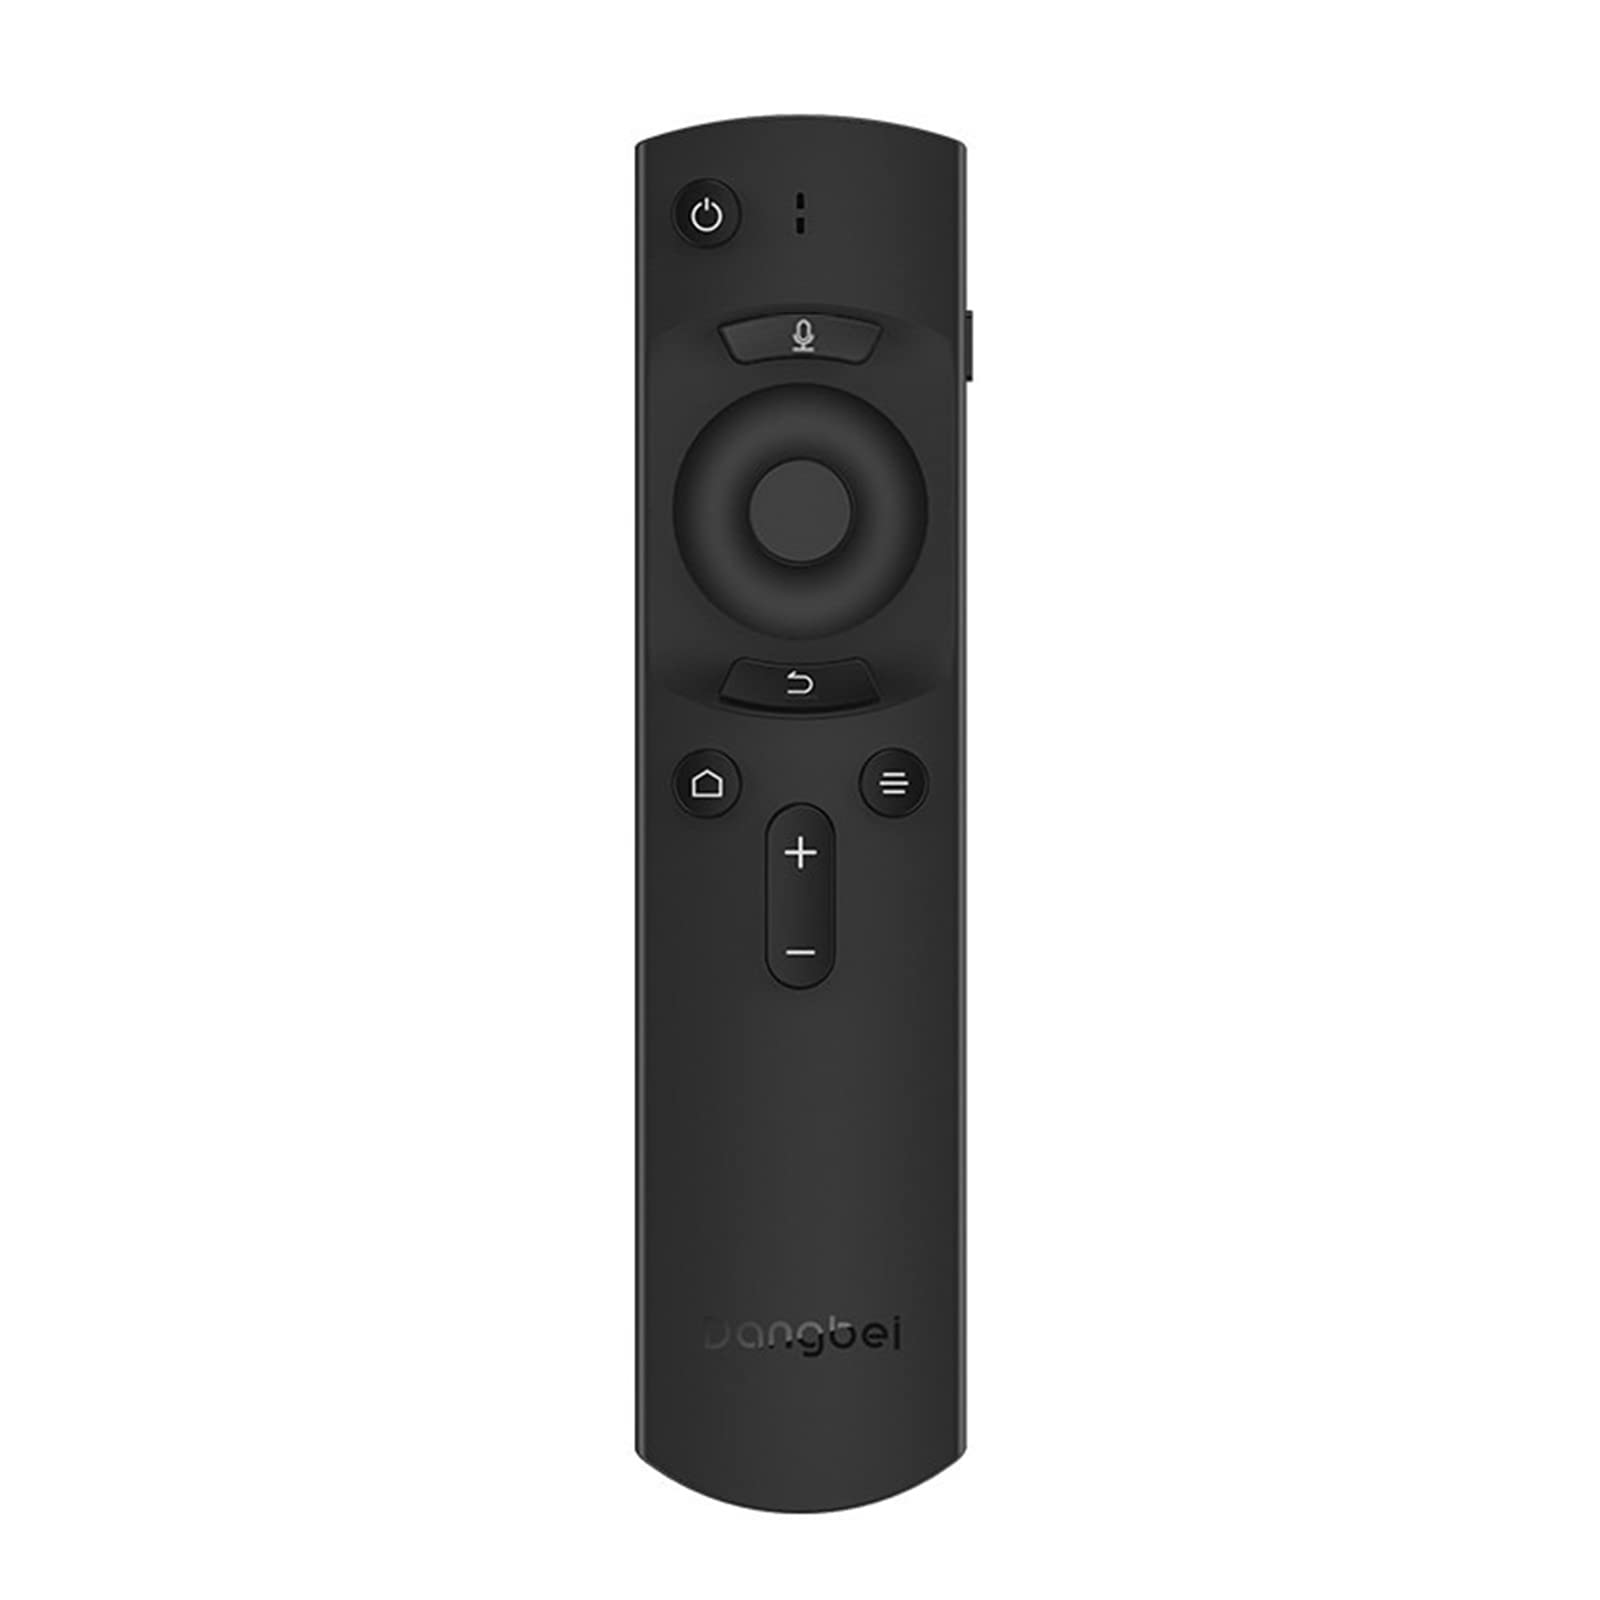
Rysunek 1: Dangbei DBX3 Pro Remote Control. This image displays the remote control from an angled perspective, highlighting its ergonomic shape and the layout of its primary control buttons, including power, navigation, volume, and home.
Funkcje przycisków:
- Przycisk zasilania (⏻): Włącza lub wyłącza podłączone urządzenie.
- Microphone Button (🎙): Activates voice control or voice search features (if supported by the connected device).
- Navigation Pad (Up, Down, Left, Right): Służy do poruszania się po menu i wybierania elementów.
- Przycisk OK: Potwierdza wybór lub otwiera menu.
- Przycisk powrotu (↩): Powrót do poprzedniego ekranu lub menu.
- Menu/Options Button (☰): Dostęp do dodatkowych opcji lub menu kontekstowych.
- Przycisk Home (🏠): Returns to the main home screen of the connected device.
- Przyciski zwiększania/zmniejszania głośności (+/-): Dostosowuje głośność dźwięku.
2. Konfiguracja
2.1. Instalacja baterii
- Znajdź pokrywę komory baterii z tyłu pilota.
- Aby otworzyć pokrywę, przesuń ją w dół lub naciśnij zatrzask.
- Włóż dwie baterie AAA (nie ma ich w zestawie), upewniając się, że bieguny dodatni (+) i ujemny (-) są prawidłowo ustawione względem oznaczeń wewnątrz komory.
- Załóż pokrywę komory baterii, aż zatrzaśnie się na swoim miejscu.
2.2. Początkowe użycie
The Dangbei DBX3 Pro remote control operates using infrared (IR) technology. For the remote to function, ensure there is a clear line of sight between the remote's IR emitter (located at the front tip) and the IR receiver on your compatible Dangbei device. Point the remote directly at the device you wish to control.
3. Instrukcja obsługi
3.1. Podstawowa nawigacja
- Użyj Panel nawigacyjny (Up, Down, Left, Right arrows) to move through menus, lists, and content on your screen.
- Naciśnij Przycisk OK to select a highlighted item, confirm an an action, or open an application.
- Naciśnij Przycisk Wstecz to return to the previous screen or exit a menu.
- Naciśnij Przycisk Home to quickly access the main interface of your device.
3.2. Regulacja zasilania i głośności
- Naciśnij Przycisk zasilania once to turn your device on or off.
- Użyj Zwiększanie głośności (+) I Ściszanie (-) przyciski do regulacji poziomu dźwięku.
3.3. Voice Control (If Supported)
If your connected Dangbei device supports voice control, press and hold the Przycisk mikrofonu. Speak clearly into the remote control's microphone. Release the button when you have finished speaking. Refer to your device's manual for specific voice command capabilities.
4. Konserwacja
4.1. Czyszczenie
Aby wyczyścić pilota, delikatnie przetrzyj jego powierzchnię miękką, suchą ściereczką. W przypadku uporczywych zabrudzeń delikatnie przetrzyj.ampPrzetrzyj ściereczkę wodą lub delikatnym, nieściernym środkiem czyszczącym. Unikaj stosowania silnych środków chemicznych, rozpuszczalników i materiałów ściernych, ponieważ mogą one uszkodzić wykończenie pilota lub jego wewnętrzne elementy.
4.2. Wymiana baterii
Replace batteries when the remote's response becomes sluggish or stops working. Always replace both batteries simultaneously with new AAA batteries. Do not mix old and new batteries, or different types of batteries, as this can lead to leakage or malfunction. Dispose of used batteries according to local regulations.
4.3. Przechowywanie
Store the remote control in a cool, dry place away from direct sunlight, extreme temperatures, and high humidity. If the remote will not be used for an extended period, it is recommended to remove the batteries to prevent potential leakage.
5. Rozwiązywanie Problemów
| Problem | Możliwa przyczyna | Rozwiązanie |
|---|---|---|
| Pilot nie odpowiada. |
|
|
| Przyciski nie reagują lub są lepkie. |
|
|
| Krótki zasięg działania. |
|
|
6. Specyfikacje
- Model: DBX3 Pro
- Marka: Danbei
- Technologia łączności: Podczerwieni (IR)
- Zgodne urządzenia: Television (specifically compatible Dangbei devices)
- Źródło zasilania: Baterie 2 x AAA (brak w zestawie)
- Wymiary produktu: 1.5 x 9.06 x 3.94 cala (około 3.8 x 23.0 x 10.0 cm)
- Waga przedmiotu: 4.6 uncji (około 130 gramów)
- Dodatek specjalny: Ergonomiczna konstrukcja
7. Gwarancja i pomoc techniczna
7.1. Informacje o gwarancji
This Dangbei product is covered by a limited manufacturer's warranty. The specific terms and duration of the warranty may vary by region and purchase date. Please retain your proof of purchase for warranty claims. For detailed warranty information, refer to the documentation provided with your primary Dangbei device or visit the official Dangbei webstrona.
7.2. Obsługa klienta
For technical assistance, troubleshooting, or inquiries regarding your Dangbei DBX3 Pro remote control, please contact Dangbei customer support. Contact information can typically be found on the official Dangbei website or within the support section of your primary Dangbei device's user interface.
Urzędnik Webstrona: www.dangbei.com (Sprawdź różnice regionalne)


