
KIDOMO F02
Instrukcja obsługi mini drona KIDOMO F02
Model: F02
Your comprehensive guide to operating and maintaining your F02 Mini Drone.
1. Środki ostrożności
To ensure safe operation and prevent damage, please read and follow these precautions carefully:
- Środowisko: Fly in open, clear areas away from people, animals, buildings, and power lines. Avoid flying in strong winds or rain.
- Kontrola przed lotem: Always ensure propellers are securely attached and undamaged. Check battery levels for both drone and remote control before each flight.
- Osłony śmigieł: Utilize the included propeller protection covers, especially for beginner pilots, to prevent accidental injury and damage.
- Awaryjny postój: Familiarize yourself with the emergency stop function. The drone is designed to automatically stop rotating when it hits a wall or object.
- Bezpieczeństwo baterii: Use only original or approved batteries. Do not overcharge or short-circuit batteries. Store batteries in a cool, dry place.
- Nadzór: Children should operate the drone under direct adult supervision.
2. Zawartość opakowania
Po rozpakowaniu sprawdź, czy w opakowaniu znajdują się wszystkie wymienione poniżej elementy:
- KIDOMO F02 Mini Drone x 1
- Pilot zdalnego sterowania x 1
- Rechargeable Drone Batteries x 4
- Kabel do ładowania USB x 1
- Zapasowe śmigła x 4
- Propeller Protection Covers x 4
- Wkrętak x 1
- Instrukcja obsługi x 1
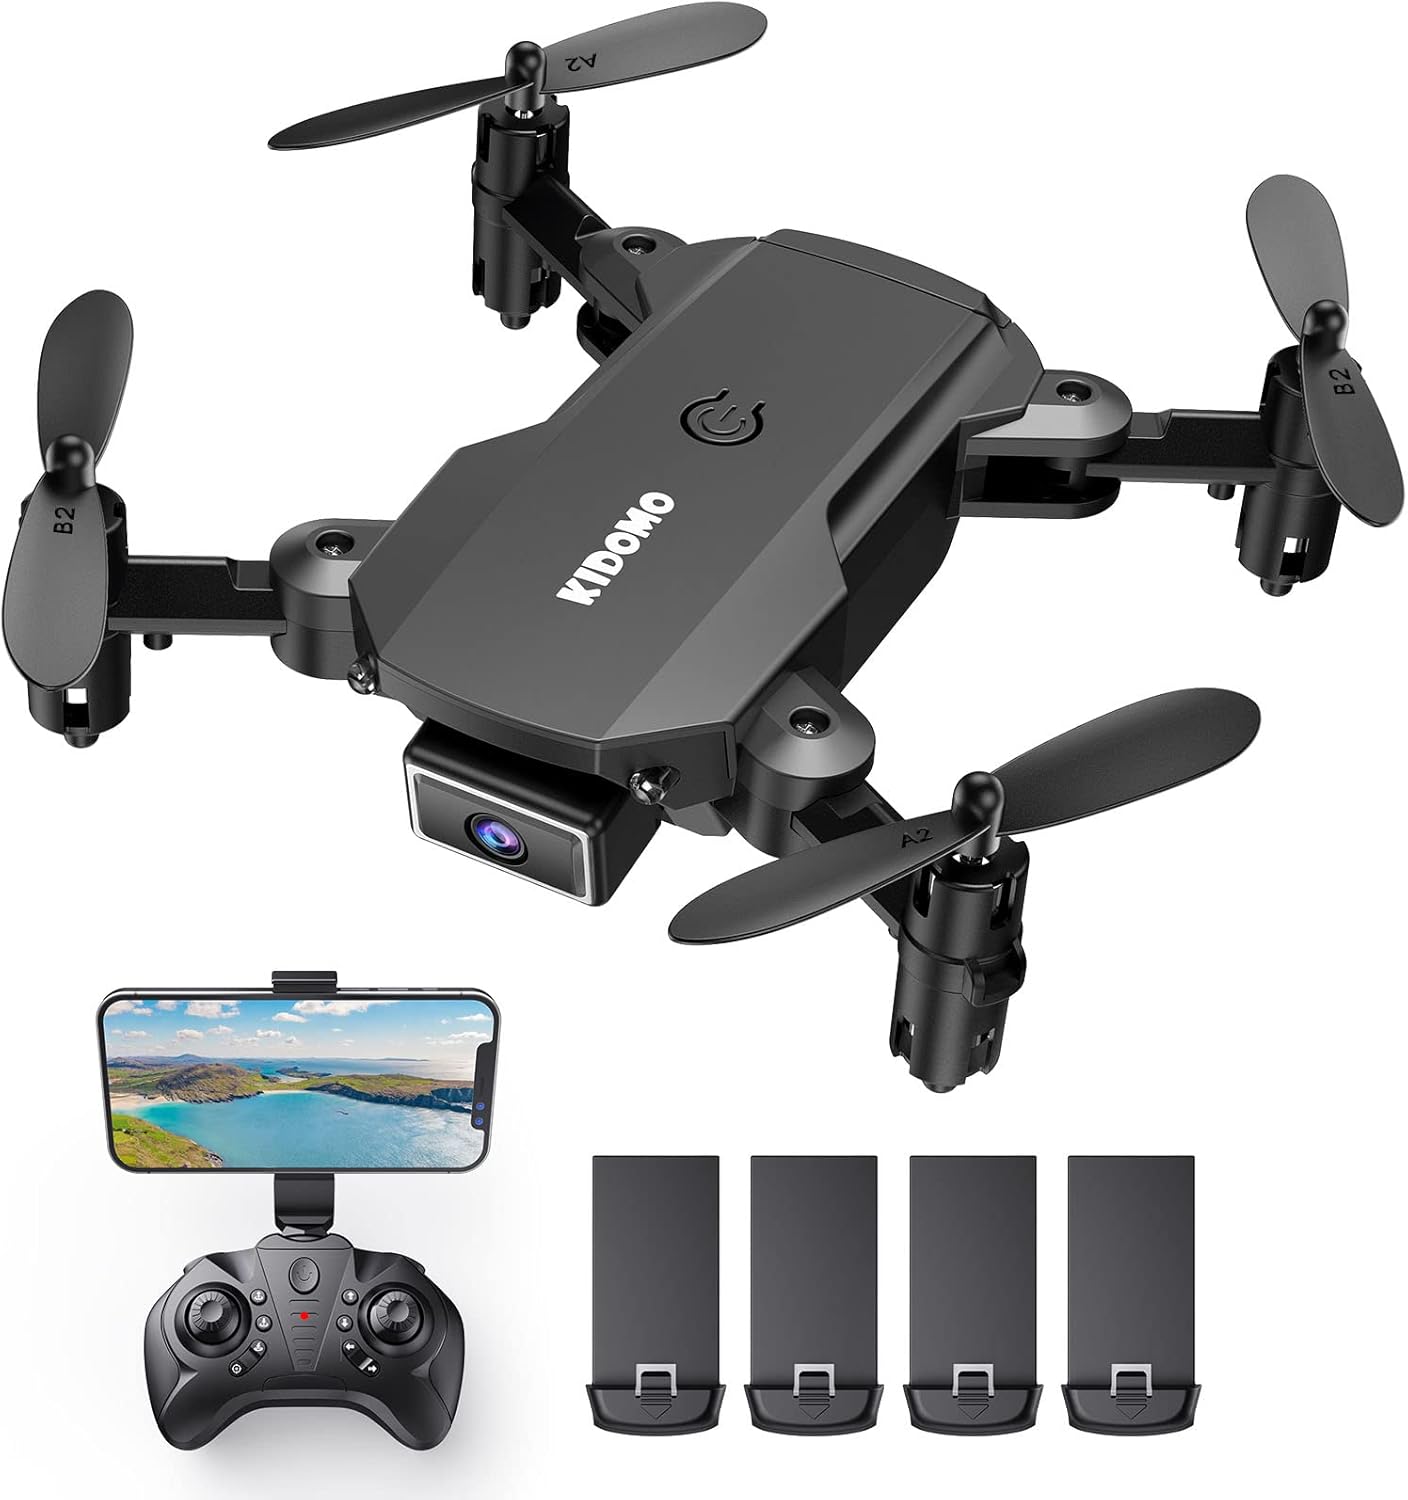
Image: Contents of the KIDOMO F02 Mini Drone package, including the drone, remote, and four batteries.
3. Koniec produktuview
3.1 Komponenty drona
The F02 Mini Drone features a compact, foldable design for easy portability.

Image: The F02 Mini Drone held in a hand, illustrating its small, portable size (less than 7.05 ounces) and folded dimensions (3.15"L x 2.56"W x 1.18"H).
- Składane ramiona: Do kompaktowego przechowywania i transportu.
- Kamera 1080P HD: Located at the front for capturing photos and videos.
- Śmigła: Four propellers (two A-type, two B-type) for flight.
- Komora baterii: Located at the rear/bottom of the drone.
- Przycisk zasilania: On top of the drone.
3.2 Pilot zdalnego sterowania
The remote controller allows for precise control of the drone.
- Lewy joystick: Kontroluje wysokość (w górę/w dół) i obrót (w lewo/w prawo).
- Prawy joystick: Kontroluje ruch do przodu/do tyłu oraz w lewo/w prawo.
- One Key Take-off/Landing Button: For simplified flight initiation and termination.
- Przełącznik prędkości: Adjusts flight speed (beginner/intermediate/advanced).
- Uchwyt na telefon: To mount your smartphone for FPV viewing.
4. Konfiguracja
4.1 Ładowanie akumulatorów
The drone comes with 4 rechargeable batteries. Ensure all batteries are fully charged before first use.
- Podłącz kabel ładujący USB do akumulatora drona.
- Plug the other end of the USB cable into a USB power adapter (e.g., phone charger, computer USB port).
- Kontrolka na kablu USB pokaże stan ładowania (np. świeci na czerwono, gdy ładowanie jest kontynuowane, a nie świeci, gdy urządzenie jest w pełni naładowane).
- Charging time is approximately 60-90 minutes per battery. Each battery provides 8-12 minutes of flight time.

Image: Visual representation of the drone batteries, indicating 8-12 minutes of flight per battery and 25-30 minutes with two batteries.
4.2 Instalacja baterii
- Drone Battery: Insert the charged drone battery into the battery compartment at the rear of the drone until it clicks into place.
- Baterie pilota: Open the battery cover on the back of the remote controller and insert 3 x AAA batteries (not included), ensuring correct polarity. Close the cover.
4.3 Propeller Installation/Check
Ensure propellers are correctly installed and free from damage. Each propeller is marked 'A' or 'B' and must match the corresponding motor arm.
- If replacing, use the screwdriver to remove the screw holding the old propeller.
- Align the new propeller (A or B) with the motor shaft and secure it with the screw.
- Attach the propeller protection covers by snapping them onto the motor arms.
4.4 Parowanie drona i pilota
- Umieść drona na płaskiej, poziomej powierzchni.
- Włącz drona, naciskając przycisk zasilania. Diody kontrolne drona zaczną migać.
- Włącz pilota.
- Przesuń lewy joystick (przepustnicę) do końca w górę, a następnie w dół. Diody drona przestaną migać i zaczną świecić światłem ciągłym, co oznacza pomyślne sparowanie.
4.5 Kalibracja żyroskopu
Po sparowaniu należy skalibrować żyroskop w celu zapewnienia stabilnego lotu.
- Połóż drona na płaskiej powierzchni i jednocześnie przesuń oba joysticki w dół i w prawo.
- Światła drona zaczną szybko migać, a następnie zaczną świecić światłem ciągłym, co będzie oznaczać pomyślną kalibrację.
5. Obsługa drona
5.1 Podstawowe sterowanie lotem

Image: Depiction of the drone's three simple operation modes: One Key Start/Landing, Headless Mode, and Altitude Hold.
- Jeden klucz do startu/lądowania: Press the dedicated button on the remote to automatically take off or land.
- Utrzymywanie wysokości: The drone will automatically maintain a certain height, making it easier to control.
- Take-off (Manual): Slowly push the left joystick up.
- Landing (Manual): Slowly pull the left joystick down.
- Naprzód wstecz: Przesuń prawy joystick w górę/w dół.
- Lot bokiem w lewo/prawo: Przesuń prawy joystick w lewo/prawo.
- Obrót: Przesuń lewy joystick w lewo/prawo.
5.2 Funkcje zaawansowane
- Tryb bezgłowy: Naciśnij przycisk trybu bezgłowego. W tym trybie dron jest zorientowany względem pilota, niezależnie od kierunku, w którym jest skierowany. Ułatwia to sterowanie początkującym.
- 360° 3D Flip: Fly the drone to a height of at least 2 meters. Press the 3D Flip button, then push the right joystick in any direction to perform a flip.

Image: The F02 Mini Drone executing a 360° 3D flip, adding dynamic maneuvers to flight.
- Sterowanie głosowe: After enabling voice control via the app, you can give commands like "Take off," "Land," "Forward," etc.
- Sterowanie gestami: Specific hand gestures can trigger photo or video capture (refer to app instructions for details).
- Trajektoria lotu: Open the app and draw a flight path on your smartphone screen. The drone will follow the designated route automatically.

Image: A smartphone displaying a custom flight trajectory drawn by the user, which the drone will follow.
5.3 Camera Operation (1080P HD FPV)
The F02 drone is equipped with a 1080P HD camera for capturing high-quality aerial footage.

Image: Visual comparison demonstrating the superior clarity of 1080P HD footage captured by the drone's FPV camera compared to 720P.
- Połączenie aplikacji: Download the dedicated drone app (check manual for QR code or app name). Connect your smartphone to the drone's Wi-Fi network.
- Na żywo View: Once connected, you will see a live feed from the drone's camera on your smartphone screen.
- Zrób zdjęcie: Tap the photo icon in the app or use the designated button on the remote (if available).
- Nagraj wideo: Aby rozpocząć/zatrzymać nagrywanie, dotknij ikony wideo w aplikacji.
- Składowanie: Photos and videos are typically saved directly to your smartphone's gallery.
6. Konserwacja
Właściwa konserwacja gwarantuje długowieczność i optymalną wydajność drona.
- Czyszczenie: Do czyszczenia korpusu drona i obiektywu kamery używaj miękkiej, suchej ściereczki. Unikaj stosowania płynów i rozpuszczalników.
- Kontrola śmigła: Regularnie sprawdzaj śmigła pod kątem pęknięć, wygięć lub uszkodzeń. Uszkodzone śmigła należy natychmiast wymienić, używając dostarczonych części zamiennych.
- Pielęgnacja silnika: Keep motors free from dust, hair, or debris. Do not attempt to lubricate the motors.
- Przechowywanie baterii: If storing the drone for an extended period, charge batteries to about 50% and remove them from the drone and remote. Store in a cool, dry place.
- Przechowywanie ogólne: Przechowuj drona w oryginalnym opakowaniu lub futerale ochronnym, aby zapobiec jego uszkodzeniu.
7. Rozwiązywanie Problemów
If you encounter issues with your F02 Mini Drone, refer to the following common problems and solutions:
| Problem | Możliwa przyczyna | Rozwiązanie |
|---|---|---|
| Dron nie reaguje na pilota. | Not paired; low battery; remote off. | Ensure drone and remote are on. Re-pair the drone and remote (Section 4.4). Charge batteries. |
| Dron lata nieregularnie lub dryfuje. | Gyroscope not calibrated; damaged propeller; strong wind. | Perform gyroscope calibration (Section 4.5). Check and replace damaged propellers. Fly in calm conditions. |
| Drone crashes immediately after take-off or flies into objects. | Improper calibration; propeller issue; environmental interference. | Ensure drone is on a flat surface for calibration. Check propellers for correct installation (A/B) and damage. Ensure sufficient clear space for flight. |
| Obraz z kamery jest niewyraźny lub w ogóle się nie wyświetla. | App not connected to drone Wi-Fi; dirty lens. | Ensure your phone is connected to the drone's Wi-Fi network. Clean the camera lens gently. |
| Krótki czas lotu. | Akumulator nie jest w pełni naładowany; akumulator jest stary. | Ensure batteries are fully charged. Consider replacing old batteries if performance degrades significantly. |
8. Specyfikacje
| Funkcja | Szczegół |
|---|---|
| Marka | KIDOMO |
| Nazwa modelu | F02 |
| Kolor | Czarny |
| Rozdzielczość przechwytywania wideo | 1080p |
| Technologia łączności | Remote, Wi-Fi (for FPV) |
| Poziom umiejętności | Początkujący |
| Waga przedmiotu | 0.43 funta (ok. 6.9 uncji) |
| Pojemność baterii | 650 mAh (na baterię) |
| Czas lotu | 8-12 minutes per battery (up to 50 minutes with 4 batteries) |
| Cechy specjalne | Voice Control, Gesture Control, Foldable Design, One Key Start/Landing, Altitude Hold, Headless Mode, 360° Flip, Trajectory Flight |
| Wymiary produktu | 3.14" dł. x 2.5" szer. x 1.18" wys. (po złożeniu) |
| UPC | 860009191877 |
9. Gwarancja i wsparcie
KIDOMO products are designed for quality and reliability. For warranty information or technical support, please refer to the contact details provided with your purchase documentation or visit the official KIDOMO webstrona.
Always ensure you have your product model number (F02) and purchase date available when contacting support.
Ask a question about this manual
Ask about setup, troubleshooting, compatibility, parts, safety, or missing instructions. Manuals+ will review the question and use this page’s manual context to help answer it.