Gioteck SC3
Gioteck SC3 Wireless Pro Controller User Manual
For Nintendo Switch, PC, and Mobile Devices
Wstęp
This manual provides detailed instructions for the setup, operation, and maintenance of your Gioteck SC3 Wireless Pro Controller. Designed for use with Nintendo Switch, PC, and mobile devices, this controller features programmable back buttons, customizable RGB lighting, and changeable magnetic thumb sticks for an enhanced gaming experience.
1. Konfiguracja
1.1 Zawartość opakowania
- Gioteck SC3 Wireless Pro Controller
- Kabel ładujący USB
- Additional Magnetic Thumb Sticks (if included)
- Instrukcja obsługi (ten dokument)
1.2 Ładowanie Kontrolera
Before initial use, fully charge the controller. Connect the supplied USB charging cable to the controller's charging port and the other end to a USB power source (e.g., Nintendo Switch dock, PC USB port, or USB wall adapter).
- Wskaźnik LED pokaże stan ładowania.
- Pełne naładowanie trwa zazwyczaj około 2–3 godzin.
Obraz: Dół view of the Gioteck SC3 controller, highlighting the USB-C charging port located between the two textured grips.
1.3 Parowanie z Nintendo Switch
- Z menu głównego konsoli Nintendo Switch wybierz Kontrolery, Następnie Zmień uchwyt/kolejność.
- On the SC3 controller, press and hold the Przycisk parowania (usually a small button on the top or back) for a few seconds until the LED indicators begin to flash rapidly.
- Once the controller is recognized by the Switch, the player LED(s) on the controller will illuminate solid, indicating successful pairing.
- Naciśnij Przycisk aby potwierdzić.
Note: For subsequent uses, the controller should automatically reconnect to the last paired Switch console when powered on.
1.4 Connecting to PC/Mobile (Bluetooth)
- Ensure Bluetooth is enabled on your PC or mobile device.
- On the SC3 controller, press and hold the Przycisk parowania for a few seconds until the LED indicators flash rapidly.
- On your PC/mobile device, navigate to Bluetooth settings and search for new devices.
- Select "Gioteck SC3" or similar from the list of available devices to pair.
- The controller's LED will become solid upon successful connection.
1.5 Installing Magnetic Thumb Sticks
The SC3 controller features changeable magnetic thumb sticks. To replace them:
- Gently pull the existing thumb stick straight up to remove it.
- Align the desired magnetic thumb stick with the base and gently push it down until it snaps into place.

Obraz: Przód view of the Gioteck SC3 controller, showcasing the magnetic thumb sticks and button layout.
2. Instrukcja obsługi
2.1 Układ przycisków
The SC3 controller features a traditional button layout. Refer to the image below for button identification.

Obraz: kątowy przód view of the Gioteck SC3 controller, displaying the full button layout including face buttons, D-pad, analog sticks, and shoulder buttons.
- Lewy/prawy drążek analogowy: Do sterowania ruchem i kamerą.
- Pad kierunkowy: Wejście kierunkowe.
- Przyciski A/B/X/Y: Przyciski akcji.
- Przyciski L/R/ZL/ZR: Przyciski na ramionach i spustowe.
- Przyciski +/-: Start/Select equivalents.
- Przycisk Home: Powrót do menu głównego konsoli.
- Przycisk przechwytywania: Robi zrzuty ekranu.
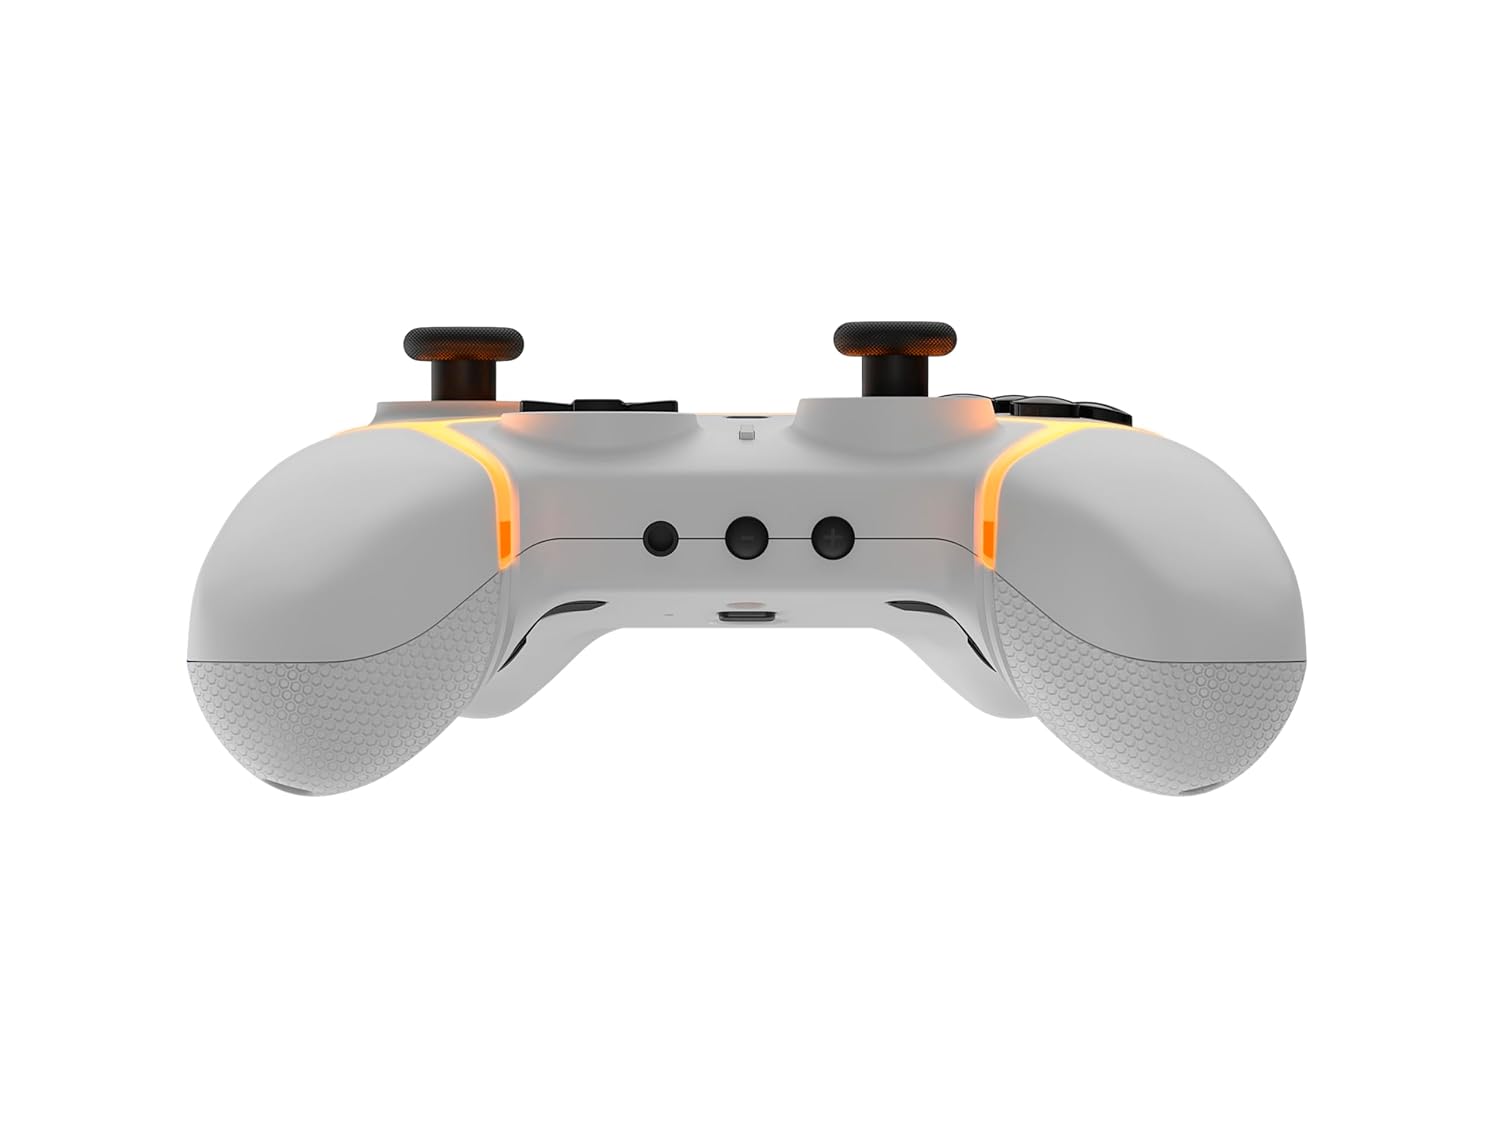
2.2 Programowalne przyciski tylne
The SC3 controller includes programmable back buttons (M1, M2, M3, M4) for custom assignments.

Obraz: Tył view of the Gioteck SC3 controller, clearly showing the four programmable back buttons (M1, M2, M3, M4) and textured grips.
Kroki programowania:
- Naciśnij i przytrzymaj Przycisk programu (refer to diagram if available, usually a small button on the back) until the LED indicator flashes.
- Naciśnij Przycisk Wstecz (M1, M2, M3, or M4) you wish to program. The LED will flash slowly.
- Naciśnij Przycisk wprowadzania (e.g., A, B, X, Y, L, R, ZL, ZR, D-pad direction) you want to assign to the back button.
- Naciśnij Przycisk programu again to save the assignment. The LED will stop flashing.
- Repeat for other back buttons as desired.
To clear a programmed button, follow steps 1-2, then press the Program Button again without pressing an input button.
2.3 Personalizacja oświetlenia RGB
The controller features customizable RGB lighting. Specific instructions for changing colors or effects are typically found in the product's quick start guide or by pressing a dedicated button combination (e.g., Function + R3).
Consult the quick start guide included with your controller for precise button combinations to adjust RGB lighting.
2.4 Motion Controls
The SC3 controller supports motion controls, allowing for immersive gameplay in compatible Nintendo Switch titles. No special setup is usually required; motion controls activate automatically when supported by the game.
2.5 Audio Headset Jack
A 3.5mm audio headset jack is located on the controller for connecting compatible headsets. It includes dedicated mute and volume control buttons.
- Zwiększanie/zmniejszanie głośności: Dostosuj wyjście audio.
- Przycisk wyciszenia: Mute/unmute microphone input.

Obraz: Góra view of the Gioteck SC3 controller, highlighting the 3.5mm audio jack, volume controls, and mute button.
3. Konserwacja
3.1 Czyszczenie
Do czyszczenia kontrolera użyj miękkiej, suchej ściereczki. W przypadku uporczywych zabrudzeń delikatnie przetrzyj kontroler.ampPrzetrzyj ściereczkę wodą. Unikaj stosowania silnych środków chemicznych, ściernych środków czyszczących i rozpuszczalników, ponieważ mogą one uszkodzić wykończenie i wewnętrzne elementy kontrolera.
- Do not immerse the controller in water or any other liquid.
- Przed ładowaniem lub podłączaniem urządzeń upewnij się, że wszystkie porty są suche.
3.2 Przechowywanie
Przechowuj kontroler w chłodnym, suchym miejscu, z dala od bezpośredniego światła słonecznego i ekstremalnych temperatur. Unikaj umieszczania ciężkich przedmiotów na kontrolerze, aby zapobiec jego uszkodzeniu.
3.3 Pielęgnacja baterii
The controller contains a rechargeable battery. To prolong battery life:
- Unikaj częstego całkowitego rozładowywania akumulatora.
- Charge the controller regularly, even if not in use for extended periods (e.g., once every 3-6 months).
- Do not expose the controller to temperatures above 60°C (140°F).
4. Rozwiązywanie Problemów
4.1 Kontroler nie łączy się/nie paruje
- Sprawdź baterię: Sprawdź, czy kontroler jest odpowiednio naładowany.
- Naprawa: Follow the pairing instructions in Section 1.3 or 1.4.
- Ingerencja: Move closer to the console/device and away from potential sources of wireless interference (e.g., Wi-Fi routers, other Bluetooth devices).
- Zresetuj kontroler: Locate a small reset button (often a pinhole) on the back of the controller. Use a paperclip to press and hold it for a few seconds. Then attempt to re-pair.
- Update Console/Device Software: Ensure your Nintendo Switch, PC, or mobile device's operating system is up to date.
4.2 Buttons/Sticks Not Responding
- Re-sync: Odłącz i ponownie podłącz kontroler.
- Czysty: Upewnij się, że wokół przycisków i drążków nie zgromadziły się żadne zanieczyszczenia.
- Test in another game/menu: Determine if the issue is specific to a game or system-wide.
- Zresetuj kontroler: Wykonaj twardy reset, jak opisano powyżej.
4.3 Motion Controls Not Working
- Kompatybilność gry: Sprawdź, czy gra, w którą grasz, obsługuje sterowanie ruchem.
- Ponowna kalibracja: On Nintendo Switch, you can recalibrate motion controls in the system settings.
- Zresetuj kontroler: Wykonaj twardy reset.
5. Specyfikacje
| Model: | Gioteck SC3 Wireless Pro Controller |
| Zgodność: | Nintendo Switch (Original, Lite, OLED), PC, Mobile Devices |
| Łączność: | Bluetooth bezprzewodowy |
| Wymiary (w przybliżeniu): | 2.87 x 5.35 x 6.34 cala (7.29 x 13.59 x 16.1 cm) |
| Waga (w przybliżeniu): | 10.6 uncji (300 grama) |
| Wtyczka dźwiękowa: | 3.5mm with mute and volume controls |
| Cechy szczególne: | Programmable back buttons, Magnetic thumb sticks, RGB lighting, Motion controls |
6. Informacje o gwarancji
The Gioteck SC3 Wireless Pro Controller comes with a manufacturer's warranty. For specific details regarding warranty coverage, duration, and claims process, please refer to the warranty card included with your product or visit the official Gioteck webstrona.
Prosimy zachować dowód zakupu w celach gwarancyjnych.
7. Obsługa klienta
If you encounter any issues or have questions not covered in this manual, please contact Gioteck customer support. Contact information can typically be found on the product packaging or the official Gioteck webstrona.
Gioteck Official Webstrona: www.gioteck.com