Ważne instrukcje bezpieczeństwa
Przed instalacją i użytkowaniem prosimy o dokładne zapoznanie się z niniejszą instrukcją. Zachowaj instrukcję do wykorzystania w przyszłości.
- Przed przystąpieniem do instalacji, konserwacji lub wymiany żarówki należy zawsze odłączyć zasilanie za pomocą głównego wyłącznika.
- Instalację powinien wykonać wykwalifikowany elektryk lub zgodnie z lokalnymi przepisami elektrycznymi.
- Upewnij się, że powierzchnia montażowa może utrzymać ciężar urządzenia.
- Nie przekraczać maksymalnej mocytage specified for the bulbs (3 x 60W E27).
- This product is designed for indoor use only (IP20 rating). Do not expose to moisture or water.
- Avoid touching bulbs directly with bare hands; use a clean cloth or gloves.
- If any damage is observed, discontinue use and contact customer support.
Produkt ponadview
The Lindby Elamira pendant lamp is a modern lighting fixture designed for living rooms and dining areas. It features three black metal shades with a golden interior, providing a pleasant and comfortable downward-directed light. The design is minimalist yet harmonious, suitable for contemporary interiors. This lamp is dimmable, allowing you to adjust the light intensity to create the desired ambiance.

Image: The Lindby Elamira pendant lamp with three black and gold shades, illuminating a dining area.
Specyfikacje
| Marka | Lindby'ego |
| Nazwa modelu | Elamira |
| Numer modelu | 9627803 |
| Wymiary produktu (dł. x szer. x wys.) | 133Dł. x 31Sz. x 150Wys. centymetrów |
| Waga przedmiotu | 2.23 kilograma |
| Kolor | Czarny, Złoty |
| Tworzywo | Aluminium, stal stopowa |
| Styl | Nowoczesny |
| Typ pokoju | Living Room, Dining Room, Kitchen, Bathroom (as per product use) |
| Do użytku wewnątrz/na zewnątrz | Wnętrz |
| Źródło zasilania | Elektryczny przewodowy |
| Cechy specjalne | Możliwość ściemniania |
| Metoda kontroli | Push Button (also compatible with slide, rotary, toggle switches) |
| Źródło światła | 3 x E27 bulbs (max 60W each) |
| Tomtage | 230 wolty |
| Kolor światła | Warm White (depending on bulb) |
| Jasność | Up to 2400 Lumens (total, depending on bulbs) |
| Poziom wodoodporności | Not Water Resistant (IP20) |
| Typ montażu | Ceiling Mount, Hanger Fixture |
| Wymagany montaż | No (pre-assembled fixture, but installation required) |

Image: Detailed dimensions of the Lindby Elamira pendant lamp. The bar length is 1330mm, total height 1500mm, and shade diameter 310mm.
Zawartość opakowania
Przed przystąpieniem do instalacji należy upewnić się, że wszystkie komponenty są obecne i nieuszkodzone.
- 1 x Lindby Elamira Pendant Lamp Fixture (with 3 shades)
- Materiały montażowe (śruby, kotwy itp.)
- Instrukcja obsługi
Note: Light bulbs are not included and must be purchased separately. This fixture requires 3 x E27 bulbs, max 60W each.
Konfiguracja i instalacja
Aby zapewnić bezpieczną i prawidłową instalację, należy dokładnie wykonać poniższe czynności.
1. Przygotowanie
- Wyłącz zasilanie: Locate the circuit breaker for the room where you are installing the lamp and turn off the power. Verify power is off using a voltagtester.
- Rozpakować: Ostrożnie wyjąć wszystkie elementy z opakowania.
- Zbierz narzędzia: You will need a screwdriver, wire strippers, pliers, a drill (if needed for anchors), and a ladder.
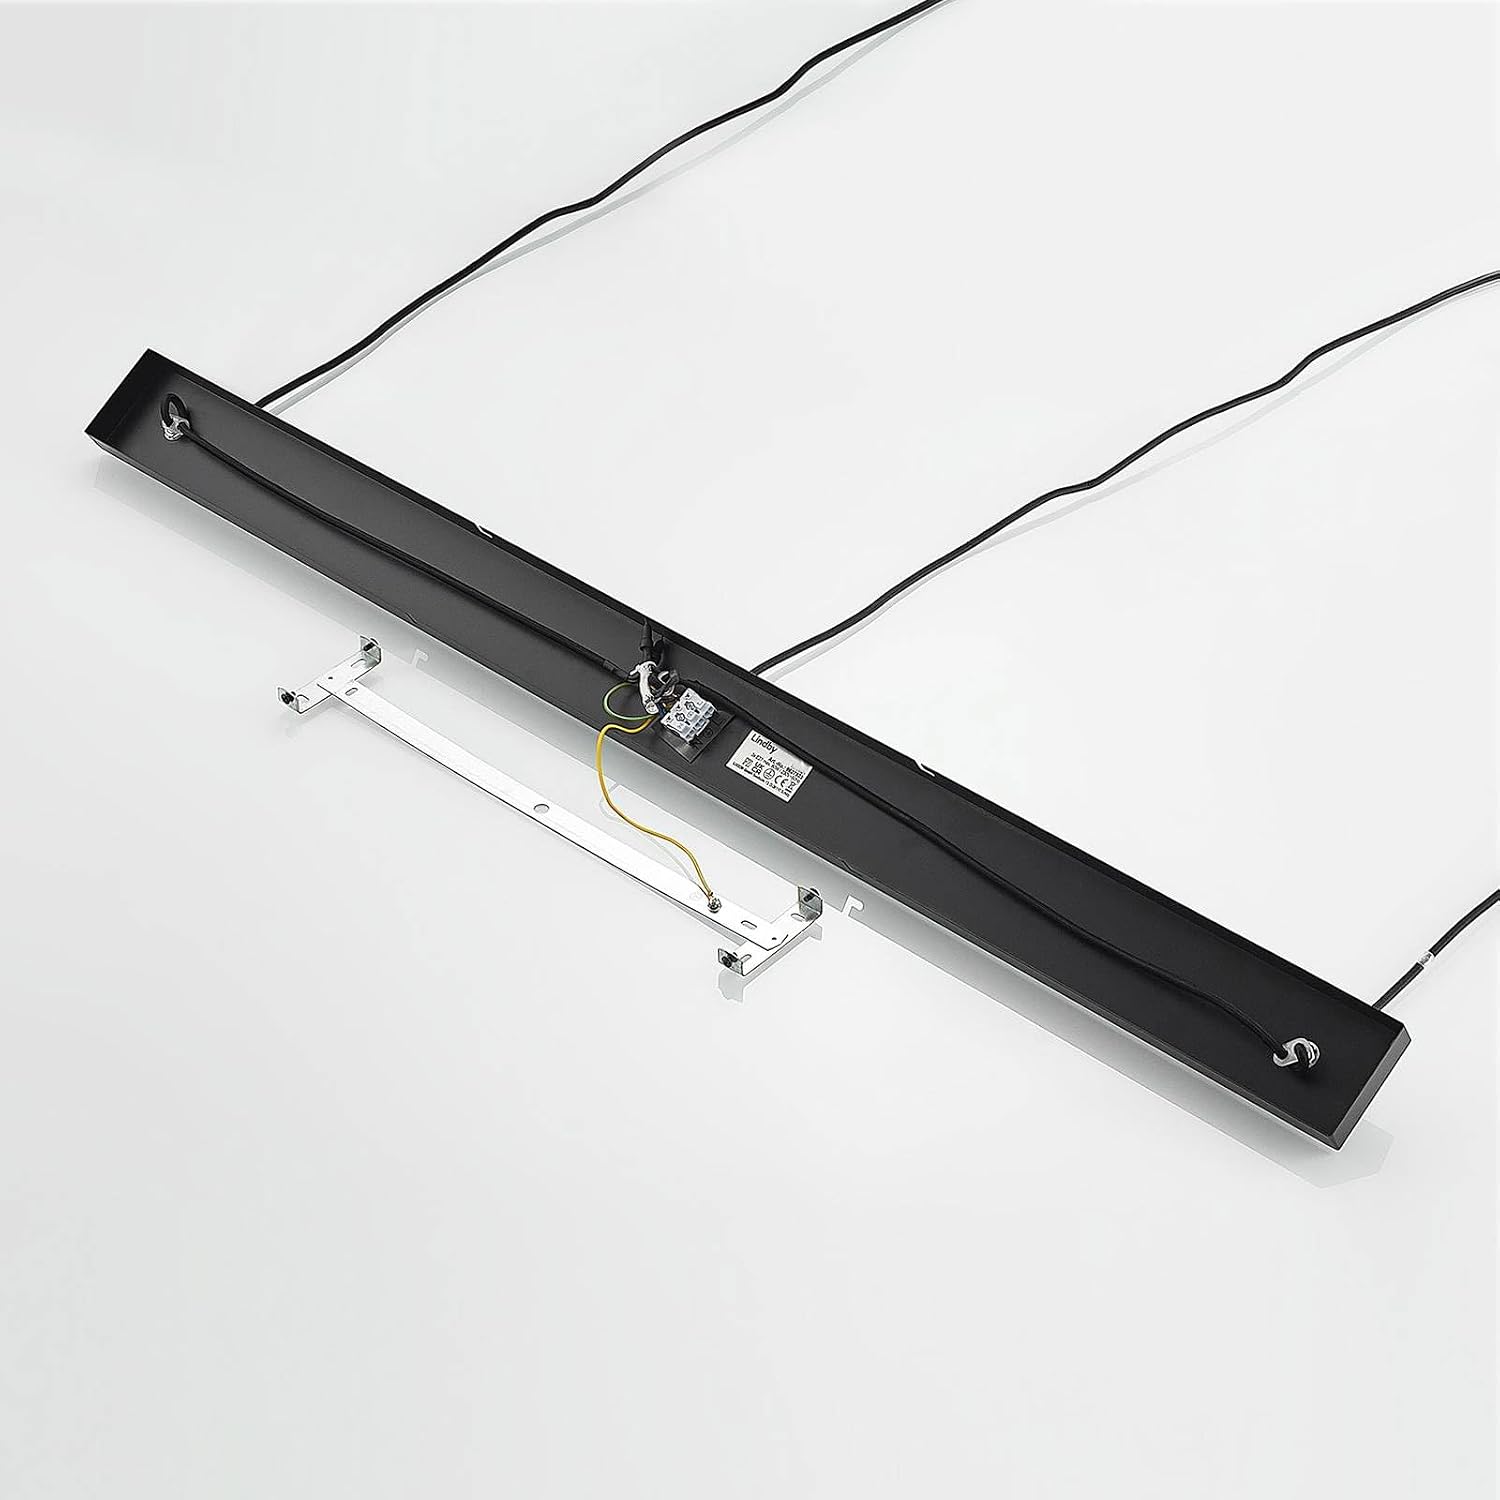
2. Montaż płyty sufitowej
Attach the mounting bracket to the ceiling junction box. Ensure it is securely fastened.

Image: The metal mounting plate and internal wiring connections of the lamp's ceiling bar.
3. Okablowanie
Podłącz lamp's wires to your household electrical wires. Follow standard wiring color codes:
- Na żywo (L): Brown or Black wire from the lamp to the Live wire from the ceiling.
- Neutralny (N): Blue wire from the lamp to the Neutral wire from the ceiling.
- Ziemia (E): Green/Yellow wire from the lamp to the Ground wire from the ceiling.
Secure all connections with wire nuts or terminal blocks provided. Ensure no bare wires are exposed.

Image: Underside of the lamp's ceiling bar, illustrating the internal wiring and connection points.
Obraz: Góra view z lamp's ceiling bar, showing the wiring paths and connection points for the pendant cables.
4. Attaching the Fixture to the Ceiling
Once wiring is complete, carefully align the lamp's ceiling bar with the mounting bracket and secure it with the provided screws. Ensure the fixture is flush against the ceiling.
Video: This video demonstrates the general installation process for a similar multi-light pendant lamp, including mounting and wiring. While not the exact model, the steps are broadly applicable.
5. Instalowanie żarówek
Screw three E27 base bulbs (max 60W each) into the sockets. For dimming functionality, ensure you use dimmable E27 LED bulbs.
Video: This video provides a closer look at an E27 Edison screw bulb, which is compatible with this fixture. It demonstrates the bulb type required.
Video: This video offers a detailed view of an E27 LED bulb, highlighting its features and design. This type of bulb is recommended for optimal performance and energy efficiency with your pendant lamp.
6. Przywróć zasilanie
Once installation is complete and all connections are secure, restore power at the main circuit breaker. Test the lampfunkcjonalność.
Instrukcja obsługi
The Lindby Elamira pendant lamp operates via a standard wall switch. If connected to a compatible dimmer switch and equipped with dimmable E27 bulbs, you can adjust the light intensity.
- Włączanie/wyłączanie: Użyj istniejącego przełącznika ściennego, aby włączyć światłoamp włączony lub wyłączony.
- Ściemnianie: If using a dimmer switch and dimmable bulbs, operate the dimmer switch according to its manufacturer's instructions to adjust brightness.

Image: The Lindby Elamira pendant lamp casting a warm, inviting glow on a wall, demonstrating its lighting effect.
Konserwacja i pielęgnacja
Regularna konserwacja zapewnia długowieczność i optymalną wydajność Twojego lamp.
- Czyszczenie: Przed czyszczeniem odłącz zasilanie. Wytrzyjamp miękką, suchą ściereczką. Nie używaj ściernych środków czyszczących, rozpuszczalników ani środków polerujących, ponieważ mogą one uszkodzić wykończenie.
- Wymiana żarówki: Ensure power is off and bulbs have cooled before replacing. Unscrew old bulbs and screw in new E27 bulbs (max 60W).
- Kontrola: Okresowo sprawdzaj, czy nie występują luźne połączenia lub oznaki zużycia.
Rozwiązywanie problemów
Jeśli napotkasz problemy, zapoznaj się z poniższymi typowymi problemami i rozwiązaniami:
| Problem | Możliwa przyczyna | Rozwiązanie |
|---|---|---|
| Lamp nie świeci. | Brak zasilania, luźne okablowanie, przepalona żarówka. | Check circuit breaker. Ensure all wires are securely connected. Replace bulb. |
| Lamp migocze. | Luźna żarówka, niekompatybilny ściemniacz, uszkodzona żarówka. | Tighten bulbs. Ensure dimmable bulbs are used with a compatible dimmer. Replace bulb. |
| Przyciemnianie nie działa. | Non-dimmable bulbs, incompatible dimmer switch. | Install dimmable E27 LED bulbs. Ensure your dimmer switch is compatible with LED lighting. |
Gwarancja i wsparcie
Aby uzyskać informacje o gwarancji lub pomocy technicznej, zapoznaj się z dokumentacją zakupu lub skontaktuj się ze sprzedawcą. Zachowaj dowód zakupu na wypadek roszczeń gwarancyjnych.
For further assistance, you may visit the Lindby website or contact their customer service directly. Contact details are typically found on the product packaging or the brand's official webstrona.