
Wstęp
The Abovsare Digital Alarm Clock is designed to provide clear time, date, and temperature information with a large LED display. Its modern design complements various room decors, and its silent operation ensures a peaceful environment. This manual provides detailed instructions for setting up and operating your new digital alarm clock.
Ważne informacje dotyczące bezpieczeństwa
- Always connect the device to a USB port or use only a 5V/1A or 5V/2A power adapter. Using an adapter with excessive voltage may cause screen damage or malfunction.
- This clock requires continuous power and must be plugged in to operate. It is not battery-operated for primary function. A built-in CR2025 3V button battery serves only as a memory backup for time data during power outagt.j.
- Unikaj wystawiania zegara na działanie ekstremalnych temperatur, bezpośredniego światła słonecznego i wysokiej wilgotności.
- Nie próbuj samodzielnie demontować ani naprawiać urządzenia. W przypadku jakichkolwiek napraw skontaktuj się z wykwalifikowanym personelem serwisowym.
Zawartość opakowania
Proszę sprawdzić, czy w paczce znajdują się następujące elementy:
- Abovsare Digital Alarm Clock (Model B0BLCYTFB2)
- Kabel zasilający USB
- USB Power Adapter (5V/1A or 5V/2A)
Produkt ponadview
Zapoznaj się z częściami i elementami sterowania zegara.
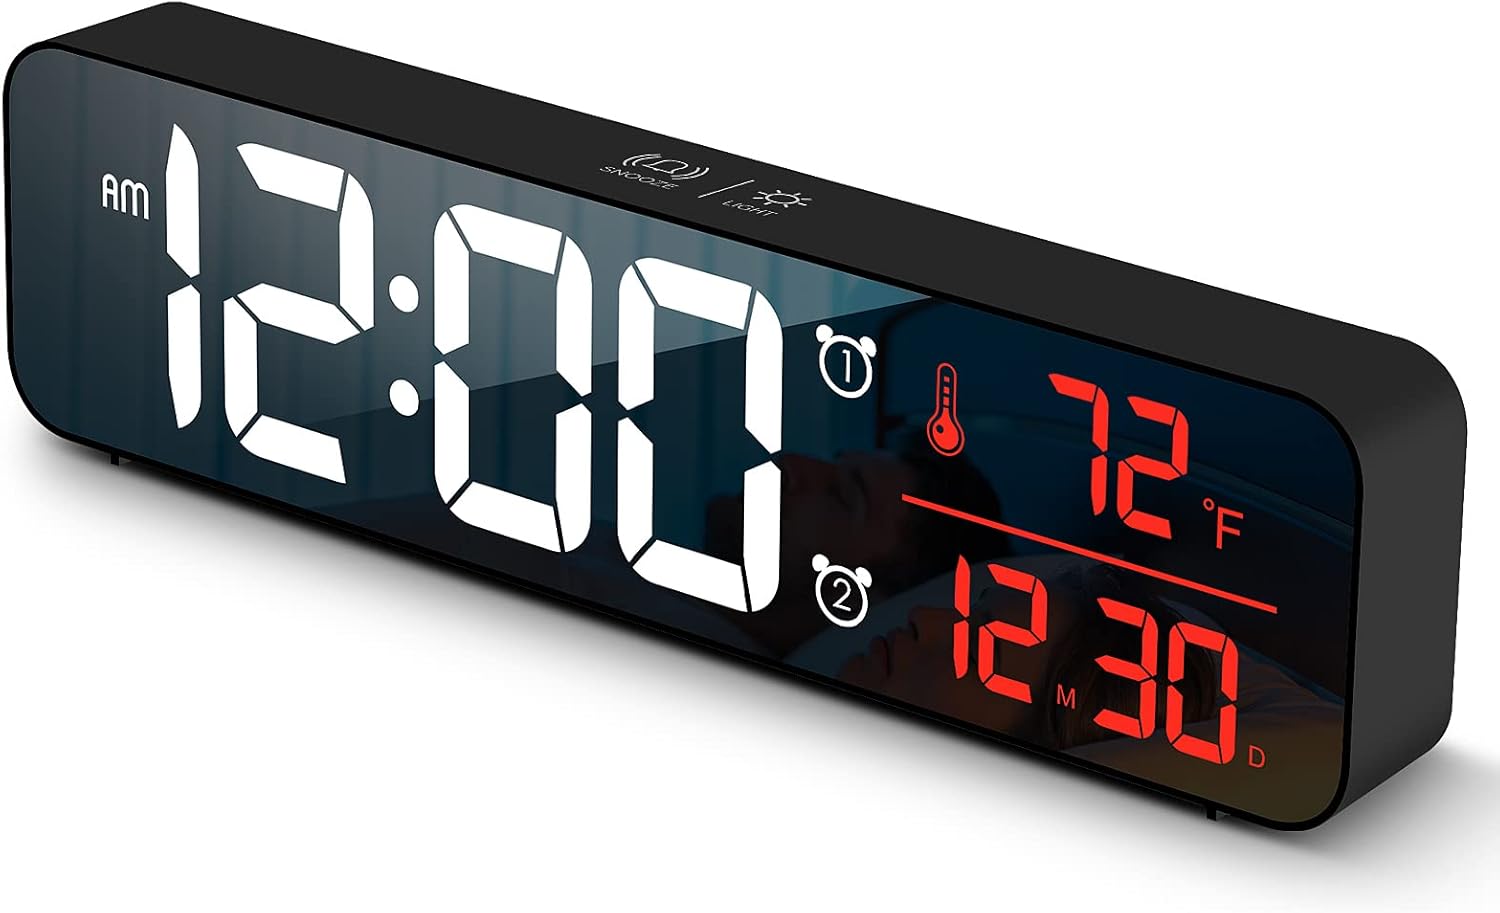
Rysunek 1: Przód view of the Abovsare Digital Alarm Clock, displaying time, temperature, and date in red LED digits.
Rysunek 2: Tył view of the clock, highlighting the control buttons and USB power input. The buttons are typically for setting time, alarms, and adjusting modes.
Przyciski sterujące i funkcje:
- Przycisk SET: Used to enter setting modes for time, date, and alarms.
- Przyciski GÓRA/DÓŁ: Used to adjust values during settings and navigate options.
- ALARM 1/2 Buttons: Used to activate/deactivate and set Alarm 1 and Alarm 2.
- Przycisk DRZEMKA/ŚWIATŁO (góra): Taps to adjust brightness, long press for snooze during alarm.
- Port zasilania USB: Connects the clock to the power adapter.
Organizować coś
- Podłączenie zasilania: Connect the provided USB power cable to the clock's USB port and then to the USB power adapter. Plug the adapter into a standard wall outlet. The display will light up.
- Ustawienie czasu początkowego:
- Naciśnij USTAWIĆ Naciśnij przycisk raz, aby wejść w tryb ustawiania czasu. Cyfry godziny zaczną migać.
- Użyj UP or W DÓŁ przyciski do regulacji godziny.
- Naciskać USTAWIĆ ponownie, aby przejść do ustawiania minut. Dostosuj minuty za pomocą UP or W DÓŁ.
- Kontynuuj naciskanie USTAWIĆ aby przełączać się między ustawieniami roku, miesiąca i dnia, dostosowując każde z nich UP or W DÓŁ.
- Naciskać USTAWIĆ po raz ostatni, aby wyjść z trybu ustawień.
- Jednostka temperatury: The clock displays temperature in either Celsius or Fahrenheit. Refer to the operating instructions for how to switch between these units.
Instrukcja obsługi
Time, Date, and Temperature Display
The clock continuously displays the current time, date (month/day), and indoor temperature. The large LED digits ensure readability from a distance.
Regulacja jasności

Rysunek 3: The clock on a nightstand, demonstrating its display in a bedroom setting, with text indicating 5 levels of brightness adjustment.
The clock features 5 levels of brightness. You can adjust it manually or use the automatic dimmer function.
- Regulacja ręczna: Kliknij SNOOZE / LIGHT button on the top of the clock to cycle through the 5 brightness levels.
- Automatic Dimmer: The clock automatically adjusts brightness based on the time of day.
- 7:00 AM - 5:59 PM: Highlight brightness
- 6:00 PM - 10:59 PM: Medium brightness
- 11:00 PM - 5:59 AM: Darkest brightness
- 6:00 AM - 6:59 AM: Medium highlight
Notatka: If you manually adjust brightness, the clock will remember your setting for that specific time period on subsequent days. However, when a new period begins, the brightness will revert to the system's preset automatic rule.
Ustawianie alarmów (Alarm 1 i Alarm 2)
The clock supports two independent alarms. This is useful for different wake-up times or for heavy sleepers.
- Naciśnij ALARM 1 or ALARM 2 button to select which alarm to set. The alarm icon and hour digits will flash.
- Użyj UP or W DÓŁ przyciski do ustawienia godziny alarmu.
- Naciśnij wybrany ALARM button again to move to minute setting. Adjust minutes with UP or W DÓŁ.
- Naciśnij ALARM button one last time to confirm and exit alarm setting. The alarm icon will remain lit, indicating the alarm is active.
- To deactivate an alarm, press its corresponding ALARM Naciskaj przycisk, aż ikona alarmu zniknie z wyświetlacza.
Ringtone Selection and Volume
The clock offers 40 selectable ringtones and 4 volume levels.
- During alarm setting, after setting the minutes, press the ALARM button again to enter ringtone selection. Use UP or W DÓŁ wstępnieview dzwonki.
- Naciśnij ALARM button again to enter volume adjustment. Use UP or W DÓŁ to select one of the 4 volume levels.
- Naciśnij ALARM przycisk, aby potwierdzić wybór i wyjść.
Funkcja drzemki
When an alarm sounds, tap the SNOOZE / LIGHT button on the top of the clock to activate the snooze function. The alarm will temporarily pause and sound again after a set interval (typically 5-9 minutes). To turn off the alarm completely, press any other button on the back of the clock.
Funkcja pamięci

Rysunek 4: Illustration of the memory function, showing the clock retaining time settings even after a power interruption, thanks to the internal CR2025 3V button battery.
The clock includes a built-in memory function. In the event of a power disconnection, the time and alarm settings will not be lost, eliminating the need to reset them once power is restored. This function is supported by an internal CR2025 3V button battery.
Konserwacja
- Clean the clock's display and casinmiękką, suchą szmatką.
- Nie należy używać środków czyszczących o działaniu ściernym, rozpuszczalników ani środków chemicznych w sprayu, gdyż mogą one uszkodzić powierzchnię.
- Ensure the clock remains dry and away from water sources.
Rozwiązywanie problemów
| Problem | Możliwa przyczyna / rozwiązanie |
|---|---|
| Display is off or flickering. |
|
| Cannot set time/alarm correctly. |
|
| Alarm is too loud or too quiet. |
|
| Clock time drifts (gains/loses minutes). |
|
| Display brightness changes unexpectedly. |
|
Specyfikacje
| Funkcja | Szczegół |
|---|---|
| Marka | Abovsare |
| Model | B0BLCYTFB2 |
| Typ wyświetlacza | Cyfrowa dioda LED |
| Kolor | Wired-black Case+red Digit |
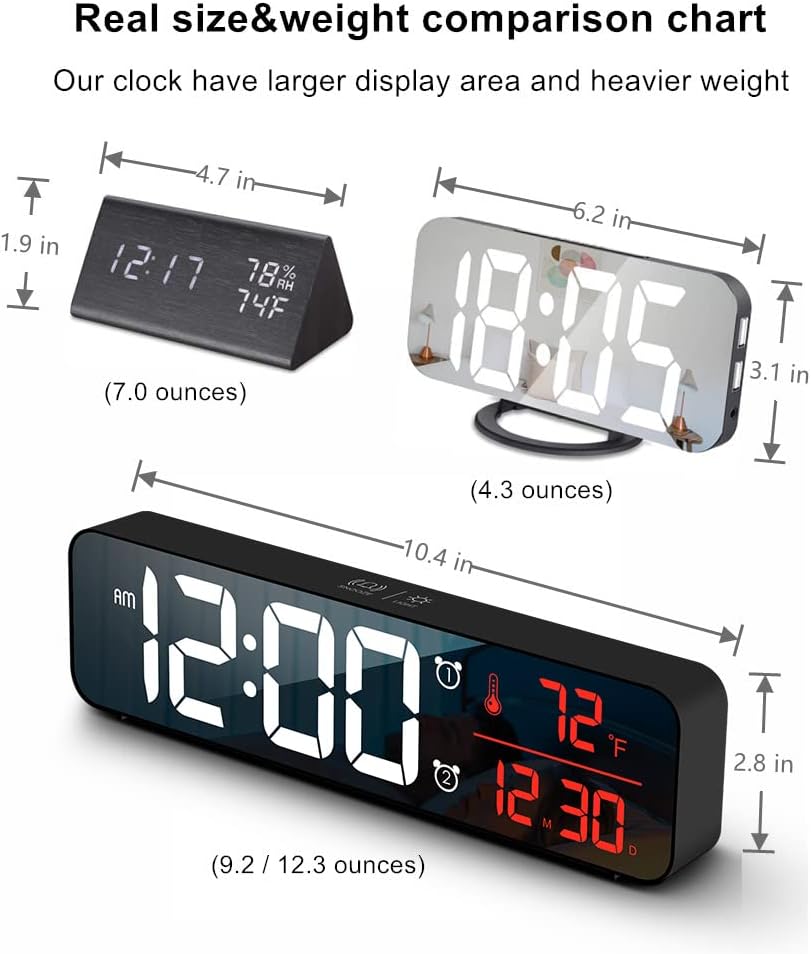
| Wymiary produktu | 10.4" szer. x 2.8" wys. |
| Źródło zasilania | Corded Electric (USB-5V) |
| Cechy specjalne | Large Display, Automatic Brightness Dimmer, Memory Function, Dual Alarms, Date, Temperature |
| Typ montażu | Możliwość montażu na stole lub ścianie |
| Tworzywo | Akrylonitryl-butadien-styren (tworzywo sztuczne) |
| Waga przedmiotu | 1 funt (około 16 uncji) |
Gwarancja i wsparcie
Abovsare is committed to providing high-quality products. For specific warranty details and customer support, please refer to the information provided at the time of purchase or visit the official Abovsare brand store.
Abovsare Brand Store: https://www.amazon.com/stores/Abovsare/page/D02B5557-764F-4435-8DFB-4333D462DA1C