1. Wprowadzenie
This manual provides essential information for the safe and efficient operation of your suevery SV240ZA 24-inch 165Hz IPS Gaming Monitor. Please read this manual thoroughly before using the product and retain it for future reference. This monitor is designed for gaming, home office, and general computing tasks, offering a Full HD 1080p resolution, a high refresh rate, and fast response time for a smooth visual experience.
2. Informacje dotyczące bezpieczeństwa
- Aby uniknąć pożaru lub porażenia prądem, nie wystawiaj monitora na działanie deszczu i wilgoci.
- Nie otwierać monitora casing. Wewnątrz nie ma żadnych części, które mogłyby być naprawiane przez użytkownika. Wszelkie prace serwisowe należy zlecać wykwalifikowanemu personelowi.
- Aby zapobiec jego upadkowi, ustaw monitor na stabilnej, płaskiej powierzchni.
- Zapewnij odpowiednią wentylację wokół monitora. Nie blokuj otworów wentylacyjnych.
- Należy używać wyłącznie zasilacza dołączonego do monitora.
- Jeśli monitor nie będzie używany przez dłuższy czas, należy odłączyć wtyczkę zasilającą od gniazdka.
3. Zawartość opakowania
Sprawdź, czy w opakowaniu znajdują się wszystkie elementy:
- 1 x suevery SV240ZA Monitor
- 1 x podstawa stojaka
- 1 x kabel HDMI
- 1 x kabel DisplayPort
- 1 x Instrukcja obsługi
- 1 x zasilacz
4. Instrukcje konfiguracji
4.1 Montaż stojaka
Attach the stand base to the monitor neck, then secure the neck to the back of the monitor. Ensure all screws are tightened securely.
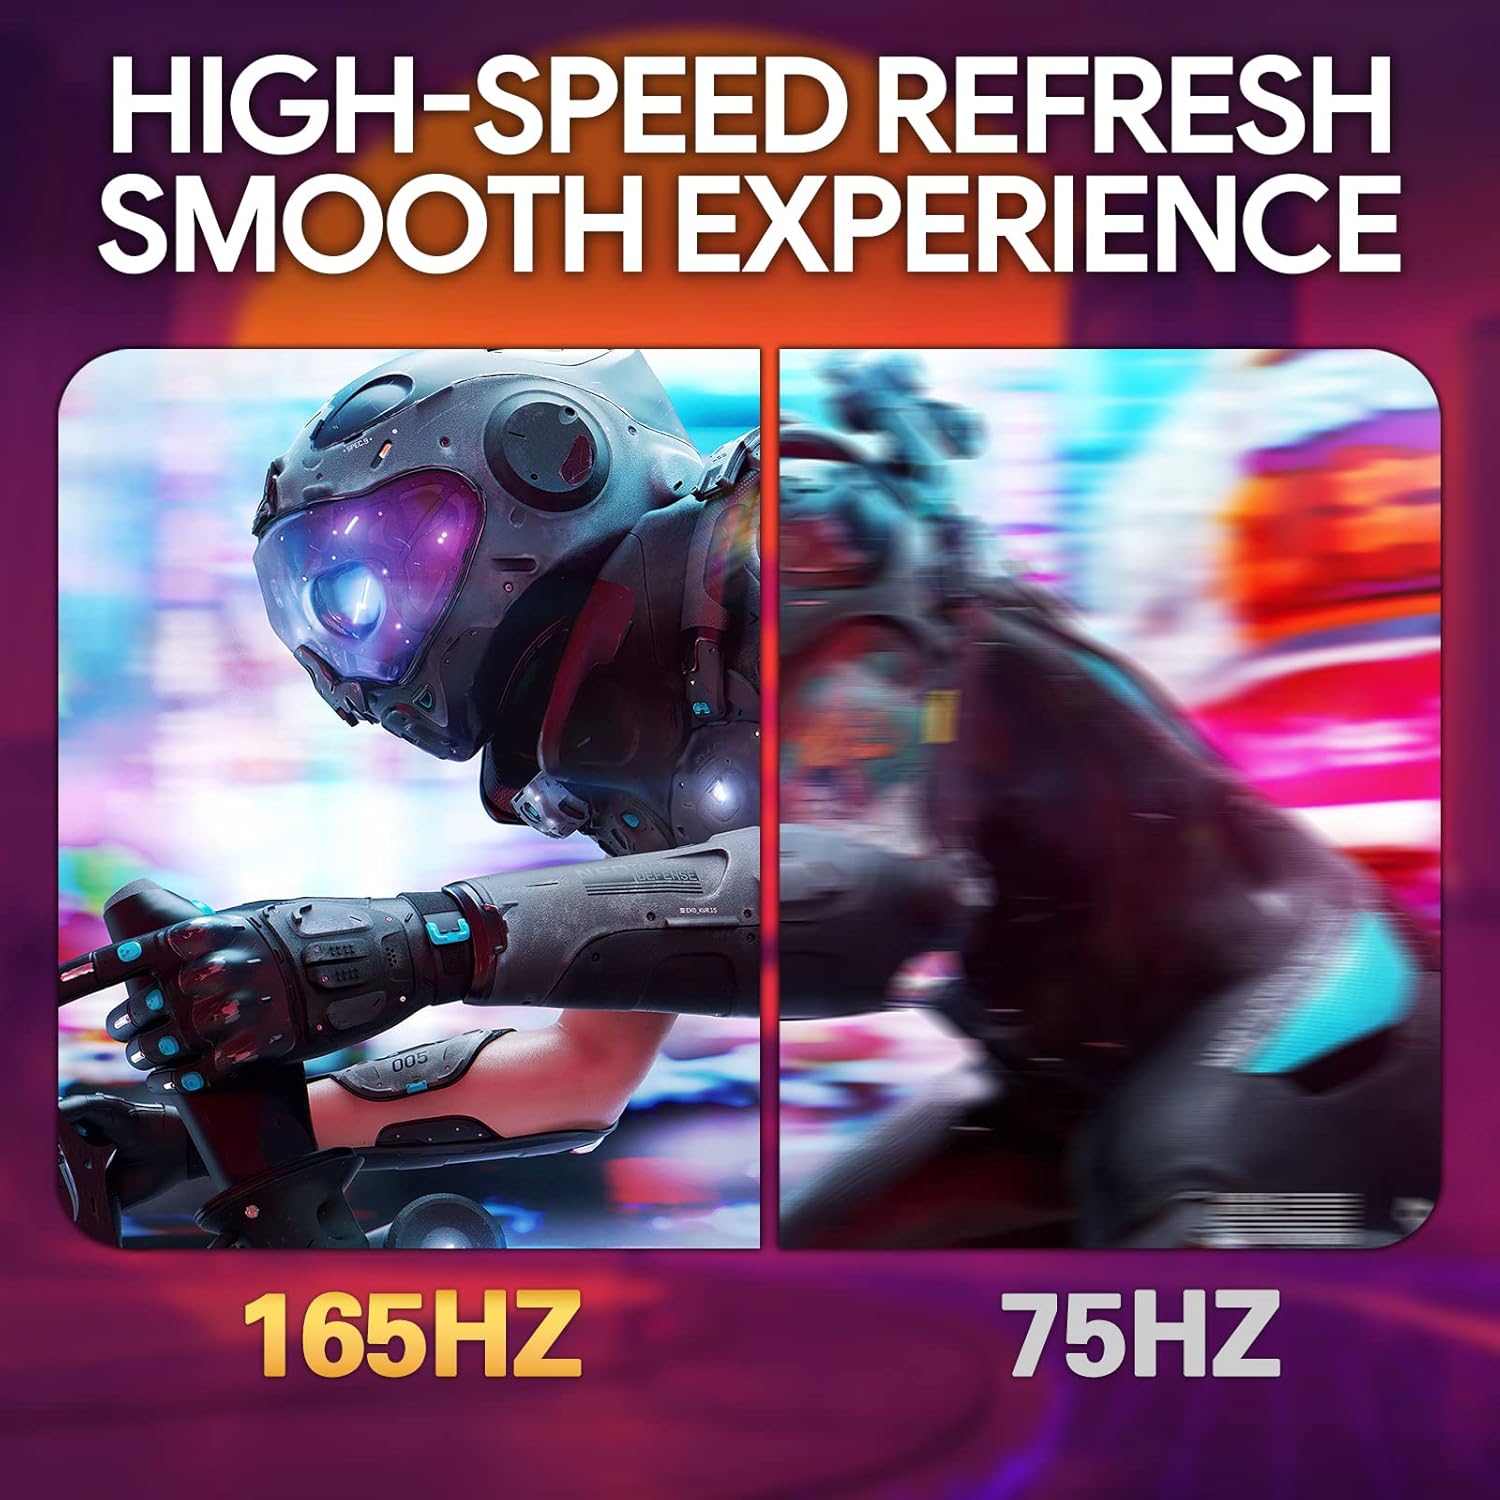
Image: The suevery SV240ZA monitor fully assembled with its desktop stand.
4.2 Montaż VESA
The monitor supports VESA mounting with a 75mm x 75mm pattern. Remove the stand if attached, and use appropriate VESA screws to mount the monitor to a compatible wall mount or desk arm.

Image: Rear of the monitor illustrating the 75mm x 75mm VESA mount compatibility.
4.3 Kable połączeniowe
Connect the power adapter to the monitor and a power outlet. Use either the HDMI or DisplayPort cable to connect the monitor to your computer or gaming device. For audio output, connect headphones or external speakers to the 3.5mm audio out port.

Obraz: Ponadview of the monitor's rear ports including USB, HDMI, DisplayPort, and Audio out.
4.4 Pierwsze włączenie zasilania
Press the power button located on the monitor to turn it on. The monitor will automatically detect the input signal. If no signal is detected, ensure your source device is powered on and connected correctly.
5. Instrukcja obsługi
5.1 Menu ekranowe (OSD)
The OSD menu allows you to adjust various monitor settings. Typically, buttons on the back or bottom of the monitor are used to navigate and select options within the OSD.
5.2 Dostosowywanie ustawień wyświetlania
- Częstotliwość odświeżania: The monitor supports up to 165Hz. Ensure your graphics card settings are configured to utilize the maximum refresh rate for a smoother experience.
- Czas reakcji: With a 1ms GTG response time, motion blur is significantly reduced. This setting is often managed automatically or through specific OSD options.
- FreeSync: Enable AMD FreeSync in the OSD menu and your graphics card control panel to synchronize the monitor's refresh rate with your GPU's frame rate, eliminating screen tearing and stuttering.
- Ustawienia kolorów: Adjust brightness, contrast, color temperature, and gamma for optimal visual quality. The IPS panel provides 99% sRGB color gamut and 8-bit color depth for rich and vibrant colors.
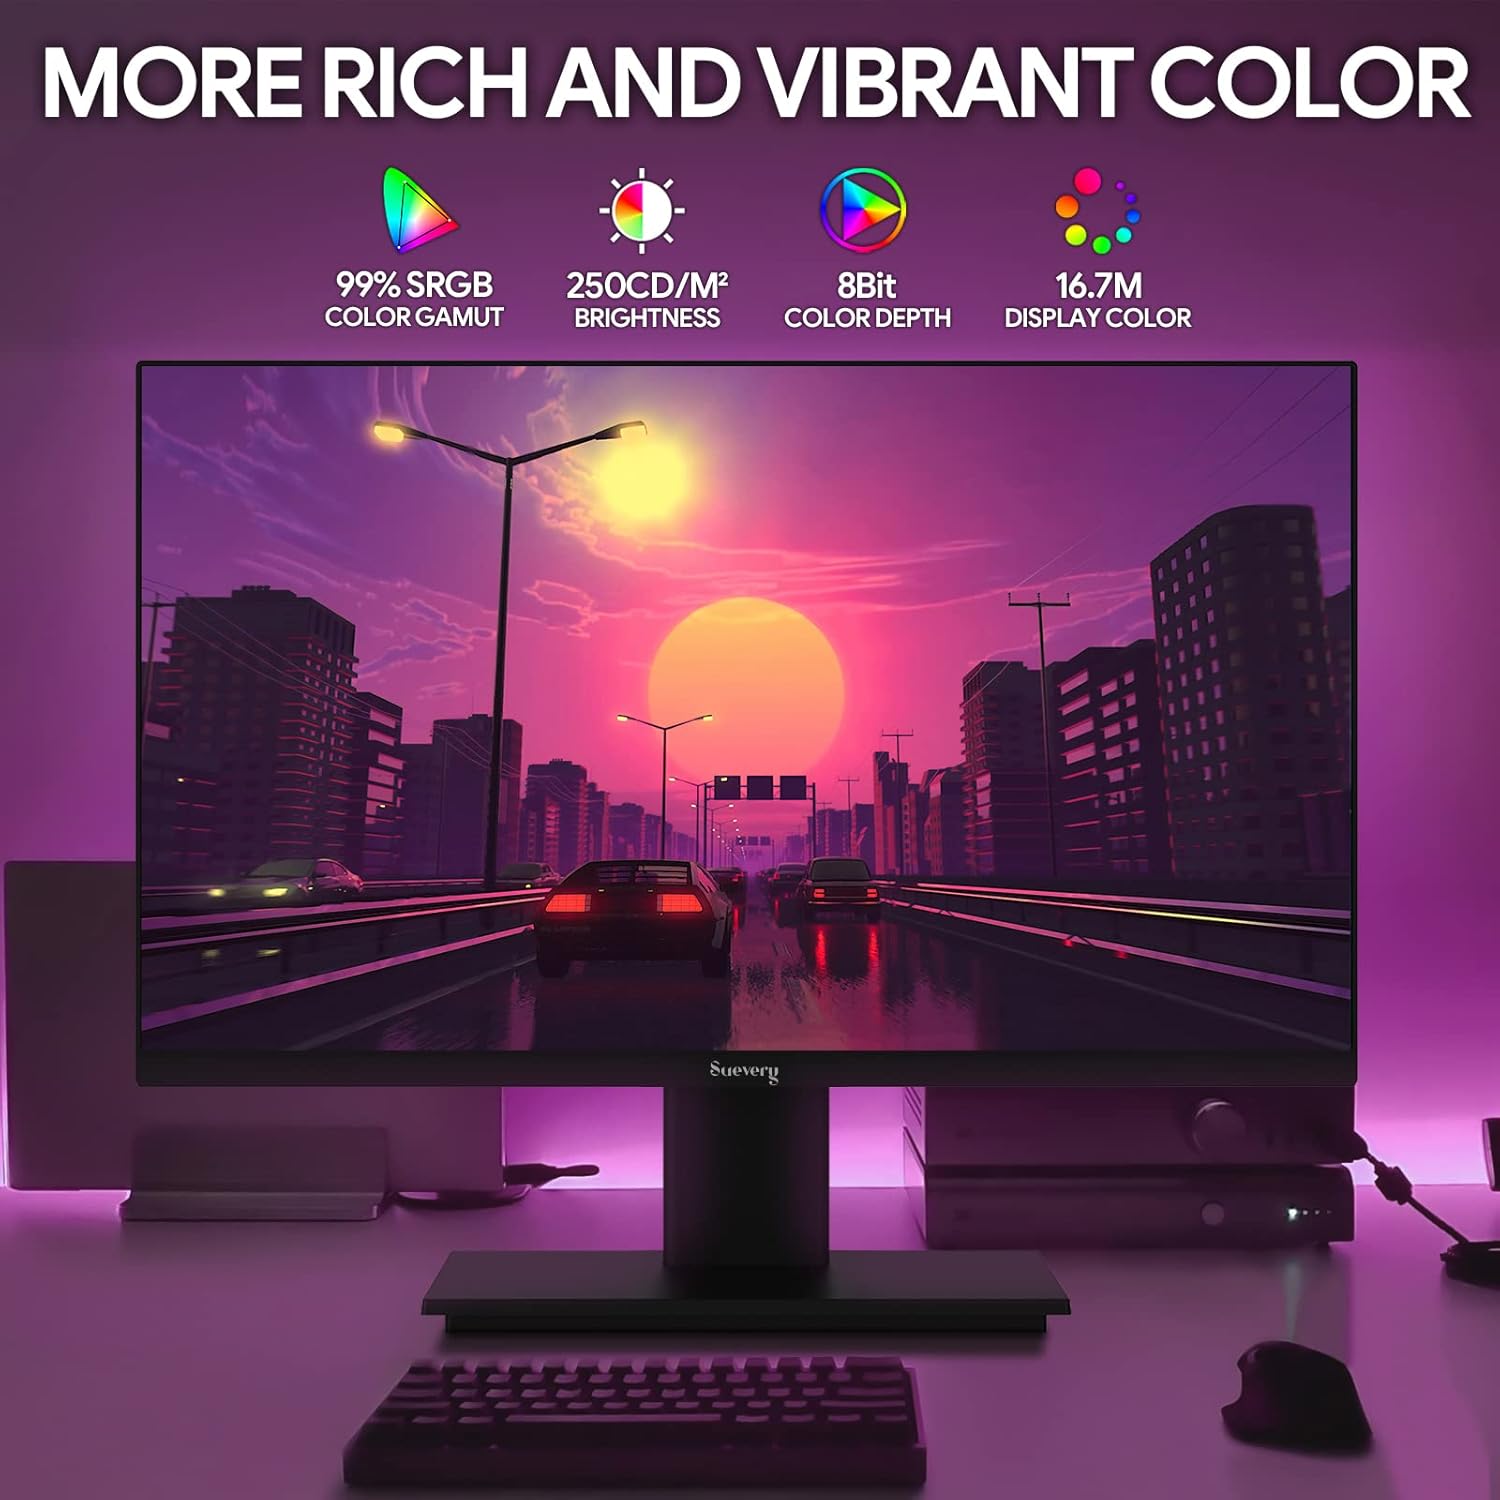
Image: The monitor's display capabilities, highlighting rich and vibrant color reproduction.
5.3 Regulacja nachylenia
The monitor allows for tilt adjustment from -3 to 18 degrees. Gently adjust the screen to your preferred viewkąt.

Image: Illustration of the monitor's adjustable tilt feature.
5.4 Wyjście audio
Connect your headphones or external speakers to the 3.5mm audio out port for private listening or enhanced sound.

Image: User connecting headphones to the 3.5mm audio out port on the monitor.
6. Funkcje ponadview
6.1 Wysoka częstotliwość odświeżania i szybki czas reakcji
Experience smooth visuals with a 165Hz refresh rate and a 1ms GTG response time, reducing motion blur and ghosting in fast-paced content.

Image: Visual comparison demonstrating the smoothness of a 165Hz refresh rate versus 75Hz.

Image: Visual comparison highlighting the reduction of afterimage and ghosting with 1ms GTG response time.
6.2 Technologia adaptacyjnej synchronizacji
AMD FreeSync support synchronizes the monitor's refresh rate with compatible graphics cards, eliminating screen tearing and stuttering for fluid gameplay.
Image: Demonstrates the smooth display experience provided by 165Hz and FreeSync technology.
6.3 IPS Panel and Full HD Resolution
The IPS panel offers wide 178-degree viewing angles and accurate color reproduction. The 1920 x 1080p Full HD resolution provides clear and detailed images.

Image: Illustrates the enhanced detail and realism of 1080p Full HD resolution compared to standard HD.
Technologia 6.4 HDR
HDR (High Dynamic Range) technology enhances contrast and color accuracy, bringing more lifelike images to your screen.

Image: Visual representation of how HDR technology improves image quality compared to SDR.
6.5 Szeroka kompatybilność
Equipped with HDMI and DisplayPort, the monitor connects to various devices such as PCs, laptops, gaming consoles, and TV boxes.

Image: The monitor connected to multiple devices, demonstrating its broad compatibility.
7. Konserwacja
7.1 Czyszczenie monitora
- Zawsze odłączaj monitor od zasilania przed czyszczeniem.
- Delikatnie użyj miękkiej, niestrzępiącej się szmatki dampspłukać wodą lub łagodnym, nieściernym środkiem do czyszczenia ekranów.
- Nie rozpylać środka czyszczącego bezpośrednio na ekran.
- Avoid using harsh chemicals like alcohol, benzene, or thinners, as they can damage the screen surface.
7.2 Ogólna opieka
- Trzymaj monitor z dala od bezpośredniego światła słonecznego i źródeł ciepła.
- Unikaj umieszczania ciężkich przedmiotów na monitorze i jego kablach.
- Nie narażaj monitora na działanie ekstremalnych temperatur lub wilgoci.
8. Rozwiązywanie Problemów
Jeśli masz problemy z monitorem, zapoznaj się z poniższymi typowymi procedurami rozwiązywania problemów:
| Problem | Możliwa przyczyna | Rozwiązanie |
|---|---|---|
| Brak obrazu na ekranie | Odłączony kabel zasilający; Odłączony kabel wideo; Wybrano nieprawidłowe źródło sygnału wejściowego. | Check power and video cable connections. Ensure the correct input source (HDMI/DP) is selected via the OSD menu. |
| Migotanie lub niestabilność obrazu | Video cable loose or damaged; Graphics card driver issue; Refresh rate mismatch. | Secure video cable. Update graphics card drivers. Adjust refresh rate in your computer's display settings. Enable FreeSync if applicable. |
| Brak dźwięku z wyjścia audio | Headphones/speakers not connected; Volume too low; Incorrect audio output device selected on computer. | Ensure audio device is properly connected. Increase volume on monitor and computer. Select the monitor as the default audio output device in your computer's sound settings. |
| Monitor się nie włącza | Power cable disconnected; Power adapter faulty. | Sprawdź, czy kabel zasilający jest prawidłowo podłączony do monitora i sprawnego gniazdka elektrycznego. Przetestuj gniazdko, podłączając je do innego urządzenia. |
9. Specyfikacje
| Funkcja | Specyfikacja |
|---|---|
| Marka | srogość |
| Model | SV240ZA |
| Rozmiar ekranu | 24 cali |
| Rezolucja | FHD 1080p (1920 x 1080 pikseli) |
| Proporcje obrazu | 16:9 |
| Typ panelu | IPS (LCD) |
| Częstotliwość odświeżania | 165 Hz |
| Czas reakcji | 1 milisekunda (GTG) |
| Współczynnik kontrastu | 1000:1 |
| Jasność | 220 cd/m² |
| Viewing kąt | 178 stopni |
| Łączność | 1 x HDMI, 1 x DisplayPort, 1 x USB (charging only), 1 x 3.5mm Audio Out |
| Adaptacyjna synchronizacja | Technologia AMD FreeSync |
| Mocowanie VESA | 75mm x 75mm |
| Regulacja nachylenia | -3 do 18 stopni |
| Wymiary (szer. x wys. x gł.) | 54.6 cm x 32.3 cm x 9.7 cm (approximate, without stand) |

Image: Detailed dimensions of the suevery SV240ZA monitor.
10. Gwarancja i wsparcie
10.1 Polityka gwarancyjna
The suevery SV240ZA monitor comes with a one-year free warranty. Returns and replacements are free within 30 days of purchase for quality issues.
10.2 Obsługa klienta
For any quality issues or support inquiries regarding your monitor, please contact suevery customer support. Refer to the contact information provided with your purchase documentation or visit the official suevery webaby uzyskać pomoc.