
Wstęp
This manual provides detailed instructions for the setup, operation, and maintenance of your LFF Atomic Clock Model LWC204. This digital clock features a large, easy-to-read display, atomic time synchronization, and a wireless sensor for indoor and outdoor temperature readings. Please read this manual thoroughly before use to ensure proper functionality and longevity of your device.
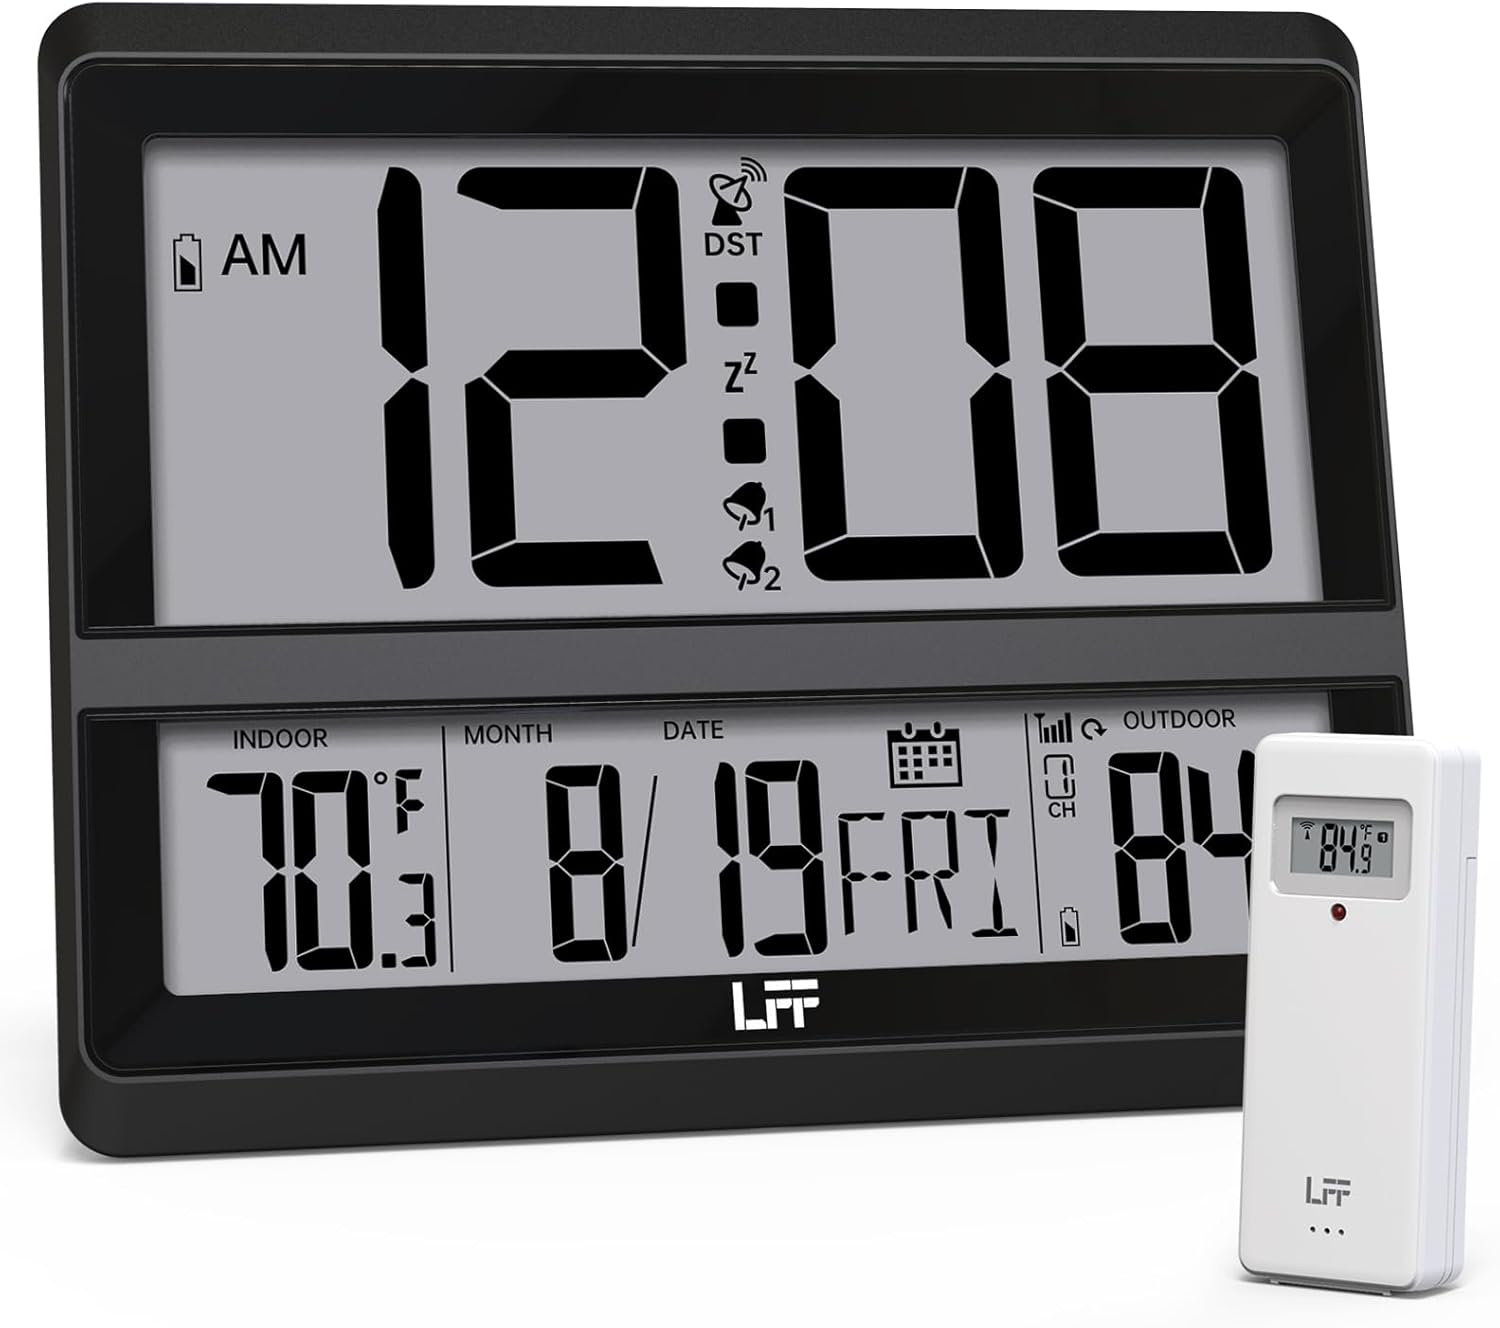
Image: The LFF Atomic Clock main unit with its wireless outdoor temperature sensor.
Zawartość opakowania
- LFF Atomic Clock Main Unit
- Bezprzewodowy czujnik temperatury zewnętrznej
- Instrukcja obsługi (ten dokument)
- Bracket for table standing
Note: Batteries are not included. The main clock unit requires 3x AA batteries, and the outdoor sensor requires 2x AAA batteries.
Produkt ponadview
Familiarize yourself with the main components and controls of your LFF Atomic Clock.

Image: Front display and rear button layout of the LFF Atomic Clock.
Funkcje wyświetlacza:
- Wyświetlacz czasu: Large digits for current time (12/24 Hour format).
- Wskaźnik AM/PM: Dla formatu 12-godzinnego.
- DST Symbol: Indicates Daylight Saving Time is active.
- RCC Reception Icon: Shows status of atomic time signal reception.
- Alarm Icons (Zz, 1, 2): Indicate active alarms and snooze function.
- Temperatura wewnętrzna: Current temperature inside (°C/°F).
- Temperatura na zewnątrz: Current temperature from wireless sensor (°C/°F).
- Date & Weekday: Month, Day, and Day of the Week.
- Wskaźnik niskiego poziomu baterii: For both main unit and outdoor sensor.
Przyciski tylne:
- Przycisk SET: Wchodzi w tryb ustawień.
- Przycisk alarmowy: Dostęp do ustawień alarmu.
- Przycisk KANAŁ: Cycles through outdoor sensor channels (if multiple sensors are used).
- DOWN/WAVE/°C/°F Button: Decreases values in setting mode, manually initiates atomic signal search (WAVE), or switches temperature units.
- UP/ALARM Button: Increases values in setting mode, or activates/deactivates alarm.
Organizować coś
1. Instalacja baterii
- Czujnik zewnętrzny:
- Otwórz komorę baterii znajdującą się z tyłu bezprzewodowego czujnika zewnętrznego.
- Włóż 2 baterie AAA, zwracając uwagę na prawidłową biegunowość (+/-).
- Dokładnie zamknij komorę baterii.
- Note: For temperatures below -4°F (-20°C), Lithium batteries are recommended for the outdoor sensor.
- Główna jednostka zegara:
- Open the battery compartment on the back of the main clock unit.
- Włóż 3 baterie AA, zwracając uwagę na prawidłową biegunowość (+/-).
- Dokładnie zamknij komorę baterii.

Image: Battery compartments for the main clock and outdoor sensor.
2. Początkowa synchronizacja i ustawienia
Upon battery installation, the clock will automatically begin searching for the WWVB atomic time signal and attempt to connect with the outdoor sensor.
- The RCC Reception Icon will flash during the atomic signal search. This process may take several minutes or up to 24 hours depending on signal strength.
- The outdoor temperature should appear on the display within a few minutes after the sensor batteries are installed. If not, press the KANAŁ button on the main unit to cycle through channels or press the reset button on the outdoor sensor.
3. Manual Settings (if needed)
If the atomic signal is not received or you wish to adjust settings manually:
- Ustawienie strefy czasowej:
- Naciśnij i przytrzymaj USTAWIĆ button for 3 seconds to enter time zone setting.
- Użyj UP/ALARM or DOWN/WAVE/°C/°F buttons to select your time zone (e.g., PST, MST, CST, EST).
- Naciskać USTAWIĆ aby potwierdzić i przejść do następnego ustawienia.
- Format 12/24-godzinny:
- After time zone, the hour format will flash. Use UP/ALARM or DOWN/WAVE/°C/°F to select 12-hour or 24-hour format.
- Naciskać USTAWIĆ aby potwierdzić.
- Ręczne ustawianie czasu i daty:
- Kontynuuj naciskanie USTAWIĆ to cycle through Year, Month, Day, Hour, Minute settings.
- Używać UP/ALARM or DOWN/WAVE/°C/°F aby dostosować każdą wartość.
- Naciskać USTAWIĆ aby potwierdzić każde ustawienie.
- Czas letni (DST):
- After setting the time, the DST setting will flash. Use UP/ALARM or DOWN/WAVE/°C/°F to enable or disable DST.
- Naciskać USTAWIĆ aby wyjść z trybu ustawień.

Image: The clock automatically corrects time daily via WWVB signal.
4. Umiejscowienie czujnika zewnętrznego
- Place the wireless outdoor sensor within 330 feet (100 meters) of the main unit.
- Choose a shaded location to avoid direct sunlight, which can affect temperature accuracy.
- Upewnij się, że czujnik jest chroniony przed bezpośrednim deszczem i śniegiem.
- Avoid placing the sensor near large metal objects or electrical appliances that may interfere with the wireless signal.

Image: Wireless range of 330 feet for the outdoor sensor.
Instrukcja obsługi
1. Tryby wyświetlania
- The clock continuously displays time, indoor temperature, outdoor temperature, date, and day of the week.
- Naciśnij DOWN/WAVE/°C/°F button to switch between Celsius (°C) and Fahrenheit (°F) for temperature display.
2. Funkcja alarmu
- Ustawianie alarmu:
- Naciśnij ALARM button once to display Alarm 1 time. Press again for Alarm 2.
- While an alarm time is displayed, press and hold the ALARM button for 3 seconds to enter alarm setting mode. The hour will flash.
- Używać UP/ALARM or DOWN/WAVE/°C/°F aby ustawić godzinę. naciśnij ALARM aby potwierdzić.
- The minute will flash. Use UP/ALARM or DOWN/WAVE/°C/°F aby ustawić minuty. naciskać ALARM aby potwierdzić i wyjść z ustawień alarmu.
- Aktywacja/Dezaktywacja alarmu:
- Naciśnij ALARM button to display Alarm 1 or Alarm 2.
- Naciśnij UP/ALARM button to toggle the alarm ON or OFF. The corresponding alarm icon (1 or 2) will appear/disappear on the display.
- Funkcja drzemki:
- Gdy zabrzmi alarm, naciśnij DRZEMKA button (usually located on top or a dedicated button) to activate snooze. The alarm will sound again after approximately 5-10 minutes.
- Aby całkowicie wyłączyć alarm, naciśnij dowolny inny przycisk (np. ALARM, USTAWIĆ).
3. Manual Atomic Signal Search
If you wish to manually initiate a search for the WWVB atomic time signal, press and hold the DOWN/WAVE/°C/°F button for 3 seconds. The RCC Reception Icon will flash, indicating the search is in progress.
Konserwacja
- Czyszczenie: Wipe the clock and sensor with a soft, dry cloth. Do not use abrasive cleaners or solvents.
- Wymiana baterii: When the low battery indicator appears on the display for either the main unit or the outdoor sensor, replace the batteries promptly to ensure continuous operation and accurate readings. Refer to the "Battery Installation" section for details.
- Składowanie: Jeśli urządzenie będzie przechowywane przez dłuższy czas, należy wyjąć wszystkie baterie, aby zapobiec wyciekowi.
Rozwiązywanie problemów
| Problem | Możliwa przyczyna | Rozwiązanie |
|---|---|---|
| Brak obrazu na jednostce głównej. | Baterie są rozładowane lub nieprawidłowo zainstalowane. | Sprawdź biegunowość baterii i wymień je na nowe baterie AA. |
| Outdoor temperature not displayed or incorrect. |
|
|
| Atomic time signal not received (RCC icon flashing or not displayed). |
|
|
| Time is incorrect after atomic synchronization. | Nieprawidłowe ustawienie strefy czasowej. | Adjust the time zone setting as described in the "Manual Settings" section. |
Specyfikacje
| Funkcja | Szczegół |
|---|---|
| Numer modelu | LWC204 |
| Typ wyświetlacza | Cyfrowy LCD |
| Źródło zasilania (jednostka główna) | 3x baterie AA (brak w zestawie) |
| Źródło zasilania (czujnik zewnętrzny) | 2x baterie AAA (brak w zestawie) |
| Zakres temperatury wewnętrznej | od 32°F do 122°F (od 0°C do 50°C) |
| Zakres temperatury zewnętrznej | -58°F do 158°F (-50°C do 70°C) |
| Zasięg bezprzewodowej | Do 100 metrów (330 stóp) na otwartej przestrzeni |
| Format czasu | Możliwość wyboru 12/24 godzin |
| Wymiary (jednostka główna) | 7.48" W x 8.66" H (approx.) |
| Opcje montażu | Wall Mount or Tabletop (bracket included) |
Gwarancja i wsparcie
LFF products are designed for reliability and performance. For specific warranty information, please refer to the warranty card included with your purchase or contact LFF customer support.
For technical assistance or further inquiries, please visit the official LFF website or contact their customer service department. Contact details are typically available on the product packaging or the brand's official online presence.


