
1. Wprowadzenie
Thank you for choosing the Saulcy C2 Dog Training Collar. This manual provides detailed instructions for the safe and effective use of your new training system. Please read this manual thoroughly before operation to ensure proper usage and to maximize the training benefits for your dog.
The Saulcy C2 Dog Training Collar is designed to assist in training dogs weighing 15-120 lbs, offering three adjustable training modes: Beep, Vibration (0-99 levels), and Static Shock (0-99 levels). Its IPX7 waterproof receiver and 1000ft remote range make it suitable for various training environments.

Image: A woman hugging a pug, surrounded by icons representing common dog behavioral issues such as biting, chewing, barking, digging, and jumping. This illustrates the types of behaviors the Saulcy C2 Dog Training Collar aims to help correct.
2. Koniec produktuview
2.1 Zawartość opakowania
- Zdalny nadajnik
- Obroża odbiornika
- Regulowany pasek nylonowy
- Kabel ładujący USB
- Testuj narzędzie światła
- Contact Points (Short and Long)
- Silicone Caps for Contact Points
- Instrukcja obsługi
2.2 Główne cechy
- 3 tryby treningowe: Beep, Vibration (0-99 levels), and Static Shock (0-99 levels) for customized training.
- Odbiornik wodoodporny IPX7: Allows the receiver to be submerged in water up to 3.2 feet for 30 minutes, suitable for training in wet conditions.
- Zasięg zdalny 1000 stóp: Zapewnia ample distance for effective outdoor training.
- Security Keypad Lock: Prevents accidental activation of static shock.
- Regulowany kołnierz: Fits dogs with neck girths from 8 to 27 inches, suitable for dogs weighing 15-120 lbs.
- Akumulatory: Long-lasting battery life for both remote (up to 90 days standby) and receiver (up to 30 days standby).
2.3 Schemat komponentów
Refer to the diagram below for an identification of the remote transmitter and receiver collar components.

Image: Detailed diagram illustrating the remote transmitter with LCD screen, buttons (Beep, Vibration, Shock, Power/Channel, Up/Down), security keypad lock, and USB charging port. The receiver collar is shown with contact points, USB charging port, On/Off button, and adjustable collar strap. Silicone caps are also depicted.
3. Informacje dotyczące bezpieczeństwa
- Nie dla agresywnych psów: Nie stosuj tego produktu u agresywnych psów. Jeśli Twój pies jest agresywny, skonsultuj się z profesjonalnym treserem psów.
- Age and Weight: This collar is suitable for dogs over 6 months old and weighing between 15-120 lbs.
- Dopasowanie kołnierza: Ensure the collar fits snugly but not too tightly. Two fingers should fit comfortably between the collar and your dog's neck.
- Czas noszenia: Do not leave the collar on your dog for more than 12 hours per day. Prolonged wear can cause skin irritation.
- Kontrole skóry: Regularly check your dog's neck for signs of irritation, redness, or sores. If irritation occurs, discontinue use and consult a veterinarian.
- Szok statyczny: Use static shock mode only as a last resort and at the lowest effective level. Always start with Beep or Vibration modes.
- Nadzór: Zawsze nadzoruj swojego psa podczas sesji szkoleniowych.
- Unikaj uszkodzeń: Nie próbuj samodzielnie demontować ani naprawiać urządzenia. Spowoduje to unieważnienie gwarancji.
4. Przewodnik konfiguracji
4.1 Ładowanie urządzeń
- Connect the USB charging cable to the charging ports on both the remote transmitter and the receiver collar.
- Plug the USB cable into a standard USB power adapter (not included) or a computer USB port.
- The battery indicator on the remote and receiver will show charging status. A full charge typically takes 2-3 hours.
- Once fully charged, the battery indicator will show full. Disconnect the devices from the charger.
Note: The remote can standby for up to 90 days, and the receiver for up to 30 days on a full charge.
4.2 Parowanie pilota i odbiornika
The remote and receiver are typically pre-paired from the factory. If they are not paired or you need to re-pair them:
- Upewnij się, że oba urządzenia są całkowicie naładowane i wyłączone.
- Turn on the remote transmitter by pressing any button.
- Press and hold the On/Off button on the receiver collar until the indicator light flashes rapidly.
- Within 10 seconds, press the Beep or Vibration button on the remote. The receiver's indicator light will flash slowly, indicating successful pairing.
- Jeśli parowanie się nie powiedzie, powtórz kroki.
4.3 Montaż kołnierza odbiornika
Proper fit is crucial for effectiveness and your dog's comfort.

Image: An illustration demonstrating the adjustable nature of the collar, suitable for dogs from 15 lbs to 120 lbs, with a neck girth of 8-27 inches. It also shows how to cut off excess strap and burn the end to prevent fraying.
- Place the receiver collar around your dog's neck, ensuring the contact points are positioned underneath, making direct contact with the skin.
- Adjust the strap so it is snug but not tight. You should be able to fit two fingers comfortably between the collar and your dog's neck.
- If your dog has long fur, you may need to trim the fur around the contact points to ensure proper skin contact.
- Select the appropriate length of contact points (short or long) based on your dog's fur length.
- If the collar strap is too long, you can trim the excess and use a lighter to carefully singe the cut edge to prevent fraying.
5. Instrukcja obsługi
5.1 Włączanie/wyłączanie
- Zdalny: Press any button to turn on. The LCD screen will illuminate. The remote will automatically enter standby mode after a period of inactivity.
- Odbiornik: Press and hold the On/Off button on the receiver until the indicator light illuminates. To turn off, press and hold the On/Off button until the light extinguishes.
5.2 Wybór trybów i poziomów treningu
The remote offers Beep, Vibration, and Static Shock modes, each with adjustable intensity levels for Vibration and Static Shock.

Image: The remote control displaying its LCD screen and three main buttons for Beep, Vibration, and Shock modes. Icons for each mode are shown alongside a dog, emphasizing the three distinct training options.
- Tryb sygnału dźwiękowego: Naciśnij Przycisk dźwiękowy (speaker icon) to deliver an audible tone to the receiver. This mode has no adjustable levels.
- Tryb wibracji: Naciśnij Przycisk wibracji (wavy lines icon) to deliver a vibration. Use the Up/Down buttons on the side of the remote to adjust the vibration intensity from 00 to 99.
- Tryb wstrząsu statycznego: Naciśnij Przycisk wstrząsu (lightning bolt icon) to deliver a static correction. Use the Up/Down buttons on the side of the remote to adjust the shock intensity from 00 to 99.
Recommendation: Always start with the lowest effective level for Vibration and Static Shock.
5.3 Security Keypad Lock
The remote features a security keypad lock to prevent accidental static shock activation.
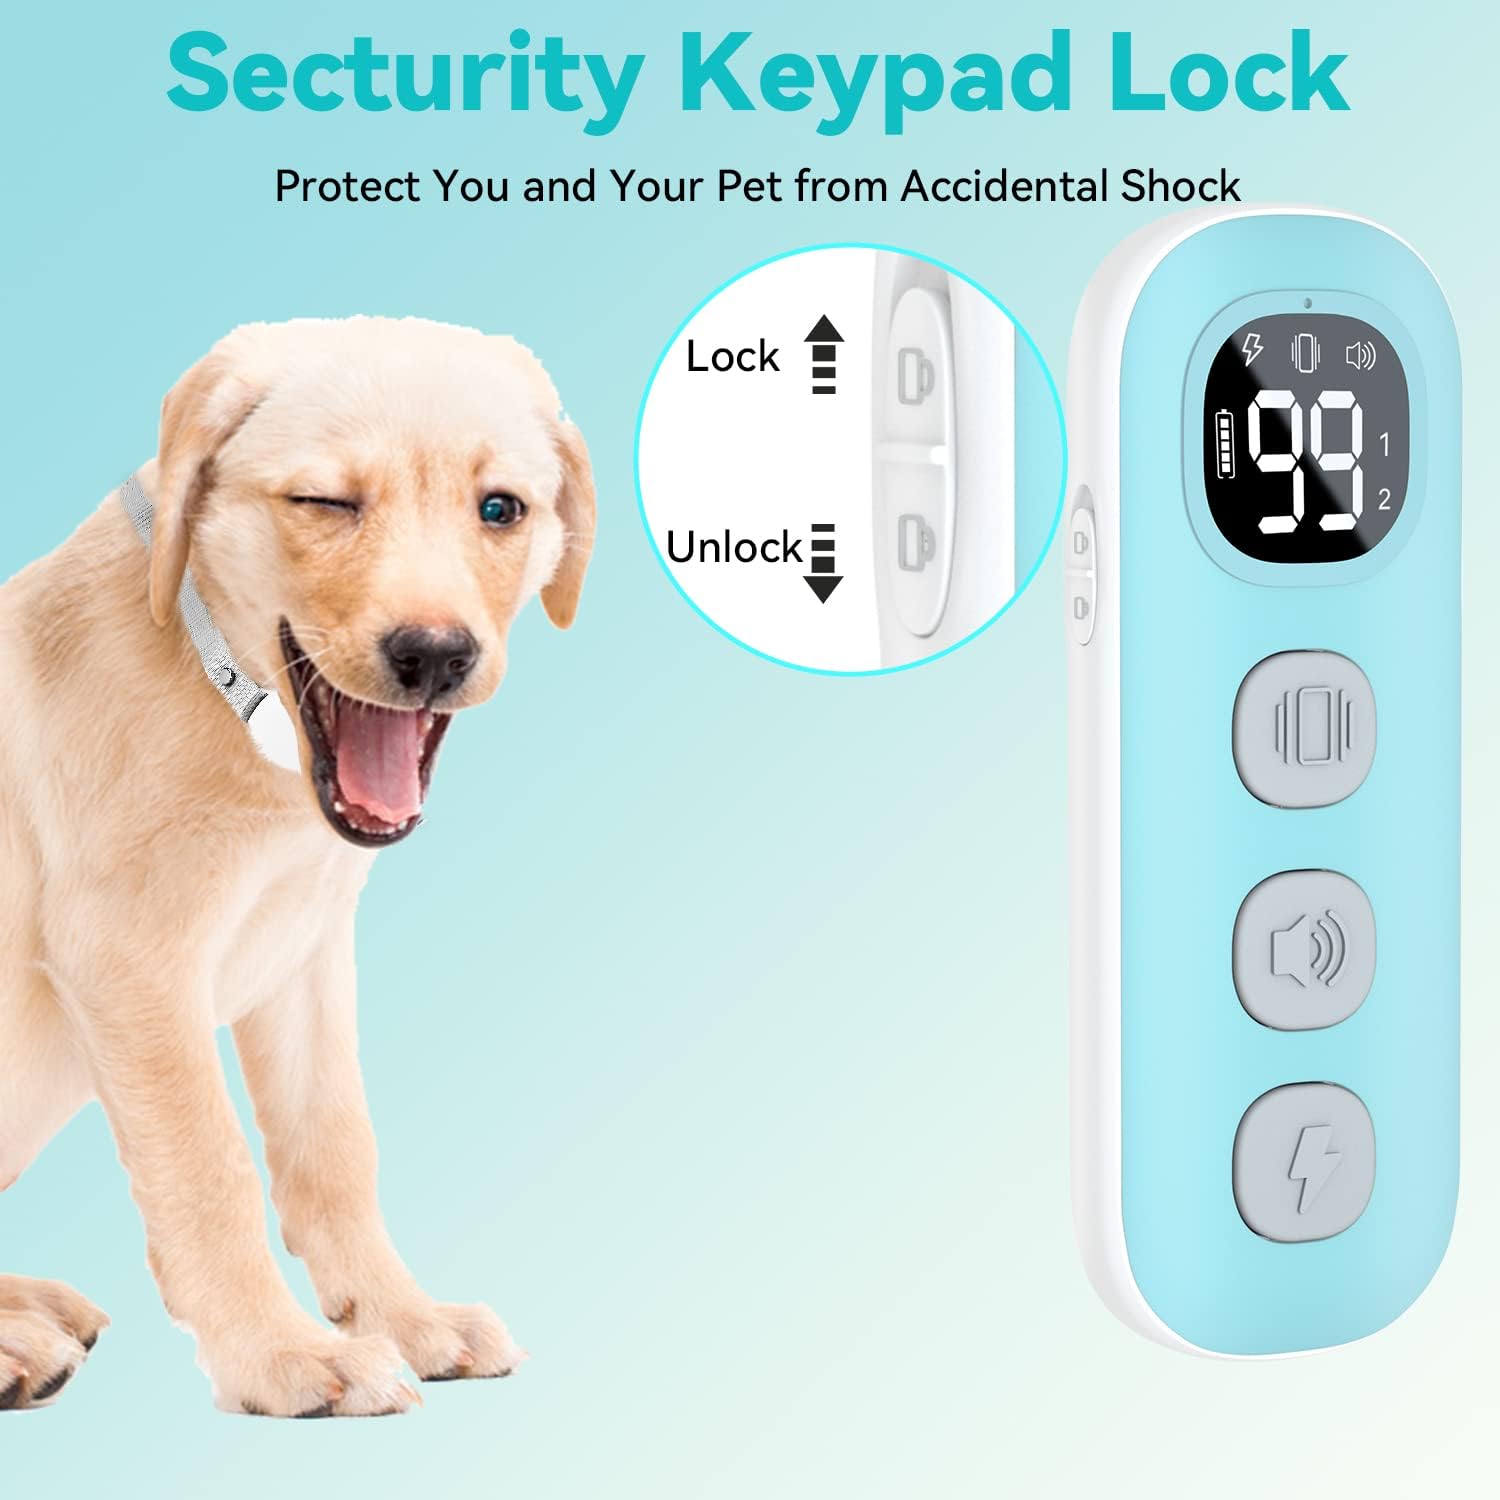
Image: A close-up of the remote control highlighting the security keypad lock switch on the side. The switch can be moved up to "Lock" or down to "Unlock" the static shock function, preventing unintended activation.
- Slide the lock switch on the side of the remote upwards to the "Lock" position to disable the static shock button.
- Slide the lock switch downwards to the "Unlock" position to enable the static shock button.
5.4 Training Tips
- Kluczem jest konsekwencja: Stosuj obroże konsekwentnie, gdy chcesz skorygować konkretne zachowania.
- Wzmocnienie pozytywne: Zawsze łącz korektę z pozytywnym wzmocnieniem, gdy Twój pies zachowuje się zgodnie z oczekiwaniami.
- Krótkie sesje: Zadbaj o to, aby sesje treningowe były krótkie i pozytywne (10–15 minut).
- Rozpocznij sygnałem dźwiękowym/wibracją: Begin training with the Beep or Vibration modes before introducing static shock.
- Obserwuj reakcje: Pay close attention to your dog's reaction to each stimulation level. The goal is to get their attention, not to cause distress.
6. Konserwacja
- Czyszczenie: Regularnie czyść obrożę odbiornika i punkty styku za pomocąamp cloth. Ensure the devices are dry before charging.
- Pielęgnacja baterii: Charge the devices fully before long periods of storage. Recharge every 3-4 months to maintain battery health.
- Kontrola paska: Periodically inspect the collar strap for wear and tear. Replace if damaged.
- Składowanie: Store the collar and remote in a cool, dry place away from direct sunlight and extreme temperatures.
7. Rozwiązywanie Problemów
| Problem | Możliwa przyczyna | Rozwiązanie |
|---|---|---|
| Collar not working / No response | Low battery; Not paired; Receiver off; Out of range. | Charge both devices; Re-pair remote and receiver; Turn on receiver; Move closer to your dog. |
| Static shock not working | Security keypad locked; Poor contact with skin; Level set to 00; Contact points too short. | Unlock keypad; Adjust collar fit; Increase shock level; Use longer contact points; Trim fur. |
| Remote LCD screen blank | Low battery; Remote in standby mode. | Charge remote; Press any button to wake up. |
| Dog shows no reaction to stimulation | Level too low; Poor contact with skin; Dog has adapted. | Increase stimulation level gradually; Adjust collar fit; Ensure contact points touch skin; Re-evaluate training approach. |
| Podrażnienie skóry na szyi psa | Collar worn too long; Collar too tight; Allergic reaction. | Remove collar immediately; Clean dog's neck; Consult veterinarian; Ensure proper fit and wear time (max 12 hours/day). |
8. Specyfikacje
| Funkcja | Szczegół |
|---|---|
| Model | C2 |
| Tryby treningowe | Sygnał dźwiękowy, wibracje (poziomy 0-99), wstrząs statyczny (poziomy 0-99) |
| Stopień wodoodporności | IPX7 (Receiver) |
| Zdalny zasięg | Do 1000 stóp (300 metrów) |
| Dog Weight Range | 15-120 funta |
| Collar Neck Girth | 8-27 cala |
| Receiver Battery Life (Standby) | Do 30 dni |
| Remote Battery Life (Standby) | Do 90 dni |
| Czas ładowania | Około 2-3 godzin |
| Tworzywo | Nylon, tworzywo sztuczne |
| Waga przedmiotu | 8.4 uncji (całe opakowanie) |
9. Gwarancja i wsparcie
Saulcy products are designed for durability and performance. For warranty information, technical support, or any questions regarding your Saulcy C2 Dog Training Collar, please contact our customer service team.
You can typically find contact information on the product packaging, the official Saulcy weblub za pośrednictwem platformy zakupowej.
Proszę zachować dowód zakupu na potrzeby roszczeń gwarancyjnych.