1. Wprowadzenie
Thank you for choosing the Yoidesu 10-inch Car Radio Stereo. This manual provides essential information for the proper installation, operation, and maintenance of your new car multimedia system. Please read this manual thoroughly before use to ensure optimal performance and safety.
Produkt ponadview
This car stereo features a 10-inch display, runs on Android 10.1, and includes 2GB RAM with 32GB ROM for smooth operation and ample storage for applications. It supports navigation, Bluetooth connectivity, and mobile phone mirror link functionality.
Zgodność
This unit is designed as a replacement for the original car radio stereo in Honda CRV models manufactured between 2012 and 2016.

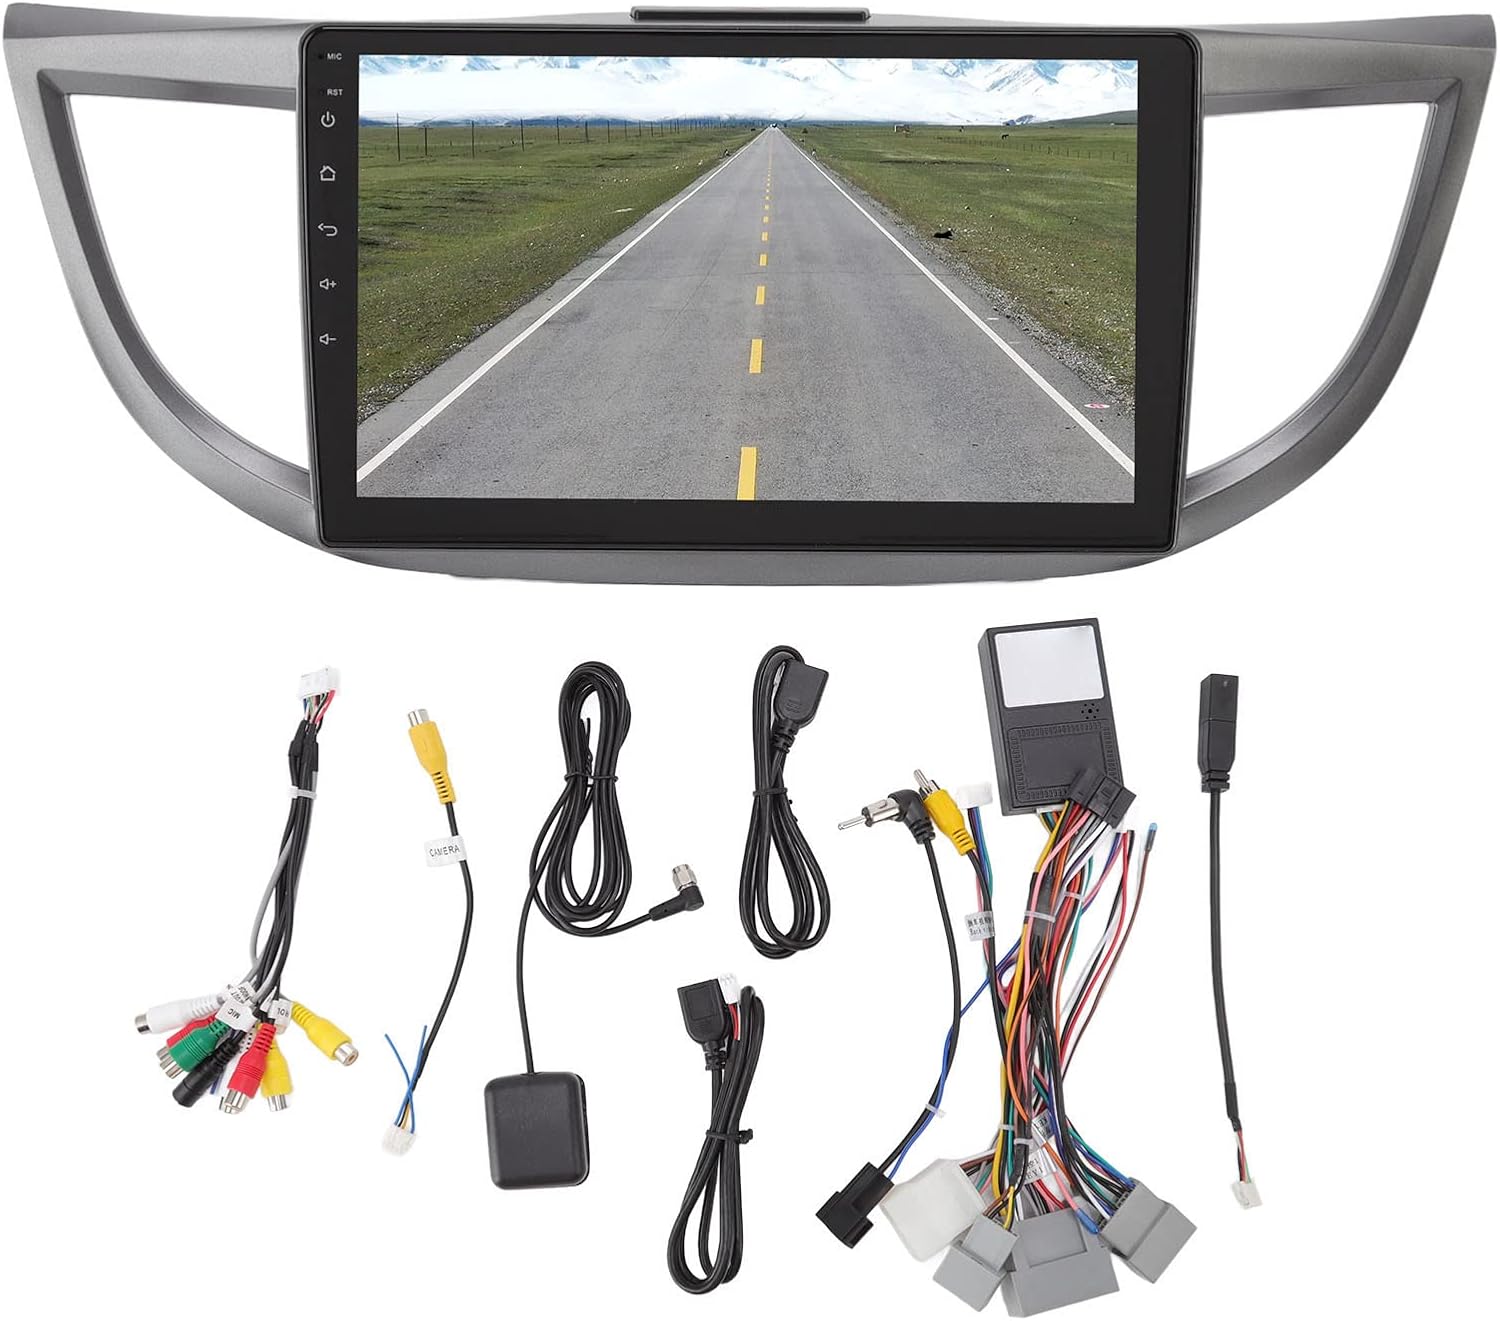
Image 1.1: The Yoidesu 10-inch Car Radio Stereo with its main interface.
2. Zawartość opakowania
Sprawdź, czy w przesyłce znajdują się wszystkie elementy wymienione poniżej:
- 1 x Host Unit (Car Stereo)
- 1 x uprząż zasilająca
- 1 x kabel
- 1 x antena GPS
- 1 x Instrukcja obsługi
- 2 x USB Extension Cables
- 1 x Camera Line
- 1 x kabel adaptera USB
Obraz 2.1: Koniecview of all included accessories and cables.
3. Specyfikacje
| Funkcja | Specyfikacja |
|---|---|
| Marka | Yoidesu |
| Nazwa modelu | Radio samochodowe Stereo |
| Typ serwisu pojazdu | Car (Honda CRV 2012-2016) |
| Rozmiar ekranu | 10 cali |
| Rezolucja | 1024x600 |
| System operacyjny | Android 10.1 |
| Pamięć (RAM) | 2 GB |
| Pamięć masowa (ROM) | 32 GB |
| Technologia łączności | USB, Wi-Fi, Bluetooth |
| Cechy specjalne | Bluetooth, Touchscreen, Navigation, Mirror Link, Steering Wheel Control Support |
| Supported Navigation System | GPS (mapy online/offline) |
| Tryb wyjścia audio | Głośnik, stereo |
| Tomtage | 12 V |
4. Konfiguracja i instalacja
Installation of the Yoidesu Car Radio Stereo involves replacing the existing factory unit. Due to the complexity of automotive electrical systems, professional installation is highly recommended to prevent damage to the unit or your vehicle.
General Installation Steps (Consult a professional)
- Przygotowanie: Odłącz akumulator pojazdu, aby zapobiec zwarciom elektrycznym.
- Usuń starą jednostkę: Carefully remove the existing car radio stereo and its surrounding trim.
- Podłącz okablowanie: Connect the provided power harness, GPS antenna, USB extension cables, and camera line (if applicable) to the new Yoidesu unit. Ensure all connections are secure.
- Funkcjonalność testu: Before fully reassembling, temporarily connect the battery and test basic functions like power, audio, and display.
- Bezpieczna jednostka: Mount the new unit into the dashboard opening and secure it.
- Ponowny montaż: Reinstall all trim pieces removed earlier.
- Kontrola końcowa: Podłącz ponownie akumulator i przeprowadź szczegółowy test wszystkich funkcji.

Image 4.1: Before and After installation of the Yoidesu Car Radio Stereo.

Obraz 4.2: Tył view of the main unit with wiring connections.
5. Instrukcja obsługi
5.1 System Android 10.1
The unit runs on Android 10.1, providing a familiar interface. You can download and install various applications from the app store, similar to a smartphone or tablet. The 2GB RAM and 32GB ROM ensure smooth operation and quick application launches.
5.2 Nawigacja
The car stereo supports both online and offline navigation applications. It is compatible with popular mapping services like Igo maps and Waze. After connecting to Wi-Fi, you can use online navigation anywhere. The system supports 2D and 3D map displays.
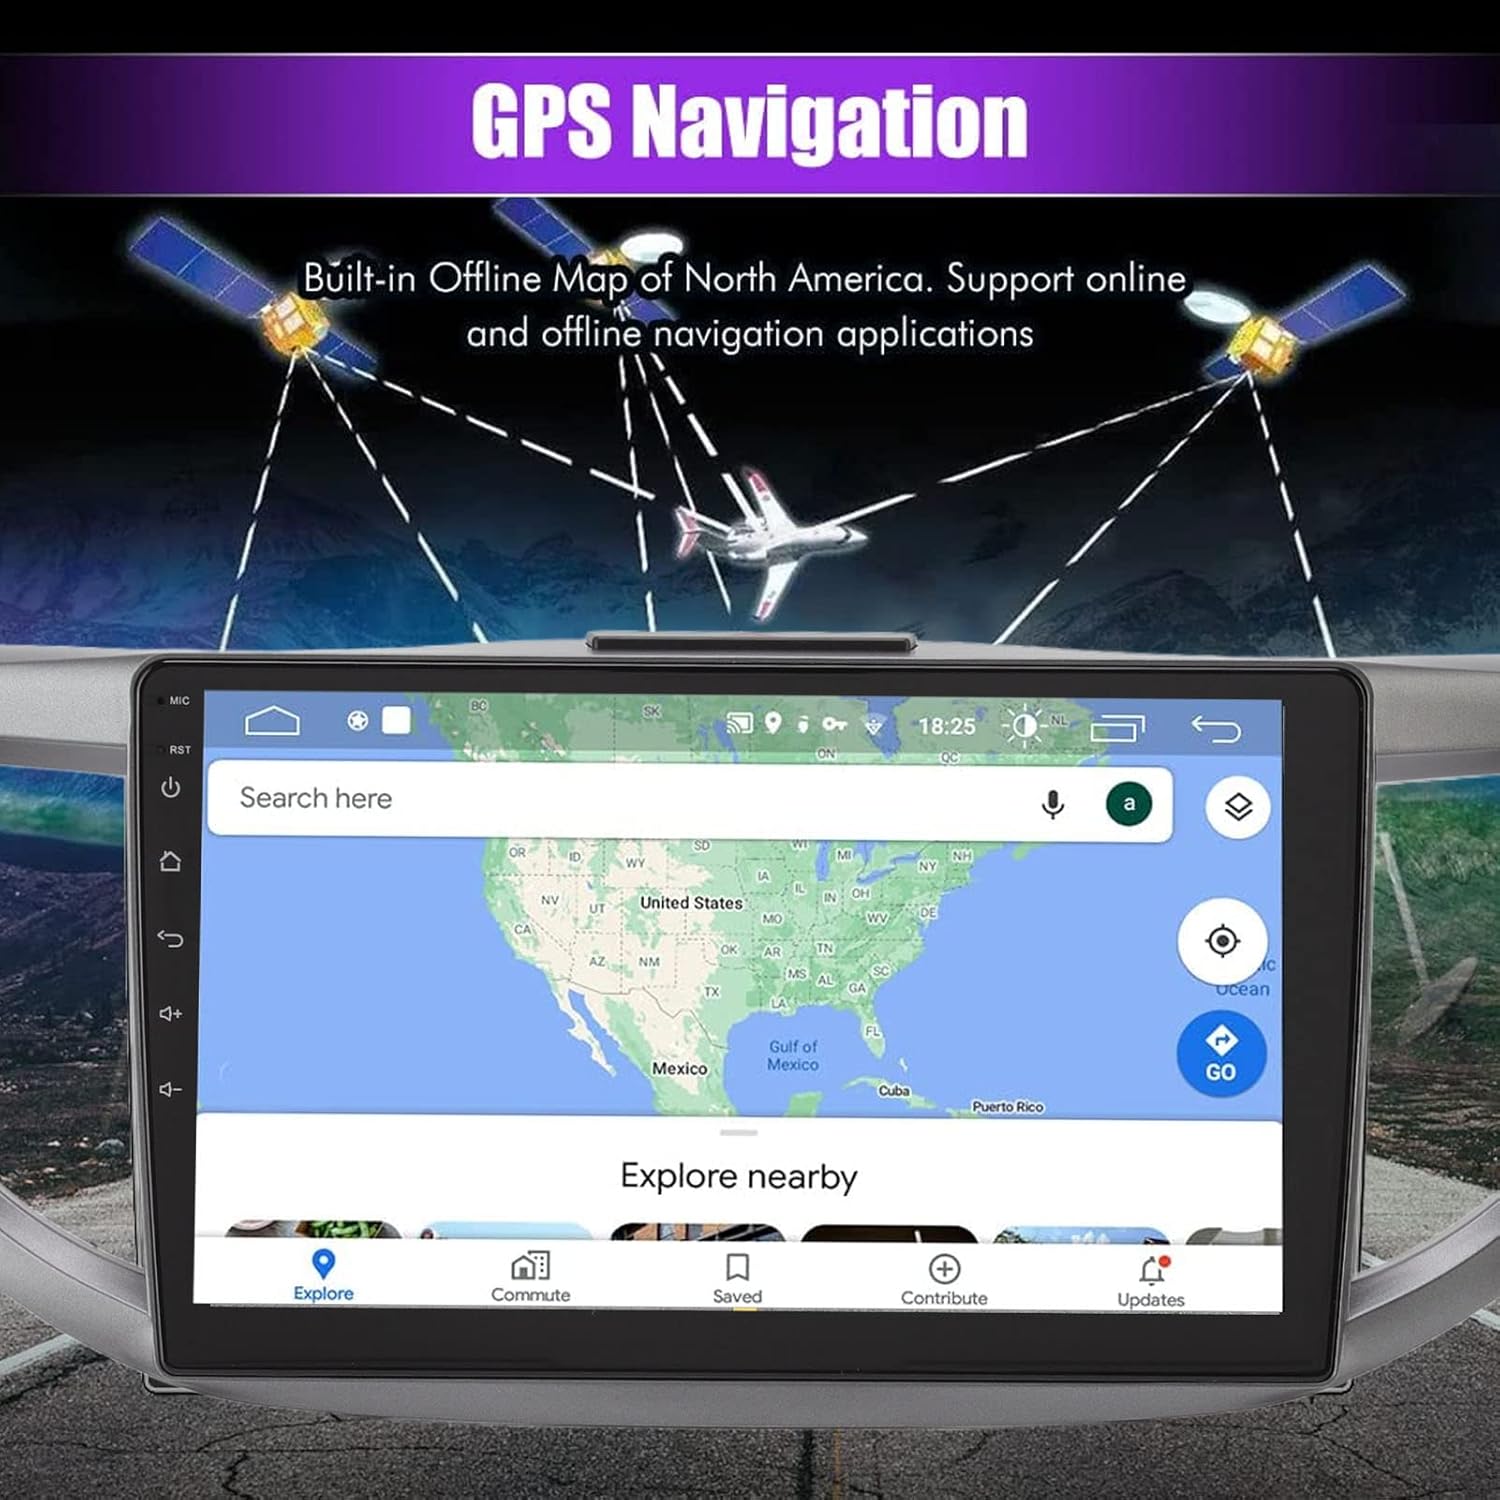
Image 5.1: GPS Navigation interface on the car stereo.
5.3 Łączność Bluetooth
Pair your mobile phone via Bluetooth to enable hands-free calling and audio streaming. The built-in microphone captures your voice, and calls are routed through your car's speakers. To pair, go to the Bluetooth settings on the unit and search for your device.
5.4 Funkcja łącza lustrzanego
The mirror link function allows you to synchronize your Android or iOS phone's screen with the car stereo display. This enables you to view maps, videos, and other content from your phone directly on the larger car stereo screen. Follow the on-screen instructions on the unit to establish the mirror link connection.
5.5 Elementy sterujące na kierownicy
The unit is designed to integrate with your vehicle's existing steering wheel controls. This allows you to manage functions such as switching songs, adjusting volume, and changing channels without taking your hands off the wheel. Configuration may be required in the unit's settings menu.
5.6 Tył View Wejście kamery
The system supports high-definition rear view camera input (camera sold separately). When the vehicle is shifted into reverse, the rear view image will automatically display on the screen, assisting with safer parking. The system offers excellent night vision capabilities.
Obraz 5.2: Tył view wyświetlacz kamery z liniami pomocniczymi do parkowania.
5.7 Ustawienia dźwięku
Access the sound settings to customize your audio experience. The unit provides options for adjusting equalizer settings, balance, and fade to optimize sound output through your car's speakers.
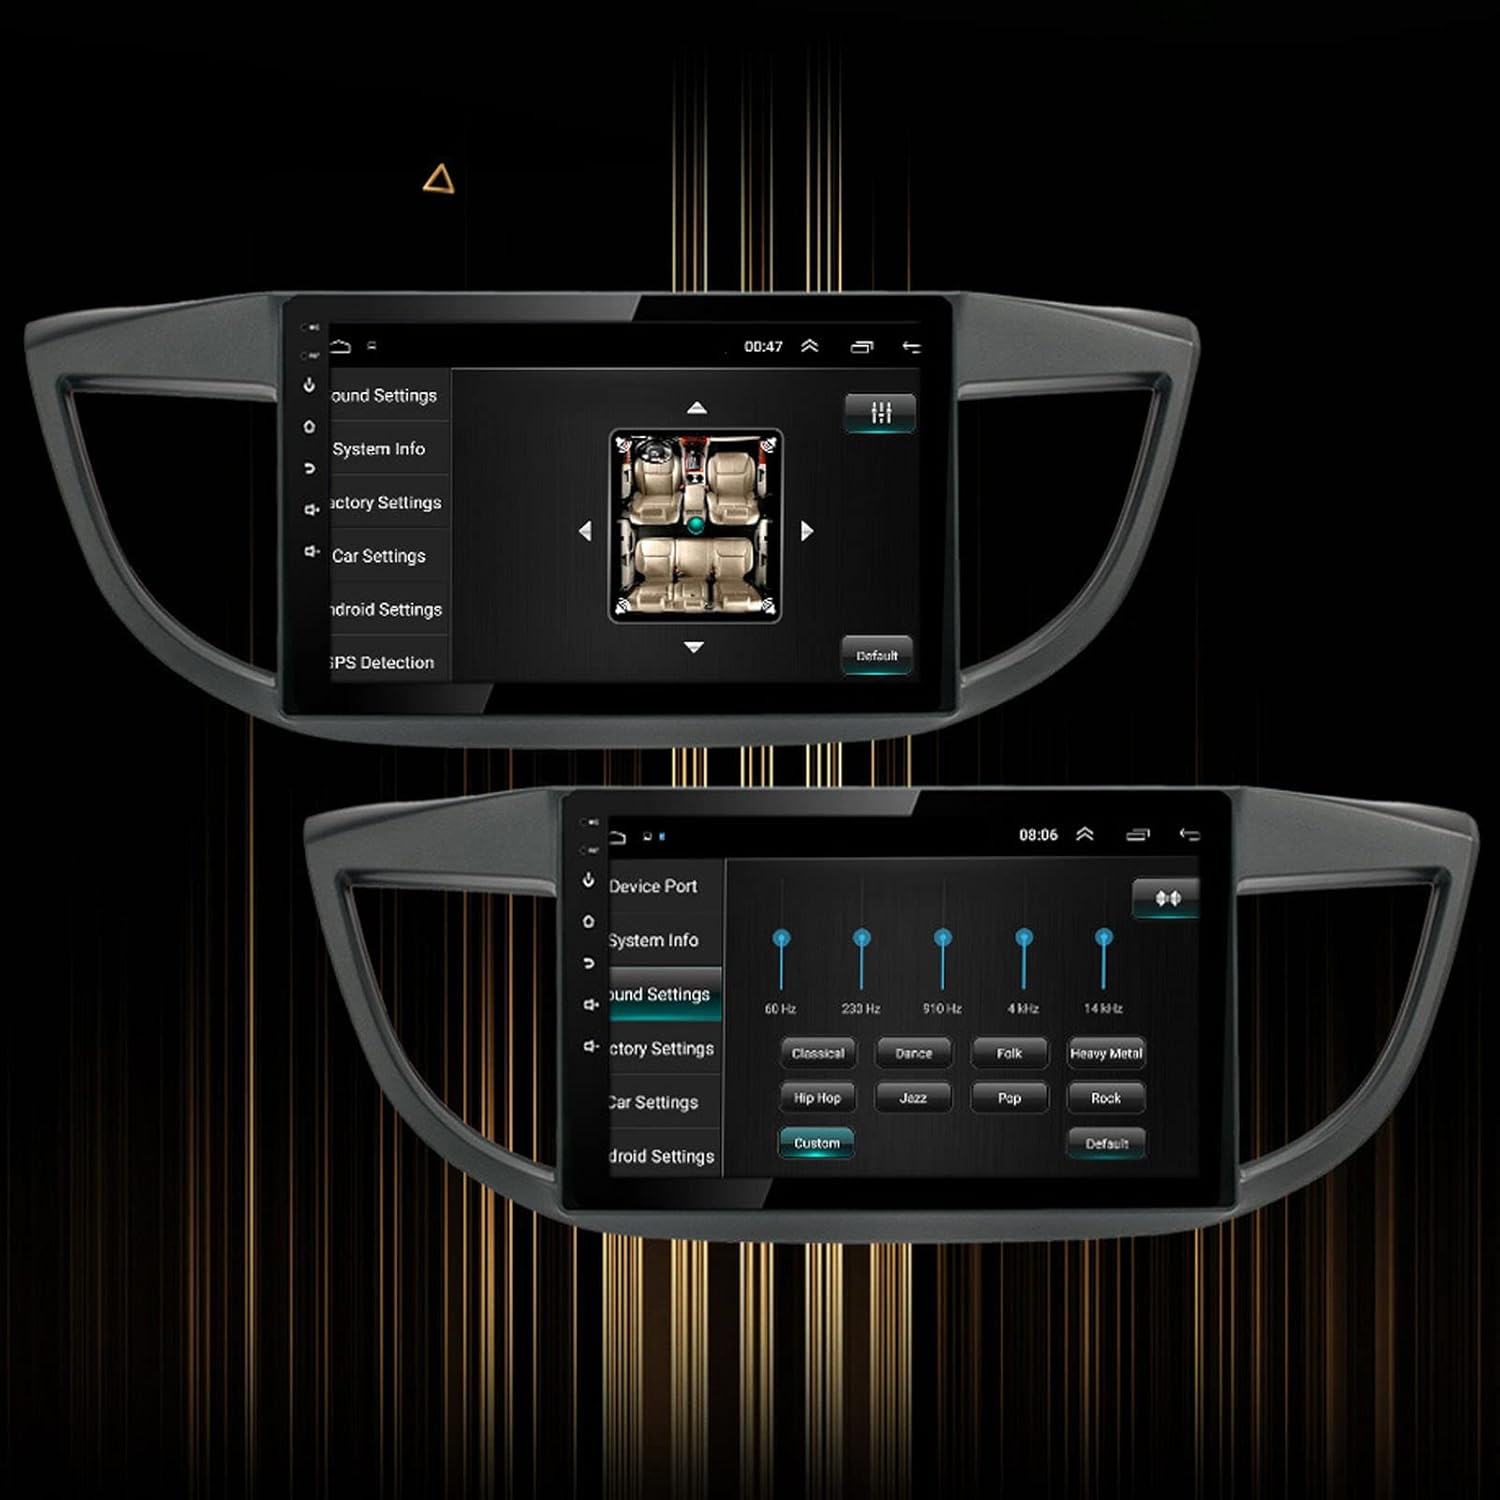
Image 5.3: Sound settings interface with equalizer options.
6. Konserwacja
To ensure the longevity and optimal performance of your Yoidesu Car Radio Stereo, follow these maintenance guidelines:
- Czyszczenie ekranu: Delikatnie przetrzyj ekran miękką, niepozostawiającą włókien ściereczką. W przypadku uporczywych plam delikatnie przetrzyj.ampen the cloth with water or a screen-cleaning solution specifically designed for electronics. Avoid harsh chemicals, abrasive materials, or excessive moisture.
- Ogólne sprzątanie: Keep the unit and surrounding dashboard area free from dust and debris. Use a soft brush or compressed air to clean crevices.
- Aktualizacje oprogramowania: Okresowo sprawdzaj dostępność aktualizacji oprogramowania za pomocą ustawień urządzenia lub u producenta. webAktualizacje mogą poprawić wydajność witryny, dodać nowe funkcje i naprawić błędy.
- Unikaj ekstremalnych temperatur: Do not expose the unit to extreme heat or cold for prolonged periods, as this can affect its electronic components and screen.
7. Rozwiązywanie Problemów
If you encounter issues with your Yoidesu Car Radio Stereo, refer to the following common problems and solutions:
| Problem | Możliwa przyczyna | Rozwiązanie |
|---|---|---|
| Urządzenie nie włącza się | Luźne połączenie zasilania, przepalony bezpiecznik, problem z akumulatorem pojazdu. | Check all power cables and connections. Inspect vehicle fuses. Ensure vehicle battery is charged. |
| Brak dźwięku | Speaker wires disconnected, volume too low, incorrect audio source selected. | Verify speaker wire connections. Increase volume. Select the correct audio input source. |
| Utrata lub niedokładność sygnału GPS | GPS antenna obstructed or improperly installed, unit in an area with poor satellite reception. | Ensure GPS antenna is clear of obstructions and properly connected. Move to an open area for better reception. |
| Problemy z parowaniem Bluetooth | Bluetooth not enabled on phone/unit, device too far, interference. | Ensure Bluetooth is active on both devices. Keep devices close. Restart both devices. |
| Sterowanie na kierownicy nie działa | Incorrect wiring, software configuration needed, compatibility issue. | Check wiring for steering wheel control adapter. Configure controls in the unit's settings. Note: Some users have reported potential limitations with steering wheel control functionality on specific CRV models. Ensure full compatibility before installation. |
| Ekran dotykowy nie reaguje | Software glitch, screen protector interference, physical damage. | Uruchom ponownie urządzenie. Zdejmij wszelkie folie ochronne ekranu, aby przetestować. Jeśli problem będzie się powtarzał, skontaktuj się z pomocą techniczną. |
Jeśli powyższe rozwiązania nie rozwiążą problemu, skontaktuj się z działem obsługi klienta w celu uzyskania dalszej pomocy.
8. Gwarancja i wsparcie
Informacje o gwarancji
Yoidesu products are manufactured to high-quality standards. For specific warranty terms and conditions, please refer to the warranty card included with your product or contact the seller/manufacturer directly. Keep your purchase receipt as proof of purchase for any warranty claims.
Obsługa klienta
For technical assistance, installation queries, or any other support needs, please contact your retailer or the Yoidesu customer service team. Contact information can typically be found on the product packaging or the official Yoidesu webstrona.
Zasoby internetowe:
- Odwiedź Yoidesu Store on Amazon Aby uzyskać informacje o produkcie i jego aktualizacjach.