
1. Wprowadzenie
This manual provides essential instructions for the installation, operation, and maintenance of your PowMr MPPT 60A Solar Charge Controller. This controller is designed to efficiently manage power flow from your solar panels to your battery bank, ensuring optimal charging and system protection. Please read this manual thoroughly before installation and use to ensure safe and correct operation.
Zawartość opakowania:
- 1 x PowMr MPPT 60A Solar Charge Controller
- 1 x Instrukcja obsługi (angielski)
2. Instrukcje bezpieczeństwa
Aby zapobiec obrażeniom ciała i uszkodzeniu kontrolera lub innych podzespołów, należy zawsze przestrzegać następujących środków ostrożności:
- Przed podłączeniem zasilania należy upewnić się, że wszystkie połączenia są prawidłowe i bezpieczne.
- The correct connection sequence for the solar controller is to connect the battery first, then the solar panel. Always adhere to this specific order. When disconnecting, follow the reverse order: disconnect solar panel, then battery.
- Nie rozmontowuj ani nie próbuj samodzielnie naprawiać kontrolera. W celu uzyskania pomocy skontaktuj się z wykwalifikowanym personelem.
- Zainstaluj kontroler w dobrze wentylowanym pomieszczeniu, z dala od materiałów łatwopalnych i bezpośredniego światła słonecznego.
- The solar charge controller is equipped with electronic protections against overcharge, over-discharge, overload, and short circuit. It also features battery temperature compensation, enhancing overall operational safety.
- Use appropriate circuit breakers or fuses for all connections to prevent damage from overcurrent.
3. Funkcje produktu
- Zaawansowana technologia MPPT: The 60A MPPT solar charge controller features automatic battery voltage detection for 12V, 24V, 36V, and 48V systems. It utilizes advanced Maximum Power Point Tracking (MPPT) technology, ensuring a tracking efficiency of no less than 99.5% and a maximum conversion efficiency of up to 97%.
- Uniwersalna kompatybilność baterii: Supports various battery types for charging, including sealed, gel, flooded, LiFePO4, and Li(NiCoMn)O2 cells. User-defined battery parameters are available for custom battery types.
- Kompleksowa ochrona: Equipped with electronic protections against overcharge, over-discharge, overload, and short circuit. Includes battery temperature compensation for enhanced safety and battery longevity.
- Wielofunkcyjny wyświetlacz LCD: Provides real-time system information, including solar panel voltage/power, charging current, battery voltage i status obciążenia.
- Wydajne chłodzenie: Features forced air cooling with an aluminum alloy construction for effective heat dissipation, maintaining optimal performance even under high temperatures.
- Dual PV and Battery Connection: Designed for straightforward connection of both photovoltaic arrays and battery banks.
- Multiple Load Working Modes: Offers various load control options, including Load OFF, Load always ON, and Time Control.
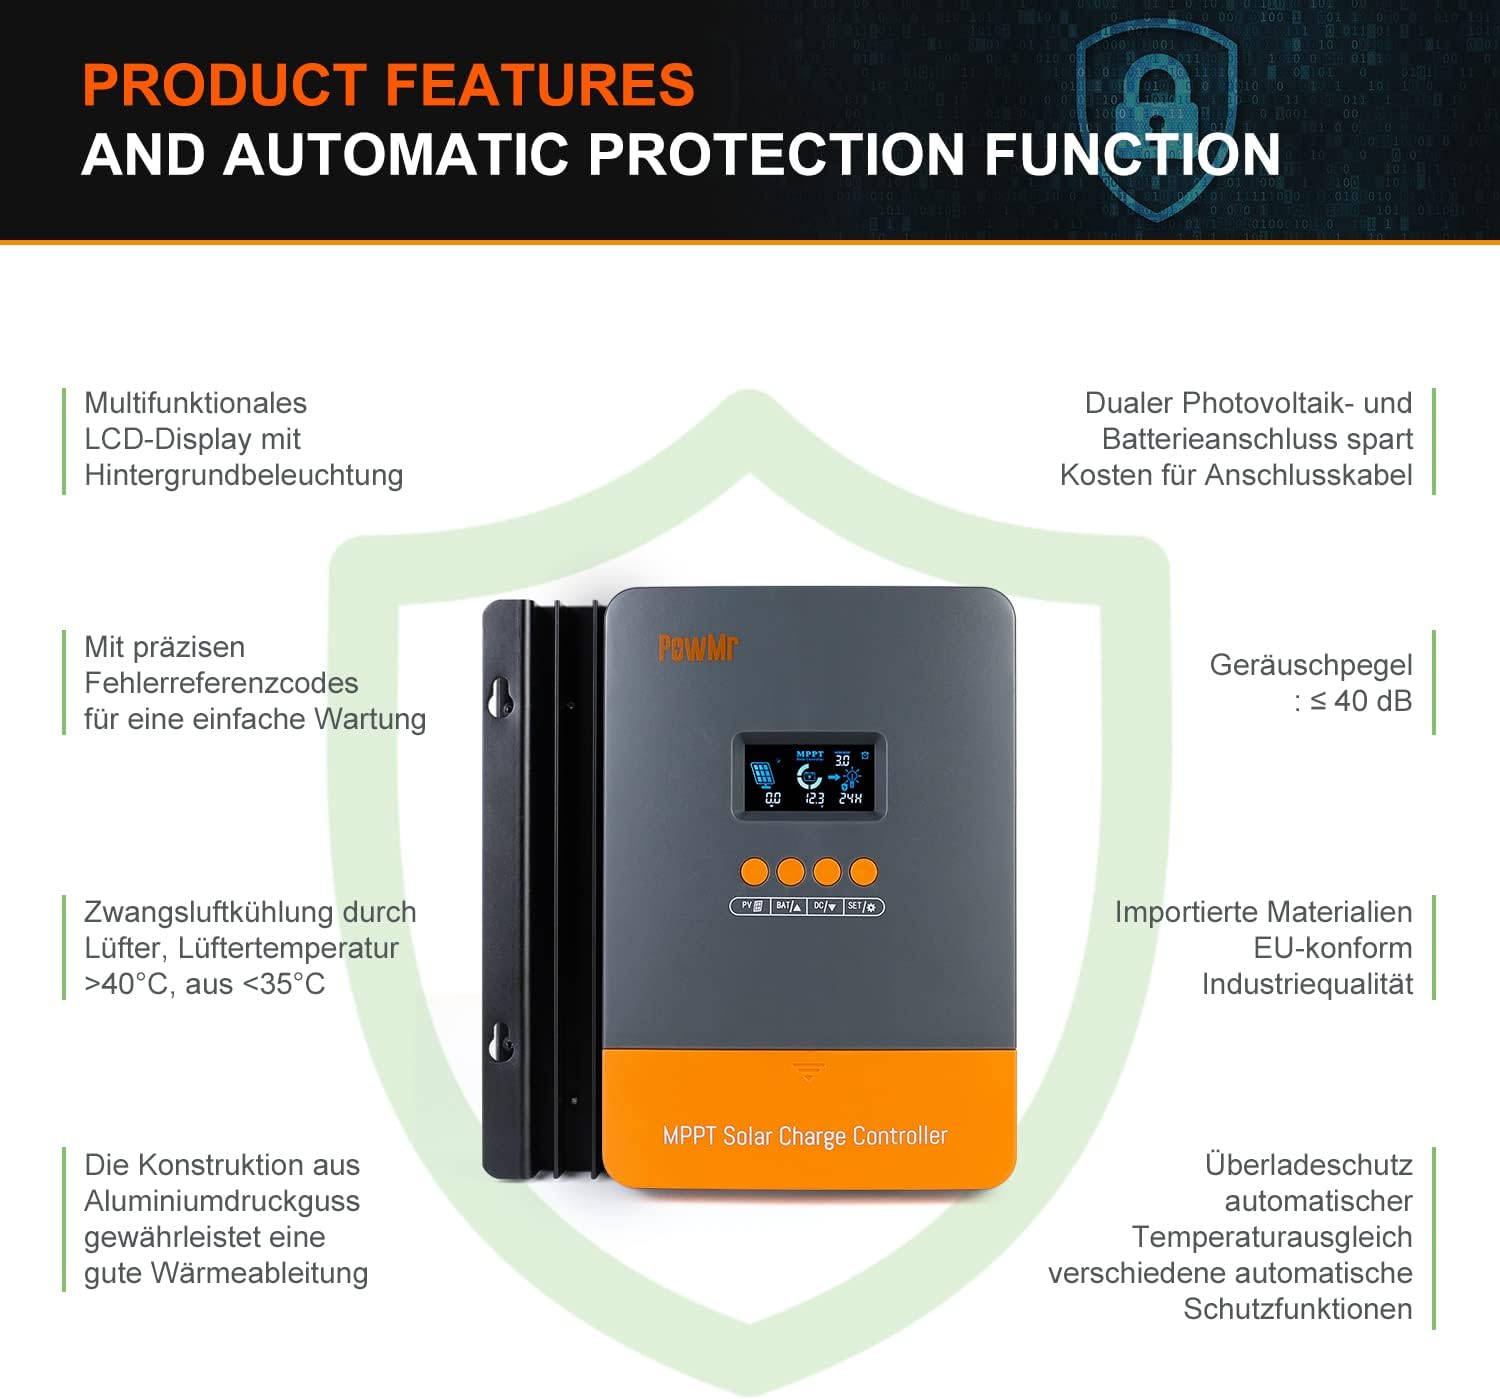
Image: Product features and automatic protection functions. Highlights include a multifunctional LCD display, dual PV and battery connection, precise error codes, forced air cooling, aluminum alloy construction for heat dissipation, and electronic protections.
4. Koniec produktuview

Image: PowMr MPPT 60A Solar Charge Controller dimensions (165mm x 230mm x 72mm) and its LCD display interface. The display shows solar panel voltage/power, charging current, battery voltage, and load information. Key buttons for PV, Battery, DC Load, and Settings are also visible.
The controller features an intuitive LCD display and control buttons for easy monitoring and configuration. The display provides real-time data on solar input, battery status, and load output.
- Ikona wskazująca dzień lub noc
- Battery icon and SOC (State of Charge)
- Tryb pracy
- State and Warning indication
- Panel słoneczny objtage/power/current
- Charging power/charging current/battery voltage
- Load working Mode / Load power / Load current / Load voltage
5. Instalacja i konfiguracja
5.1 Montaż kontrolera
- Choose a dry, well-ventilated location, protected from direct sunlight, high temperatures, and water.
- Ensure there is sufficient airflow around the controller for proper cooling.
- Mount the controller vertically on a wall or suitable surface using appropriate fasteners.
5.2 połączeń przewodów
Ważny: Zawsze podłączaj najpierw akumulator, potem panel słoneczny, a na końcu obciążenie. Odłączaj w odwrotnej kolejności.
- Podłącz akumulator: Connect the positive and negative terminals of your battery bank to the corresponding battery terminals on the controller. Ensure correct polarity. The controller will automatically detect the battery voltagnp. (12V/24V/36V/48V).
- Podłącz panel słoneczny: Connect the positive and negative terminals of your solar panel array to the corresponding PV input terminals on the controller. Ensure correct polarity. The maximum open circuit voltage (Voc) from the PV array should not exceed 160V.
- Podłącz obciążenie DC (opcjonalnie): If using a DC load directly from the controller, connect its positive and negative terminals to the load terminals on the controller.

Image: Diagram illustrating recommended wiring configurations for 12V, 24V, 36V, and 48V battery systems, including corresponding input solar power and voltage ranges. Also shows the three load working modes (Load OFF, Load always ON, Time control).
5.3 Wybór typu baterii
The controller supports various battery types. You can select the appropriate type through the controller's settings menu. For lithium batteries (LiFePO4, Li(NiCoMn)O2), it is essential to set the specific start and end charging voltages according to the battery manufacturer's specifications. Refer to the detailed instructions in the user manual for proper configuration.

Image: Illustration detailing the supported battery types (Sealed, GEL, Flooded, AGM, Lithium, User Custom Battery) and a graph depicting the four-stage battery charging process: Bulk Charge, Constant Charging (Boost/Equalize), and Float Charge.
6. Instrukcja obsługi
6.1 Wyświetlacz LCD i przyciski
The LCD display provides real-time system status. Use the buttons (PV, BAT, DC, SET) to navigate through menus and adjust parameters. Refer to the detailed manual for specific button functions and menu navigation.
6.2 Ładowanie Stages
Kontroler wykorzystuje wielokanałowytagAlgorytm ładowania optymalizujący żywotność i wydajność baterii:
- Ładunek zbiorczy: Ładuje akumulator maksymalnym prądem do momentu osiągnięcia pojemnościtage wzrasta do poziomu absorpcji.
- Constant Charging (Boost/Equalize): Utrzymuje stałą objętośćtage, allowing the current to gradually decrease. Equalization is a controlled overcharge for flooded batteries to balance cell voltagt.j.
- Opłata za pływak: Zmniejsza objętośćtage to a lower level once the battery is fully charged, maintaining it at a safe level to prevent self-discharge.
6.3 Załaduj tryby pracy
The DC load output can be configured with different working modes:
- WYŁĄCZ obciążenie: Wyjście obciążenia jest zawsze wyłączone.
- Load Always ON: Wyjście obciążenia jest cały czas włączone.
- Kontrola czasu: The load output operates for a specified duration after sunset.
7. Konserwacja
Regularna konserwacja zapewnia optymalną wydajność i długowieczność regulatora ładowania słonecznego:
- Okresowo sprawdzaj wszystkie połączenia przewodów pod kątem szczelności i korozji.
- Clean the controller's exterior with a dry cloth. Do not use liquids or solvents.
- Aby umożliwić właściwe odprowadzanie ciepła, należy upewnić się, że otwory wentylacyjne są czyste, bez kurzu i zanieczyszczeń.
- Monitoruj wyświetlacz LCD pod kątem kodów błędów lub nietypowych odczytów.
8. Rozwiązywanie Problemów
If you encounter issues, refer to the following common problems and solutions. For more complex issues, contact customer support.
| Problem | Możliwa przyczyna | Rozwiązanie |
|---|---|---|
| Brak wyświetlacza/brak zasilania | Akumulator nie jest podłączony lub jego głośność jest niskatage; odwrócona polaryzacja. | Sprawdź połączenia akumulatora i objtage. Upewnij się, że polaryzacja jest prawidłowa. |
| Bateria się nie ładuje | Solar panel not connected; low solar input; PV reversed polarity; battery type misconfigured. | Check solar panel connections and polarity. Verify sufficient sunlight. Confirm correct battery type settings. |
| Ładowanie nie działa | Load mode set to OFF; overload; short circuit; low battery voltage. | Check load mode settings. Reduce load. Inspect for short circuits. Charge battery. |
| Wyświetlony kod błędu | Konkretna usterka systemowa. | Listę kodów błędów i odpowiadających im rozwiązań można znaleźć w pełnej instrukcji obsługi. |
9. Specyfikacje
| Parametr | Wartość |
|---|---|
| Numer modelu | POW-M60-PRO |
| Marka | Pan Pow |
| Prąd znamionowy ładowania | 60A |
| Objętość systemutage | 12V/24V/36V/48V Auto-Identify |
| Maks. Wejście PV Objętośćtage VOC) | 160V prądu stałego |
| Max. Solar Panel Power (for 48V system) | 2880W (12V: 720W, 24V: 1440W, 36V: 2160W) |
| Wydajność śledzenia | ≥99.5% |
| Efektywność konwersji | Do 97% |
| Obsługiwane typy baterii | Sealed, Gel, Flooded, LiFePO4, Li(NiCoMn)O2, User-defined |
| Typ wyświetlacza | LCD z podświetleniem |
| Wymiary produktu (dł. x szer. x wys.) | Wymiary: 16.5 cm x 7.1 cm x 23.1 cm |
| Waga produktu | 1.3 kilogramów |
| Temperatura pracy | -20°C to +50°C (Max. 60°C ambient) |

Image: Universal compatibility of the PowMr 60A MPPT controller compared to other controllers. It highlights higher maximum input solar power and voltage for 12V, 24V, 36V, and 48V systems, supporting SLA, SLD, GEL, AGM, and LiFePO4 battery types.
10. Gwarancja i wsparcie
For warranty information, technical support, or any questions regarding your PowMr MPPT 60A Solar Charge Controller, please contact PowMr customer service. Refer to the product packaging or the official PowMr webstrona dla danych kontaktowych.


