1. Wprowadzenie
This manual provides essential instructions for the safe and effective use, setup, operation, and maintenance of your LITE LP-2211-06 6-Foot Aluminium Step Ladder. Please read this manual thoroughly before using the ladder and retain it for future reference.
Ważne informacje dotyczące bezpieczeństwa
Always prioritize safety when using any ladder. Failure to follow these instructions can result in serious injury or death.
- Sprawdź przed użyciem: Always check the ladder for damage, loose fasteners, or missing parts before each use. Do not use a damaged ladder.
- Stabilna powierzchnia: Ensure the ladder is placed on a firm, level, and non-slippery surface. Avoid placing it on unstable objects.
- Maintain Three Points of Contact: Always maintain three points of contact (two hands and one foot, or two feet and one hand) with the ladder when climbing or descending.
- Face the Ladder: Wchodząc lub schodząc, zawsze stawaj twarzą do drabiny.
- Nie przesadzaj: Keep your body centered between the side rails. Do not overreach, as this can cause the ladder to tip.
- Nośność: Do not exceed the maximum load capacity of 225 pounds (including user and tools). This ladder is Type II rated.
- Bezpieczeństwo elektryczne: This aluminum ladder conducts electricity. Do not use it near live electrical circuits or power lines.
- Odpowiednie obuwie: Wear slip-resistant footwear when using the ladder.
- One Person Only: Drabina ta jest przeznaczona do użytku przez jedną osobę na raz.
- Do Not Stand on Top Cap: The top cap is not a step. Do not stand or sit on the top cap.
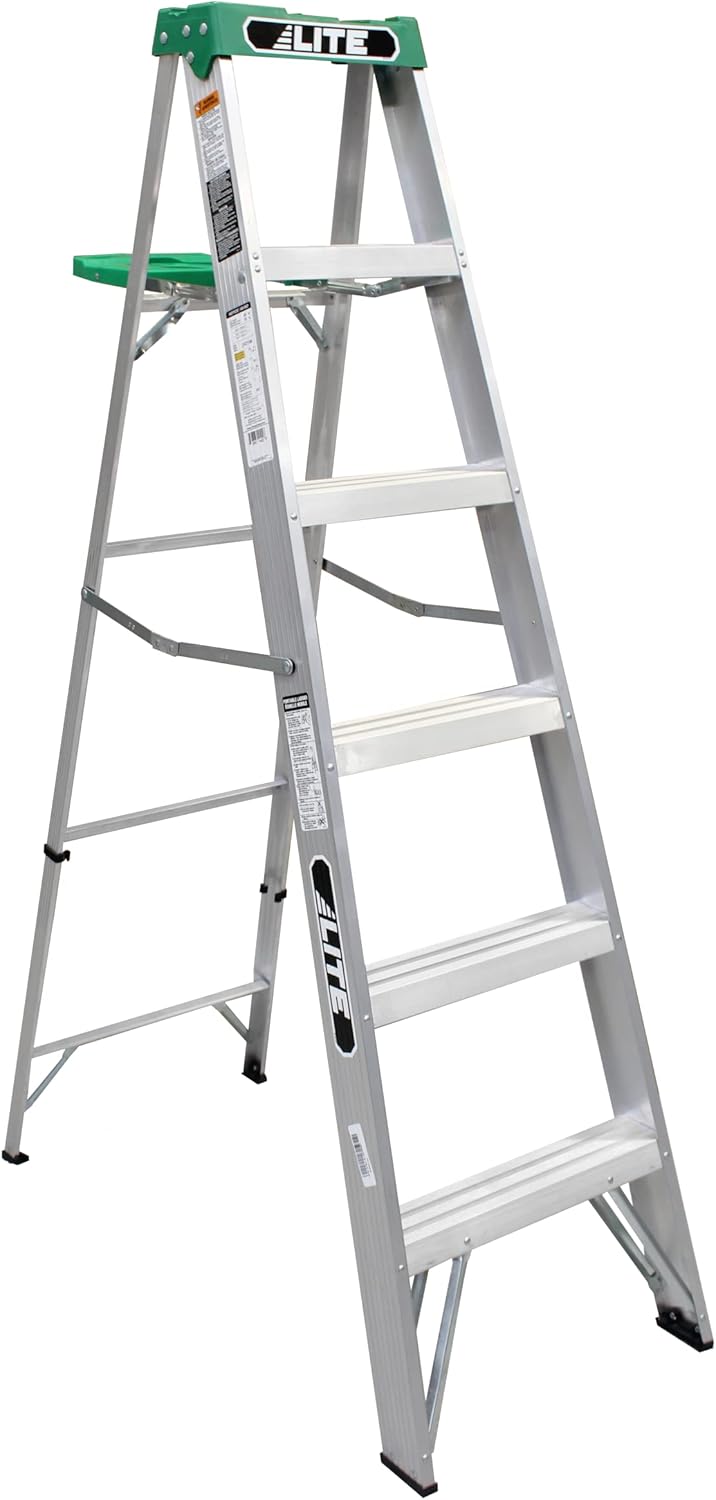
2. składniki
Familiarize yourself with the key components of your LITE step ladder:
- Górna czapka: The uppermost platform, featuring integrated tool slots and a drill slot.
- Molded Pail Shelf: A secondary shelf designed to hold paint cans or other items, located below the top cap.
- Steps/Rungs: The horizontal platforms for climbing.
- Szyny boczne: The vertical supports of the ladder.
- Spreader Braces: Hinged metal bars that lock the ladder in the open position for stability.
- Slip-Resistant Rubber Feet: Protective caps on the bottom of the ladder legs to prevent slipping and protect surfaces.


3. Przygotowanie i rozkładanie
Rozkładanie drabiny
- Place the folded ladder on a flat, stable surface.
- Grasp the top cap with one hand and the front rail with the other.
- Carefully pull the front and back sections apart until the spreader braces are fully extended and locked into place. Ensure both spreader braces are locked before use.
- Verify that all four feet are firmly on the ground and the ladder is stable.
Inspecting the Ladder
Przed każdym użyciem należy przeprowadzić następujące kontrole:
- Check for any bends, cracks, or damage to the aluminum frame, steps, or side rails.
- Ensure all rivets and fasteners are secure and not loose or missing.
- Verify that the spreader braces operate smoothly and lock securely.
- Inspect the rubber feet for wear, damage, or absence. Replace if necessary.
- Clean any dirt, grease, or debris from the steps and feet to prevent slipping.

4. Instrukcja obsługi
Prawidłowe rozmieszczenie
- Position the ladder directly in front of the work area.
- Ensure the ladder is fully open with spreader braces locked.
- Avoid placing the ladder on uneven ground, soft surfaces, or near doorways that could be opened unexpectedly.
Wspinaczka i schodzenie
- Always face the ladder when climbing or descending.
- Use both hands to grip the side rails.
- Maintain three points of contact at all times.
- Do not carry heavy or bulky items that could cause you to lose balance. Use the tool tray or have someone hand you items.
- Never stand on the top cap. The highest safe standing level is typically the step below the top cap.
Using the Tool Tray
- The integrated top cap features multiple slots for small tools like screwdrivers, pliers, and drills.
- The molded pail shelf can hold paint cans or other containers. Ensure items are placed securely and do not exceed the shelf's capacity.
- Do not overload the tool tray or pail shelf, as this can affect ladder stability.

5. Konserwacja i przechowywanie
Czyszczenie
- Clean the ladder regularly with a damp szmatką i łagodnym detergentem.
- Remove any paint, grease, or other slippery substances from the steps and feet.
- Ensure the ladder is completely dry before storage or next use.
Kontrola
- Periodically check all moving parts, especially the spreader braces, for smooth operation.
- Inspect the rubber feet for wear and tear. Worn feet should be replaced immediately to maintain stability.
- Look for any signs of corrosion on the aluminum frame.
Składowanie
- Fold the ladder completely after each use.
- Store the ladder in a dry, secure location, away from extreme temperatures and direct sunlight.
- Store horizontally or vertically in a manner that prevents it from falling or being damaged.
6. Rozwiązywanie Problemów
| Wydanie | Możliwa przyczyna | Rozwiązanie |
|---|---|---|
| Drabina wydaje się niestabilna | Not fully opened; uneven surface; worn feet; overloaded. | Ensure spreader braces are locked. Move to a level surface. Replace worn rubber feet. Reduce load. |
| Spreader braces are stiff | Dirt/debris in hinge; lack of lubrication. | Clean hinges. Apply a small amount of lubricant (e.g., silicone spray) to moving parts. |
| Ladder slips on surface | Worn or missing rubber feet; slippery surface. | Replace rubber feet. Ensure surface is clean and dry. Use on a non-slip surface. |
| Damage to frame/steps | Impact; excessive load. | Do not use the ladder. Contact customer support for advice or replacement. |
7. Specyfikacje
| Funkcja | Szczegół |
|---|---|
| Numer modelu | LP-2211-06 |
| Tworzywo | Aluminium |
| Ladder Type | Drabina schodkowa |
| Wysokość | 6 stóp |
| Nośność | 225 Pounds (Type II Duty Rating) |
| Waga przedmiotu | 13 funtów |
| Wymiary produktu (po otwarciu) | Około 52.07" szer. x 68.25" wys. |
| Cechy specjalne | Anti-Slip, Foldable, Heavy Duty, Lightweight, Integrated Tool Tray, Molded Pail Shelf |
| UPC | 728865144096 |

8. Gwarancja i wsparcie
LITE products are manufactured to high-quality standards. For specific warranty details, please refer to the warranty card included with your purchase or visit the official LITE website. If you encounter any issues or require technical assistance, please contact LITE customer support.
9. Informacje kontaktowe
Aby uzyskać więcej informacji lub wsparcia, odwiedź stronę Official LITE Store on Amazon.