1. Wprowadzenie
This manual provides essential instructions for the safe operation, assembly, maintenance, and troubleshooting of your BENCHMARK Electric Snow Blower, Model YF6022. Please read this manual thoroughly before using the snow blower to ensure proper function and to prevent injury or damage.

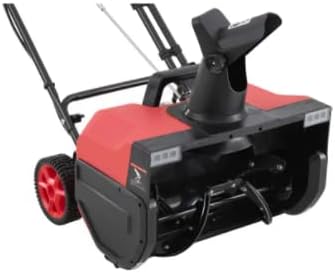
Figure 1: BENCHMARK Electric Snow Blower YF6022, front-side view.
The BENCHMARK Electric Snow Blower YF6022 is designed for clearing snow from driveways and walkways. It features a powerful 15A motor, a 180° adjustable directional chute, and dual 3W LED headlampdla lepszej widoczności.
2. Informacje dotyczące bezpieczeństwa
Always prioritize safety when operating the snow blower. Failure to follow these safety guidelines can result in serious injury.
- Wear appropriate protective clothing, including gloves and non-slip footwear, when operating the snow blower.
- Keep hands and other body parts away from rotating parts, such as the auger and impeller.
- Do not operate the snow blower in enclosed spaces to prevent carbon monoxide buildup. This is an electric unit, but proper ventilation is always recommended.
- Always unplug the machine from the power source before performing any maintenance, cleaning, or when clearing blockages.
- Ensure the work area is clear of debris, rocks, or other objects that could be thrown by the snow blower.
- Nie należy pozwalać dzieciom ani osobom nieprzeszkolonym na obsługę odśnieżarki.
- Pracuj wyłącznie przy świetle dziennym lub dobrym świetle sztucznym.
3. Montaż i konfiguracja
Your BENCHMARK Electric Snow Blower YF6022 may require minor assembly before first use. Follow these general steps:
- Zespół uchwytu: Attach the upper handle to the lower handle using the provided knobs and bolts. Ensure all connections are secure.
- Montaż zsypu: Secure the discharge chute to the main unit. Ensure the chute rotation mechanism is properly connected and allows for 180° adjustment.
- Zarządzanie przewodem zasilającym: Route the power cord securely along the handle, using any provided clips or ties, to prevent it from interfering with operation or becoming damaged.
- Kontrola przed rozpoczęciem pracy: Before connecting to power, inspect the unit for any loose parts, damage, or obstructions. Ensure the auger area is clear.

Rysunek 2: Strona view of the snow blower, illustrating overall structure.
4. Instrukcja obsługi
Aby skutecznie i bezpiecznie odśnieżać, postępuj zgodnie z poniższymi wskazówkami:
- Podłącz zasilanie: Plug the snow blower into a suitable outdoor-rated extension cord, ensuring the cord is rated for the 15A motor.
- Regulacja zsypu: Use the chute adjustment handle to direct the snow discharge. The chute can be rotated up to 180° to throw snow up to 30 feet away from your clearing path.
- Uruchom jednostkę: Press and hold the safety button, then squeeze the bail switch to start the motor. Release the safety button once the motor is running.
- Engage Headlamps: The dual 3W LED headlamps automatically illuminate when the unit is powered on, providing visibility for clearing paths at night or in early mornings.
- Clear Snow: Push the snow blower forward into the snow. The 22-inch clearing width and up to 12-inch clearing depth allow for efficient snow removal. Overlap passes slightly to ensure complete clearing.
- Stop the Unit: Zwolnij wyłącznik kaucyjny, aby zatrzymać silnik.
Rysunek 3: Zbliżenie view of the auger and adjustable chute mechanism.
5. Konserwacja
Regular maintenance ensures the longevity and optimal performance of your snow blower. Always unplug the unit before performing any maintenance.
- Chute Clean-Out: Use the provided chute clean-out tool to remove any snow build-up or blockages from the discharge chute. Never use your hands.
- Kontrola: Periodically inspect the auger, scraper blade, and wheels for wear or damage. Replace worn parts as needed.
- Czyszczenie: After each use, wipe down the exterior of the snow blower with a damp cloth. Ensure all vents are clear of snow and debris.
- Składowanie: Store the snow blower in a dry, protected area when not in use. Coil the power cord neatly.
This electric snow blower requires no gas, oil, or tune-ups, simplifying maintenance.

Figure 4: Detail of the handle and the integrated chute clean-out tool.
6. Rozwiązywanie Problemów
If you encounter issues with your snow blower, refer to these common troubleshooting tips:
- Jednostka nie uruchamia się: Ensure the power cord is securely plugged into a working outlet and the safety button and bail switch are engaged correctly. Check for tripped circuit breakers.
- Obniżona wydajność: Check for snow or ice blockages in the auger or chute. Always unplug the unit before clearing blockages with the clean-out tool. Ensure the scraper blade is not excessively worn.
- Nietypowy hałas/wibracje: Immediately stop the unit and unplug it. Inspect for loose parts, foreign objects, or damage to the auger or motor housing.
Jeśli po wykonaniu tych czynności problemu nie uda się rozwiązać, skontaktuj się z obsługą klienta.
7. Specyfikacje
| Funkcja | Specyfikacja |
|---|---|
| Numer modelu | Numer katalogowy: YF6022 |
| Silnik | 15 Amp |
| Szerokość czyszczenia | 22 cali |
| Głębokość czyszczenia | Do 12 cali |
| Odległość rzucania śniegu | Do 30 stóp |
| Obrót rynny | 180 stopnia |
| Headliamps | Dual 3W LED |
| No-Load Paddle Speed | Do 2,700 obr./min. |
| Moment obrotowy | 48.7 cala-funta |
| Koła | 7-inch compact |
| Wymiary produktu | Wymiary 97 x 46.99 x 113 cm |
| Waga przedmiotu | 19.5 kilogramów |
| Źródło zasilania | Elektryczny przewodowy |
8. Gwarancja i wsparcie
The BENCHMARK Electric Snow Blower YF6022 comes with a Ograniczona 5-letnia gwarancja. Zachowaj dowód zakupu na wypadek roszczeń gwarancyjnych.
For technical assistance, replacement parts, or warranty inquiries, please refer to the contact information provided with your purchase documentation or visit the official Benchmark webstrona.