1. Wprowadzenie
The Neoline G-Tech X63 is an advanced high-definition video recorder designed for vehicles. It features a dual-camera system integrated into a single housing, providing comprehensive coverage. The front camera offers a wide-angle 2K QHD resolution, while an interior Full HD camera monitors the cabin. Additionally, a separate Full HD rear camera captures events behind your vehicle. This device is equipped with a supercapacitor, which provides enhanced durability and more reliable operation across a wider range of temperatures compared to traditional batteries.
Key features include a wide viewing angle, front, interior, and rear cameras, high-contrast video recording, weather protection, a built-in GPS module, and 2K QHD resolution for the front camera.
2. Zawartość opakowania
Proszę zaznaczyć pole dotyczące następujących elementów:
- Neoline G-Tech X63 Dash Cam
- Kamera tylna
- Mocowanie samoprzylepne 3 M.
- Zasilacz (ładowarka samochodowa)
- Kabel Micro USB
- Instrukcja obsługi
- Certyfikat Gwarancji
3. Koniec produktuview
Familiarize yourself with the components of your Neoline G-Tech X63 dash cam.
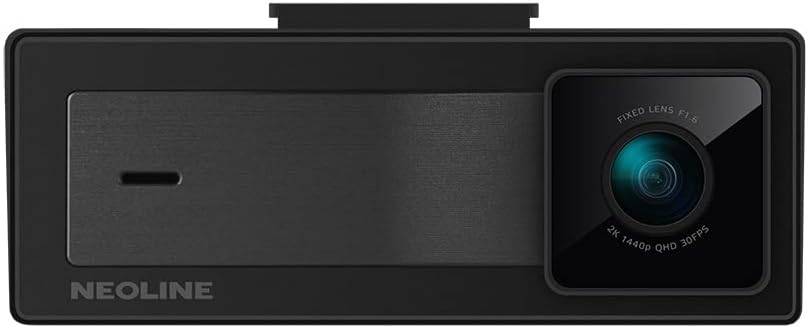
Rysunek 3.1: Przód view of the Neoline G-Tech X63 dash cam, showing the main lens and Neoline branding.

Rysunek 3.2: Tył view of the dash cam, displaying the screen and control buttons.

Rysunek 3.3: The compact rear camera module for external mounting.

Rysunek 3.4: Szczyt view showing the mounting slot and various ports for connections.
4. Konfiguracja i instalacja
4.1. Wkładanie karty pamięci
Before first use, insert a high-speed microSD card (Class 10 or higher, up to 128GB recommended) into the designated slot on the dash cam. Ensure the card is inserted correctly until it clicks into place. Format the card within the dash cam settings for optimal performance.
4.2. Montaż kamery samochodowej
- Clean the windshield surface where you intend to mount the dash cam. Ensure it is dry and free of dust.
- Attach the 3M adhesive mount to the dash cam.
- Peel off the protective film from the 3M adhesive and firmly press the mount onto the chosen spot on your windshield, ideally behind the rearview lustro dla niezakłóconego widoku view. Przytrzymaj przez co najmniej 30 sekund.
- Adjust the camera lens to ensure it captures the road ahead clearly, with the horizon in the middle of the frame.

Rysunek 4.1: Example of the dash cam mounted on the vehicle's windshield.
4.3. Podłączanie tylnej kamery
Connect the rear camera cable to the main dash cam unit. Route the cable neatly along the vehicle's headliner and pillars to the rear of the vehicle. Mount the rear camera on the rear windshield or license plate area, ensuring a clear view. Connect the red wire of the rear camera to the reverse light power source if you wish to enable parking assistance features.
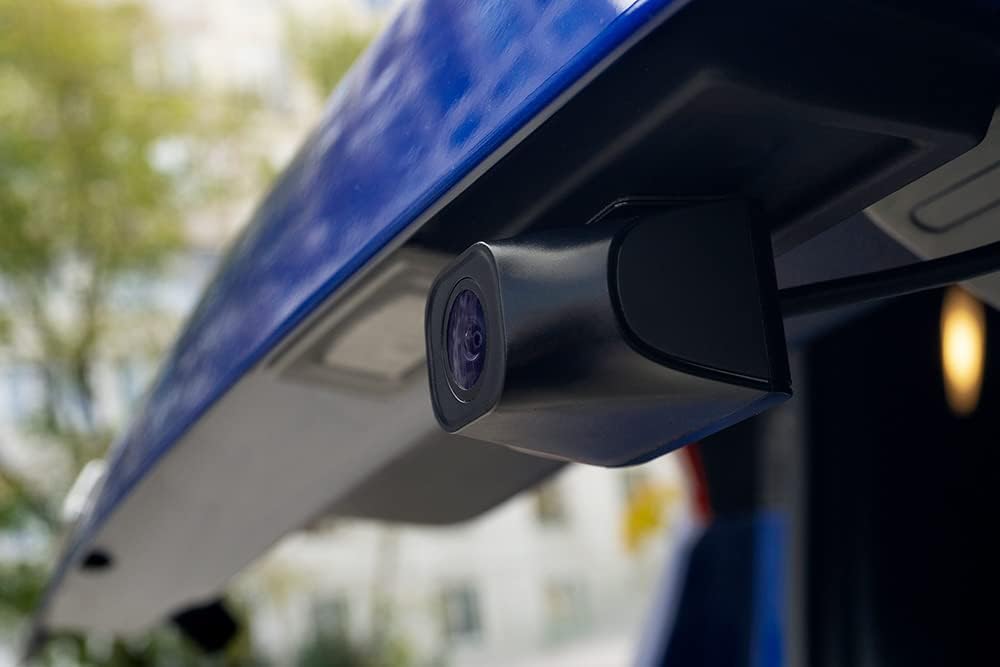
Rysunek 4.2: The rear camera installed, providing a view obszaru za pojazdem.
4.4. Podłączenie zasilania
Plug the included power adapter into your vehicle's 12V power outlet (cigarette lighter socket). Connect the other end of the cable to the dash cam's power input. The dash cam will automatically power on and begin recording when the vehicle's ignition is turned on, and power off when the ignition is turned off.
5. Instrukcja obsługi
5.1. Podstawowe nagrywanie
Once powered on, the dash cam will automatically start continuous loop recording. Video files are saved in segments (e.g., 1, 3, or 5 minutes) to the microSD card. When the card is full, the oldest unprotected filezostaną nadpisane przez nowe nagrania.
5.2. Czujnik G (nagrywanie awaryjne)
The built-in G-sensor detects sudden impacts or rapid acceleration/deceleration. When triggered, the current video segment is automatically locked and protected from being overwritten, ensuring critical footage is saved. The sensitivity of the G-sensor can be adjusted in the settings menu.
5.3. Tryb parkowania
The Neoline G-Tech X63 supports parking mode. When enabled and the vehicle is parked, the dash cam can detect motion or impacts and automatically start recording. This feature requires a continuous power supply (e.g., hardwiring kit, sold separately) to function when the vehicle is off.
5.4. Funkcjonalność GPS
Zintegrowany moduł GPS rejestruje dane dotyczące prędkości i lokalizacji pojazdu, które można viewed during video playback using dedicated software. This provides additional context for recorded events.
5.5. Nawigacja po menu
Use the buttons located on the device (refer to Figure 3.2 and 5.1 for button layout) to navigate through the menu options. The 'OK' button typically confirms selections, while arrow buttons navigate. The 'M' button often switches between recording, playback, and settings modes.
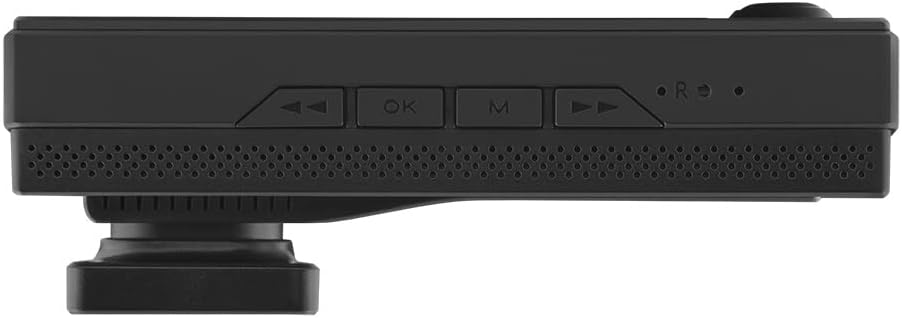
Rysunek 5.1: Spód view showing the control buttons for menu navigation and operation.
6. Konserwacja
- Czyszczenie: Use a soft, dry cloth to clean the dash cam body and lenses. Do not use abrasive cleaners or solvents.
- Karta pamięci: Regularly format your microSD card (at least once a month) within the dash cam to maintain optimal recording performance and prevent data corruption. Back up any important files przed formatowaniem.
- Aktualizacje oprogramowania układowego: Check the official Neoline webOdwiedzaj naszą stronę regularnie w celu uzyskania aktualizacji oprogramowania sprzętowego. Aktualizacja oprogramowania sprzętowego może poprawić wydajność, dodać nowe funkcje lub naprawić błędy. Postępuj zgodnie z instrukcjami dołączonymi do aktualizacji oprogramowania sprzętowego.
- Temperatura: Avoid exposing the dash cam to extreme temperatures for extended periods. While the supercapacitor offers better temperature tolerance, prolonged exposure to direct sunlight in a hot car can still affect its lifespan.
7. Rozwiązywanie Problemów
| Problem | Możliwa przyczyna | Rozwiązanie |
|---|---|---|
| Kamera samochodowa nie włącza się. | Brak zasilania, uszkodzony zasilacz, luźne połączenie. | Check power connection to the vehicle's 12V outlet. Ensure the power adapter is working. Try a different power source if available. |
| Nagrywanie zostaje zatrzymane lub zawieszone. | Memory card full; slow memory card; memory card error. | Format the microSD card. Use a high-speed (Class 10 or U3) microSD card. Replace the memory card if errors persist. |
| Jakość wideo jest słaba. | Brudny obiektyw; na obiektywie nadal znajduje się folia ochronna; nieprawidłowe ustawienia rozdzielczości. | Clean the camera lens. Remove any protective film. Check video resolution settings in the menu and set to 2K QHD for front camera. |
| GPS nie działa. | Poor satellite signal; GPS module obstruction. | Upewnij się, że kamera samochodowa ma czyste pole widzenia. view of the sky. Avoid mounting near metallic objects that could interfere with the signal. |
| Przyciski nie reagują. | Tymczasowy błąd oprogramowania. | Perform a soft reset (if available, check manual for specific instructions) or disconnect and reconnect power. |
8. Specyfikacje
- Model: G-Tech X63
- Producent: Neolina
- Rozdzielczość przedniej kamery: 2K QHD (1440p)
- Rozdzielczość kamery wewnętrznej: Pełna rozdzielczość HD (1080p)
- Rozdzielczość kamery tylnej: Pełna rozdzielczość HD (1080p)
- Rozmiar wyświetlacza: 3 cali
- Źródło zasilania: Superkondensator
- Moduł GPS: Zintegrowany
- Czujnik G: Tak
- Nagrywanie w pętli: Tak
- Tryb parkowania: Yes (requires continuous power)
- Wymiary (dł. x szer. x wys.): 10.5 x 3.5 x 3.5 cm (ok. 4.13 x 1.38 x 1.38 cala)
- Waga: 100 gramów (ok. 0.22 funta)
- Typ montażu: Uchwyt na szybę przednią (klej 3M)
- Kolor: Czarny
9. Gwarancja i wsparcie
The Neoline G-Tech X63 comes with a warranty certificate included in the package. Please refer to this document for specific warranty terms and conditions, including coverage period and claim procedures. For technical support, troubleshooting assistance beyond this manual, or service inquiries, please contact Neoline customer support through their official website or the contact information provided on your warranty certificate.
Keep your purchase receipt and warranty certificate in a safe place as proof of purchase may be required for warranty claims.