
1. Wprowadzenie
Dziękujemy za zakupasing the SONA 16-inch Stand Fan, Model SFS 1602T. This instruction manual provides important information regarding the safe operation, assembly, maintenance, and troubleshooting of your new fan. Please read this manual thoroughly before using the appliance and retain it for future reference.
2. Instrukcje bezpieczeństwa
Aby zmniejszyć ryzyko pożaru, porażenia prądem lub obrażeń ciała, zawsze należy przestrzegać poniższych podstawowych środków ostrożności:
- Upewnij się, że objętośćtagWartość podana na etykiecie znamionowej odpowiada napięciu zasilania sieciowegotage.
- Nie zanurzaj wentylatora, wtyczki ani przewodu w wodzie ani innych płynach.
- Odłączaj wentylator od gniazdka, gdy nie używasz go, gdy go przenosisz i przed czyszczeniem.
- Przechowuj wentylator w miejscu niedostępnym dla dzieci i zwierząt domowych.
- Nie należy używać wentylatora, jeśli przewód zasilający lub wtyczka są uszkodzone, ani jeśli wentylator nie działa prawidłowo, został upuszczony lub w jakikolwiek inny sposób uszkodzony.
- Avoid placing the fan near curtains, drapes, or other objects that may be drawn into the fan.
- Nie wkładaj palców ani żadnych przedmiotów do kratki, gdy wentylator pracuje.
- Ustaw wentylator na stabilnej i równej powierzchni, aby zapobiec jego przewróceniu.
- To urządzenie jest przeznaczone wyłącznie do użytku domowego.
3. Koniec produktuview
The SONA 16-inch Stand Fan SFS 1602T is designed to provide efficient air circulation with user-friendly features. It includes a robust full copper coil motor for reliable performance and durable ABS plastic blades.

Rysunek 1: Fully assembled SONA 16-inch Stand Fan SFS 1602T.

Rysunek 2: Nadview of the SONA SFS 1602T fan, highlighting its 50W power consumption and 16-inch blade diameter.

Rysunek 3: Illustration of the fan's full copper coil motor, designed for durability and efficient performance.
Kluczowe komponenty:
- Front and Rear Grilles: Protective covers for the fan blades.
- Łopatki wentylatora: Five durable ABS plastic blades.
- Obudowa silnika: Contains the full copper coil motor.
- Panel sterowania: Buttons for speed selection and a timer knob.
- Regulowany stojak: Allows for height and vertical angle adjustment.
- Opierać: Zapewnia stabilność wentylatora.
4. Instrukcja montażu
Aby złożyć wentylator stojący, wykonaj następujące czynności:
- Zamontuj podstawę: Secure the stand pole to the fan base using the provided fasteners.
- Montaż jednostki silnikowej: Attach the motor housing to the top of the stand pole, ensuring it is firmly seated.
- Install Rear Grille: Place the rear grille onto the motor housing, aligning the mounting holes. Secure it with the provided locking nut.
- Zamontuj łopatki wentylatora: Slide the fan blades onto the motor shaft, ensuring they are correctly oriented and secured with the blade cap.
- Install Front Grille: Position the front grille over the fan blades and secure it to the rear grille using the clips or screws provided, ensuring a tight fit.
5. Instrukcja obsługi
Familiarize yourself with the control panel to operate your fan effectively.

Rysunek 4: Control panel with timer and speed selections.

Rysunek 5: Fan demonstrating vertical neck adjustment and horizontal oscillation.
Włączanie/wyłączanie i wybór prędkości:
- Podłącz wentylator do odpowiedniego gniazdka elektrycznego.
- Press the desired speed button (1, 2, or 3) on the control panel to turn on the fan and select the airflow intensity. '1' is the lowest speed, '3' is the highest.
- Press the '0' button to turn off the fan.
Funkcja timera:
- Rotate the timer knob clockwise to set the desired operating time, up to 120 minutes.
- Po upływie ustawionego czasu wentylator wyłączy się automatycznie.
- To operate continuously, set the timer to the 'ON' position (usually indicated by an infinity symbol or a specific mark beyond 120 minutes).
Oscylacja:
- To activate horizontal oscillation, press down the oscillation knob located on top of the motor housing.
- To stop oscillation and fix the fan in one direction, pull up the oscillation knob.
Regulacja kąta pionowego:
- Loosen the tilt adjustment knob (usually located on the side of the motor housing).
- Adjust the fan head to the desired upward or downward angle.
- Tighten the tilt adjustment knob to secure the fan head in position.
Regulacja wysokości:
- Loosen the height adjustment collar on the stand pole.
- Ustaw wewnętrzny słupek na żądaną wysokość.
- Tighten the height adjustment collar firmly to secure the fan at the new height.
6. Konserwacja i czyszczenie
Regularne czyszczenie i konserwacja zapewnią optymalną wydajność i wydłużą żywotność wentylatora.
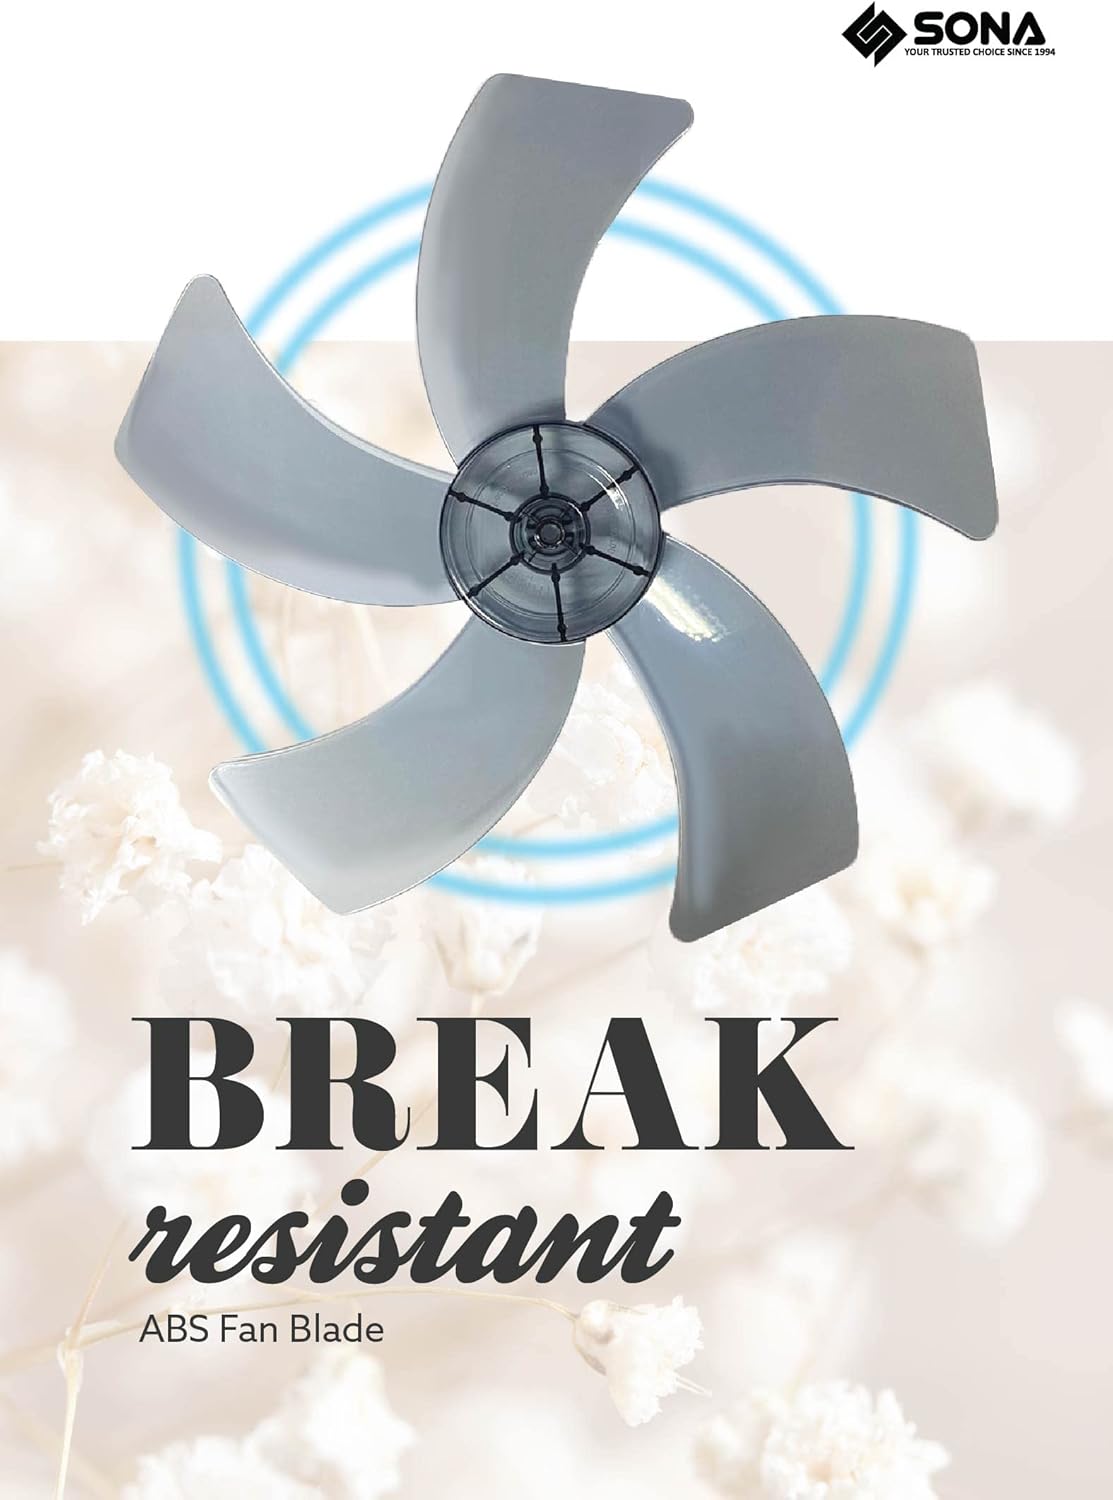
Rysunek 6: Durable ABS plastic fan blades.
- Zawsze odłączaj wentylator od zasilania odłączyć od gniazdka elektrycznego przed czyszczeniem.
- Czyszczenie zewnętrzne: Wytrzyj zewnętrzne powierzchnie wentylatora miękką,amp ściereczka. Nie należy używać środków czyszczących o właściwościach ściernych ani rozpuszczalników.
- Grille and Blades Cleaning: To clean the fan blades and inside the grilles, you may need to remove the front grille. Refer to the assembly instructions for reverse steps. Carefully wipe the blades and grilles with a damp cloth or use a soft brush to remove dust. Ensure all parts are completely dry before reassembling and operating the fan.
- Składowanie: Jeśli wentylator nie będzie używany przez dłuższy czas, należy przechowywać go w chłodnym i suchym miejscu, najlepiej w oryginalnym opakowaniu, aby chronić go przed kurzem.
7. Rozwiązywanie Problemów
Jeśli masz problemy z wentylatorem, zapoznaj się z poniższymi typowymi problemami i rozwiązaniami:
| Problem | Możliwa przyczyna | Rozwiązanie |
|---|---|---|
| Wentylator się nie włącza. | Brak zasilania. Timer is set to 'OFF' or has expired. | Sprawdź, czy wentylator jest prawidłowo podłączony do sprawnego gniazdka. Ensure the timer is set to 'ON' or a desired duration. |
| Słaby przepływ powietrza. | Fan blades or grilles are dirty. Wentylator jest ustawiony na niską prędkość. | Clean the fan blades and grilles as per maintenance instructions. Zwiększ ustawienie prędkości wentylatora. |
| Nietypowy dźwięk podczas pracy. | Luźne części. Przeszkoda w łopatkach wentylatora. | Ensure all assembly parts are securely tightened. Unplug the fan and check for any foreign objects obstructing the blades. |
| Oscylacja nie działa. | Oscillation knob is not pressed down. | Press the oscillation knob down firmly to engage the oscillation function. |
Jeśli po wypróbowaniu tych rozwiązań problem nadal występuje, skontaktuj się z obsługą klienta.
8. Specyfikacje
| Marka | Sona |
| Model | SFS 1602T |
| Projekt wentylatora elektrycznego | Wentylator podłogowy |
| Źródło zasilania | Elektryczny przewodowy |
| Liczba prędkości | 3 |
| Liczba ostrzy | 5 |
| Tworzywo | Plastic (ABS Fan Blade) |
| Typ montażu | Montaż na podłodze |
| Regulator czasowy | Do 120 minut |
| Oscylacja | Oscylacja pozioma |
| Dostosowania | Vertical Neck Adjustment, Height Adjustment |
9. Gwarancja i wsparcie
For warranty information or technical support, please refer to the warranty card included with your product or contact SONA customer service directly. Keep your purchase receipt as proof of purchase for any warranty claims.

