
1. Koniec produktuview
The Xigmatek LUX S Arctic (Model EN48298) is a mid-tower PC case designed for computer enthusiasts and gamers. It features a distinctive triangular mesh front panel for optimal airflow and comes equipped with four 120mm X24A A-RGB fans to provide efficient cooling and customizable lighting. The case supports Micro ATX motherboards and is constructed with durable materials, including tempered glass for a clear view komponentów wewnętrznych.
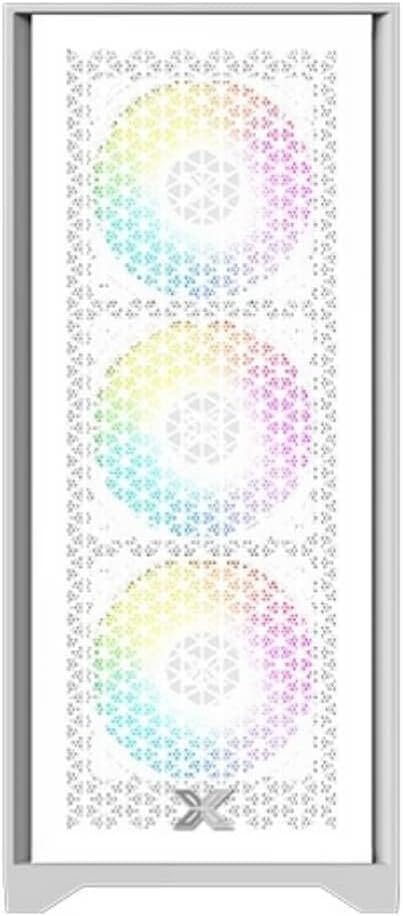
Rysunek 1.1: Przód view of the Xigmatek LUX S Arctic PC case, showcasing the triangular mesh design and the pre-installed A-RGB fans.
2. Zawartość opakowania
Before proceeding with installation, please ensure all components listed below are present in your package. If any items are missing or damaged, contact your retailer or Xigmatek support.
- Xigmatek LUX S Arctic Mid-Tower PC Case
- 4 x 120mm X24A A-RGB Fans (pre-installed)
- Accessory box (screws, cable ties, standoffs, user manual)
3. Konfiguracja i instalacja
Follow these steps to install your computer components into the Xigmatek LUX S Arctic PC case. Ensure your system is powered off and unplugged before beginning any installation.
3.1. Przygotowanie sprawy
- Połóż obudowę na płaskiej i stabilnej powierzchni.
- Carefully remove the tempered glass side panel by unscrewing the thumb screws at the rear of the case and gently pulling the panel away.
- Remove the opposite side panel (metal) in a similar manner to access the cable management area.

Rysunek 3.1: Wnętrze view obudowy komputera, pokazujący przestronny układ umożliwiający instalację podzespołów.
3.2. Instalacja płyty głównej
- Install the I/O shield that came with your motherboard into the designated opening at the rear of the case.
- Align your Micro ATX motherboard with the pre-installed standoffs. Ensure all screw holes on the motherboard match the standoffs.
- Zamocuj płytę główną za pomocą dołączonych śrub z pudełka z akcesoriami. Nie dokręcaj ich zbyt mocno.
3.3. Instalacja zasilacza (PSU)
- Locate the PSU mounting area at the rear bottom of the case.
- Slide your PSU into the bay from the rear, ensuring the fan faces the bottom (if the case has a filtered intake) or upwards.
- Przymocuj zasilacz za pomocą śrub znajdujących się na zewnątrz tylnej części obudowy.
3.4. Instalacja dysku pamięci masowej
The case supports various storage configurations. Refer to the accessory box for specific mounting hardware.
- Dyski SSD 2.5": Mount SSDs to the designated brackets behind the motherboard tray.
- Dyski twarde 3.5": Zainstaluj dyski twarde w klatce dysków znajdującej się pod osłoną zasilacza.

Rysunek 3.2: Wnętrze tylne view, highlighting cable management cutouts and storage drive mounting locations.
3.5. Instalacja karty rozszerzeń (GPU itp.)
- Zdejmij niezbędne osłony gniazd PCIe z tyłu obudowy.
- Insert your expansion card (e.g., graphics card) into the corresponding PCIe slot on your motherboard until it clicks into place.
- Secure the card with a screw to the case chassis.
3.6. Zarządzanie kablami i połączenia
Connect all necessary cables from the PSU to your motherboard and components. Utilize the cable routing cutouts and tie-down points behind the motherboard tray for a clean build and improved airflow.
- Connect front panel headers (Power SW, Reset SW, HDD LED, Power LED) to the motherboard.
- Connect USB 2.0 and USB 3.0 headers to the motherboard.
- Connect audio header to the motherboard.
- Connect the pre-installed A-RGB fans to your motherboard's A-RGB header or a compatible controller. Ensure power is supplied to the fan hub/controller if applicable.
4. Instrukcja obsługi
Po zainstalowaniu wszystkich komponentów i podłączeniu kabli można włączyć system.
- Replace both side panels and secure them with their respective screws.
- Connect your monitor, keyboard, mouse, and power cable to the rear of your PC.
- Flip the power switch on your PSU to the 'ON' position.
- Press the power button on the front panel of the case.
- The pre-installed A-RGB fans will illuminate. You can control their lighting effects via your motherboard's software (if connected to an A-RGB header) or a dedicated controller (if included with the fans or purchased separately).
5. Konserwacja
Regularna konserwacja pomaga zapewnić optymalną wydajność i długowieczność podzespołów komputera.
- Filtry przeciwpyłowe: The Xigmatek LUX S Arctic case likely includes removable dust filters (e.g., top, bottom, front). Clean these filters every 1-3 months, depending on your environment, by gently brushing or washing them with water and allowing them to dry completely before reinstallation.
- Czyszczenie wnętrza: Periodically (every 6-12 months), open the case and use compressed air to remove dust buildup from fans, heatsinks, and other components. Hold fan blades gently to prevent them from spinning too fast during cleaning.
- Czyszczenie zewnętrzne: Przetrzyj zewnętrzne powierzchnie miękką, damp cloth. Avoid harsh chemicals that may damage the finish or tempered glass.
6. Rozwiązywanie Problemów
If you encounter issues with your PC build, refer to these common troubleshooting steps.
- System się nie włącza:
- Upewnij się, że przełącznik zasilacza jest w pozycji „ON”.
- Check all power cables (24-pin ATX, 8-pin CPU, GPU power) are securely connected.
- Verify front panel power switch header is correctly connected to the motherboard.
- Wentylatory nie kręcą się/RGB się nie świeci:
- Check fan power connections to the motherboard or fan hub.
- Ensure A-RGB cables are correctly connected to the motherboard's A-RGB header or controller.
- Verify that any fan hub or controller is receiving power.
- Brak wyjścia wyświetlacza:
- Ensure your monitor cable is connected to the graphics card (not the motherboard's integrated graphics ports, unless you are using integrated graphics).
- Ponownie włóż kartę graficzną do gniazda PCIe.
- Check graphics card power connections.
For more complex issues, consult your motherboard manual or component manufacturer's support resources.
7. Specyfikacje
| Funkcja | Szczegół |
|---|---|
| Marka | Xigmatek |
| Nazwa modelu | LUX S Arctic |
| Numer modelu | EN48298 |
| Typ sprawy | Średnia wieża |
| Kolor | Arktyczna biel |
| Tworzywo | Tempered Glass (side panel) |
| Zgodność płyty głównej | Mikro ATX |
| Fabrycznie zainstalowane wentylatory | 4 x 120mm X24A A-RGB Fans |
| Metoda chłodzenia | Powietrze |
| Wejście / wyjście na panelu przednim | 2 x USB ports (type not specified, typically USB 2.0/3.0), Audio Jacks |
| Montaż zasilacza | Rear Mount (bottom) |
| Zalecane zastosowanie | Hazard |
8. Gwarancja i wsparcie
For information regarding warranty coverage, technical support, or replacement parts, please refer to the warranty card included with your product or visit the official Xigmatek webstrona.