Ważne informacje dotyczące bezpieczeństwa
Przed montażem i użyciem należy uważnie przeczytać wszystkie instrukcje. Zachowaj tę instrukcję do wykorzystania w przyszłości.
- Przed rozpoczęciem montażu należy upewnić się, że wszystkie części są obecne i nieuszkodzone.
- Nie dokręcaj śrub zbyt mocno, gdyż może to uszkodzić materiał.
- Do not overload the table or drawers. The maximum load capacity for the tabletop is 48 kg, and for each drawer is 6 kg.
- Nie stawaj na stole.
- Aby uniknąć ryzyka zadławienia, podczas montażu małe części należy trzymać z dala od dzieci.
- Aby zapobiec zarysowaniom, należy montować na miękkiej i czystej powierzchni.
Lista części
Sprawdź, czy w opakowaniu znajdują się wszystkie elementy. Jeśli brakuje którejkolwiek części lub jest ona uszkodzona, skontaktuj się z obsługą klienta.
- Main Panels (Top, Bottom, Sides, Back)
- Panele szuflad (przód, tył, boki, dół)
- Drawer Slides (Left and Right)
- Hardware (Screws, Dowels, Cam Locks, Knobs)
- Nogi

Figure 1: All components included in the package, ready for assembly.
Instrukcja montażu
Follow these steps carefully to assemble your Yaheetech 3-Drawer Nightstand. Refer to the included hardware and panel labels (e.g., A, B, C, D, E, F, G for hardware; 1-12 for panels) for identification.
Video 1: Comprehensive assembly guide for the Yaheetech 3-Drawer Nightstand.
Step 1: Prepare Drawer Panels
- Insert cam lock screws (A) into the designated holes on the drawer front panels (Part 8).
- Attach the side panels (Parts 9, 10) to the drawer front panel (Part 8) using dowels (D) and cam locks (C). Ensure the grooves for the drawer bottom are facing inwards and aligned.
- Slide the drawer bottom panel (Part 12) into the grooves of the assembled drawer sides.
- Attach the drawer back panel (Part 11) to complete the drawer box, securing it with dowels (D) and cam locks (C).
- Insert the knob screw (F) from the inside of the drawer front panel (Part 8) and attach the metal knob (E) from the outside. Tighten securely.
- Attach the drawer slides (H-2(R) and H-2(L)) to the outer sides of each assembled drawer using screws (G). Ensure the roller is at the front of the drawer.
- Repeat these steps for all three drawers.

Figure 2: Assembled drawers with knobs and slides attached, demonstrating storage capacity.
Krok 2: Złóż ramę główną
- Insert cam lock screws (A) into the designated holes on the top panel (Part 1) and bottom panel (Part 5).
- Attach the main frame slides (H-1(L) and H-1(R)) to the inner sides of the side panels (Parts 2, 3) using screws (G). Ensure the roller is at the front of the nightstand.
- Insert dowels (D) into the top of the legs (Parts 4, 6).
- Attach the side panels (Parts 2, 3) to the bottom panel (Part 5) by aligning the dowels and cam lock screws. Secure with cam locks (C).
- Slide the back panel (Part 7) into the designated grooves on the main frame.
- Attach the top panel (Part 1) to the assembled frame, aligning the dowels and cam lock screws. Secure with cam locks (C).

Figure 3: Main frame assembly with overall dimensions.
Krok 3: Włóż szuflady
Carefully slide each assembled drawer into the main frame, aligning the drawer slides on the drawer with the slides on the frame. Push firmly until the drawer is fully seated. Test each drawer for smooth operation.
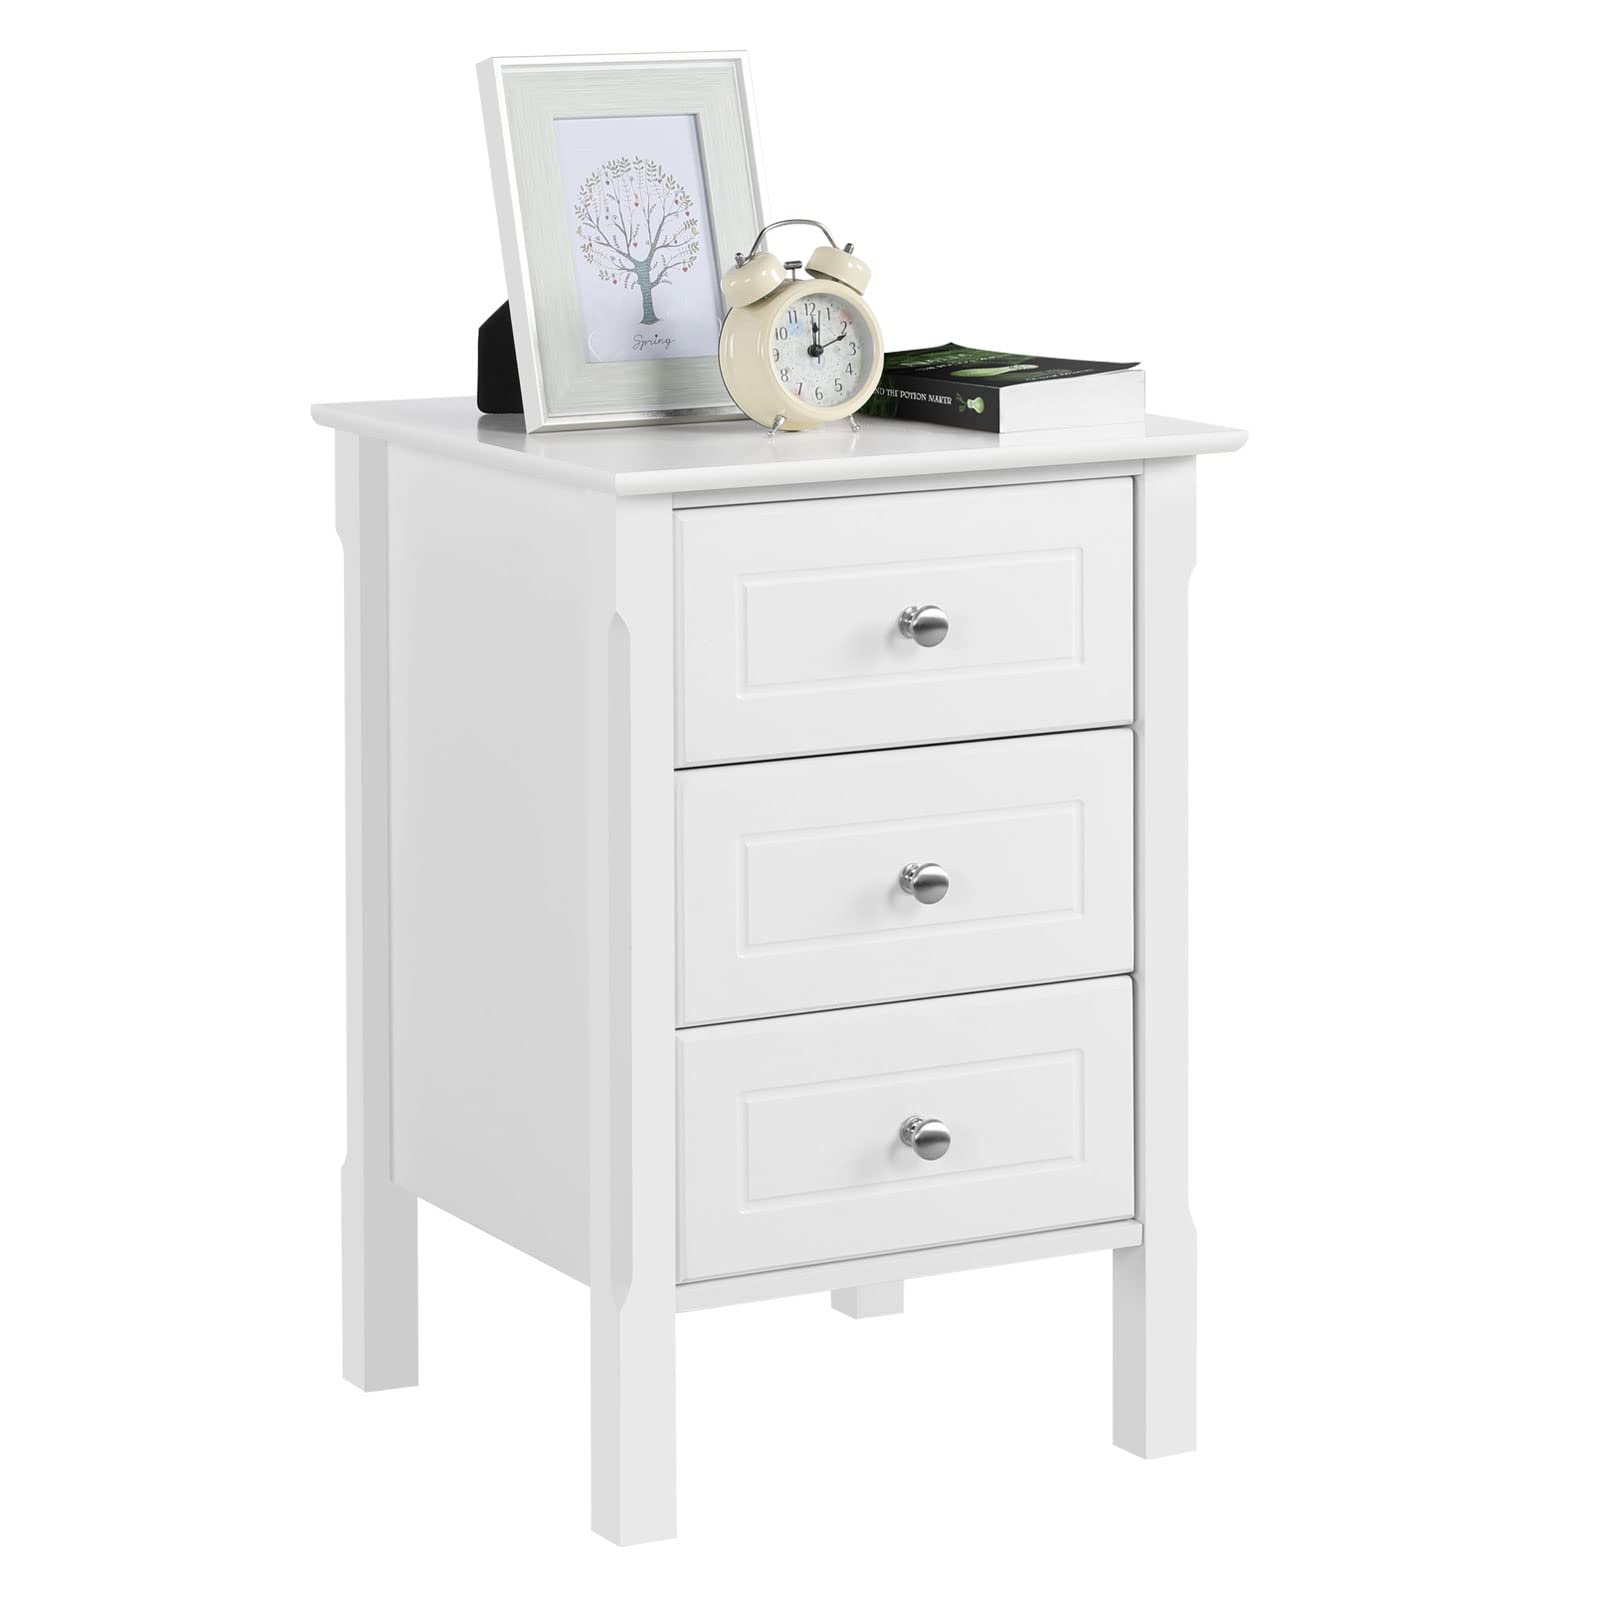
Figure 4: Fully assembled nightstand ready for use.
Instrukcja obsługi
The Yaheetech 3-Drawer Nightstand is designed for convenient storage and display in various settings.
- Kalesony: Trzy szuflady zapewniają ample enclosed storage for personal items, books, chargers, and other essentials. Pull the metal knobs gently to open and push to close.
- Górna powierzchnia: Use the top surface to place lamps, alarm clocks, decorative items, or beverages. Ensure items are placed stably.

Figure 5: Nightstand in a living room setup, demonstrating versatile use.
Konserwacja i pielęgnacja
Właściwa pielęgnacja zapewni trwałość i piękny wygląd Twojej szafki nocnej.
- Czyszczenie: The surface is designed to be scratch and water-resistant. For daily cleaning, simply wipe with a soft, damp ściereczką. Unikaj środków czyszczących o działaniu ściernym i silnych środków chemicznych.
- Wycieki: Wipe up spills immediately to prevent moisture damage, especially on unsealed edges or inside drawers.
- Światło słoneczne: Unikaj długotrwałego wystawiania na bezpośrednie działanie promieni słonecznych, aby zapobiec blaknięciu lub odbarwieniu powłoki.
- Ciepło: Nie kładź gorących przedmiotów bezpośrednio na powierzchni. Używaj podstawek lub podkładek ochronnych.
- Sprzęt komputerowy: Okresowo sprawdzaj wszystkie śruby i łączniki, aby upewnić się, że są dobrze dokręcone. W razie potrzeby dokręć.
Rozwiązywanie problemów
Jeśli napotkasz jakiekolwiek problemy ze swoją szafką nocną, zapoznaj się z poniższymi, często stosowanymi rozwiązaniami:
- Chwiejny stół: Check all leg and frame connections. Ensure all screws and cam locks are securely tightened. Adjust if necessary.
- Przyklejanie szuflad:
- Sprawdź, czy prowadnice szuflad są prawidłowo wyrównane i czy nie ma na nich żadnych przeszkód.
- Verify that the drawer slides are securely attached to both the drawer and the main frame.
- Check if the drawer is overloaded. Remove some items to see if it improves.
- Uszkodzona powierzchnia: For minor scratches, touch-up pens or furniture repair kits may be used. For significant damage, contact customer support.
Specyfikacje
| Funkcja | Szczegół |
|---|---|
| Marka | Yaheetech |
| Numer modelu | 592513 |
| Wymiary produktu (Gł. x Szer. x Wys.) | 40 cm x 40 cm x 60 cm (15.7 x 15.7 x 23.6 cala) |
| Waga produktu | 12 kg (26.4 funta) |
| Maximum Recommended Weight (Tabletop) | 48 kg (105.8 funta) |
| Maximum Recommended Weight (Each Drawer) | 6 kg (13.2 funta) |
| Materiał ramy | Drewno |
| Materiał wierzchni | Drewno inżynieryjne (MDF) |
| Kolor | Biały |
| Kształt | Prostokątny |
| Styl | 3 Szuflady |
| Wykończenie obróbki | Błyszczący |
| Wymagany montaż | Tak |
| Typ bazowy | Nogi |
| Cechy specjalne | Z miejscem do przechowywania |
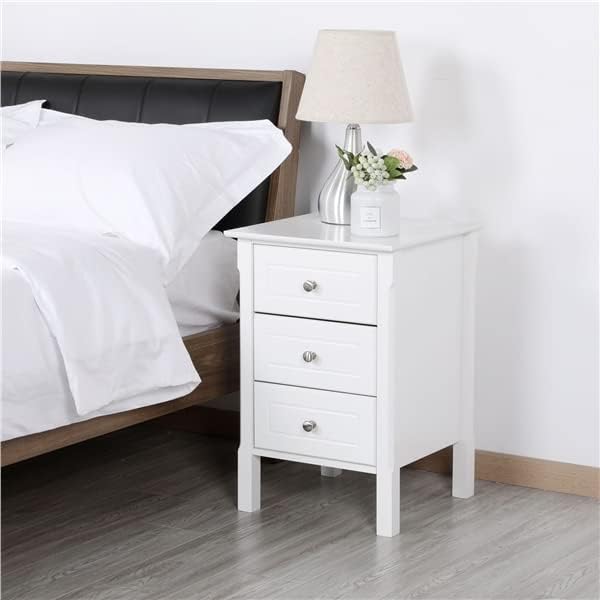
Figure 6: Detailed dimensions of the nightstand.
Gwarancja i wsparcie
Aby uzyskać informacje dotyczące gwarancji lub obsługi klienta, zapoznaj się z danymi kontaktowymi podanymi przy zakupie lub odwiedź oficjalną stronę Yaheetech webZachowaj dowód zakupu na wypadek roszczeń gwarancyjnych.


