
1. Wprowadzenie
This manual provides detailed instructions for the installation, operation, and maintenance of the Walfront HF020-7X1T1M Stepper Motor Motion Controller Module. This module is designed for precise control of stepper motors in various industrial automation applications.
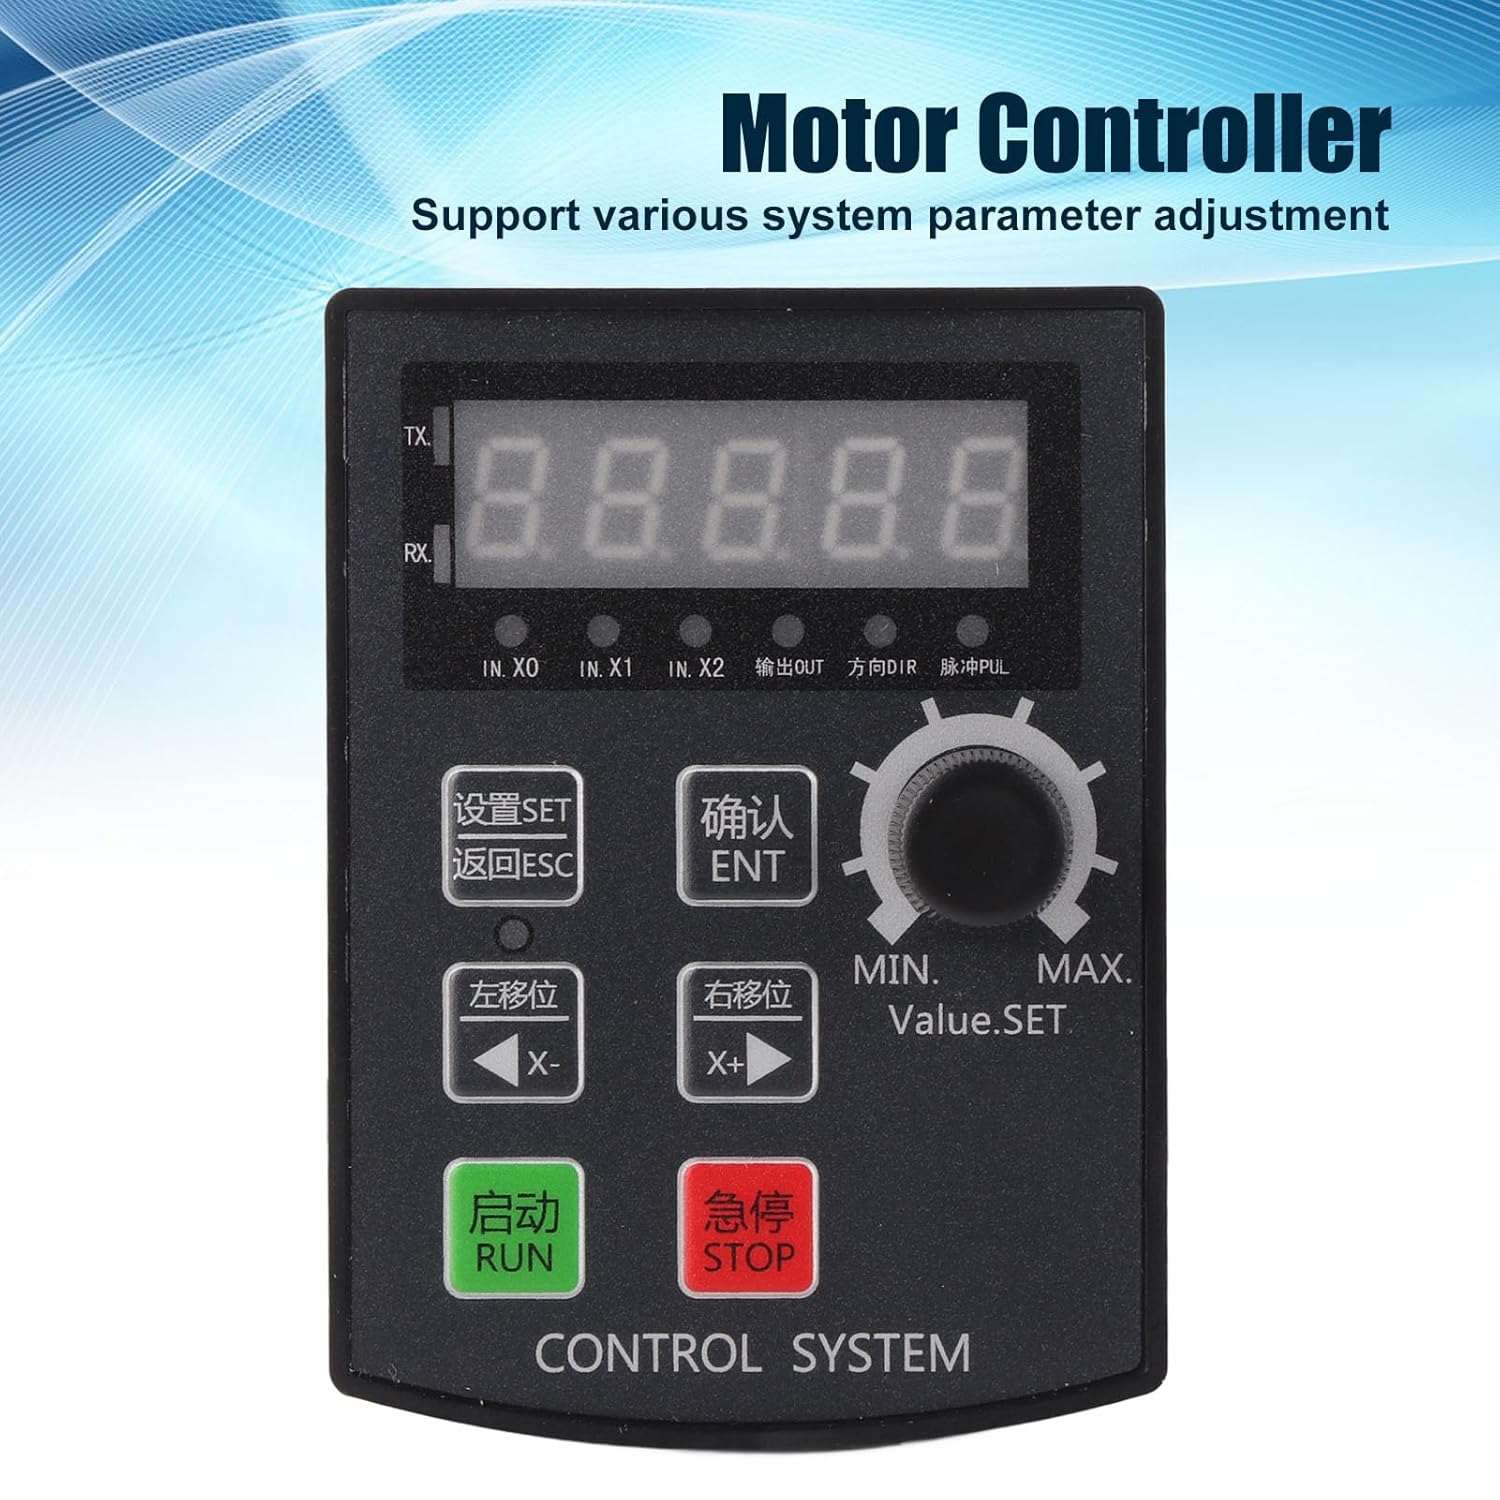
Rycina 1: Przód view of the Walfront HF020-7X1T1M Stepper Motor Motion Controller Module, showing the 5-digit display and control buttons.
2. Główne cechy
- Kontrola parametrów: Supports precise positioning, angle, and revolution control, along with various system parameter adjustments.
- Debugging Convenience: Allows for manual motor movement, simplifying the debugging process.
- Szerokie zastosowanie: Suitable for industrial automation control, small machinery and equipment, automatic painting systems, and rotary indexing tools.
- High Pulse Frequency: Operates with a motor pulse frequency of 85 KHz.
- Zgodność ze sterownikami: The 24V motor pulse voltage collector can be directly connected to 5-24V drivers.
- Wyczyść wyświetlacz: Features a 5-digit digital screen with a high-brightness digital tube for clear information display and positive/negative limit communication.
3. Specyfikacje
| Parametr | Wartość |
|---|---|
| Model produktu | HF020-7X1T1M |
| Tworzywo | ABS |
| Objętość operacyjnatage | DC 12-24V |
| Rozmiar otworu | Approx. 92 x 69.8 mm / 3.62 x 2.75 inches |
| Środowisko operacyjne | -5℃ to 60℃ (non-condensing) |
| Motor Pulse Frequency | 85 kHz |
| Motor Pulse Voltage | 24V collector (directly connectable to 5-24V driver) |
| Struktura wyświetlania | 5-digit, high-brightness digital tube |
| Wyjścia | 2 outputs (0V output voltage) |
| Wejścia | 7 inputs (0V as valid signal) |
| Wymiary opakowania | Wymiary 15.1 x 10.4 x 4.2 cm |
| Waga | 120 gramów |
| Kraj pochodzenia | Chiny |
4. Konfiguracja i instalacja
Proper installation and wiring are crucial for the safe and effective operation of the controller module. Ensure all connections are secure and follow electrical safety guidelines.
4.1 Fizyczna instalacja
The module is designed for panel mounting. Cut an opening of approximately 92 x 69.8 mm (3.62 x 2.75 inches) in your control panel. Insert the module and secure it using the provided mounting hardware.

Rysunek 2: Góra view of the controller module, showing the removable green terminal blocks for wiring connections.
4.2 połączeń przewodów
Connect the power supply, motor driver, and input/output signals to the corresponding terminal blocks on the module. The module operates on DC 12-24V. The motor pulse voltage collector is 24V and can be directly connected to 5-24V drivers. Ensure correct polarity for the power supply.
- Pobór mocy: Connect DC 12-24V to the designated power terminals.
- Motor Driver Connection: Connect the pulse (PUL) and direction (DIR) signals to your stepper motor driver. The module provides 85 KHz pulse frequency.
- Inputs (IN.X0, IN.X1, IN.X2, etc.): The module has 7 inputs. A 0V signal is considered valid for these inputs.
- Wyjścia: The module provides 2 outputs with 0V output voltage.

Rysunek 3: Kątowy view of the module's rear, highlighting the terminal blocks for input, output, and power connections.
5. Instrukcja obsługi
The HF020-7X1T1M controller features a user-friendly interface with a 5-digit display and dedicated buttons for various functions.

Figure 4: Close-up of the control panel, showing the display, rotary encoder, and function buttons for setting parameters and controlling motor movement.
5.1 Panel sterowania ponadview
- 5-cyfrowy wyświetlacz: Shows current values, parameters, and status.
- Przycisk SET: Wchodzi w tryb ustawiania parametrów.
- Przycisk ESC: Wychodzi z bieżącego menu lub anuluje operację.
- ENT (OK) Button: Potwierdza wybór lub przechodzi do podmenu.
- X- (Left Shift) Button: Moves cursor left or decreases value.
- X+ (Right Shift) Button: Moves cursor right or increases value.
- Przycisk URUCHOM: Inicjuje działanie silnika.
- Przycisk stopu: Zatrzymuje pracę silnika.
- Rotary Encoder (Value.SET): Adjusts numerical values or navigates menus.
5.2 Regulacja parametrów
Aby dostosować parametry systemu:
- Naciśnij USTAWIĆ przycisk, aby wejść w tryb ustawiania parametrów.
- Użyj Enkoder obrotowy or X- / X+ buttons to navigate through parameters.
- Naciskać laryngologia to select a parameter for editing.
- Dostosuj wartość za pomocą Enkoder obrotowy or X- / X+ pikolak.
- Naciskać laryngologia aby potwierdzić nową wartość.
- Naciskać ESC aby wyjść z trybu ustawiania parametrów.
5.3 Manual Motor Movement
For debugging or precise manual control, the module supports manual motor movement:
- Ensure the motor is connected and powered.
- Użyj X- I X+ buttons to manually jog the motor in the desired direction.
- The speed of manual movement may be adjustable in parameters.
6. Konserwacja
The Walfront HF020-7X1T1M module is designed for durability and requires minimal maintenance. Adhering to these guidelines will ensure its longevity and reliable performance.
- Czyszczenie: Utrzymuj moduł w czystości, bez kurzu i zanieczyszczeń. Do czyszczenia używaj miękkiej, suchej ściereczki. Unikaj stosowania płynnych środków czyszczących i rozpuszczalników.
- Warunki środowiskowe: Operate the module within the specified temperature range of -5℃ to 60℃ and in a non-condensing environment. Protect it from excessive moisture, direct sunlight, and corrosive substances.
- Kontrola połączenia: Okresowo sprawdzaj wszystkie połączenia przewodów, aby mieć pewność, że są solidne i nie są skorodowane ani uszkodzone.
- Aktualizacje oprogramowania układowego: Sprawdź producenta webOdwiedź naszą witrynę, aby sprawdzić dostępne aktualizacje oprogramowania sprzętowego. Podczas aktualizacji postępuj zgodnie z instrukcjami.
7. Rozwiązywanie Problemów
This section provides guidance for common issues you might encounter with the HF020-7X1T1M module.
7.1 Controller Version ViewMetoda
Do view the controller's version number:
- Naciśnij i przytrzymaj ENT (OK) klawisz.
- Podczas trzymania laryngologia, power on the module.
- The version number will be displayed on the screen, for exampLe, [21.100].
- The first two digits (e.g., 21) indicate the year (e.g., 2021).
- The next two digits (e.g., 10) indicate the month (e.g., October).
- The last digit (e.g., 0) indicates the version without RS485 communication, while 8 indicates a version with RS485 communication.
7.2 Typowe problemy
- Brak zasilania: Check the DC 12-24V power supply connection and ensure correct polarity. Verify the power source is active.
- Silnik nie porusza się: Verify motor driver connections (PUL, DIR), power to the motor driver, and motor wiring. Check if the RUN command has been issued and if parameters are set correctly.
- Nieprawidłowy ruch: Review the direction and step parameters. Ensure the motor driver is configured correctly for the stepper motor.
- Wyświetlane błędy: If the display shows unusual characters or no information, try restarting the module. If the issue persists, contact support.
8. Gwarancja i wsparcie
For warranty information, technical support, or service inquiries, please refer to the documentation provided with your purchase or contact Walfront customer service through their official channels. Keep your purchase receipt for warranty claims.