1. Wprowadzenie
Thank you for choosing the LUX-TOOLS 1 PowerSystem A-EAS-20/156 Cordless Pruning Saw. This manual provides essential information for the safe assembly, operation, maintenance, and troubleshooting of your new tool. Please read these instructions carefully before using the product and keep them for future reference. This pruning saw is designed for cutting branches and small wood in garden and landscaping applications.
2. Instrukcje bezpieczeństwa
Zawsze przestrzegaj podstawowych zasad bezpieczeństwa, aby zmniejszyć ryzyko pożaru, porażenia prądem i obrażeń ciała. Nieprzestrzeganie tych instrukcji może spowodować poważne obrażenia.
2.1 Ogólne bezpieczeństwo elektronarzędzi
- Bezpieczeństwo w miejscu pracy: Utrzymuj miejsce pracy w czystości i dobrym oświetleniu. Zagracone lub ciemne pomieszczenia sprzyjają wypadkom. Nie używaj elektronarzędzi w atmosferach wybuchowych, takich jak łatwopalne ciecze, gazy lub pyły.
- Bezpieczeństwo elektryczne: Unikaj kontaktu ciała z powierzchniami uziemionymi (np. rurami, grzejnikami, kuchenkami, lodówkami). Nie wystawiaj elektronarzędzi na działanie deszczu ani wilgoci.
- Bezpieczeństwo osobiste: Always wear appropriate personal protective equipment (PPE) including safety glasses, hearing protection, gloves, and sturdy footwear. Dress properly; avoid loose clothing or jewelry that can get caught in moving parts.
2.2 Pruning Saw Specific Safety
- Utrzymaj mocny chwyt: Always hold the saw firmly with both hands during operation.
- Zapobieganie odrzutom: Be aware of kickback, which can occur when the tip of the guide bar touches an object, or when the wood closes in and pinches the saw chain in the cut.
- Wyczyść obszar roboczy: Ensure no bystanders, children, or pets are in the work area. Keep a safe distance from other people and animals.
- Stabilne podłoże: Work only from a stable and secure position. Do not overreach.
- Bezpieczeństwo baterii: Use only LUX-TOOLS 1 PowerSystem 20V batteries and chargers. Do not expose batteries to extreme heat or fire.
3. Koniec produktuview
Familiarize yourself with the components of your LUX-TOOLS A-EAS-20/156 Cordless Pruning Saw.

The LUX-TOOLS 1 PowerSystem A-EAS-20/156 cordless pruning saw, shown with its battery attached, chain cover, and a small screwdriver for adjustments.

Na bok view of the pruning saw, illustrating its compact design, ergonomic handle, and the protective guard over the chain.
3.1 Składniki
- Prowadnica
- Piła łańcuchowa
- Osłona łańcucha
- Uchwyt ergonomiczny
- Wyłącznik bezpieczeństwa
- Przełącznik wyzwalający
- Komora baterii
- Chain Tensioning Knob (Tool-free)
- Protective Hand Guard
- Śrubokręt (do drobnych regulacji)
4. Konfiguracja
Before first use, ensure all components are present and undamaged. The saw is part of the LUX-TOOLS 1 PowerSystem and requires a compatible 20V battery (sold separately).
4.1 Montaż i demontaż baterii

A close-up of the LUX-TOOLS 1 PowerSystem 20V Lithium-ion battery pack, which powers the pruning saw.
- Instalacja: Align the battery pack with the battery compartment on the saw. Slide the battery into the compartment until it clicks securely into place. Ensure it is fully seated.
- Usuwanie: Press the battery release button (usually located on the battery pack itself) and slide the battery out of the compartment.
4.2 Chain and Guide Bar Assembly
The LUX-TOOLS A-EAS-20/156 features tool-free chain tensioning for easy setup.

Szczegółowy view of the saw's chain and guide bar, featuring the LUX-TOOLS logo, demonstrating the cutting mechanism.
- Ensure the battery is removed before handling the chain or guide bar.
- Place the saw chain around the guide bar, ensuring the cutting edges face the correct direction (refer to markings on the chain and guide bar).
- Fit the guide bar and chain onto the saw body, engaging the drive sprocket.
- Adjust the chain tension using the tool-free tensioning knob until the chain is snug but can still be pulled freely around the guide bar by hand. There should be no slack on the underside of the guide bar, but the chain should not be overly tight.
- Secure the guide bar cover.
5. Obsługa
Always wear appropriate safety gear (safety glasses, gloves, hearing protection) before operating the saw.
5.1 Uruchamianie i zatrzymywanie piły
- Zacząć: Press and hold the safety switch (usually located on the handle) with one hand, then squeeze the trigger switch with the same hand. The saw chain will begin to move.
- Zatrzymać: Release the trigger switch. The chain will stop quickly.
5.2 Techniki cięcia

An image depicting the cordless pruning saw in action, cutting through a piece of wood, with sawdust visible, illustrating its cutting capability.

The pruning saw being used to cut a branch directly on a tree, highlighting its suitability for garden pruning tasks.
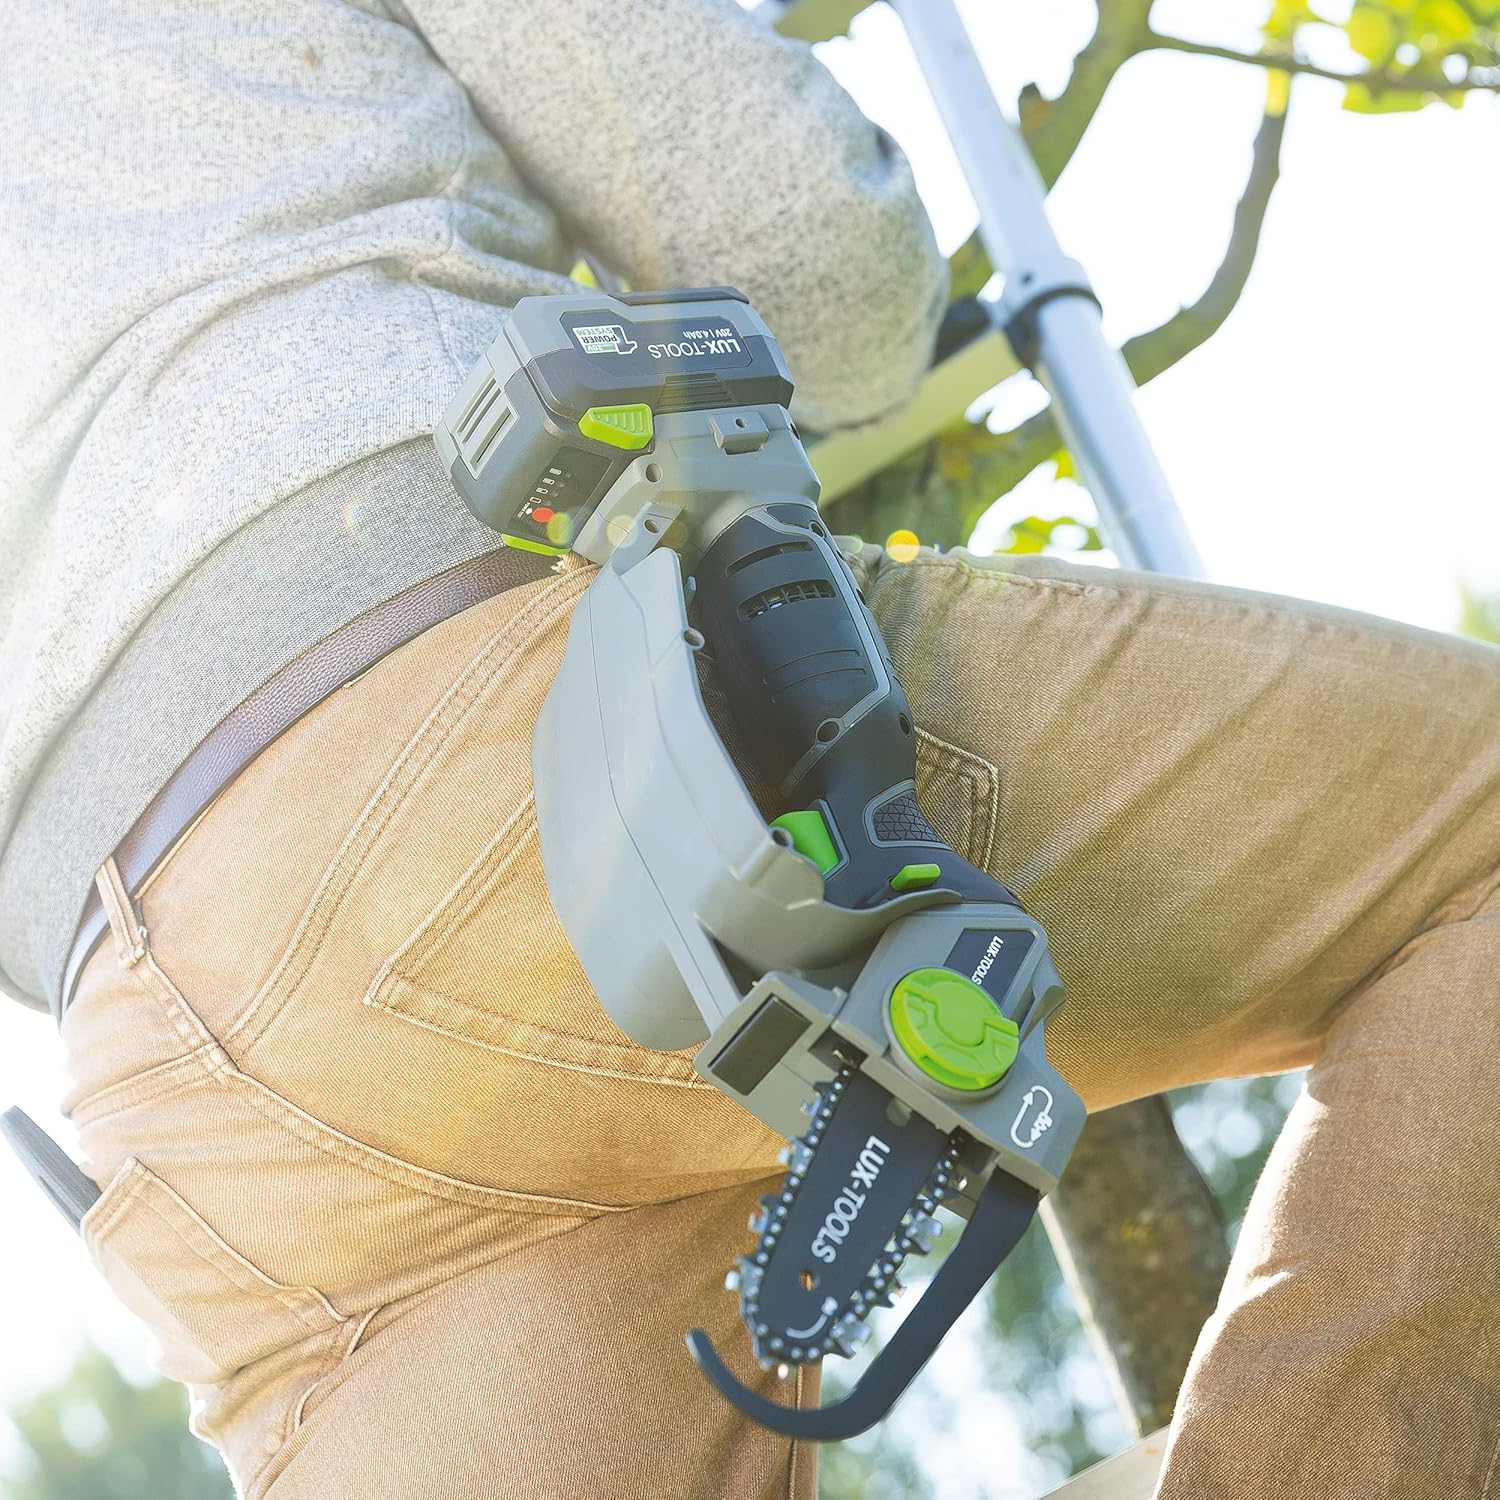
A user on a ladder operating the cordless pruning saw to trim higher branches, showcasing the tool's portability and ease of use for elevated tasks.
- Małe oddziały: For small branches, position the saw firmly against the branch and allow the saw to do the work. Do not force the cut.
- Większe oddziały: For thicker branches, make a relief cut on the underside first to prevent pinching or splintering, then complete the cut from the top.
- Unikaj odrzutu: Always be aware of the guide bar tip. Avoid contact with other objects or the ground.
- Praca nad głową: When working overhead, ensure stable footing and be mindful of falling debris. Consider using a ladder if necessary, ensuring it is stable.
6. Konserwacja
Regularna konserwacja zapewnia optymalną wydajność i wydłuża żywotność piły do przycinania. Zawsze wyjmuj akumulator przed przystąpieniem do jakichkolwiek czynności konserwacyjnych.
6.1 Czyszczenie
- Po każdym użyciu należy oczyścić korpus piły za pomocąamp płótno.
- Remove sawdust and debris from the guide bar groove and around the sprocket.
- Upewnij się, że otwory wentylacyjne są drożne.
6.2 Smarowanie łańcucha
The saw chain requires regular lubrication to reduce friction and wear. Apply chain oil to the guide bar groove and chain links before and during extended use.
6.3 Ostrzenie i wymiana łańcucha

A hand demonstrating the proper way to hold the pruning saw with the chain cover securely in place, emphasizing safety during handling and storage.
- A dull chain will reduce cutting efficiency and increase strain on the motor. Sharpen the chain regularly or replace it when necessary. Refer to the chain manufacturer's instructions for sharpening.
- When replacing the chain, ensure it is the correct size and type for your A-EAS-20/156 model.
6.4 Przechowywanie
- Always install the chain cover before storing or transporting the saw.
- Store the saw in a dry, secure place, out of reach of children.
- Remove the battery from the saw if storing for extended periods.
7. Rozwiązywanie Problemów
W tej sekcji omówiono typowe problemy, które mogą wystąpić. W przypadku problemów, których tutaj nie wymieniono, skontaktuj się z obsługą klienta.
| Problem | Możliwa przyczyna | Rozwiązanie |
|---|---|---|
| Piła się nie uruchamia | Battery not charged or improperly installed; Safety switch not engaged; Faulty trigger switch. | Ensure battery is fully charged and correctly inserted. Press safety switch before trigger. If problem persists, contact service. |
| Łańcuch nie porusza się lub porusza się powoli | Chain too tight; Chain dull or damaged; Guide bar clogged; Low battery charge. | Adjust chain tension. Sharpen or replace chain. Clean guide bar groove. Recharge battery. |
| Słaba wydajność cięcia | Tępy łańcuch; Nieprawidłowe naprężenie łańcucha; Niedostateczne smarowanie. | Sharpen or replace chain. Adjust chain tension. Apply chain oil. |
| Nadmierne wibracje | Uszkodzony łańcuch lub prowadnica; Luźne elementy. | Sprawdź łańcuch i prowadnicę pod kątem uszkodzeń i wymień je w razie potrzeby. Sprawdź dokręcenie wszystkich elementów mocujących. |
8. Specyfikacje
Technical data for the LUX-TOOLS 1 PowerSystem A-EAS-20/156 Cordless Pruning Saw.
| Funkcja | Specyfikacja |
|---|---|
| Model | A-EAS-20/156 |
| Marka | NARZĘDZIA LUX |
| Źródło zasilania | Zasilany bateryjnie |
| Tomtage | 20 wolty |
| Typ baterii | Litowo-jonowy (nie wchodzi w skład zestawu) |
| Długość ostrza | 16 cm |
| Wymiary produktu (dł. x szer. x wys.) | Wymiary 42 x 15 x 17 cm |
| Waga (bez akumulatora) | 1.5 kilogramów |
| Materiał uchwytu | Złożony |
| Materiał ostrza | Stal stopowa |
| Funkcja specjalna | Tool-free chain replacement |
9. Gwarancja i wsparcie
For warranty information, technical support, or to purchase replacement parts, please refer to the documentation included with your product or contact your retailer. You may also visit the official LUX-TOOLS webAby uzyskać dalszą pomoc, odwiedź naszą witrynę.