1. Wprowadzenie
Ten Weber Genesis Smart SX-335 LP SS Liquid Propane Grill is designed to provide a comprehensive outdoor cooking experience. This manual provides essential information for the safe and efficient operation, maintenance, and troubleshooting of your new grill.

Rysunek 1: Weber Genesis Smart SX-335 LP SS Liquid Propane Grill. This image shows the full grill unit with its stainless steel finish and black cabinet.
2. Ważne informacje dotyczące bezpieczeństwa
OSTRZEŻENIE: Nieprzestrzeganie tych instrukcji może skutkować pożarem, wybuchem lub poparzeniem, co może spowodować uszkodzenie mienia, obrażenia ciała lub śmierć.
- Grilla należy zawsze używać na zewnątrz, w dobrze wentylowanym pomieszczeniu.
- Nie przechowuj ani nie używaj benzyny ani innych łatwopalnych oparów i cieczy w pobliżu tego i jakiegokolwiek innego urządzenia.
- Utrzymuj urządzenie w czystości i nie dopuszczaj do obecności materiałów łatwopalnych, benzyny i innych łatwopalnych oparów i cieczy.
- Nie utrudniaj przepływu powietrza do spalania i wentylacji.
- Keep any electrical supply cord and fuel supply hose away from heated surfaces.
- Przed każdym użyciem należy sprawdzić, czy nie ma wycieków gazu.
- Nigdy nie pozostawiaj grilla bez nadzoru podczas gotowania.
- Trzymaj dzieci i zwierzęta z dala od grilla przez cały czas.
- Podczas pracy z gorącymi elementami należy nosić rękawice ochronne.
3. Co znajduje się w pudełku
Twój Weber Genesis Smart SX-335 LP SS grill package includes the following components:
- Weber Genesis Smart SX-335 LP SS Gas Grill Unit
- Cooking Grates (porcelain-enameled cast iron)
- Batony smakowe
- Grease Management System (including drip tray and catch pan)
- Side Burner (integrated)
- Weber Connect Smart Grilling Hub (integrated)
- Propane Tank (sold separately, but required for operation)
- Instrukcja obsługi

Rysunek 2: Weber Genesis Smart SX-335 LP SS grill with its lid closed, showcasing the stainless steel finish and control panel.
4. Konfiguracja
4.1 Montaż
Montaż Twojego Weber Genesis Smart SX-335 LP SS grill is required. For detailed, step-by-step interactive 3D instructions, download the free BILT app on your mobile device. This app provides visual guidance for each step of the assembly process.
Video 1: BILT App - Step by Step Interactive Assembly Instructions. This video demonstrates the interactive 3D assembly guide available through the BILT app for the Webgrill er Genesis.
Ensure all parts are accounted for before beginning assembly. It is recommended to have a second person assist with assembly due to the size and weight of some components.
4.2 Connecting the Liquid Propane Tank
- Sprawdź, czy wszystkie pokrętła palnika są ustawione w pozycji WYŁĄCZONE.
- Open the cabinet doors located beneath the grill.
- Place the liquid propane tank securely in the designated tank holder.
- Connect the regulator hose from the grill to the propane tank valve. Hand-tighten the connection firmly.
- Powoli i całkowicie otwórz zawór zbiornika propanu.
- Check for any gas leaks using a soapy water solution on all connections. Bubbles indicate a leak. If a leak is detected, close the tank valve, tighten connections, and re-test. If the leak persists, do not use the grill and contact customer service.

Figure 3: A hand connecting the liquid propane tank to the grill's regulator hose inside the cabinet.
The grill cabinet features a hook that indicates the propane level by weight, helping you monitor remaining fuel.
4.3 Pierwsze uruchomienie
Before first use, operate the grill on high heat for 15 minutes with the lid closed to burn off any manufacturing residues. This process is called "seasoning" the grill.
5. Instrukcja obsługi
5.1 Lighting the Main Burners
- Otwórz pokrywę grilla.
- Sprawdź, czy zawór zbiornika propanu jest całkowicie otwarty.
- Turn the leftmost main burner control knob to the START/HIGH position.
- Natychmiast naciśnij i przytrzymaj elektroniczny przycisk zapłonu, aż palnik się zapali.
- Once the first burner is lit, turn on adjacent burners to the desired heat setting.
- If ignition does not occur within 5 seconds, turn the burner control(s) OFF, wait 5 minutes, and repeat the lighting procedure.

Rysunek 4: Zbliżenie Weber Genesis grill's control knobs, showing the ignition button and burner controls.
5.2 Temperature Control and Smart Features
Ten Weber Genesis Smart SX-335 LP SS features integrated Weber Connect smart technology for precise temperature monitoring. The digital display on the side table shows real-time food temperatures from connected probes.
- Weber Connect App: Pobierz Weber Connect app to your smartphone for remote monitoring, temperature alerts, and flip & serve notifications.
- Pojemność sondy: The grill supports up to 2 temperature probes for monitoring different food items simultaneously.
- Włączanie wyświetlacza: The grill display can be powered by plugging it into an electrical outlet or by using a USB-certified, 10,000mAh rechargeable power bank (sold separately) clipped under the side table.

Rysunek 5: Weber Connect smart display on the grill's side table, showing temperature readings, alongside a smartphone displaying the Weber Connect app with temperature alerts.
5.3 Using the Sear Zone
The extra-large sear zone is designed for high-heat searing to achieve perfect grill marks and lock in juices. To activate the sear zone, turn the dedicated sear zone burner knob to the HIGH position. Allow it to preheat for 5-10 minutes before placing food directly over it.
5.4 Using the Side Burner
The integrated side burner allows you to sauté vegetables, boil corn, or heat up sauces while grilling. To light the side burner, open its cover, turn the control knob to the START/HIGH position, and press the electronic ignition button until it ignites.

Rysunek 6: Weber Genesis grill with the side burner cover open, revealing the burner grate.
5.5 Weber Crafted Outdoor Kitchen Collection
Expand your culinary possibilities with the Weber Crafted Outdoor Kitchen Collection. By replacing a cooking grate with custom-fit grillware (sold separately), you can sear, roast, bake, steam, and stir-fry. The grill locker provides convenient storage for these accessories.

Rysunek 7: Weber Crafted grillware frame installed in the grill, ready to accommodate various inserts.

Figure 8: A person stir-frying vegetables and rice in a wok insert on the Webgrill er Genesis.
5.6 Cooking Techniques
- Direct Heat: Use direct heat for searing, grilling smaller items, or cooking foods that require quick cooking.
- Indirect Heat: For larger cuts of meat, poultry, or delicate items, use indirect heat. Turn off the burners directly beneath the food and use adjacent burners to maintain the desired temperature. The expandable top cooking grate provides additional space for indirect cooking.

Figure 9: Two whole chickens cooking on the main grates, with temperature probes inserted, demonstrating indirect cooking.

Figure 10: Grilled shrimp, mixed vegetables in a basket, and toasted bread on the upper warming rack, illustrating diverse cooking options.
6. Konserwacja
6.1 Cleaning the Cooking Grates
After each use, while the grates are still warm, use a grill brush to scrape off any food residue. For a deeper clean, remove the grates and wash them with warm, soapy water.
6.2 System zarządzania smarem
The improved grease management system simplifies cleaning. Simply pull the grease tray out from the front of the grill and scrape away accumulated grease and debris. Replace the disposable catch pan as needed.
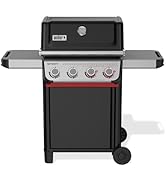
Figure 11: A hand demonstrating the removal and cleaning of the grease management system's pull-out tray.
6.3 Pokrowiec na grilla
Protect your grill from the elements by using a weather-resistant grill cover when not in use. This helps prolong the life and appearance of your grill.
7. Rozwiązywanie Problemów
| Problem | Możliwa przyczyna | Rozwiązanie |
|---|---|---|
| Palnik nie zapala się | Brak przepływu gazu, zatkany palnik, uszkodzona zapalarka. | Check propane tank connection and fuel level. Clean burner ports. Check igniter electrode. |
| Nierównomierne ogrzewanie | Clogged burner ports, low fuel, wind. | Clean burner ports. Ensure adequate fuel. Position grill away from strong winds. |
| Mały płomień lub brak płomienia | Low fuel, regulator bypass, gas leak. | Check fuel level. Reset regulator by turning off all gas, disconnecting, waiting 1 minute, and reconnecting. Check for leaks. |
| Weber Connect display not working | No power, battery low (if using power bank). | Ensure plugged into outlet or power bank is charged and connected. |
For further assistance, refer to the full troubleshooting guide in your printed manual or contact Webe Obsługa Klienta.
8. Specyfikacje
| Funkcja | Szczegół |
|---|---|
| Marka | Weber |
| Nazwa modelu | Genesis Smart SX-335 LP SS |
| Numer modelu przedmiotu | 35600001 |
| Wymiary produktu | 35.5" gł. x 31" szer. x 30.75" wys. |
| Waga przedmiotu | 209 funta |
| Kolor | Stal nierdzewna |
| Typ paliwa | Ciekły propan (LP) |
| Liczba głównych palników | 3 |
| Moc grzewcza | 13000 brytyjskich jednostek cieplnych (BTU) |
| Powierzchnia do gotowania | 787 cali kwadratowych |
| Funkcja specjalna | Grease Management System, Weber Connect Smart Technology, Sear Zone, Side Burner, Expandable Top Cooking Grate, Grill Locker |
| Tworzywo | Stal nierdzewna |
| Wymagany montaż | Tak |
9. Gwarancja i wsparcie
Ten Weber Genesis Smart SX-335 LP SS Liquid Propane Grill comes with a 12-roczna ograniczona gwarancja. For detailed warranty information, please refer to the warranty card included with your product or visit the official Weber webstrona.
Aby uzyskać pomoc techniczną, wsparcie klienta lub zamówić części zamienne, odwiedź stronę WebSklep er na Amazon lub kontakt Weber directly through their official channels.