1. Wprowadzenie
This manual provides comprehensive instructions for the installation, operation, and maintenance of your Cabletech URZ0336B DVB-T2 H.265 HEVC Digital Tuner. Please read this manual thoroughly before using the device to ensure proper functionality and to prevent damage.
2. Informacje dotyczące bezpieczeństwa
Aby uniknąć porażenia prądem elektrycznym, pożaru lub uszkodzenia urządzenia, należy zawsze przestrzegać następujących środków ostrożności:
- Nie wystawiaj urządzenia na deszcz lub wilgoć.
- Nie otwierać casing. Wszelkie prace serwisowe powierzaj wykwalifikowanemu personelowi.
- Zapewnij odpowiednią wentylację wokół urządzenia. Nie blokuj otworów wentylacyjnych.
- Używaj wyłącznie zasilacza dostarczonego z urządzeniem.
- Trzymaj urządzenie z dala od źródeł ciepła i bezpośredniego światła słonecznego.
- Odłącz wtyczkę zasilającą od gniazdka ściennego, jeśli urządzenie nie będzie używane przez dłuższy czas.
3. Zawartość opakowania
Proszę sprawdzić, czy w paczce znajdują się następujące elementy:
- Cabletech URZ0336B DVB-T2 H.265 HEVC Digital Tuner
- Zdalne sterowanie
- Baterie AAA (2x)
- Zasilacz
- Instrukcja obsługi (ten dokument)
4. Koniec produktuview
Familiarize yourself with the main components and connections of your Cabletech URZ0336B tuner.
4.1. Urządzenie i pilot zdalnego sterowania
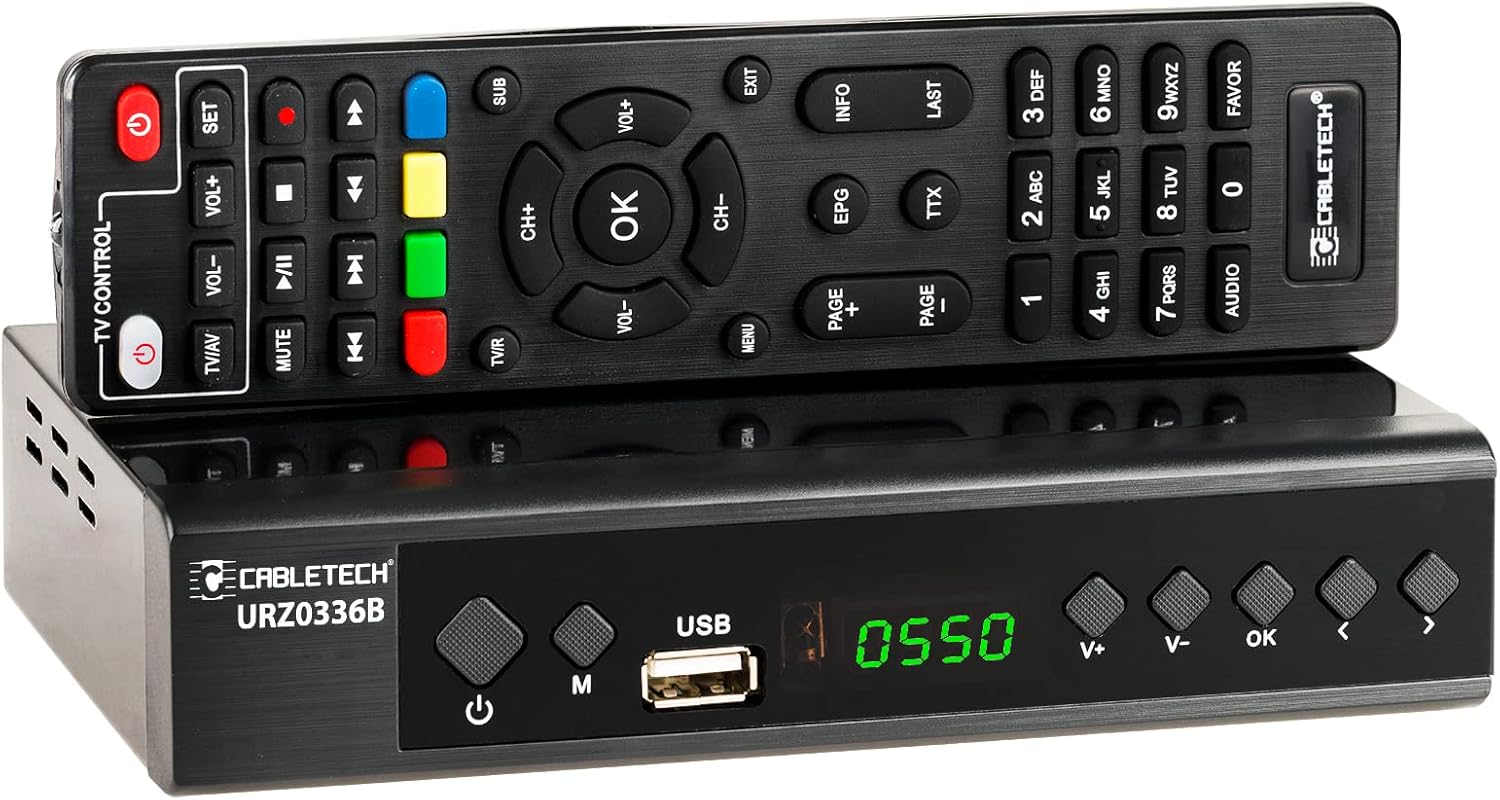
Image: The Cabletech URZ0336B DVB-T2 H.265 HEVC Digital Tuner shown with its accompanying remote control. The tuner is a compact black box, and the remote is also black with various control buttons.
4.2. Panel przedni
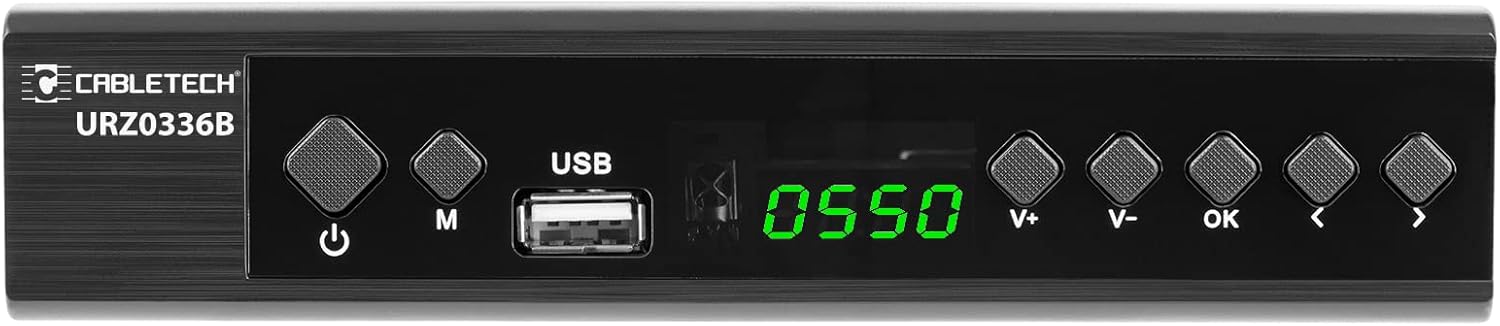
Image: Close-up of the Cabletech URZ0336B front panel, featuring a power button, menu button (M), USB 2.0 port, LED display showing "0550", and navigation/volume buttons (V+, V-, OK, <, >).
- Przycisk zasilania: Turns the device on/off or to standby.
- Przycisk M (Menu): Dostęp do menu głównego.
- Port USB 2.0: For software updates, PVR recording, and media playback.
- Wyświetlacz LED: Pokazuje numer kanału lub godzinę.
- V+/V- Buttons: Reguluje głośność.
- Przycisk OK: Potwierdza wybór.
- </> Buttons: Navigates through menus or changes channels.
4.3. Złącza panelu tylnego

Image: The rear panel of the Cabletech URZ0336B, showing various input and output ports: ANT IN (IEC socket), COAXIAL, USB, HD OUT (HDMI), SCART, and the power input (110-240V~ 50/60Hz).
- MRÓWKA W: Connects to your DVB-T/T2 antenna.
- WSPÓŁOSIOWY: Cyfrowe wyjście audio.
- USB: Additional USB 2.0 port for external devices.
- HD OUT (HDMI): Connects to your TV for high-definition video and audio.
- SCART: Connects to older TVs or VCRs.
- Pobór mocy: Łączy się z zasilaczem.
4.4. Układ pilota zdalnego sterowania

Obraz: Szczegółowy view of the Cabletech URZ0336B remote control, showing buttons for power, TV/AV, volume, channel, mute, playback controls, EPG, TTX, INFO, numeric keypad, and special function buttons.
The remote control provides full functionality for operating your tuner. Insert 2x AAA batteries into the battery compartment before first use.
5. Konfiguracja
5.1. Connecting the Tuner
- Podłącz antenę: Connect your DVB-T/T2 antenna cable to the MRÓWKA W port on the rear panel of the tuner.
- Połącz z telewizorem:
- W przypadku telewizorów HD: Podłącz kabel HDMI do telewizora HD OUT (HDMI) port on the tuner to an HDMI input on your TV.
- W przypadku starszych telewizorów: Podłącz kabel SCART do SCART port on the tuner to the SCART input on your TV.
- Podłącz zasilanie: Connect the power adapter to the tuner's power input and then plug it into a wall outlet.
- Włóż baterie: Open the battery compartment on the remote control and insert 2x AAA batteries, observing polarity.
5.2. First-Time Installation and Channel Scan
- Turn on your TV and select the correct HDMI or SCART input source that the tuner is connected to.
- Power on the Cabletech URZ0336B tuner using the power button on the front panel or remote control.
- The first-time installation wizard should appear on your TV screen. Follow the on-screen prompts.
- Select your preferred language and country.
- Initiate an Wyszukiwanie automatyczne for channels. The tuner will scan for all available DVB-T/T2 channels in your area. This process may take several minutes.
- Once the scan is complete, the tuner will save the found channels and display the first channel.
Note: If you experience poor signal quality, adjust your antenna position or consider using a signal ampliyfikator.
6. Instrukcja obsługi
6.1. Funkcje podstawowe
- Włączanie/wyłączanie: Naciśnij MOC przycisk na pilocie.
- Zmiana kanału: Użyj CH+/CH- buttons or the numeric keypad to enter a channel number.
- Regulacja głośności: Użyj GŁOŚNOŚĆ+/GŁOŚNOŚĆ- pikolak.
- Niemy: Naciśnij NIEMY przycisk, aby tymczasowo wyciszyć dźwięk.
- Menu: Naciśnij MENU przycisk umożliwiający dostęp do menu głównego w celu uzyskania dostępu do ustawień i funkcji.
- OK: Confirms selections in menus or displays the channel list.
- WYJŚCIE: Wychodzi z bieżącego menu lub ekranu.
6.2. Elektroniczny przewodnik po programach (EPG)
The 7-day EPG provides a schedule of current and upcoming programs.
- Naciśnij EPG przycisk na pilocie.
- Navigate through channels and program times using the arrow buttons.
- Naciskać OK Do view Szczegóły wybranego programu.
6.3. PVR (Program Recording) and Timeshift
Connect a USB storage device (e.g., USB flash drive or external hard drive) to one of the USB 2.0 ports to use PVR and Timeshift functions.
- Nagrywanie PVR:
- Naciśnij REK button (red circle) on the remote to start immediate recording of the current program. Press ZATRZYMYWAĆ SIĘ (square) to end recording.
- Schedule recordings via the EPG: Select a program in the EPG and press OK, then choose the record option.
- Przesunięcie w czasie:
- Podczas oglądania programu naciśnij przycisk PAUZA button. The tuner will begin recording the live broadcast to the USB device.
- Możesz wtedy GRAĆ, SZYBKO PRZEWIJAJ, Lub PRZEWIJAĆ within the buffered content.
- Naciskać ZATRZYMYWAĆ SIĘ to exit Timeshift and return to live TV.
6.4. Odtwarzanie multimediów
The tuner supports playback of various media filez podłączonego urządzenia pamięci masowej USB.
- Connect your USB device to a USB port on the tuner.
- Go to the main menu and select "Media" or "USB".
- Przejdź do żądanego file type (MP3, WMA, JPEG, BMP, AVI) and select the file grać.
6.5. Supported Applications
The tuner supports various online applications when connected to the internet via an external MT7601 Wi-Fi adapter (not included).
- Pogoda: View lokalne prognozy pogody.
- Telewizja IP: Access Internet Protocol Television streams.
- YouTube: Watch videos from YouTube.
- RSS: Read RSS news feeds.
Note: An external MT7601 Wi-Fi adapter is required for internet connectivity and access to these applications.
6.6. Kontrola rodzicielska
Set up parental control to restrict access to certain channels or programs based on age ratings.
- Przejdź do sekcji „Kontrola rodzicielska” w menu głównym.
- Enter your PIN (default is usually 0000 or 1234, check your device for specifics).
- Configure age restrictions or lock specific channels.
6.7. Funkcja timera
The timer function allows you to schedule the tuner to turn on/off at specific times or to switch to a particular channel.
- Navigate to the "Timer" section in the main menu.
- Set the event type (e.g., Power On, Power Off, Record), time, and duration.
7. Konserwacja
7.1. Czyszczenie
To clean the device, disconnect it from the power supply and wipe the exterior with a soft, dry cloth. Do not use liquid or aerosol cleaners.
7.2. Aktualizacja oprogramowania
Software updates can improve performance and add new features. Updates are performed via the USB port.
- Pobierz najnowsze oprogramowanie układowe file from the official Cabletech support webwitryna (jeśli jest dostępna).
- Kopiuj oprogramowanie układowe file do katalogu głównego dysku flash USB.
- Connect the USB flash drive to the tuner's USB port.
- Go to the "System" or "Tools" menu, then select "Software Update" or "Upgrade by USB".
- Follow the on-screen instructions to complete the update. Do not power off the device during the update process.
8. Rozwiązywanie Problemów
If you encounter issues with your tuner, refer to the following common problems and solutions:
| Problem | Możliwa przyczyna | Rozwiązanie |
|---|---|---|
| Brak obrazu i dźwięku | Incorrect TV input selected; Loose cable connections; Tuner not powered on. | Select correct TV input (HDMI/SCART); Check all cable connections; Ensure tuner is powered on. |
| Komunikat „Brak sygnału” | Antenna not connected; Poor antenna signal; No channels scanned. | Connect antenna properly; Adjust antenna position; Perform an automatic channel scan. |
| Pilot nie działa | Batteries are dead or inserted incorrectly; Obstruction between remote and tuner. | Replace batteries; Check battery polarity; Remove any obstructions; Point remote directly at the tuner. |
| Nie można nagrywać na USB | USB device not connected or formatted incorrectly; Insufficient storage space. | Ensure USB device is connected; Format USB device to FAT32 or NTFS; Free up space on USB device. |
| No internet access for apps | No MT7601 Wi-Fi adapter connected; Network configuration issues. | Connect a compatible MT7601 Wi-Fi adapter; Check network settings in the tuner's menu. |
9. Specyfikacje
| Funkcja | Szczegół |
|---|---|
| Numer modelu | URZ0336B |
| Procesor | GX6702S5 |
| Pamięć wewnętrzna | 32 MB |
| BARAN | 512 MB DDR2 |
| Złącze ANT | Gniazdo IEC |
| Zakres częstotliwości | VHF: 170–230 MHz, UHF: 470–862 MHz |
| Demodulacja | QPSK, 16QAM, 64QAM, 256QAM |
| Przepustowość łącza | Częstotliwość 7 MHz, 8 MHz |
| Rozszyfrowanie | MPEG-1, MPEG-2, MPEG-4, H.264, H.265, AAC, HE-AAC, AC-3, DD+ |
| Wejścia/Wyjścia | 2x USB 2.0, HDMI, SCART, COAXIAL |
| Proporcje obrazu | Auto, 16:9 WS, 16:9 PB, 16:9 PS; 4:3 LB, 4:3 PS, 4:3 Full |
| Obsługiwane formaty | MP3, WMA, JPEG, BMP, AVI |
| Rozdzielczość ekranu | 480i, 480p, 576i, 576p, 720p, 1080i, 1080p |
| Rozdzielczość wideo | 1920 x 1080 pikseli |
| Dekodowanie dźwięku | MPEG-1 LayerI/II, Dolby-Downmix 2-Channel (License), AAC LC, HE-AAC v1/V2, PCM-Downmix, IEC958 SPDIF |
| File System | FAT32, NTFS |
| Zgodność | Fully compatible with DVB-T2/DVB-T |
| Zdalne sterowanie | Requires 2x AAA batteries |
| Pobór mocy | Max. 6 W (Operating), Max. 50/60 Hz (Standby) |
| Wymiary (szer. x wys.) | Wymiary 168mm x 36mm |
| Obsługa Wi-Fi | Requires external MT7601 chip adapter |
| Tuner Bit Depth | 10 bitów |
10. Gwarancja i wsparcie
This product comes with a standard manufacturer's warranty. For specific warranty terms and conditions, please refer to the documentation included with your purchase or contact Cabletech customer support.
For technical assistance, troubleshooting beyond this manual, or warranty claims, please contact your retailer or the official Cabletech support channels.