
Kavolet AAL3477640380121LF
Kavolet Smart Wi-Fi Thermostat 16A for Electric Heating
Model: AAL3477640380121LF
1. Wprowadzenie
Thank you for choosing the Kavolet Smart Wi-Fi Thermostat. This device is designed to provide intelligent temperature control for electric heating systems, enhancing comfort and energy efficiency in your home, office, or other environments. Featuring a large LCD touch screen, Wi-Fi connectivity, and APP control, it offers flexible weekly programming to suit your lifestyle.

Image 1.1: Kavolet Smart Wi-Fi Thermostat and its mobile application interface. This image illustrates the thermostat's sleek design and its remote control capability via a smartphone app.
Główne cechy:
- Electric Heating Compatibility: Suitable for various electric heating systems.
- System podwójnego czujnika: Equipped with an internal sensor for ambient temperature and an external floor sensor for high-temperature protection.
- Programowalny tygodniowo: Supports 7-day weekly operation modes with 6 daily time settings for customized temperature schedules.
- Kontrola aplikacji: Remotely manage your thermostat settings from your smartphone, anytime and anywhere.
- Large LCD Touch Screen: Clear display with backlight for easy reading and intuitive touch controls.
- Wysoka dokładność: Maintains temperature within 1°C of the set point.
- Pamięć danych: Zachowuje ustawienia w przypadku zaniku zasilania.
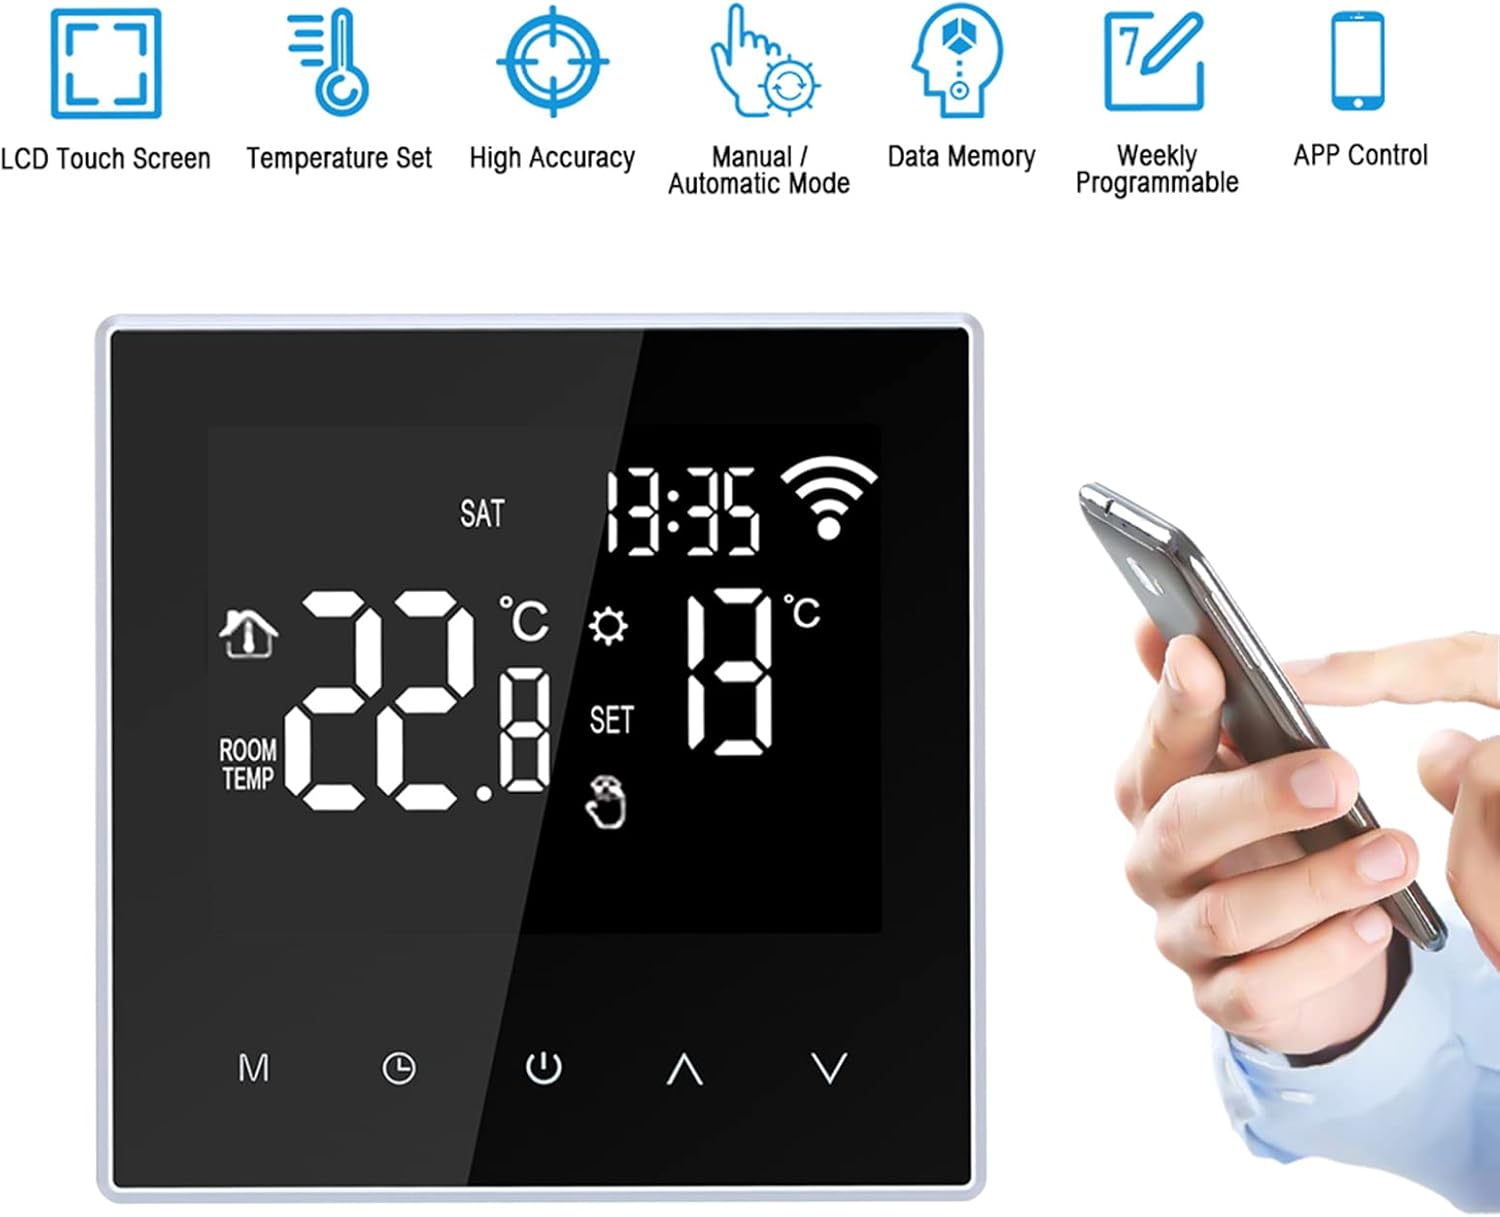
Image 1.2: Visual representation of the thermostat's main features, including LCD touch screen, temperature setting, high accuracy, manual/automatic mode, data memory, weekly programmability, and APP control.
2. Informacje dotyczące bezpieczeństwa
OSTRZEŻENIE: Installation of this thermostat involves high voltage. To prevent electric shock or damage to the product, installation must be performed by a qualified professional electrician in accordance with local electrical codes and regulations.
- Przed przystąpieniem do montażu lub serwisowania termostatu należy zawsze odłączyć zasilanie na wyłączniku automatycznym.
- Ensure all wiring connections are secure and correctly matched to avoid short circuits or malfunction.
- Nie obsługuj termostatu mokrymi rękami.
- Trzymaj urządzenie z dala od wody i nadmiernej wilgoci.
- This product is designed for electric heating systems only. Do not use with other heating types.
3. Zawartość opakowania
Po otwarciu opakowania należy sprawdzić jego zawartość, aby upewnić się, że znajdują się w nim wszystkie elementy:
- 1 x Kavolet Smart Wi-Fi Thermostat
- 1 x 3-meter Sensor Cable (external floor sensor)
- 2 x śruby montażowe
- 1 x Instrukcja obsługi (angielski)
4. Specyfikacje
| Marka | Kavolet |
| Numer modelu | AAL3477640380121LF |
| Kolor | Czarny |
| Zasilacz | 220 V AC 50/60 Hz |
| Aktualne obciążenie | 16A |
| Dokładność temperatury | ±1°C |
| Zakres ustawień temperatury | 5-60°C |
| Zakres regulacji temperatury | 5-95°C (Factory Default: 35°C) |
| Pobór mocy | <2 W |
| Błąd czasowy | <1% |
| Materiał skorupy | PC (ognioodporny) |
| Czujniki | Internal (ambient), External (floor protection) |
| Odległość instalacji | 60mm |
| Klasa ochrony | IP20 |
| Typ sterowania | Klawisze dotykowe |
| Łączność | Wi-Fi |
| Wymiary przedmiotu (dł.*szer.*wys.) | 86 x 86 x 40 mm (3.4 x 3.4 x 1.6 cale) |
| Waga przedmiotu | 168 g (5.9 uncji) |

Image 4.1: Detailed dimensions of the Kavolet Smart Wi-Fi Thermostat, showing its front and side profilez pomiarami w milimetrach i calach.
5. Instalacja i konfiguracja
Ważny: As stated in the safety information, installation must be carried out by a qualified professional electrician. Incorrect installation can lead to electric shock, fire, or damage to the device.
5.1 Schemat okablowania
Refer to the following diagram for correct wiring connections. Ensure power is disconnected before proceeding.

Image 5.1: Wiring diagram for the Kavolet Thermostat (model ME88H.16). It shows connections for AC230V, 16A, N, L1, N1, and sensor terminals (1, 2).
- Terminale 1 i 2: External sensor connection.
- Terminale 3 i 4: Power supply (N and L1).
- Terminale 5 i 6: Load connection (N1 and L).
- Ensure proper grounding if applicable.
5.2 Fizyczna instalacja
- Odłącz zasilanie na głównym wyłączniku.
- Mount the backplate of the thermostat to a standard 60mm wall box using the provided screws.
- Connect the wires according to the wiring diagram (Image 5.1).
- Carefully attach the front panel of the thermostat to the mounted backplate, ensuring it clicks securely into place.
- Przywróć zasilanie za pomocą wyłącznika obwodu.
5.3 Pierwsze włączenie i połączenie Wi-Fi
- Upon first power-on, the thermostat display will illuminate.
- Download the compatible mobile application (e.g., Smart Life, Tuya Smart) from your smartphone's app store.
- Register or log in to the application.
- Follow the in-app instructions to add a new device. This typically involves putting the thermostat into pairing mode (often by pressing and holding a specific button combination until a Wi-Fi icon flashes rapidly).
- Wprowadź dane logowania do sieci Wi-Fi (wymagana sieć 2.4 GHz).
- Po nawiązaniu połączenia ikona Wi-Fi na wyświetlaczu termostatu stanie się ciągła.
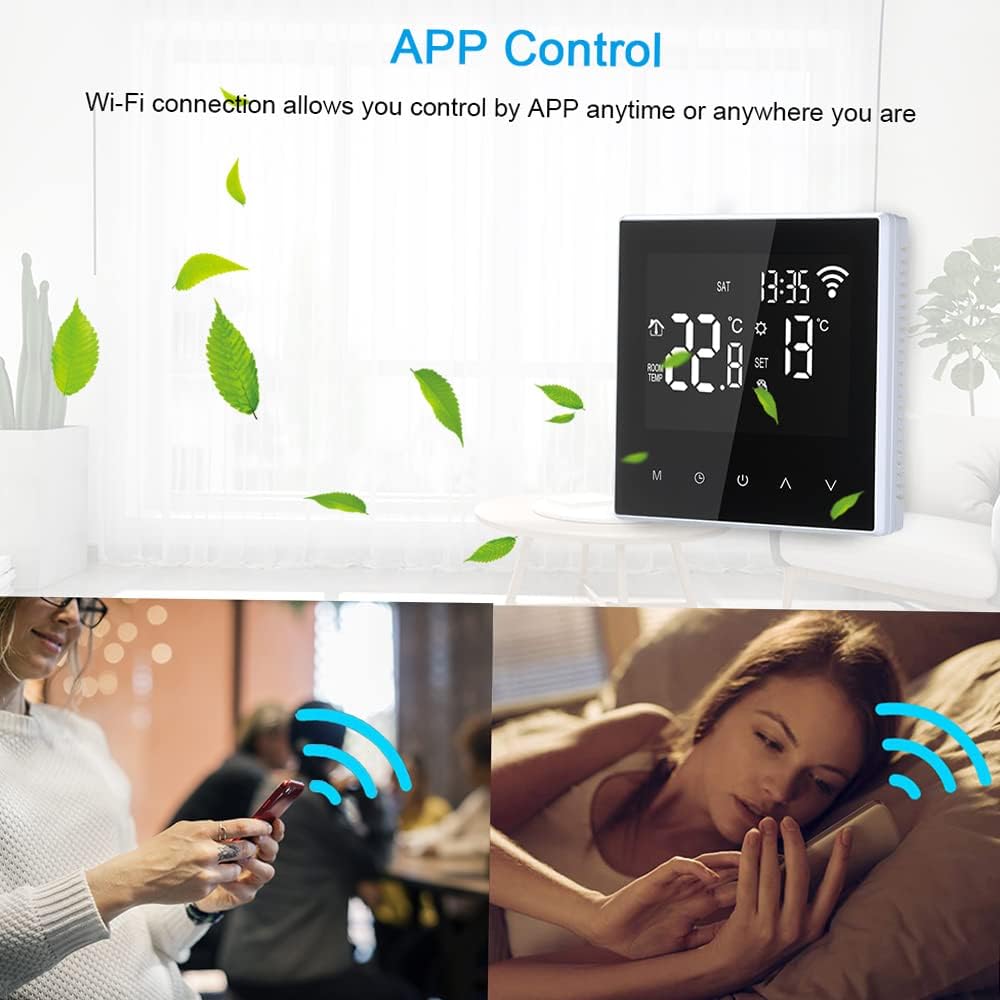
Image 5.2: The thermostat display alongside a smartphone screen demonstrating the APP control functionality, highlighting the convenience of remote temperature management.
6. Instrukcja obsługi
6.1 Wyświetl ponadview
The LCD screen provides all necessary information and control options. Refer to the diagram below for key indicators:

Image 6.1: Annotated diagram of the Kavolet Thermostat's LCD display, indicating the positions of Time, Week, Room Temperature, Setting Temperature, Manual/Automatic Mode indicator, Touch Keys, Mode Key (M), Clock Key, Power ON/OFF, Up Button, and Down Button.
- Czas: Wyświetlanie aktualnego czasu.
- Tydzień: Aktualny dzień tygodnia.
- Temperatura pokojowa: Current ambient temperature detected by the internal sensor.
- Ustawienie temperatury: Desired temperature set by the user or program.
- Tryb ręczny/automatyczny: Indicates whether the thermostat is operating in manual or programmed mode.
- Ikona Wi-Fi: Indicates Wi-Fi connection status (flashing for pairing, solid for connected).
- Ikona ogrzewania: Appears when the heating system is active.
6.2 Funkcje przycisków
- M (Mode Key): Press to switch between Manual mode and Automatic (Programmed) mode.
- Klucz zegara: Press and hold to enter time and week setting mode. Short press to confirm settings.
- Włączanie/wyłączanie zasilania: Naciśnij, aby włączyć lub wyłączyć termostat.
- Przycisk w górę (▲): Increase temperature setting or navigate menu options.
- Przycisk w dół (▼): Decrease temperature setting or navigate menu options.
6.3 Ustawianie godziny i dnia
- Naciśnij i przytrzymaj Klucz zegara until the time display flashes.
- Użyj W górę (▲) I W dół (▼) przyciski do regulacji godziny.
- Naciśnij Klucz zegara again to move to minute adjustment, then day of the week adjustment.
- Używać W górę (▲) I W dół (▼) to set the minutes and day.
- Naciśnij Klucz zegara one last time to save and exit.
6.4 Praca w trybie ręcznym
- Naciśnij M (Mode Key) until the manual mode icon is displayed.
- Użyj W górę (▲) or W dół (▼) buttons to set your desired temperature. The thermostat will maintain this temperature until changed or switched to automatic mode.
6.5 Weekly Programming (Automatic Mode)
The thermostat supports 6 time modes daily for 7 days a week. This allows for customized heating schedules.

Image 6.2: The thermostat display highlighting its weekly programmable feature, indicating support for 7-day operation modes with multiple daily temperature settings.
- Naciśnij M (Mode Key) until the automatic mode icon is displayed.
- To enter programming mode, press and hold the M (Mode Key) for several seconds. The display will show the first programming period (e.g., "Period 1" or a specific time slot).
- Użyj W górę (▲) I W dół (▼) buttons to adjust the start time and desired temperature for each period.
- Naciskać M (Mode Key) to cycle through the 6 periods for the current day, and then to the next day.
- Repeat for all 7 days and 6 periods as desired.
- Po zakończeniu wszystkich ustawień naciśnij przycisk Włączanie/wyłączanie zasilania button or wait for a few seconds for the thermostat to automatically save and exit programming mode.
6.6 Kontrola aplikacji
Once the thermostat is connected to your Wi-Fi network and paired with the mobile application, you can control it remotely:
- Dostosuj ustawienia temperatury.
- Switch between manual and automatic modes.
- Modify weekly programming schedules.
- Monitoruj aktualną temperaturę w pomieszczeniu.
- Access advanced settings (if available in the app).

Image 6.3: The thermostat in a home setting, illustrating its role in maintaining a comfortable temperature with high accuracy, benefiting occupants.
7. Konserwacja
- Czyszczenie: Gently wipe the thermostat's screen and body with a soft, dry cloth. Do not use abrasive cleaners, solvents, or spray directly onto the device.
- Unikaj płynów: Ensure no liquids enter the thermostat's casing, as this can cause damage or electric shock.
- Pielęgnacja czujnika: Keep the external floor sensor free from obstructions and debris to ensure accurate temperature readings.
- Aktualizacje oprogramowania układowego: Periodically check the mobile application for any available firmware updates for your thermostat to ensure optimal performance and security.
8. Rozwiązywanie Problemów
| Problem | Możliwa przyczyna | Rozwiązanie |
|---|---|---|
| Termostat się nie włącza. | Brak zasilania, nieprawidłowe okablowanie, zadziałał wyłącznik automatyczny. | Check circuit breaker. Verify wiring connections (consult a professional). Ensure power is restored. |
| System ogrzewania nie odpowiada. | Incorrect temperature setting; thermostat in OFF mode; wiring issue; heating system malfunction. | Ensure thermostat is ON and set to a temperature higher than ambient. Check wiring. Consult a heating technician if the heating system itself is faulty. |
| Wi-Fi connection unstable or disconnected. | Weak Wi-Fi signal; incorrect Wi-Fi password; router issue; thermostat too far from router. | Ensure thermostat is within Wi-Fi range. Restart your router. Re-enter Wi-Fi credentials in the app. Ensure you are using a 2.4GHz network. |
| Niedokładne odczyty temperatury. | Sensor obstruction; thermostat exposed to direct sunlight or drafts; faulty sensor. | Ensure sensors are clear. Relocate thermostat if exposed to external influences. Contact support if sensor is suspected faulty. |
| Cannot program schedules. | Thermostat in Manual mode; incorrect programming steps. | Switch to Automatic mode. Review Section 6.5 for detailed programming steps. |
9. Gwarancja i wsparcie
Kavolet products are designed for reliability and performance. While specific warranty details are not provided in this manual, please retain your proof of purchase for any warranty claims.
Obsługa klienta:
For technical assistance, troubleshooting beyond this manual, or warranty inquiries, please contact Kavolet customer support through the retailer where you purchased the product or refer to the official Kavolet webwitryna do informacji kontaktowych.
Kontaktując się z pomocą techniczną, przygotuj następujące informacje:
- Product Model: AAL3477640380121LF
- Data zakupu
- opis problemu
Ask a question about this manual
Ask about setup, troubleshooting, compatibility, parts, safety, or missing instructions. Manuals+ will review the question and use this page’s manual context to help answer it.