
1. Wprowadzenie
This manual provides instructions for the HCDZ Replacement Remote Control, designed for use with various Epson 3LCD 4K Large Venue Laser Projectors. This remote offers direct functionality without the need for programming.
Zawartość opakowania:
- 1 x HCDZ Replacement Remote Control
Note: Batteries and additional instructions are not included in the package.
2. Konfiguracja
2.1 Instalacja baterii
Do pilota potrzebne są dwie baterie AAA (brak w zestawie). Aby je zainstalować, wykonaj następujące kroki:
- Znajdź pokrywę komory baterii z tyłu pilota.
- Aby otworzyć komorę, przesuń pokrywę w dół lub naciśnij zatrzask i unieś.
- Włóż dwie baterie AAA, upewniając się, że bieguny dodatni (+) i ujemny (-) są prawidłowo ustawione względem oznaczeń wewnątrz komory.
- Załóż pokrywę komory baterii i wsuń ją z powrotem na miejsce, aż usłyszysz kliknięcie.

Image: Back of the remote control with the battery compartment open, illustrating correct AAA battery placement.
2.2 Pierwsze użycie
Once batteries are correctly installed, the remote control is ready for immediate use. No programming or pairing is required. Point the remote directly at your Epson projector's infrared (IR) sensor.
3. Obsługa pilota
This remote control provides full functionality for your compatible Epson projector. Refer to your projector's original user manual for specific functions of each button.
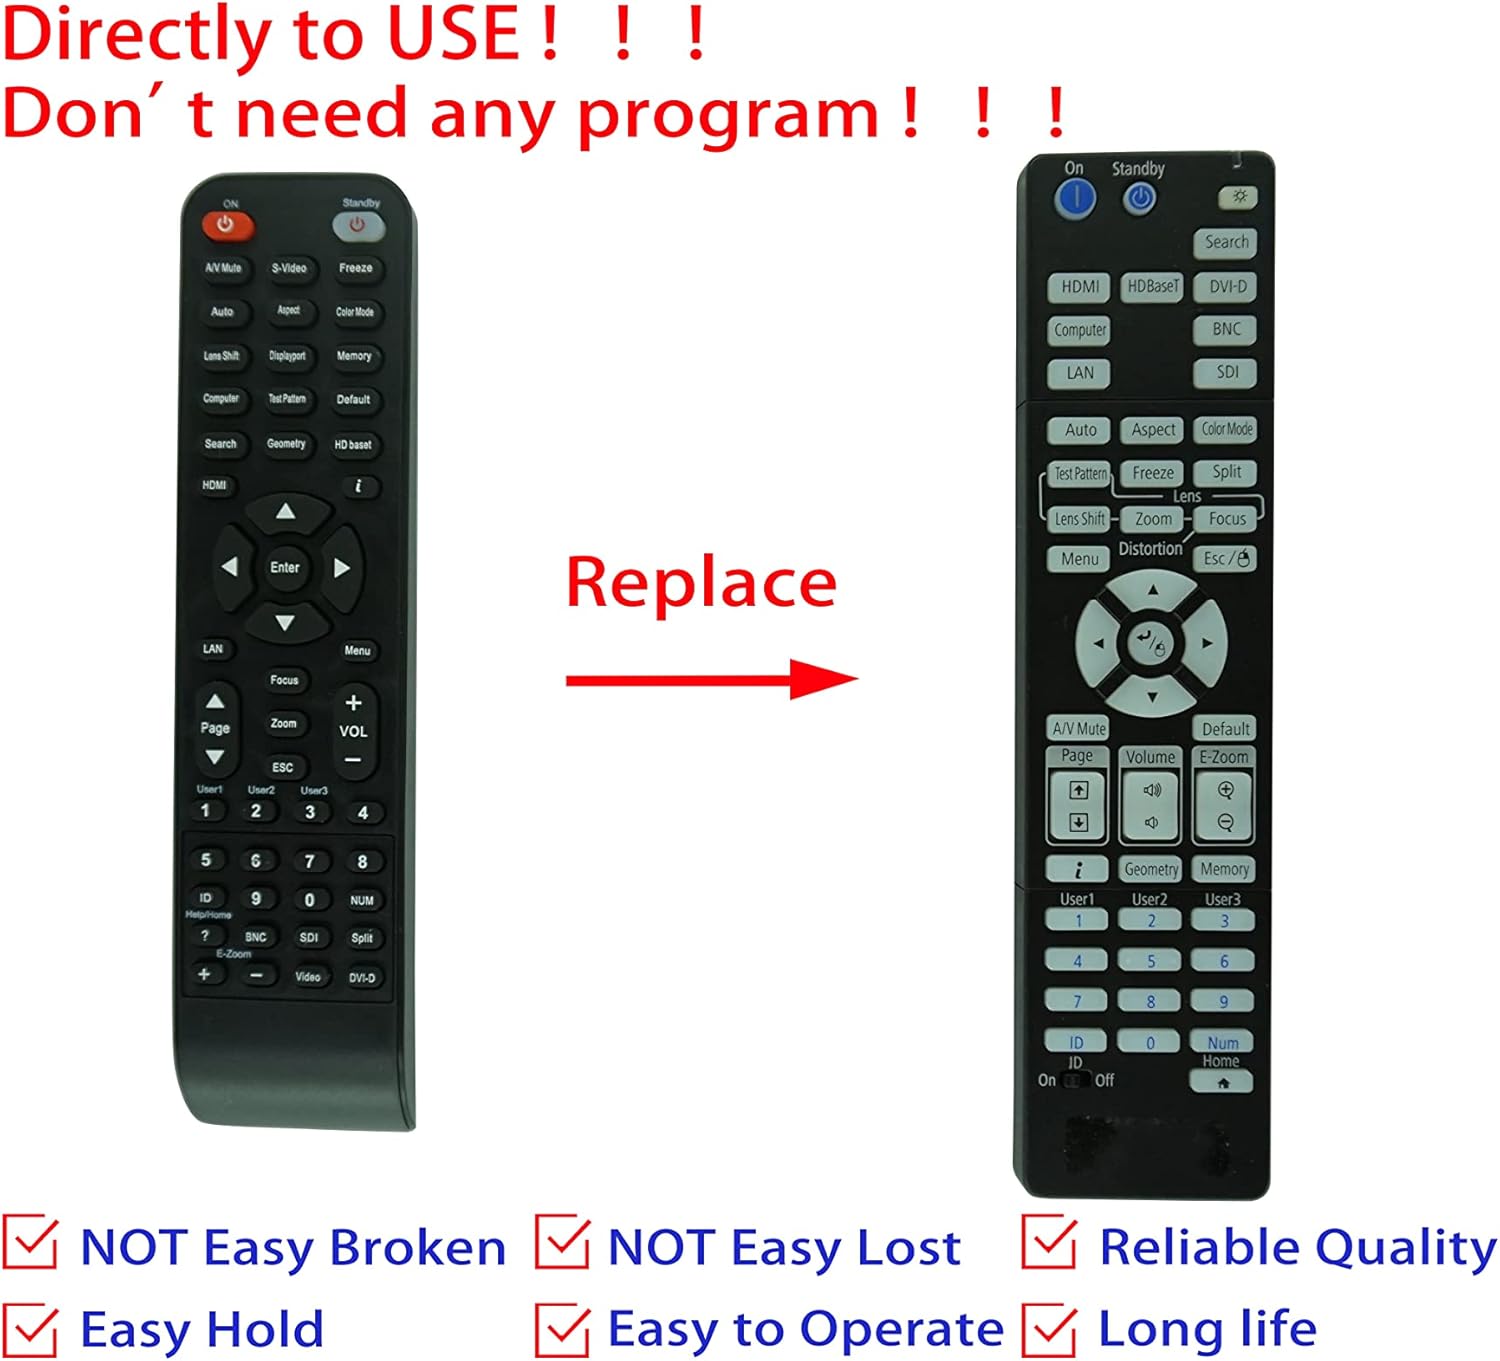
Image: Comparison of an original Epson remote (left) and the HCDZ replacement remote (right), highlighting the replacement functionality.
3.1 Key Functions (General)
- Włączanie/wyłączanie: Typically a dedicated button, often red or clearly marked.
- Wybór wejścia: Buttons for HDMI, Computer, Video, etc., to switch input sources.
- Nawigacja: Arrow keys (Up, Down, Left, Right) and an Enter/OK button for menu navigation.
- Menu: Accesses the projector's on-screen display (OSD) menu.
- Tom: Adjusts audio output if the projector has built-in speakers or audio pass-through.
- Powiększenie/ostrość: Adjusts the projected image size and clarity.
- Klawiatura numeryczna: For direct input or selecting specific functions.
4. Konserwacja i pielęgnacja
To ensure the longevity and proper functioning of your remote control, observe the following guidelines:
- Czyszczenie: Przetrzyj pilota miękką, suchą ściereczką. Nie używaj płynnych środków czyszczących ani materiałów ściernych.
- Środowisko: Avoid exposing the remote to extreme temperatures, high humidity, or direct sunlight.
- Wymiana baterii: Replace both batteries simultaneously. Do not mix new and old batteries, or different types of batteries.
- Składowanie: Jeśli pilot nie będzie używany przez dłuższy czas, należy wyjąć baterie, aby zapobiec wyciekowi i potencjalnym uszkodzeniom.
- Uderzenie: Unikaj upuszczania pilota i narażania go na silne uderzenia.

Obraz: Tył view of the HCDZ remote control, illustrating its design.
5. Rozwiązywanie Problemów
Jeśli masz problemy z pilotem, wypróbuj poniższe kroki rozwiązywania problemów:
- Pilot nie odpowiada:
- Sprawdź, czy baterie zostały włożone prawidłowo, z zachowaniem właściwej polaryzacji.
- Wymień stare baterie na nowe baterie AAA.
- Check for any obstructions between the remote and the projector's IR sensor.
- Ensure you are within the effective range and pointing the remote directly at the projector.
- Przerywana funkcjonalność:
- Strong light sources (e.g., direct sunlight, fluorescent lights) can interfere with IR signals. Try operating the remote in a different lighting condition.
- Sprawdź, czy styki akumulatora są czyste i nie mają śladów korozji.
6. Specyfikacje
| Funkcja | Szczegół |
|---|---|
| Marka | HCDZ |
| Zgodność | Epson EB-PU2010B, EB-PU1007B, EB-PU2010W, EB-PU1007W, EB-PU1008B, EB-PU1006W, EB-PU1008W Projectors |
| Technologia łączności | Podczerwieni (IR) |
| Źródło zasilania | Baterie 2 x AAA (brak w zestawie) |
| Wymagane programowanie | NIE |
| Kolor | Czarny |
7. Gwarancja i wsparcie
This HCDZ replacement remote control comes with a 90-day warranty from the date of purchase. This warranty covers manufacturing defects under normal use.
For warranty claims or technical support, please contact your retailer or the HCDZ customer service department with your purchase details.
Prosimy zachować dowód zakupu w celach gwarancyjnych.