
1. Wprowadzenie
This manual provides instructions for the safe and effective use of your Narcissus QN-M866 Electric Knife Sharpener. This device is designed for home and kitchen use, offering a professional 2-stage sharpening and polishing system for various straight-blade knives and a dedicated slot for scissors. Please read this manual thoroughly before initial use and retain it for future reference.
2. Instrukcje bezpieczeństwa
Aby zapobiec obrażeniom ciała lub uszkodzeniu urządzenia, należy zawsze przestrzegać następujących środków ostrożności:
- Always place the sharpener on a stable, flat surface.
- Ensure your hands are dry before plugging in or unplugging the sharpener.
- Keep fingers away from the sharpening slots during operation.
- Do not attempt to sharpen serrated knives in the knife slots; use the dedicated scissors slot for scissors only.
- Unplug the sharpener when not in use or before cleaning.
- Nie zanurzaj temperówki w wodzie ani innym płynie.
- Przechowywać w miejscu niedostępnym dla dzieci.
- Do not operate the sharpener if the cord or plug is damaged, or if the appliance malfunctions or has been dropped.
3. Składniki produktu
The Narcissus QN-M866 Electric Knife Sharpener features a robust design for efficient sharpening. Familiarize yourself with its main components:
- Przycisk zasilania: Located on the side, controls the sharpener's operation.
- Crude Sharpening Slot: For initial sharpening of dull blades.
- Fine Polishing Slot: For refining the blade edge and removing burrs.
- Scissors Sharpening Slot: A dedicated slot for sharpening scissors.
- Magnetic Dust Collection Box: Located at the bottom, collects metal shavings.
- Przyssawki antypoślizgowe: Dla zapewnienia stabilności podczas użytkowania.

Rysunek 3.1: Koniecview of the Narcissus QN-M866 Electric Knife Sharpener, showing the knife and scissors sharpening capabilities.

Rysunek 3.2: Szczegółowy view of the two sharpening stages: Crude for quick sharpening and Fine for polishing.
4. Konfiguracja
Before using the sharpener, follow these steps:
- Umieszczenie: Place the sharpener on a clean, dry, and stable countertop. Ensure the non-slip suction feet are securely attached to the surface to prevent movement during operation.
- Podłączenie zasilania: Plug the power adapter into the sharpener's power port, then plug the adapter into a standard electrical outlet (100-240V).
- Orientacja: Position the sharpener with the Narcissus logo facing you.
Figure 4.1: Non-slip suction feet for stable operation.

Figure 4.2: Connecting the power adapter to the sharpener and outlet.
5. Instrukcja obsługi
Always ensure the sharpener is powered on using the red power switch before beginning. For optimal results, read the instructions carefully and practice with an old knife first.
5.1 Sharpening Knives (2-Stage Process)
This sharpener features two stages for knives: a crude stage do wstępnego ostrzenia i drobne stage for polishing.
- Crude Sharpening (Stagmi 1): For very dull knives, begin with the 'Crude' slot. Insert the knife blade into the slot at an angle, ensuring it stays in close contact with the outer wall. Pull the knife from the outside (heel) to the inside (tip) of the blade, applying light, consistent pressure. Repeat this motion 2-5 times for each side of the blade.
- Fine Polishing (Stagmi 2): After crude sharpening, or for knives that only need a touch-up, move to the 'Fine' slot. Insert the knife blade and pull it through from heel to tip, similar to the crude stagmi. to jesttage polishes the blade and removes any burrs, resulting in a smooth, sharp edge. Repeat 2-5 times for each side.

Figure 5.1: Step-by-step guide for knife sharpening.

Rysunek 5.2: Szczegółowy view of blade insertion and pulling direction for both stagt.j.
Ważne uwagi:
- Always pull the knife towards you; do not push it away.
- Maintain a consistent, light pressure. Excessive force is not necessary and can damage the blade or sharpener.
- Clean the knife blade after sharpening to remove any metal particles.
5.2 Sharpening Scissors
The sharpener includes a dedicated slot for sharpening scissors.
- Całkowicie otwórz nożyczki.
- Insert one blade of the scissors into the designated scissors sharpening slot.
- Pull the blade through the slot from the pivot to the tip, applying light pressure.
- Repeat this motion 3-5 times for each blade.
- Test the sharpness and repeat if necessary.
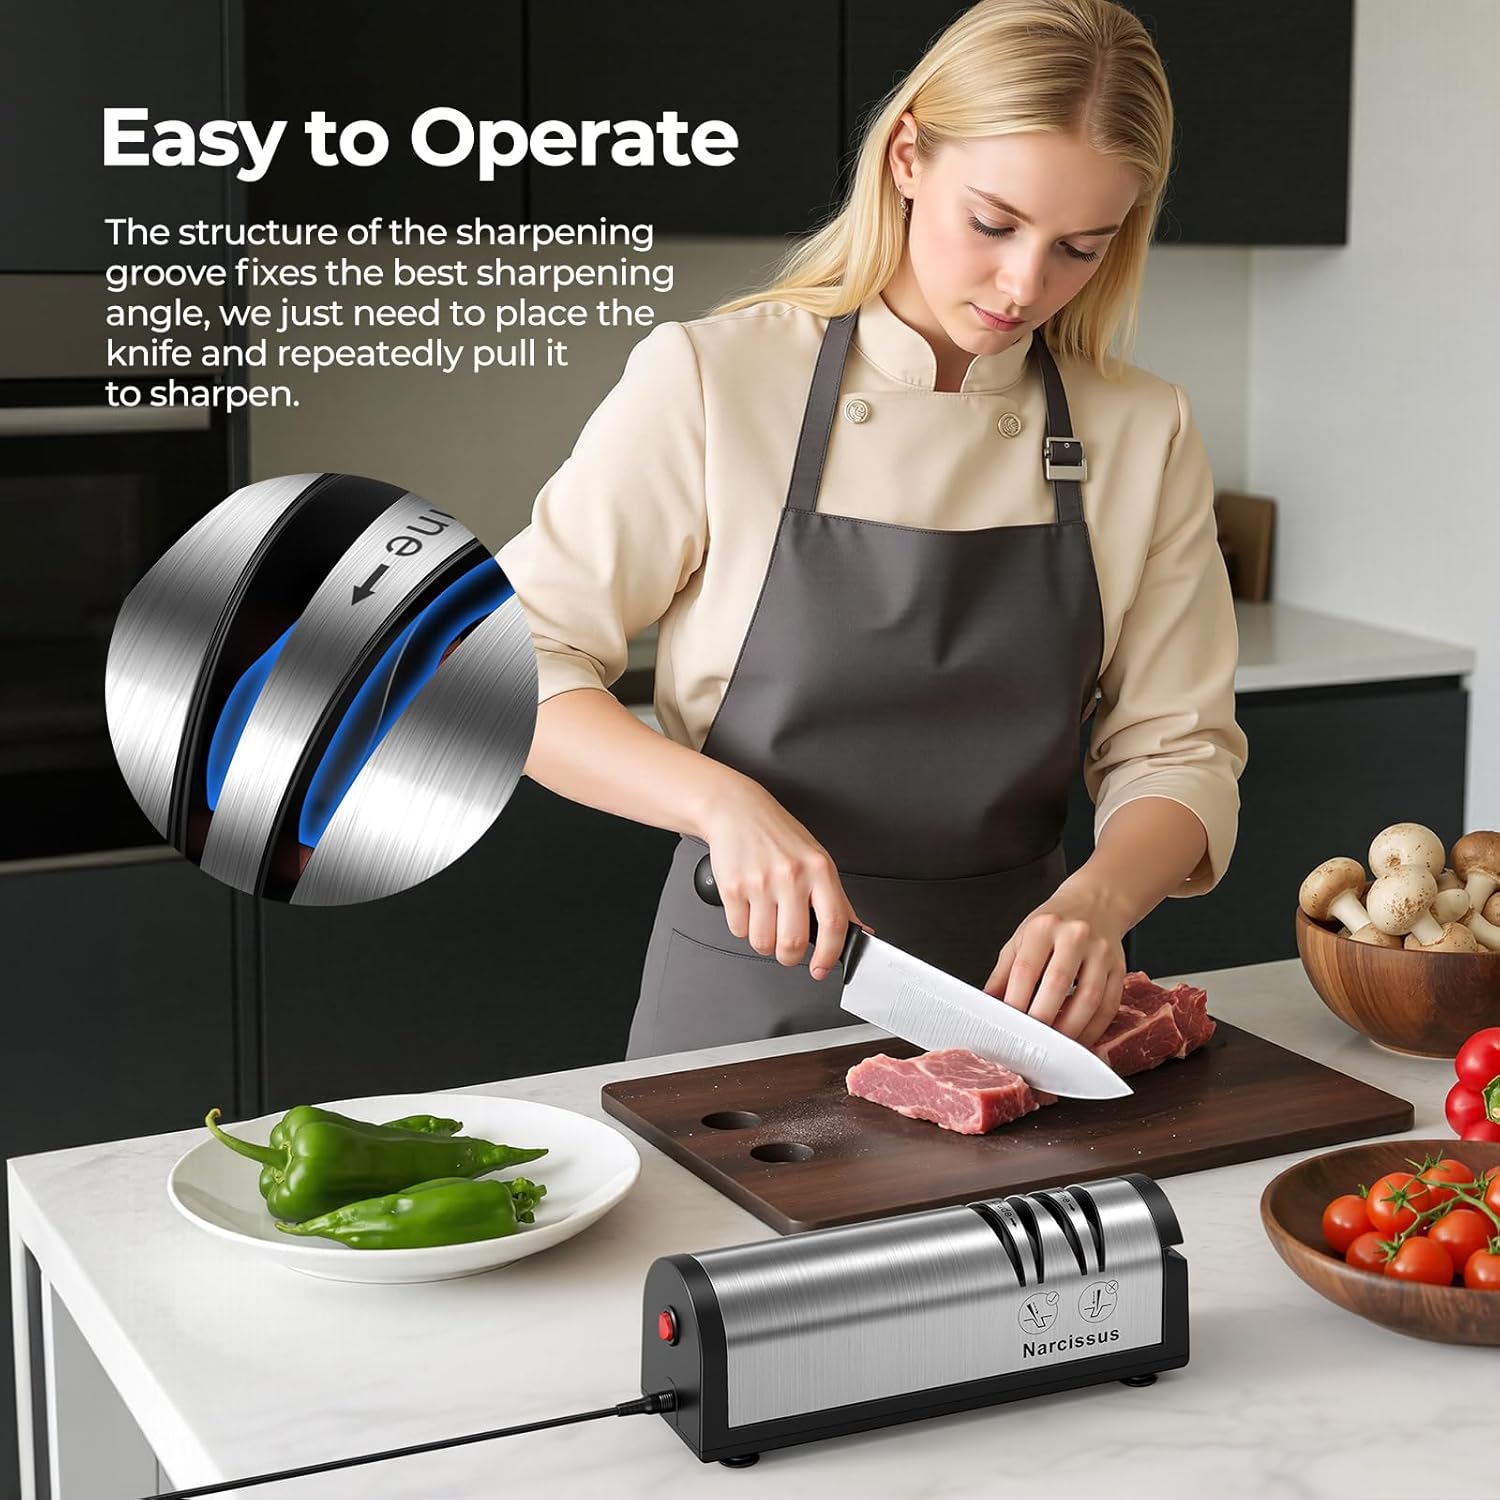
Figure 5.3: Sharpening scissors using the dedicated slot.
6. Konserwacja i czyszczenie
Regular maintenance ensures the longevity and performance of your sharpener.
- Odłącz przed czyszczeniem: Always unplug the sharpener from the power outlet before cleaning.
- Czysty wygląd zewnętrzny: Przetrzyj zewnętrzną część temperówki miękką,amp ściereczką. Nie używaj środków czyszczących o właściwościach ściernych ani nie zanurzaj urządzenia w wodzie.
- Empty Dust Collection Box: The sharpener is equipped with a magnetic dust collection box at the bottom to collect metal shavings. Regularly remove and empty this box. To do so, gently slide the box out, discard the shavings, and reinsert it securely.
Figure 6.1: Removing the magnetic dust collection box for cleaning.
7. Rozwiązywanie Problemów
If you encounter issues with your sharpener, refer to the following common problems and solutions:
| Problem | Możliwa przyczyna | Rozwiązanie |
|---|---|---|
| Temperówka się nie włącza. | Niepodłączony; wyłączony; wyłączonytage. | Ensure power cord is securely plugged in. Turn power switch to 'ON'. Check household power supply. |
| Knives are not sharpening effectively. | Incorrect technique; insufficient passes; worn sharpening wheels. | Review operating instructions for correct technique and number of passes. Ensure light, consistent pressure. If wheels are worn, contact customer support. |
| Nadmierny hałas podczas pracy. | Blade inserted incorrectly; foreign object in slot. | Ensure blade is inserted correctly and not forced. Unplug and inspect slots for obstructions. |
If the problem persists after attempting these solutions, please contact Narcissus customer support.
8. Specyfikacje
- Model: QN-M866
- Tworzywo: Stal nierdzewna
- Kolor: Srebrny
- Wymiary produktu: 8.6" dł. x 2.6" szer. x 2.9" wys.
- Waga przedmiotu: 1.63 funtów
- Moc: 30-watt DC motor
- Tomtage: 100-240V (Wide Voltage-projekt)
- Ostrzenie Stages: 2 (Crude & Fine)
- Dodatkowe funkcje: Scissors Sharpening Slot, Magnetic Dust Collection Box
9. Gwarancja i obsługa klienta
Narcissus is committed to providing exceptional customer service.
- Gwarancja: This product comes with a 12-month free replacement or refund policy.
- Rozszerzona usługa: An extended 24-month after-sales service is also provided.
- Problemy z jakością: Should you encounter any quality issues, please contact Narcissus customer support immediately.
- Kontakt: Refer to the product packaging or the official Narcissus webwitryna do informacji kontaktowych.