
1. Informacje dotyczące bezpieczeństwa
Please read and understand all safety information before operating this digital multimeter. Failure to follow these instructions may result in electric shock, fire, or damage to the device.
- Przed dokonaniem jakichkolwiek pomiarów należy zawsze upewnić się, że multimetr jest ustawiony na właściwą funkcję i zakres.
- Nie należy przekraczać maksymalnych wartości wejściowych określonych dla każdej funkcji.
- Zachowaj ostrożność podczas pracy z objętościątagNie należy używać urządzeń o napięciu powyżej 30 V AC RMS, 42 V szczytowym lub 60 V DC, gdyż stwarzają one zagrożenie porażenia prądem.
- Przed każdym użyciem sprawdź przewody pomiarowe pod kątem uszkodzeń. Nie używaj ich, jeśli izolacja jest uszkodzona.
- OSTRZEŻENIE: Before opening the case for battery or fuse replacement, always remove the test leads from the object being measured and disconnect from any power source to avoid electric shock.
- This device features F0.5A/600V fuse overload protection. Replace fuses only with specified types and ratings.
2. Koniec produktuview
The ANENG AN101 is a portable digital multimeter designed for measuring AC voltage, AC current, DC voltage, DC current, and resistance. It features an easy-to-read LCD display with 1999 counts and supports both automatic and manual ranging for versatile use in various electrical and electronic applications.
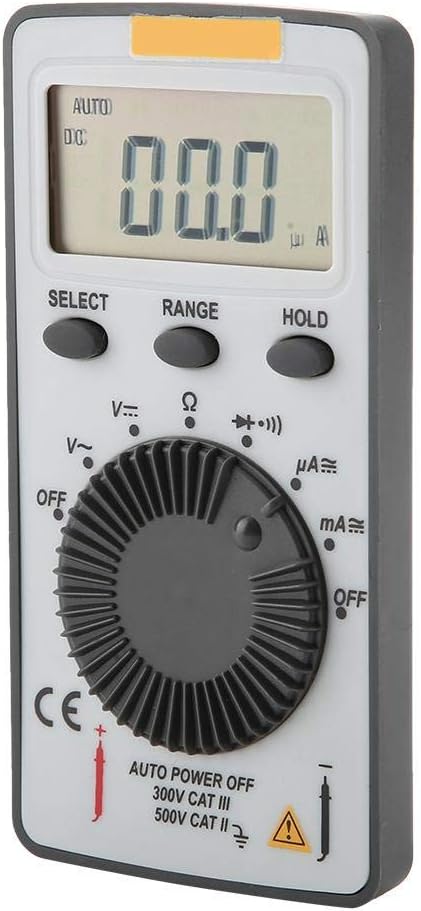
Rycina 2.1: Przód view of the ANENG AN101 Digital Multimeter. This image displays the device's LCD screen, the central rotary function dial, and the 'SELECT', 'RANGE', and 'HOLD' buttons.
3. Konfiguracja
3.1 Instalacja baterii
- Upewnij się, że multimetr jest wyłączony i odłącz wszystkie przewody pomiarowe.
- Znajdź komorę baterii z tyłu urządzenia.
- Za pomocą śrubokręta otwórz pokrywę komory baterii.
- Insert two 3V CR2032 batteries, observing the correct polarity.
- Załóż pokrywę komory baterii i zabezpiecz ją śrubą.

Rysunek 3.1: Tył view of the ANENG AN101 Digital Multimeter. This image shows the battery compartment cover and a safety warning regarding opening the case.
3.2 Podłączanie przewodów pomiarowych
- Insert the red test lead into the 'VΩmA' input jack.
- Insert the black test lead into the 'COM' input jack.
- Ensure the connections are firm before proceeding with measurements.
4. Instrukcja obsługi
4.1 Włączanie/wyłączanie zasilania
Rotate the central dial from 'OFF' to any measurement function to power on the device. To power off, rotate the dial back to 'OFF'. The multimeter also features an auto power-off function to conserve battery life.
4.2 Wybór funkcji
Turn the rotary dial to select the desired measurement function (e.g., DC Voltage (V=), AC Voltage (V~), Resistance (Ω), DC Current (μA=, mA=), AC Current (μA~, mA~)).
4.3 Range Selection (Auto/Manual)
The AN101 supports both automatic and manual ranging. In auto-ranging mode, the meter automatically selects the best range for the measurement. Press the 'RANGE' button to switch between auto and manual ranging. In manual mode, press 'RANGE' repeatedly to cycle through available ranges.
4.4 Pomiar objętości prądu stałegotage
- Set the rotary dial to 'V='.
- Podłącz czerwony przewód pomiarowy do dodatniego bieguna obwodu, a czarny przewód pomiarowy do ujemnego bieguna.
- Przeczytaj tomtage value on the LCD display. The polarity will be indicated automatically.
4.5 Pomiar objętości prądu przemiennegotage
- Set the rotary dial to 'V~'.
- Podłącz przewody pomiarowe do obwodu prądu przemiennegotagŹródło.
- Przeczytaj tomtage wartość na wyświetlaczu LCD.
4.6 Pomiar prądu stałego
- Set the rotary dial to 'μA=' or 'mA=' depending on the expected current.
- OSTRZEŻENIE: To measure current, the multimeter must be connected in series with the circuit. Do not connect it in parallel across a voltagŹródło.
- Break the circuit and connect the multimeter in series, ensuring the red lead is towards the higher potential and the black lead towards the lower potential.
- Odczytaj aktualną wartość na wyświetlaczu LCD.
4.7 Pomiar prądu przemiennego
- Set the rotary dial to 'μA~' or 'mA~'.
- OSTRZEŻENIE: Podłącz multimetr szeregowo do obwodu.
- Przerwij obwód i podłącz multimetr szeregowo.
- Odczytaj aktualną wartość na wyświetlaczu LCD.
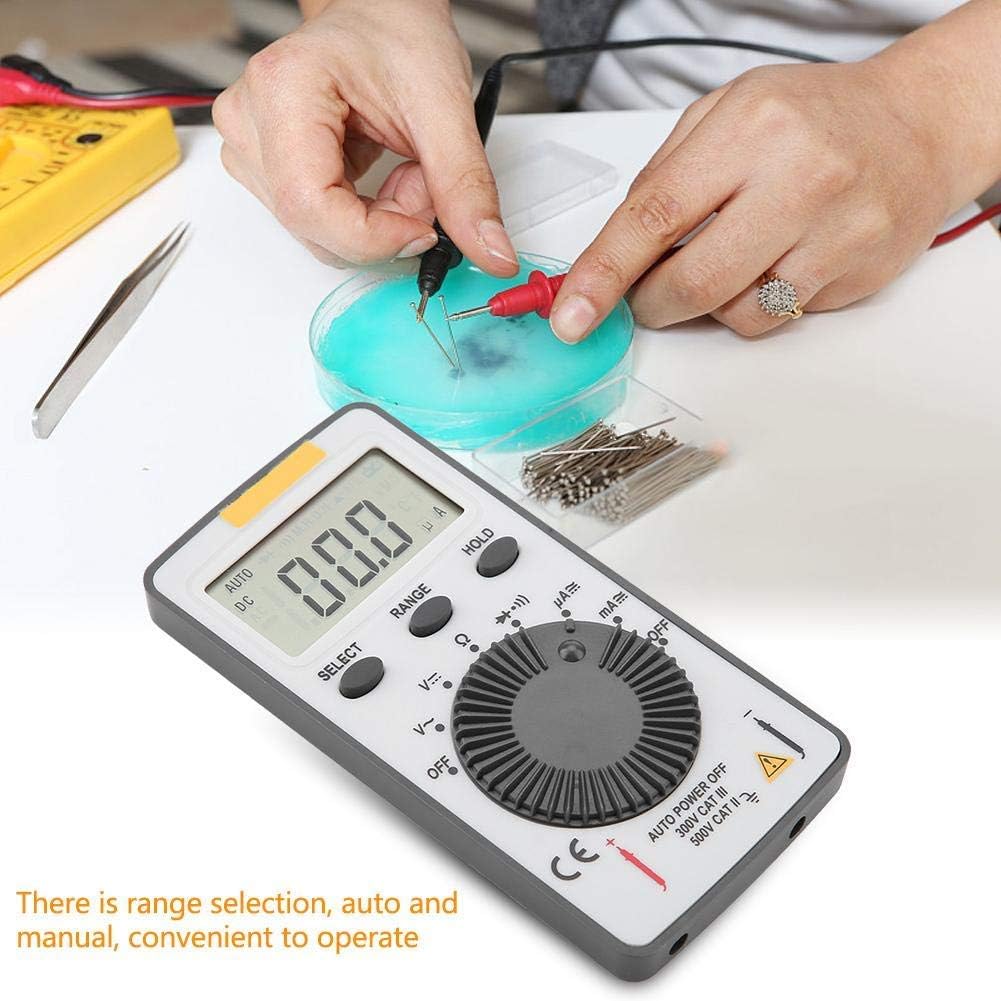
Figure 4.1: The ANENG AN101 Digital Multimeter in use, demonstrating its application for measuring electrical components. The image highlights the ease of operation with auto and manual range selection.
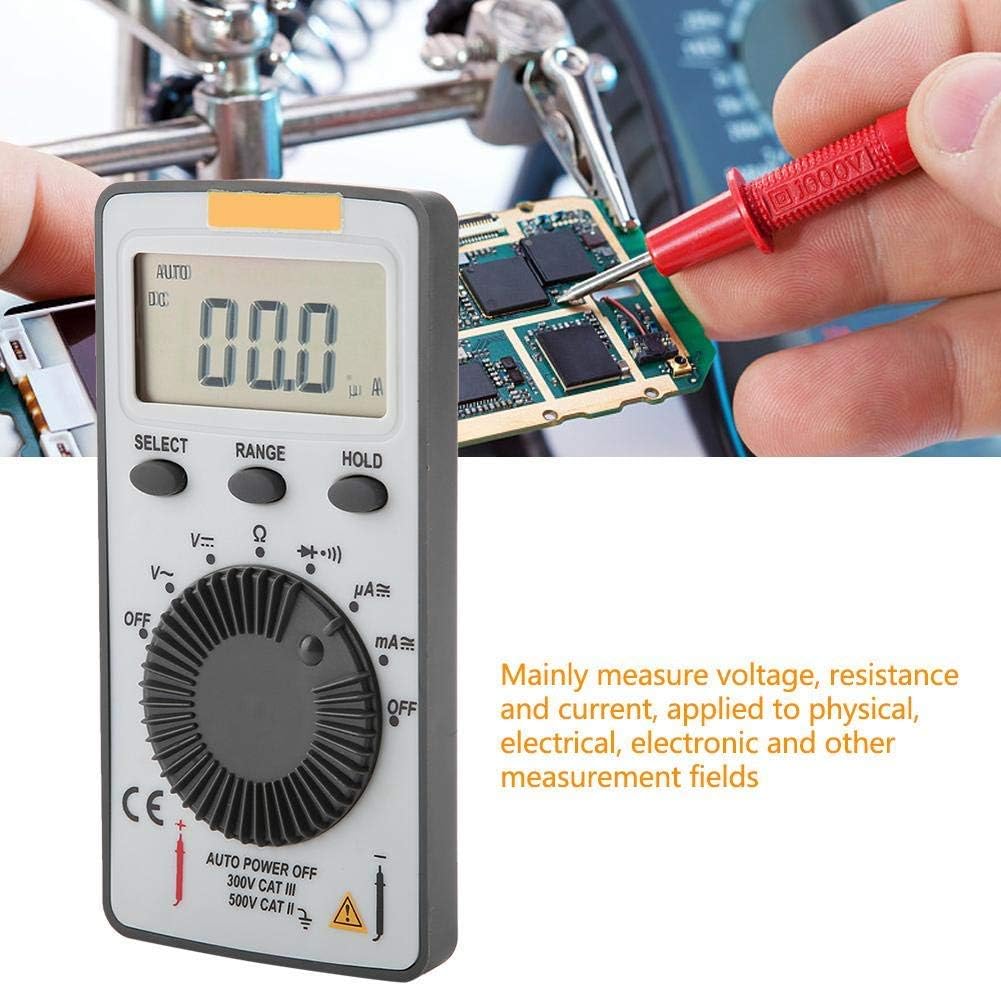
Figure 4.2: The ANENG AN101 Digital Multimeter being used to measure voltage or current on a circuit board. This illustrates its primary function in physical, electrical, and electronic measurement fields.
4.8 Funkcja wstrzymania
Naciśnij przycisk „HOLD”, aby zamrozić aktualny odczyt na wyświetlaczu. Naciśnij go ponownie, aby wyłączyć funkcję HOLD i wznowić pomiary na żywo.
5. Konserwacja
5.1 Czyszczenie
Wipe the device with a dry, soft cloth. Do not use abrasive cleaners or solvents. Keep the device free from dust and moisture.
5.2 Wymiana baterii
When the battery indicator appears on the display, replace the batteries as described in Section 3.1. Always use two new 3V CR2032 batteries.
5.3 Wymiana bezpiecznika
If the current measurement functions stop working, the fuse may need replacement. Refer to the safety warnings in Section 1 before attempting to open the case. Replace the fuse only with a F0.5A/600V type.
6. Rozwiązywanie Problemów
- Brak wyświetlacza: Sprawdź instalację baterii i upewnij się, że nie są rozładowane.
- Wyświetlany jest komunikat „OL”: This indicates an over-range condition. Either the measured value exceeds the selected range, or the circuit is open (for resistance/current measurements). Select a higher range or check circuit continuity.
- Nieprawidłowe odczyty: Ensure test leads are properly connected, the correct function and range are selected, and the circuit connections are secure.
- Pomiar prądu nie działa: Sprawdź bezpiecznik zgodnie z opisem w rozdziale 5.3.
7. Specyfikacje
| Funkcja | Specyfikacja |
|---|---|
| Marka | ANENG |
| Model | AN101 |
| Wyświetlacz | LCD, 1999 Counts |
| Aktualizuj częstotliwość | 2 razy / sekundę |
| Rozmiar LCD | Wymiary: 40*20mm |
| Wskazanie biegunowości | Automatic '-' |
| Wskazanie przekroczenia zakresu | OL |
| Wybór zakresu | Automatyczna lub ręczna |
| Temperatura pracy | 0℃ to 40℃, Relative Humidity: <80% RH |
| Temperatura przechowywania | -10℃ to 50℃, Relative Humidity: <85% RH |
| Typ baterii | 2 * 3V, CR2032 size (not included) |
| Objętość DCtage Impedancja wejściowa | 10MΩ |
| Objętość DCtage Zabezpieczenie przed przeciążeniem | 600 V DC/AC RMS |
| Maks. Objętość DCtage Wejście | 600V prądu stałego |
| DC Current Overload Protection | F0.5A / 600V Fuse |
| Max. DC Current Input | 500mA |
| AC Current Overload Protection | F0.5A / 600V Fuse |
| Max. AC Current Input | 500mA |
| AC Current Frequency Range | 40Hz - 400Hz |
| AC Objętośćtage Impedancja wejściowa | 10MΩ |
| AC ObjętośćtagZakres częstotliwości | 40Hz - 400Hz |
| AC Objętośćtage Zabezpieczenie przed przeciążeniem | 600 V DC/AC RMS |
| Maks. AC Objętośćtage Wejście | 600 V AC RMS |
| Waga | Około 102 g / 3.6 uncji |
| Wymiary | Około 110 * 55 * 10 mm / 4.3 * 2.2 * 0.4 cala |
| Zawartość opakowania | 1 * Digital Multimeter, 2 * Test Leads |

Figure 7.1: Dimensions of the ANENG AN101 Digital Multimeter, showing its compact size for portability.
8. Gwarancja i wsparcie
Aby uzyskać informacje o gwarancji i pomocy technicznej, zapoznaj się z dokumentacją dołączoną do produktu lub skontaktuj się ze sprzedawcą. Zachowaj paragon jako dowód zakupu.


