Mytee S300-H
Mytee S300-H Tempo Heated Spotter User Manual
Model: S300-H | Brand: Mytee
1. Wprowadzenie
This manual provides comprehensive instructions for the safe and effective operation, maintenance, and troubleshooting of your Mytee S300-H Tempo Heated Spotter. Please read this manual thoroughly before operating the unit and retain it for future reference.
1.1 Informacje dotyczące bezpieczeństwa
Always observe basic safety precautions when using electrical appliances to reduce the risk of fire, electric shock, or injury. This includes:
- Przed użyciem należy przeczytać wszystkie instrukcje.
- Podłączać wyłącznie do prawidłowo uziemionego gniazdka.
- Nie zanurzaj urządzenia w wodzie.
- Nie używaj z uszkodzonym przewodem lub wtyczką.
- Podczas pracy urządzenia należy trzymać dzieci i zwierzęta z dala od niego.
- Use only recommended cleaning solutions.
2. Koniec produktuview
The Mytee S300-H Tempo Heated Spotter is a compact and powerful heated carpet extractor designed for efficient spot cleaning and interior maintenance. Its features include:
- Powerful Vacuum Motor: Produces 85 inches of water lift for maximum extraction, reducing drying times with its two-stagi projekt.
- Przyjazny dla użytkownika projekt: Features one-switch operation and easy-to-open caps for solution and recovery tanks, enhancing convenience and safety.
- Trwała konstrukcja: Built with Mytee’s robust roto-molded housing for long-lasting performance, and includes an Air Lite Upholstery Tool.
- Przenośny i kompaktowy: With a 1-gallon tank capacity and weighing only 26 pounds, it is easy to transport and store.
2.1 Składniki
Familiarize yourself with the main components of your S300-H Tempo Heated Spotter:

Rysunek 1: Pełny view of the Mytee S300-H Tempo Heated Spotter, showing the main unit, vacuum hose, solution hose, and upholstery tool.

Rysunek 2: Strona view of the unit, highlighting the control panel with power switches and the quick-connect fitting for the solution hose.
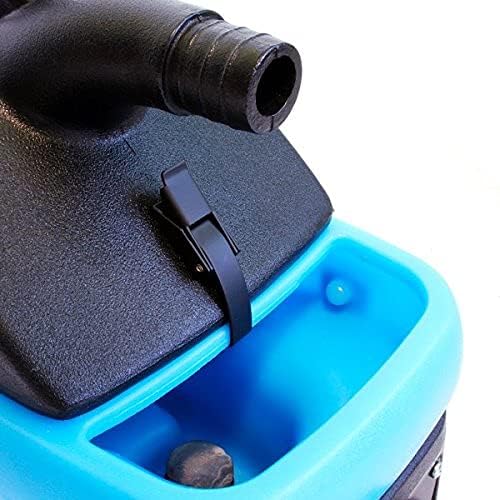
Rysunek 3: Close-up of the easy-to-open cap for the solution tank, located on the top of the unit.
3. Konfiguracja
3.1 Montaż początkowy
- Rozpakuj wszystkie elementy z opakowania.
- Ensure all hoses and the upholstery tool are present.
- Attach the vacuum hose to the vacuum port on the unit.
- Connect the solution hose to the quick-connect fitting on the unit and to the upholstery tool.
3.2 Napełnianie zbiornika z roztworem
- Open the solution tank cap (refer to Figure 3).
- Fill the tank with clean water and the recommended carpet cleaning solution according to the solution manufacturer's instructions. Do not overfill.
- Securely close the solution tank cap.
4. Instrukcja obsługi
4.1 Włączanie
- Podłącz przewód zasilający do uziemionego gniazdka elektrycznego.
- Turn on the "Vacuum" switch.
- Turn on the "Pump" switch.
- If heated cleaning is desired, turn on the "Heater" switch. Allow a few minutes for the water to heat up.
4.2 Proces czyszczenia
- Pre-test the cleaning solution on an inconspicuous area of the material to be cleaned for colorfastness.
- Position the upholstery tool over the area to be cleaned.
- Press the trigger on the upholstery tool to spray the cleaning solution onto the surface.
- While spraying, pull the tool slowly across the surface to extract the dirty solution. Overlap passes slightly.
- For heavily soiled areas, repeat the process. For best results, perform a final pass without spraying solution to maximize extraction of moisture.
- Monitor the recovery tank for dirty water.

Rysunek 4: The upholstery tool in action, demonstrating the cleaning process on a carpeted surface.
4.3 Emptying the Recovery Tank
- Turn off all switches and unplug the unit.
- Locate the recovery tank drain.
- Carefully drain the dirty water into a suitable receptacle.
- Rinse the recovery tank with clean water if necessary.
5. Konserwacja
5.1 Rutynowe czyszczenie
- After each use, empty and rinse both the solution and recovery tanks thoroughly.
- Flush the solution lines by running clean water through the system.
- Clean the upholstery tool, removing any debris from the nozzle and extraction head.
- Przetrzyj zewnętrzną część urządzenia za pomocą reklamyamp płótno.
5.2 Przechowywanie
Store the unit in a clean, dry place, away from extreme temperatures. Ensure all tanks are empty and hoses are properly coiled to prevent damage.
6. Rozwiązywanie Problemów
| Problem | Możliwa przyczyna | Rozwiązanie |
|---|---|---|
| Urządzenie nie włącza się. | Not plugged in; circuit breaker tripped; faulty power switch. | Sprawdź podłączenie zasilania, zresetuj wyłącznik automatyczny, skontaktuj się z serwisem. |
| No spray from upholstery tool. | Solution tank empty; pump switch off; clogged nozzle; kinked solution hose. | Refill solution tank; turn on pump switch; clean nozzle; straighten hose. |
| Niskie ssanie. | Recovery tank full; vacuum hose clogged or disconnected; vacuum motor issue. | Empty recovery tank; check hose connections and clear obstructions; contact service center. |
| Grzejnik nie działa. | Heater switch off; electrical issue. | Turn on heater switch; ensure adequate power supply; contact service center. |
| Z jednostki wycieka woda. | Loose hose connection; damaged tank or seal; internal component issue. | Check all connections; inspect tanks and seals for damage; contact service center. |
For issues not listed or if solutions do not resolve the problem, please contact Mytee customer support.
7. Specyfikacje
| Funkcja | Szczegół |
|---|---|
| Numer modelu | S300-H |
| Producent | Mytee |
| Waga przedmiotu | 26 funtów |
| Wymiary opakowania | 24.25 x 22 x 10 cala |
| Pojemność zbiornika | 1 Gallon (Solution & Recovery) |
| Winda wodna | 85 cali |
| Silnik próżniowy | Dwójkatage |
| Kolor | White (Unit housing is black and blue) |
| ASIN | B09GPR8VY3 |
8. Gwarancja i wsparcie
8.1 Informacje o gwarancji
Mytee offers a limited lifetime warranty on the body of the S300-H Tempo Heated Spotter. Additionally, there is a one-year warranty covering the pump, vacuum motor, and heating system. Please retain your proof of purchase for warranty claims.
8.2 Obsługa klienta
For technical assistance, warranty service, or to locate a service center, please visit the official Mytee website or contact their customer support directly. Mytee maintains a national network of authorized service centers to assist you.
Ask a question about this manual
Ask about setup, troubleshooting, compatibility, parts, safety, or missing instructions. Manuals+ will review the question and use this page’s manual context to help answer it.