
Roxicosly CR1018
Instrukcja obsługi budzika cyfrowego Roxicosly
Model: CR1018
1. Wprowadzenie
Thank you for choosing the Roxicosly Digital Alarm Clock. This device is designed to provide accurate timekeeping, reliable alarm functions, and convenient charging capabilities for your mobile devices. Featuring a large LED display and user-friendly controls, this manual will guide you through the setup, operation, and maintenance of your new alarm clock.
2. Funkcje produktu
- 8.7" LED Display with 7-Level Dimmer: Large digits for clear visibility from a distance, with adjustable brightness to suit day and night viewing.
- Podwójny budzik: Set two separate alarms for different schedules.
- 2 porty ładowania USB: Wygodne ładowanie dwóch urządzeń mobilnych jednocześnie.
- 7-Level Adjustable Volume: Customize alarm volume from 92-110dB.
- Large Snooze Button: Zapewnia dodatkowe 9 minut snu.
- Zasilany prądem przemiennym z baterią podtrzymującą: Requires AC power for operation, with a CR2032 coin cell battery (included) to retain time and alarm settings during power outagt.j.
- 12/24H & DST Support: Switch between 12-hour and 24-hour time formats, and enable/disable Daylight Saving Time.
3. Zawartość opakowania
- Roxicosly Digital Alarm Clock (Model: CR1018)
- CR2032 Coin Cell Battery (pre-installed)
- Kabel ładujący
- Zasilacz
- Instrukcja obsługi
4. Przewodnik konfiguracji
4.1 Połączenie zasilania
Connect the provided charging cable to the DC IN 5V port on the back of the alarm clock. Plug the power adapter into a standard AC outlet (100-240V). The display will light up, indicating the clock is powered on.
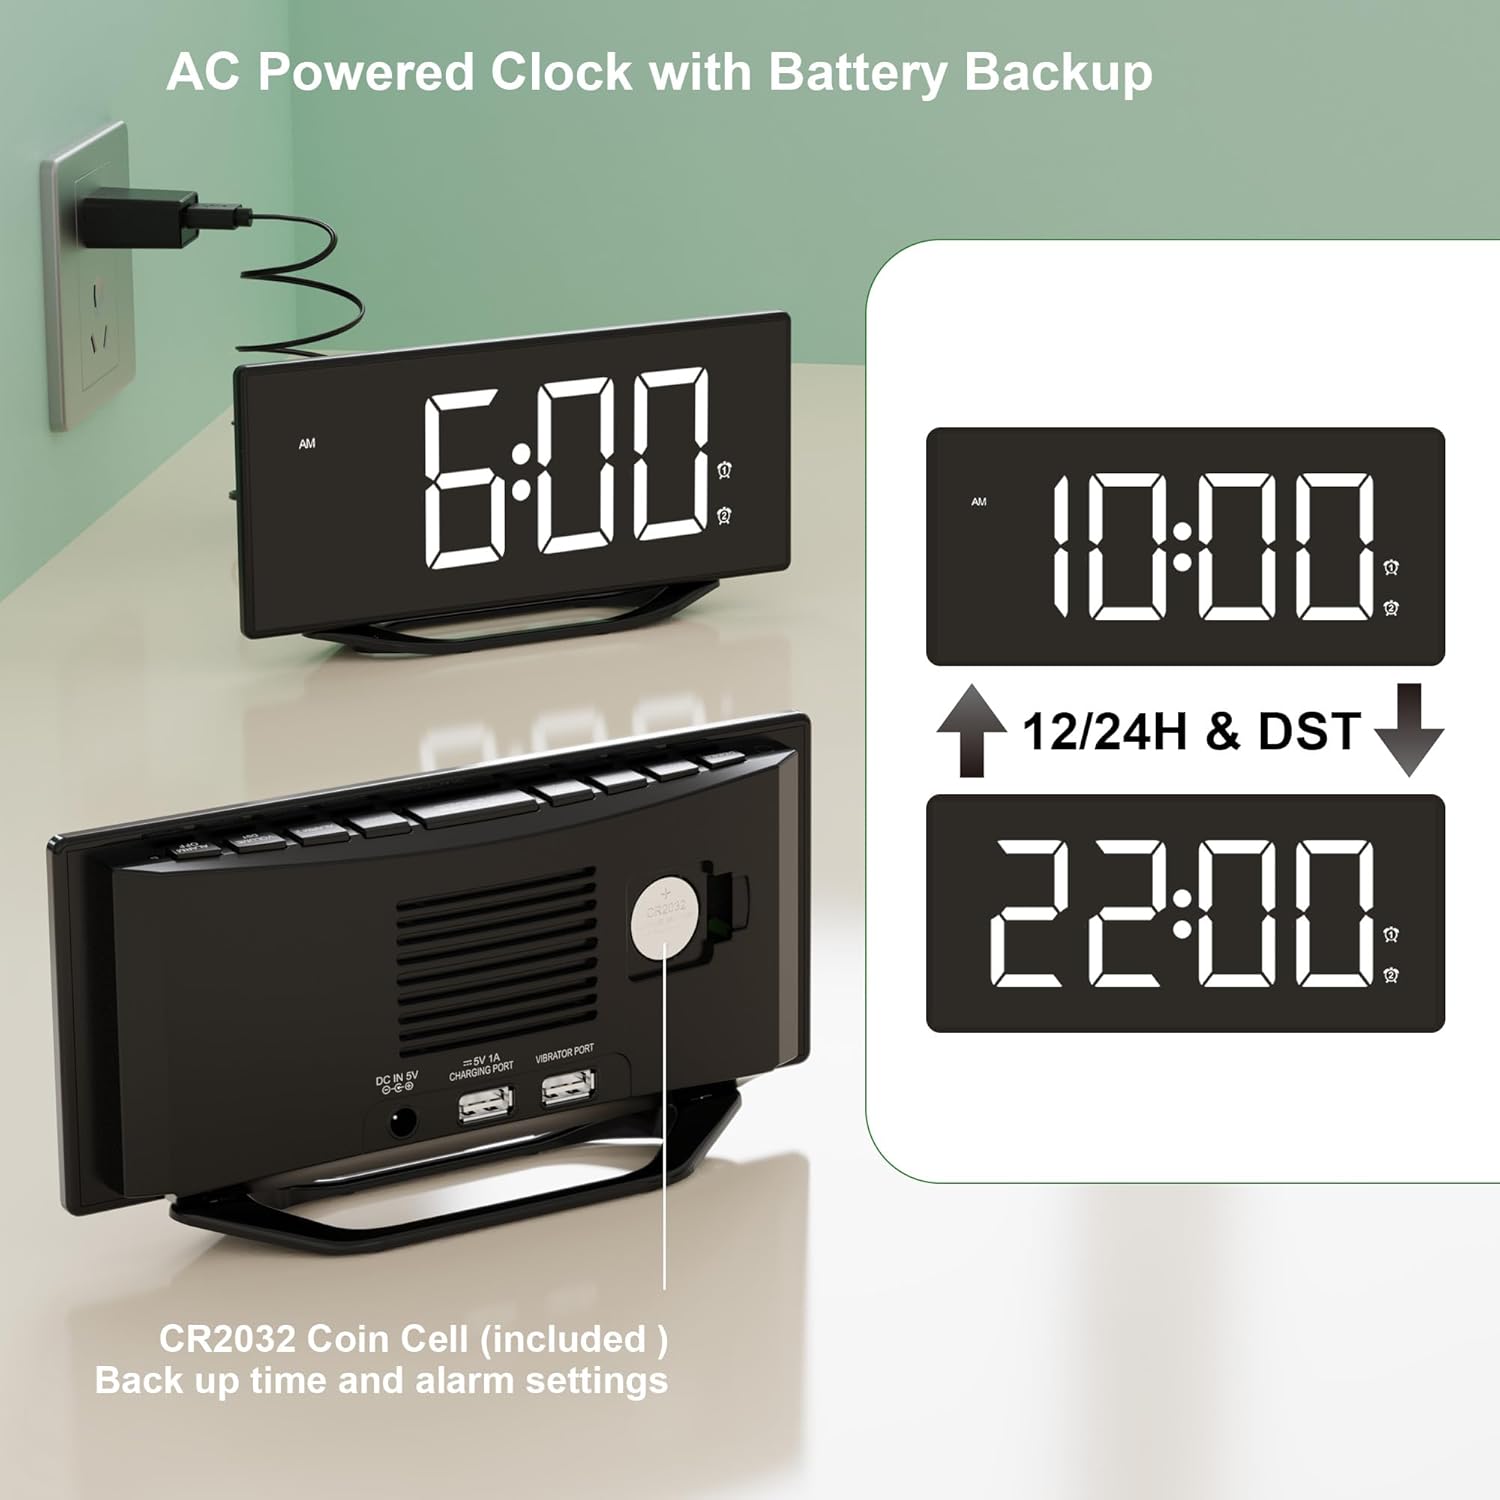
Image: The alarm clock connected to a wall outlet via its power adapter, illustrating the AC power connection.
4.2 Zapasowa bateria
A CR2032 coin cell battery is pre-installed to provide backup power. This battery ensures that time and alarm settings are retained during a power outage. The clock will not display time or function without AC power, but settings will be saved.

Obraz: Tył view of the clock highlighting the CR2032 battery compartment, indicating its role in backing up settings.
5. Instrukcja obsługi
5.1 Ustawianie czasu
- Naciśnij USTAWIENIE CZASU Naciśnij przycisk raz. Cyfry godzin zaczną migać.
- Użyj GODZINA przycisk, aby ustawić godzinę.
- Naciśnij CHWILA przycisk, aby ustawić minuty.
- Naciskać USTAWIENIE CZASU ponownie, aby potwierdzić i wyjść z trybu ustawiania czasu.
5.2 Ustawianie alarmów (Alarm 1 i Alarm 2)
This clock features two independent alarms.
- Naciśnij ALARM 1 or ALARM 2 button once. The corresponding alarm time will flash.
- Użyj GODZINA przycisk, aby ustawić żądaną godzinę alarmu.
- Użyj CHWILA przycisk, aby ustawić żądaną minutę alarmu.
- Naciskać ALARM 1 or ALARM 2 again to confirm the alarm time. The alarm icon (1 or 2) will appear on the display, indicating the alarm is active.
- Aby wyłączyć alarm, naciśnij odpowiedni przycisk ALARM 1 or ALARM 2 Naciskaj przycisk, aż ikona alarmu zniknie z wyświetlacza.

Image: Illustration of the dual alarm functionality, allowing for two distinct alarm settings.
5.3 Regulacja jasności wyświetlacza
The display has 7 levels of brightness. Press the OPORNIK button repeatedly to cycle through the brightness levels from brightest to dimmest. Select the level that is most comfortable for your environment.

Image: Visual representation of the 7-level display brightness settings.
5.4 Regulacja głośności alarmu
The alarm volume can be adjusted to 7 levels. When an alarm is sounding, or while setting an alarm, press the TOM button to cycle through the volume levels. Choose a volume suitable for your needs.

Image: Detail of the volume control button on the clock's interface.
5.5 Funkcja drzemki
Gdy zabrzmi alarm, naciśnij duży przycisk DRZEMKA button located on top of the clock. The alarm will pause for 9 minutes and then sound again. You can repeat this process until you press the corresponding ALARM WYŁĄCZONY button to fully deactivate the alarm.

Image: A user activating the snooze function by pressing the large button on top of the clock.
5.6 porty ładowania USB
The clock is equipped with two USB output ports (5V/1A) on the back, allowing you to charge your smartphones, tablets, or other USB-powered devices. Simply connect your device's USB charging cable to one of the ports.

Image: The alarm clock actively charging two mobile devices via its integrated USB ports.
5.7 12/24H Format & DST
Aby przełączać się między formatem czasu 12-godzinnym i 24-godzinnym, naciśnij przycisk 12/24 godziny button. When in 12-hour format, 'AM' or 'PM' indicators will be displayed. To enable or disable Daylight Saving Time (DST), press the Czas letni button. When DST is active, the time will adjust by one hour, and the 'DST' indicator will appear on the display.

Image: Comparison of the clock display in 12-hour and 24-hour formats.
6. Konserwacja
To ensure the longevity and optimal performance of your alarm clock, follow these maintenance guidelines:
- Czyszczenie: Przetrzyj zegar miękką, suchą ściereczką. Nie używaj środków czyszczących o właściwościach ściernych, wosków ani rozpuszczalników, ponieważ mogą one uszkodzić wykończenie.
- Umieszczenie: Zegar należy ustawić na stabilnej, płaskiej powierzchni, z dala od bezpośredniego światła słonecznego, nadmiernego ciepła i wilgoci.
- Wymiana baterii: If the CR2032 backup battery needs replacement, carefully open the battery compartment on the back of the unit and insert a new CR2032 battery, observing polarity.
7. Rozwiązywanie Problemów
| Problem | Możliwa przyczyna | Rozwiązanie |
|---|---|---|
| Wyświetlacz jest pusty lub nie świeci się. | No AC power; Power adapter faulty; Dimmer set to lowest level. | Ensure power adapter is securely plugged into the clock and a working outlet. Check the power outlet. Press the DIMMER button to increase brightness. |
| Alarm nie włącza się. | Alarm not set or deactivated; Volume set too low. | Verify alarm icon (1 or 2) is visible on the display. Re-set the alarm if necessary. Increase alarm volume using the VOLUME button. |
| Ładowanie przez USB nie działa. | Device not properly connected; Cable faulty; Device requires more power than 1A. | Ensure USB cable is firmly connected to both the clock and the device. Try a different USB cable. Note that the ports provide 5V/1A, which may not be sufficient for all devices (e.g., some tablets). |
| Resetowanie czasu/ustawień po wyłączeniu zasilaniatage. | Brak lub rozładowanie zapasowej baterii CR2032. | Replace the CR2032 coin cell battery. Ensure it is inserted with correct polarity. |
8. Specyfikacje
- Marka: Roxicosly
- Numer modelu: CR1018
- Kolor: Black (non-mirror Surface)
- Wymiary produktu: Wymiary 19.79 x 10.21 x 4.42 cm
- Waga przedmiotu: 300 gramów
- Tworzywo: Plastikowy
- Typ wyświetlacza: PROWADZONY
- Źródło zasilania: prąd zmienny (100-240 V)
- Zapas baterii: 1 x CR2032 Coin Cell (included)
- Wyjście USB: 2 x 5V/1A ports
- Cechy szczególne: 7-level Dimmer, Dual Alarm, Dual USB Charging Ports, Snooze, 12/24H & DST
9. Gwarancja i wsparcie
Aby uzyskać informacje o gwarancji lub pomocy technicznej, zapoznaj się z dokumentacją zakupu lub skontaktuj się bezpośrednio ze sprzedawcą/producentem. Zachowaj dowód zakupu na wypadek roszczeń gwarancyjnych.
Powiązane dokumentyCR1018


Ask a question about this manual
Ask about setup, troubleshooting, compatibility, parts, safety, or missing instructions. Manuals+ will review the question and use this page’s manual context to help answer it.