1. Ważne instrukcje bezpieczeństwa
Before operating your Kirby G6 Upright Vacuum Cleaner, please read and understand all safety instructions. Failure to follow these instructions may result in electric shock, fire, or serious injury.
- Always unplug the vacuum cleaner from the electrical outlet before servicing or cleaning.
- Nie używaj odkurzacza na mokrych powierzchniach ani do zbierania płynów.
- Trzymaj włosy, luźne ubrania, palce i inne części ciała z dala od otworów i ruchomych części.
- Nie zbieraj palących się lub dymiących przedmiotów, np. papierosów, zapałek lub gorącego popiołu.
- Używaj wyłącznie zgodnie z opisem w niniejszej instrukcji. Używaj wyłącznie akcesoriów zalecanych przez producenta.
- Nie używaj z uszkodzonym przewodem lub wtyczką. Jeśli urządzenie nie działa tak, jak powinno, zostało upuszczone, uszkodzone, pozostawione na zewnątrz lub wrzucone do wody, zwróć je do centrum serwisowego.
- Zachowaj szczególną ostrożność podczas sprzątania schodów.
2. Koniec produktuview
The Kirby G6 Upright Vacuum Cleaner is designed for effective cleaning of various surfaces. It features a robust motor and a versatile design for both upright and handheld use with its included tool kit.

Rysunek 2.1: Pełny view of the Kirby G6 Upright Vacuum Cleaner.

Figure 2.2: Close-up of the Kirby G6 vacuum cleaner head.
3. Instalacja i montaż
Your Kirby G6 vacuum cleaner comes partially assembled. Follow these steps to prepare it for use.
3.1 Handle Attachment
- Ostrożnie wyjąć wszystkie elementy z opakowania.
- Align the handle assembly with the main vacuum body.
- Insert the handle into the designated slot until it clicks securely into place. Ensure the locking mechanism is engaged to prevent wobbling during operation.
3.2 Podłączenie przewodu zasilającego
The Kirby G6 operates on a standard 120 Volt corded electric power source. Ensure the power cord is untangled before plugging it into a grounded electrical outlet.
3.3 Tool Kit Assembly
Your vacuum includes a full tool kit for versatile cleaning. Refer to the specific tool instructions for attachment and use. Common tools include brushes for upholstery and crevice tools for tight spaces.
4. Instrukcja obsługi
The Kirby G6 is designed for efficient cleaning across various indoor and outdoor surfaces, including upholstery. It features a single power level controlled by a push button and touch interface.

Figure 4.1: The Kirby G6 in operation on a carpeted surface.
4.1 Włączanie/wyłączanie
- Podłącz przewód zasilający do odpowiedniego gniazdka elektrycznego.
- Locate the power button, typically on the main unit or handle. Press the button to turn the vacuum cleaner on.
- Aby wyłączyć, naciśnij ponownie przycisk zasilania.
4.2 Adjusting for Different Surfaces
The vacuum head may have height adjustments for different carpet pile heights or hard floors. Consult the markings on the vacuum head for appropriate settings. For upholstery, use the specialized brush attachment from the tool kit.
4.3 Korzystanie z załączników
To use attachments, detach the main vacuum head or convert the unit to handheld mode as per the design. Connect the desired tool (e.g., crevice tool, upholstery brush) firmly to the hose or attachment port.
5. Konserwacja
Regular maintenance ensures optimal performance and extends the life of your Kirby G6 vacuum cleaner. Always unplug the unit before performing any maintenance.

Figure 5.1: Airflow diagram showing the path of air and debris through the vacuum.

Figure 5.2: Filtration diagram detailing how dust and allergens are captured.
5.1 Changing Filter Bags
The Kirby G6 uses cloth filter bags for filtration. Replace the filter bag when it is approximately two-thirds full to maintain suction power and filtration efficiency.
- Odłącz odkurzacz.
- Locate the filter bag compartment, usually on the side or front of the main unit.
- Open the compartment and carefully remove the full filter bag. Dispose of it properly.
- Insert a new Kirby filter bag, ensuring it is seated correctly and the seal is tight.
- Dokładnie zamknij komorę.
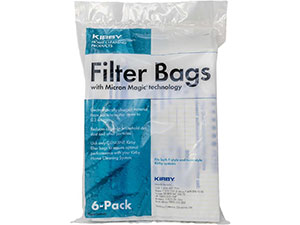
Rysunek 5.3: Example of Kirby Micron Magic Filter Bags.
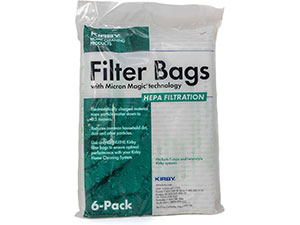
Rysunek 5.4: Example of Kirby HEPA Filtration Filter Bags.
5.2 Brush Roll and Belt Inspection
Periodically check the brush roll for tangled hair or debris. Clean as necessary. Inspect the drive belt for wear or damage. Replace worn belts to maintain effective brush roll rotation.

Figure 5.5: Kirby replacement drive belts.
5.3 Ogólne czyszczenie
Wytrzyj zewnętrzną część odkurzacza miękką szmatką.amp cloth. Do not use harsh chemicals or abrasive cleaners. Ensure all air vents are clear of obstructions.
6. Rozwiązywanie Problemów
If you encounter issues with your Kirby G6, refer to the following common problems and solutions.
| Problem | Możliwa przyczyna | Rozwiązanie |
|---|---|---|
| Utrata ssania | Full filter bag, clogged hose/attachments, obstructed brush roll. | Replace filter bag, clear any blockages from hose/attachments, clean brush roll. |
| Odkurzacz się nie włącza | No power, loose plug, tripped circuit breaker. | Check power cord connection, try a different outlet, reset circuit breaker. |
| Nietypowe dźwięki | Object caught in brush roll or fan, worn belt, loose component. | Unplug and inspect brush roll for obstructions. Check belt for wear. Ensure all parts are securely fastened. |
| Szczotka rolkowa się nie obraca | Broken or worn belt, brush roll jammed. | Replace drive belt. Clear any debris from brush roll. |
Jeśli po wypróbowaniu tych rozwiązań problem nadal występuje, skontaktuj się z obsługą klienta.
7. Specyfikacje
- Marka: Kirby
- Model: G6
- Źródło zasilania: Elektryczny przewodowy
- Tomtage: 120 wolty
- Typ filtra: Cloth (Note: While some specifications may list 'Bagless', this model utilizes replaceable cloth filter bags for optimal filtration.)
- Maksymalne ssanie: 114.7 Centimeters (measurement unit as provided)
- Poziom hałasu: 70 decybeli
- Współczynnik kształtu: Upright, Handheld (with attachments)
- Zawartość zestawu: Main unit, Handle, Full Tool Kit (including various brushes)
- Metoda sterowania: Przycisk, dotyk
- Zastosowanie wewnątrz/na zewnątrz: Wewnątrz, Na zewnątrz
8. Informacje o gwarancji
This Kirby G6 Upright Vacuum Cleaner comes with a 5-year warranty. Please retain your proof of purchase for warranty claims. The warranty covers manufacturing defects and malfunctions under normal use. It does not cover damage caused by misuse, neglect, or unauthorized repairs.
For specific warranty terms and conditions, please refer to the warranty card included with your product or visit the official Kirby webstrona.
9. Obsługa klienta
For further assistance, technical support, or to order replacement parts, please contact Kirby customer service. You can typically find contact information on the official Kirby webna stronie internetowej lub w dokumentacji dołączonej do zakupu.
When contacting support, please have your model number (G6) and serial number (if applicable) ready.