
1. Wprowadzenie
This manual provides detailed instructions for the installation, operation, and maintenance of the VIVOTEK ND9323P H.265 8-Channel Embedded PoE Network Video Recorder (NVR). Please read this manual thoroughly before using the product to ensure proper and safe operation. Keep this manual for future reference.
2. Informacje dotyczące bezpieczeństwa
Observe the following safety precautions to prevent damage to the NVR and to ensure user safety:
- Zasilanie: Use only the power adapter supplied with the NVR. Ensure the power source matches the NVR's voltagi wymagania.
- Wentylacja: Do not block any ventilation openings. Install the NVR in a well-ventilated area to prevent overheating.
- Środowisko: Avoid exposing the NVR to water, moisture, extreme temperatures, or direct sunlight. Do not place heavy objects on the NVR.
- Serwisowanie: Nie próbuj samodzielnie naprawiać tego produktu. Wszelkie czynności serwisowe należy powierzyć wykwalifikowanemu personelowi serwisowemu.
- Obsługiwanie: Należy obchodzić się z rejestratorem NVR ostrożnie. Unikać upuszczania i narażania na silne uderzenia.
3. Zawartość opakowania
Carefully unpack the box and ensure all items are present and in good condition. If any items are missing or damaged, contact your vendor immediately.
- VIVOTEK ND9323P NVR Unit
- Zasilacz
- Mysz USB
- Szybki przewodnik instalacji
- Accessory Pack (Screws for HDD installation, Ethernet cable)
- Case (referring to the NVR enclosure itself)
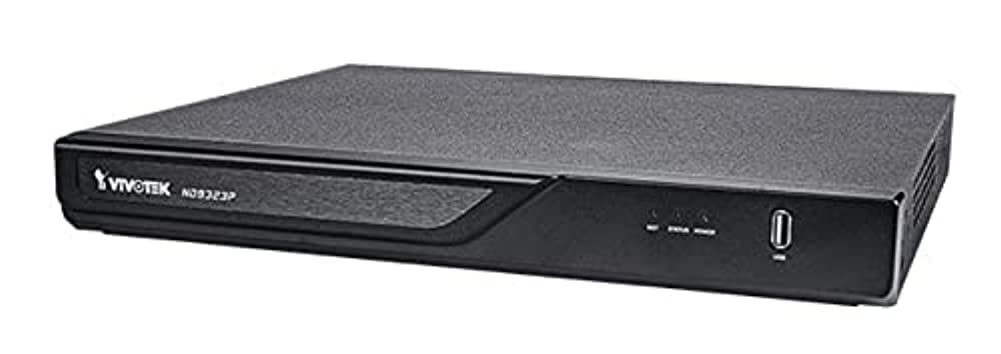
Figure 3.1: VIVOTEK ND9323P NVR unit. This image shows the front panel of the NVR, typically featuring status indicators and USB ports.
4. Koniec produktuview
The VIVOTEK ND9323P is an 8-channel embedded Network Video Recorder designed for IP surveillance systems. It supports H.265 video compression for efficient storage and bandwidth usage. With its integrated Power over Ethernet (PoE) ports, it simplifies camera installation by providing both power and data connectivity through a single Ethernet cable.
4.1 Główne cechy
- 8-Channel Video Input
- H.265/H.264 Video Compression
- 8 x 802.3at/af PoE Ports
- Local Display Output (HDMI/VGA)
- Remote Access via VIVOTEK VIVOCloud App or VMS
- Supports up to 16TB HDD storage (HDD not included)
4.2 Panele przednie i tylne
Refer to the Quick Installation Guide for detailed diagrams of the front and rear panels, indicating ports and indicators.
- Panel przedni: Power LED, HDD LED, Network LED, USB ports.
- Tylny panel: Power input, LAN port, PoE ports (1-8), HDMI output, VGA output, Audio I/O, USB ports.
5. Konfiguracja
5.1 Instalacja dysku twardego (opcjonalnie)
The NVR does not typically include a pre-installed hard drive. Follow these steps to install a 3.5-inch SATA hard drive:
- Odkręć i zdejmij górną pokrywę rejestratora NVR.
- Podłącz kabel danych SATA i kabel zasilający rejestratora NVR do dysku twardego.
- Przymocuj dysk twardy do obudowy rejestratora NVR za pomocą dołączonych śrub.
- Załóż górną pokrywę i przykręć ją śrubami.
Notatka: Ensure the NVR is powered off and unplugged before installing or removing a hard drive.
5.2 Połączenia fizyczne
- Podłącz kamery: Connect your IP cameras to the NVR's PoE ports (1-8) using Ethernet cables. The NVR will provide power and network connectivity to the cameras.
- Połącz z siecią: Connect the NVR's LAN port to your local network router or switch using an Ethernet cable.
- Podłącz wyświetlacz: Podłącz monitor do portu wyjściowego HDMI lub VGA rejestratora NVR.
- Podłącz mysz: Podłącz mysz USB do jednego z portów USB rejestratora NVR.
- Włączanie: Podłącz zasilacz do wejścia zasilania rejestratora NVR, a następnie do gniazdka elektrycznego. Rejestrator NVR włączy się automatycznie.
5.3 Konfiguracja początkowa
Upon first boot, the NVR will guide you through a setup wizard on the connected monitor:
- Wybór języka: Wybierz preferowany język.
- Konfiguracja hasła: Utwórz silne hasło do konta administratora. Jest to kluczowe dla bezpieczeństwa.
- Ustawienia sieciowe: Configure network settings (DHCP or Static IP). DHCP is recommended for most home users.
- Czas i data: Ustaw prawidłową strefę czasową, datę i godzinę.
- Inicjalizacja dysku twardego: If you installed a new hard drive, the NVR will prompt you to format it. Confirm to proceed. Ostrzeżenie: Formatting will erase all data on the drive.
- Wyszukiwanie i dodawanie kamer: The NVR will automatically search for connected VIVOTEK cameras. Select and add them to the NVR.
- Skończyć: Complete the wizard to access the NVR's live view.
6. Obsługa rejestratora NVR
6.1 Accessing the NVR
You can access and manage the NVR through various methods:
- Wyświetlacz lokalny: Directly via the connected monitor and USB mouse.
- Web Przeglądarka: Wprowadź adres IP NVR do web przeglądarkę na komputerze podłączonym do tej samej sieci.
- VIVOTEK VIVOCloud App: Download the mobile app for remote viewi zarządzania.
- VIVOTEK VAST 2 VMS: For advanced management and multi-NVR systems.
6.2 Na żywo View
Życie view displays real-time video feeds from all connected cameras. You can switch between single-camera view, siatka wielokamerowa viewi dostosuj układ wyświetlania.
6.3 Ustawienia nagrywania
Configure recording schedules and modes for each camera:
- Ciągłe nagrywanie: Nagrywa 24/7.
- Nagrywanie z wykrywaniem ruchu: Nagrywa tylko po wykryciu ruchu.
- Zaplanowane nagrywanie: Nagrania z określonych okresów czasu.
- Rejestrowanie zdarzeń: Records based on external triggers or alarms.
Access these settings through the NVR's main menu: Configuration > Recording > Schedule.
6.4 Odtwarzanie
Aby ponownieview nagrano footage:
- Z menu głównego wybierz Odtwarzanie nagranego dźwięku.
- Choose the camera(s) and the date/time range you wish to review.
- Użyj osi czasu i elementów sterujących odtwarzaniem (odtwarzanie, pauza, szybkie przewijanie do przodu, przewijanie do tyłu), aby poruszać się po utworze.tage.
6.5 Event Management and Notifications
Configure the NVR to respond to events such as motion detection, camera tampering, or network disconnection. The NVR can send email notifications, trigger alarms, or start recording.
Access these settings via: Configuration > Event.
7. Konserwacja
7.1 aktualizacji oprogramowania sprzętowego
Regularly check for and install firmware updates to ensure optimal performance, security, and access to new features. Firmware can be updated via the NVR's web interface or local display menu: Configuration > System > Firmware Upgrade.
Ostrożność: Do not power off the NVR during a firmware upgrade. This can cause permanent damage.
7.2 Zarządzanie dyskiem twardym
Monitor the health of your hard drive(s) and ensure sufficient storage space. The NVR will automatically overwrite the oldest recordings when the disk is full, based on your settings.
Access HDD status and settings via: Configuration > Storage > HDD Management.
7.3 Czyszczenie
Keep the NVR unit clean and free from dust. Use a soft, dry cloth for cleaning. Do not use liquid cleaners or aerosols.
8. Rozwiązywanie Problemów
This section addresses common issues you might encounter with your VIVOTEK ND9323P NVR.
8.1 Brak obrazu na monitorze
- Sprawdź kable: Upewnij się, że kabel HDMI/VGA jest prawidłowo podłączony do rejestratora NVR i monitora.
- Wejście monitora: Sprawdź, czy monitor jest ustawiony na prawidłowe źródło sygnału wejściowego (HDMI/VGA).
- Zasilanie NVR: Confirm the NVR is powered on and its power LED is illuminated.
8.2 Cameras Not Showing Up / No Image
- Połączenie PoE: Ensure cameras are properly connected to the NVR's PoE ports. Check if the PoE port LEDs on the NVR are active.
- Moc aparatu: If not using PoE, ensure cameras are receiving power from their own power adapters.
- Łączność sieciowa: Verify the NVR and cameras are on the same network segment if not directly connected via PoE.
- Stan aparatu: Check the camera's own status indicators.
- NVR Camera Management: Idź do Configuration > Camera > Camera Management to ensure cameras are added and enabled. Try rescanning for cameras.
8.3 Cannot Access NVR via Web Przeglądarka
- Adres IP: Confirm the NVR's IP address is correct and that your computer is on the same network.
- Kabel internetowy: Ensure the NVR's LAN port is connected to your network.
- Zapora sieciowa: Temporarily disable your computer's firewall to check if it's blocking access.
- Zgodność z przeglądarkami: Use a recommended web przeglądarka (np. Chrome, Firefox).
8.4 Zapomniane hasło
If you forget the administrator password, you may need to perform a factory reset. Refer to the VIVOTEK support website or contact technical support for the specific procedure for your model, as this often involves a physical reset button or a specific utility.
9. Specyfikacje
The following table lists the key specifications for the VIVOTEK ND9323P NVR:
| Funkcja | Specyfikacja |
|---|---|
| Numer modelu | ND9323P |
| Marka | VIWOTEK |
| Liczba kanałów | 8 |
| Technologia łączności | Sieć Ethernetowa |
| Kompatybilne urządzenia | Camera, Mobile Device |
| Kompresja wideo | H.265, H.264 |
| Porty PoE | 8 x 802.3at/af |
| Wymiary produktu | 19.69 x 19.69 x 11.02 cala |
| Waga przedmiotu | 0.01 uncji |
| Producent | Wiwotek |
10. Gwarancja i wsparcie
VIVOTEK products are covered by a limited warranty. For detailed warranty terms and conditions, please refer to the warranty card included with your product or visit the official VIVOTEK webstrona.
For technical support, product registration, or to download the latest firmware and software, please visit the VIVOTEK support portal:
VIVOTEK Official Support Webstrona
When contacting support, please have your NVR's model number (ND9323P) and serial number ready.