Wstęp
The XTUGA Recording Microphone Isolation Shield MIS02 is designed to enhance vocal and instrument recording quality by minimizing unwanted ambient noise and reflections. This portable soundproof cover features a multi-panel design with high-density absorbent foam, creating an optimal acoustic environment for clear and professional audio capture. Its foldable structure offers flexibility for various recording setups, whether on a desktop or a microphone stand.
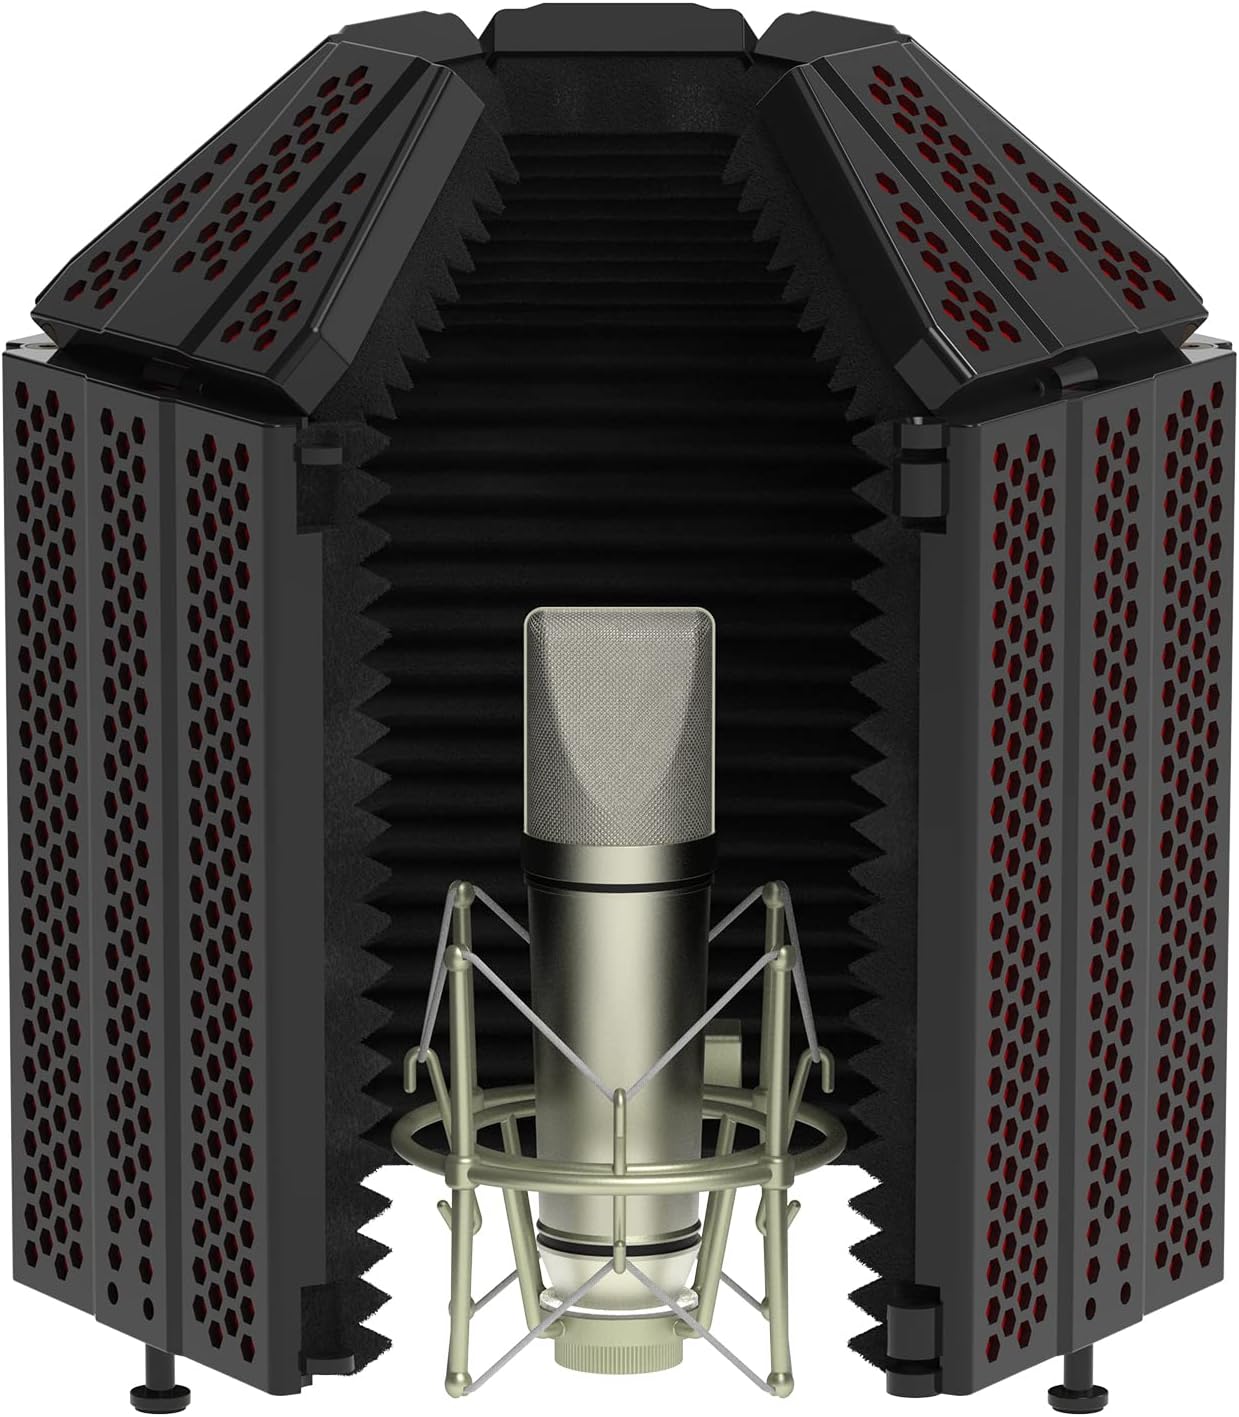
Figure 1: The XTUGA Microphone Isolation Shield MIS02 in its assembled, open configuration, showcasing the microphone placed inside for recording.
Komponenty i montaż
Before assembly, ensure all components are present. The XTUGA Microphone Isolation Shield MIS02 includes the main sound insulation boards, support rods, knobs, and various screws and shims for secure mounting.

Rysunek 2: Koniecview of the included accessories for the XTUGA Microphone Isolation Shield, detailing sound insulation boards, support rods, knobs, and various fasteners.
Kroki montażu:
- Rozpakuj komponenty: Carefully remove all parts from the packaging. Verify that all items listed in Figure 2 are present.
- Attach Support Rods: Secure the support rods to the central panel of the isolation shield using the provided screws and knobs. Ensure they are tightened firmly but do not overtighten.
- Podłącz panele boczne: Attach the foldable side panels to the central panel. The design allows for either a 3-panel or 5-panel configuration, depending on your model and desired sound isolation.
- Mount to Stand or Desktop:
- Microphone Stand Mounting: Use the bracket and bracket screws to attach the assembled shield to a compatible microphone stand. Adjust the height as needed.
- Umieszczenie na pulpicie: The shield can also be placed directly on a flat surface, such as a desktop or countertop, for convenient use.
- Pozycja mikrofonu: Place your condenser microphone inside the shield. Ensure it is securely mounted to its shock mount or stand within the shield's enclosure.
For detailed visual instructions, please refer to the official Installation Manual (PDF) available on the product's Amazon page or the XTUGA webstrona.
Instrukcja obsługi
The XTUGA Microphone Isolation Shield is designed to create a focused acoustic space for your microphone, reducing unwanted room reflections and external noise. Proper positioning and adjustment are key to achieving optimal sound quality.
Noise Reduction Principle:
The shield utilizes a multi-layer noise cancellation structure comprising a reflective layer, a filter layer, and an absorbing layer. This design effectively blocks and absorbs sound waves from the back and sides, ensuring a cleaner recording.

Figure 3: Diagram illustrating the three layers (reflective, filter, absorbing) of the isolation shield that work together to reduce noise.

Figure 4: Visual representation of how the isolation shield filters out unwanted noise, creating a quiet recording environment.
Adjusting for Optimal Performance:
- Konfiguracja panelu: The shield can be configured with 3 or 5 panels. For maximum isolation, utilize all 5 panels and ensure the foldable end panels are extended to enclose the microphone as much as possible.
- Regulacja kąta: The arch design allows for angle adjustments to optimize sound insulation.
- Collection Range 60° (Closure 120°): Bending the top panels to approximately 45° creates a narrower sound collection range, ideal for highly directional recording.
- Collection Range 180° (Closure 90°): Bending the top panels to approximately 90° provides a wider sound collection range, suitable for broader vocal or instrument capture.

Figure 5: Illustrations demonstrating different closure angles (90° and 120°) and their corresponding sound collection ranges (180° and 60°), along with the top panel bend angles (45° and 90°).

Figure 6: Depiction of the sound collection range when the shield is in use, showing how it focuses audio capture and minimizes external interference.
Experiment with different panel configurations and angles to find the best setup for your specific recording environment and microphone type.


Rysunek 7: Examples of the isolation shield in use, demonstrating its application in both vocal recording and general studio setups.
Konserwacja
To ensure the longevity and optimal performance of your XTUGA Microphone Isolation Shield, follow these maintenance guidelines:
- Czyszczenie: Przetrzyj powierzchnie zewnętrzne miękką, suchą ściereczką. W przypadku uporczywych zabrudzeń delikatnie przetrzyj.amp cloth can be used, but ensure no moisture enters the foam or internal components.
- Składowanie: When not in use, store the shield in a clean, dry environment, away from direct sunlight and extreme temperatures. The foldable design allows for compact storage.
- Obsługiwanie: Handle the shield with care. Avoid dropping it or subjecting it to strong impacts, which could damage the panels or internal foam.
- Unikaj ostrych przedmiotów: Do not use sharp objects near the shield, as they can scratch the surface or tear the absorbent foam.
- Wentylacja: Use the product in a well-ventilated environment to prevent moisture buildup within the foam.
- Unikaj wody: Keep the product away from water or high humidity to prevent damage to the materials.

Figure 8: Important precautions for the use and care of the isolation shield, emphasizing safety and product longevity.
Rozwiązywanie problemów
If you encounter issues with your XTUGA Microphone Isolation Shield, consider the following common troubleshooting steps:
- Niewystarczająca redukcja hałasu:
- Ensure all panels are fully extended and properly angled to enclose the microphone.
- Verify that the microphone is positioned correctly within the shield, facing the absorbent foam.
- Check for external noise sources in your recording environment that may be bypassing the shield (e.g., open windows, loud computer fans).
- Consider adding additional room treatment if the environment is excessively reverberant.
- Problemy ze stabilnością:
- Ensure all screws and knobs used for assembly are tightened securely.
- If mounted on a microphone stand, verify that the stand itself is stable and capable of supporting the shield's weight (approximately 4.07 pounds).
- If used on a desktop, ensure the surface is flat and level.
- Uszkodzone elementy:
- If any part of the shield appears damaged, do not attempt to disassemble or repair it yourself. Contact XTUGA customer support for assistance.
If these steps do not resolve your issue, please contact XTUGA customer support for further assistance.
Specyfikacje
| Funkcja | Szczegół |
|---|---|
| Numer modelu | MIS02 (Also known as A-BURNER PRO) |
| Waga przedmiotu | 4.07 funta |
| Wymiary produktu | 15.75 x 7.87 x 7.09 cala |
| Materiał korpusu | Plastikowy |
| Kolor | Czarny |
| Projekt panelu | 5-panel (with 4 foldable end panels) |
| Materiał akustyczny | High Density Absorbent Foam |
Gwarancja i wsparcie
For any warranty claims, technical support, or inquiries regarding your XTUGA Microphone Isolation Shield MIS02, please contact XTUGA customer service directly.
You can find contact information and additional resources by visiting the official XTUGA store on Amazon:
Prosimy zachować dowód zakupu w celach gwarancyjnych.