
1. Wprowadzenie
Thank you for choosing a Kraus Loften Kitchen Workstation Sink. This manual provides detailed instructions for the safe and proper installation, operation, and maintenance of your new sink. Please read all instructions carefully before beginning installation and keep this manual for future reference. For additional information or assistance, please visit kraususa.com.
2. Informacje dotyczące bezpieczeństwa
OSTRZEŻENIE: Niezastosowanie się do tych instrukcji może spowodować uszkodzenie mienia, obrażenia ciała lub śmierć.
- Podczas montażu należy zawsze nosić okulary ochronne i rękawice.
- Należy upewnić się, że przestrzegane są wszystkie lokalne przepisy budowlane i dotyczące instalacji wodno-kanalizacyjnych.
- Przed rozpoczęciem jakichkolwiek prac hydraulicznych należy zakręcić dopływ wody.
- If you are unsure about any part of the installation, consult a professional plumber.
3. Zawartość opakowania
Przed wyrzuceniem materiałów opakowaniowych należy sprawdzić, czy w opakowaniu znajdują się wszystkie elementy.
- Kitchen Sink (KWT321-25/18)
- Sprzęt montażowy
- Szablon wycinanki
- Dolna siatka
- Zespół filtra siatkowego
- Korek spustowy
- Ręcznik kuchenny
- Instrukcja obsługi
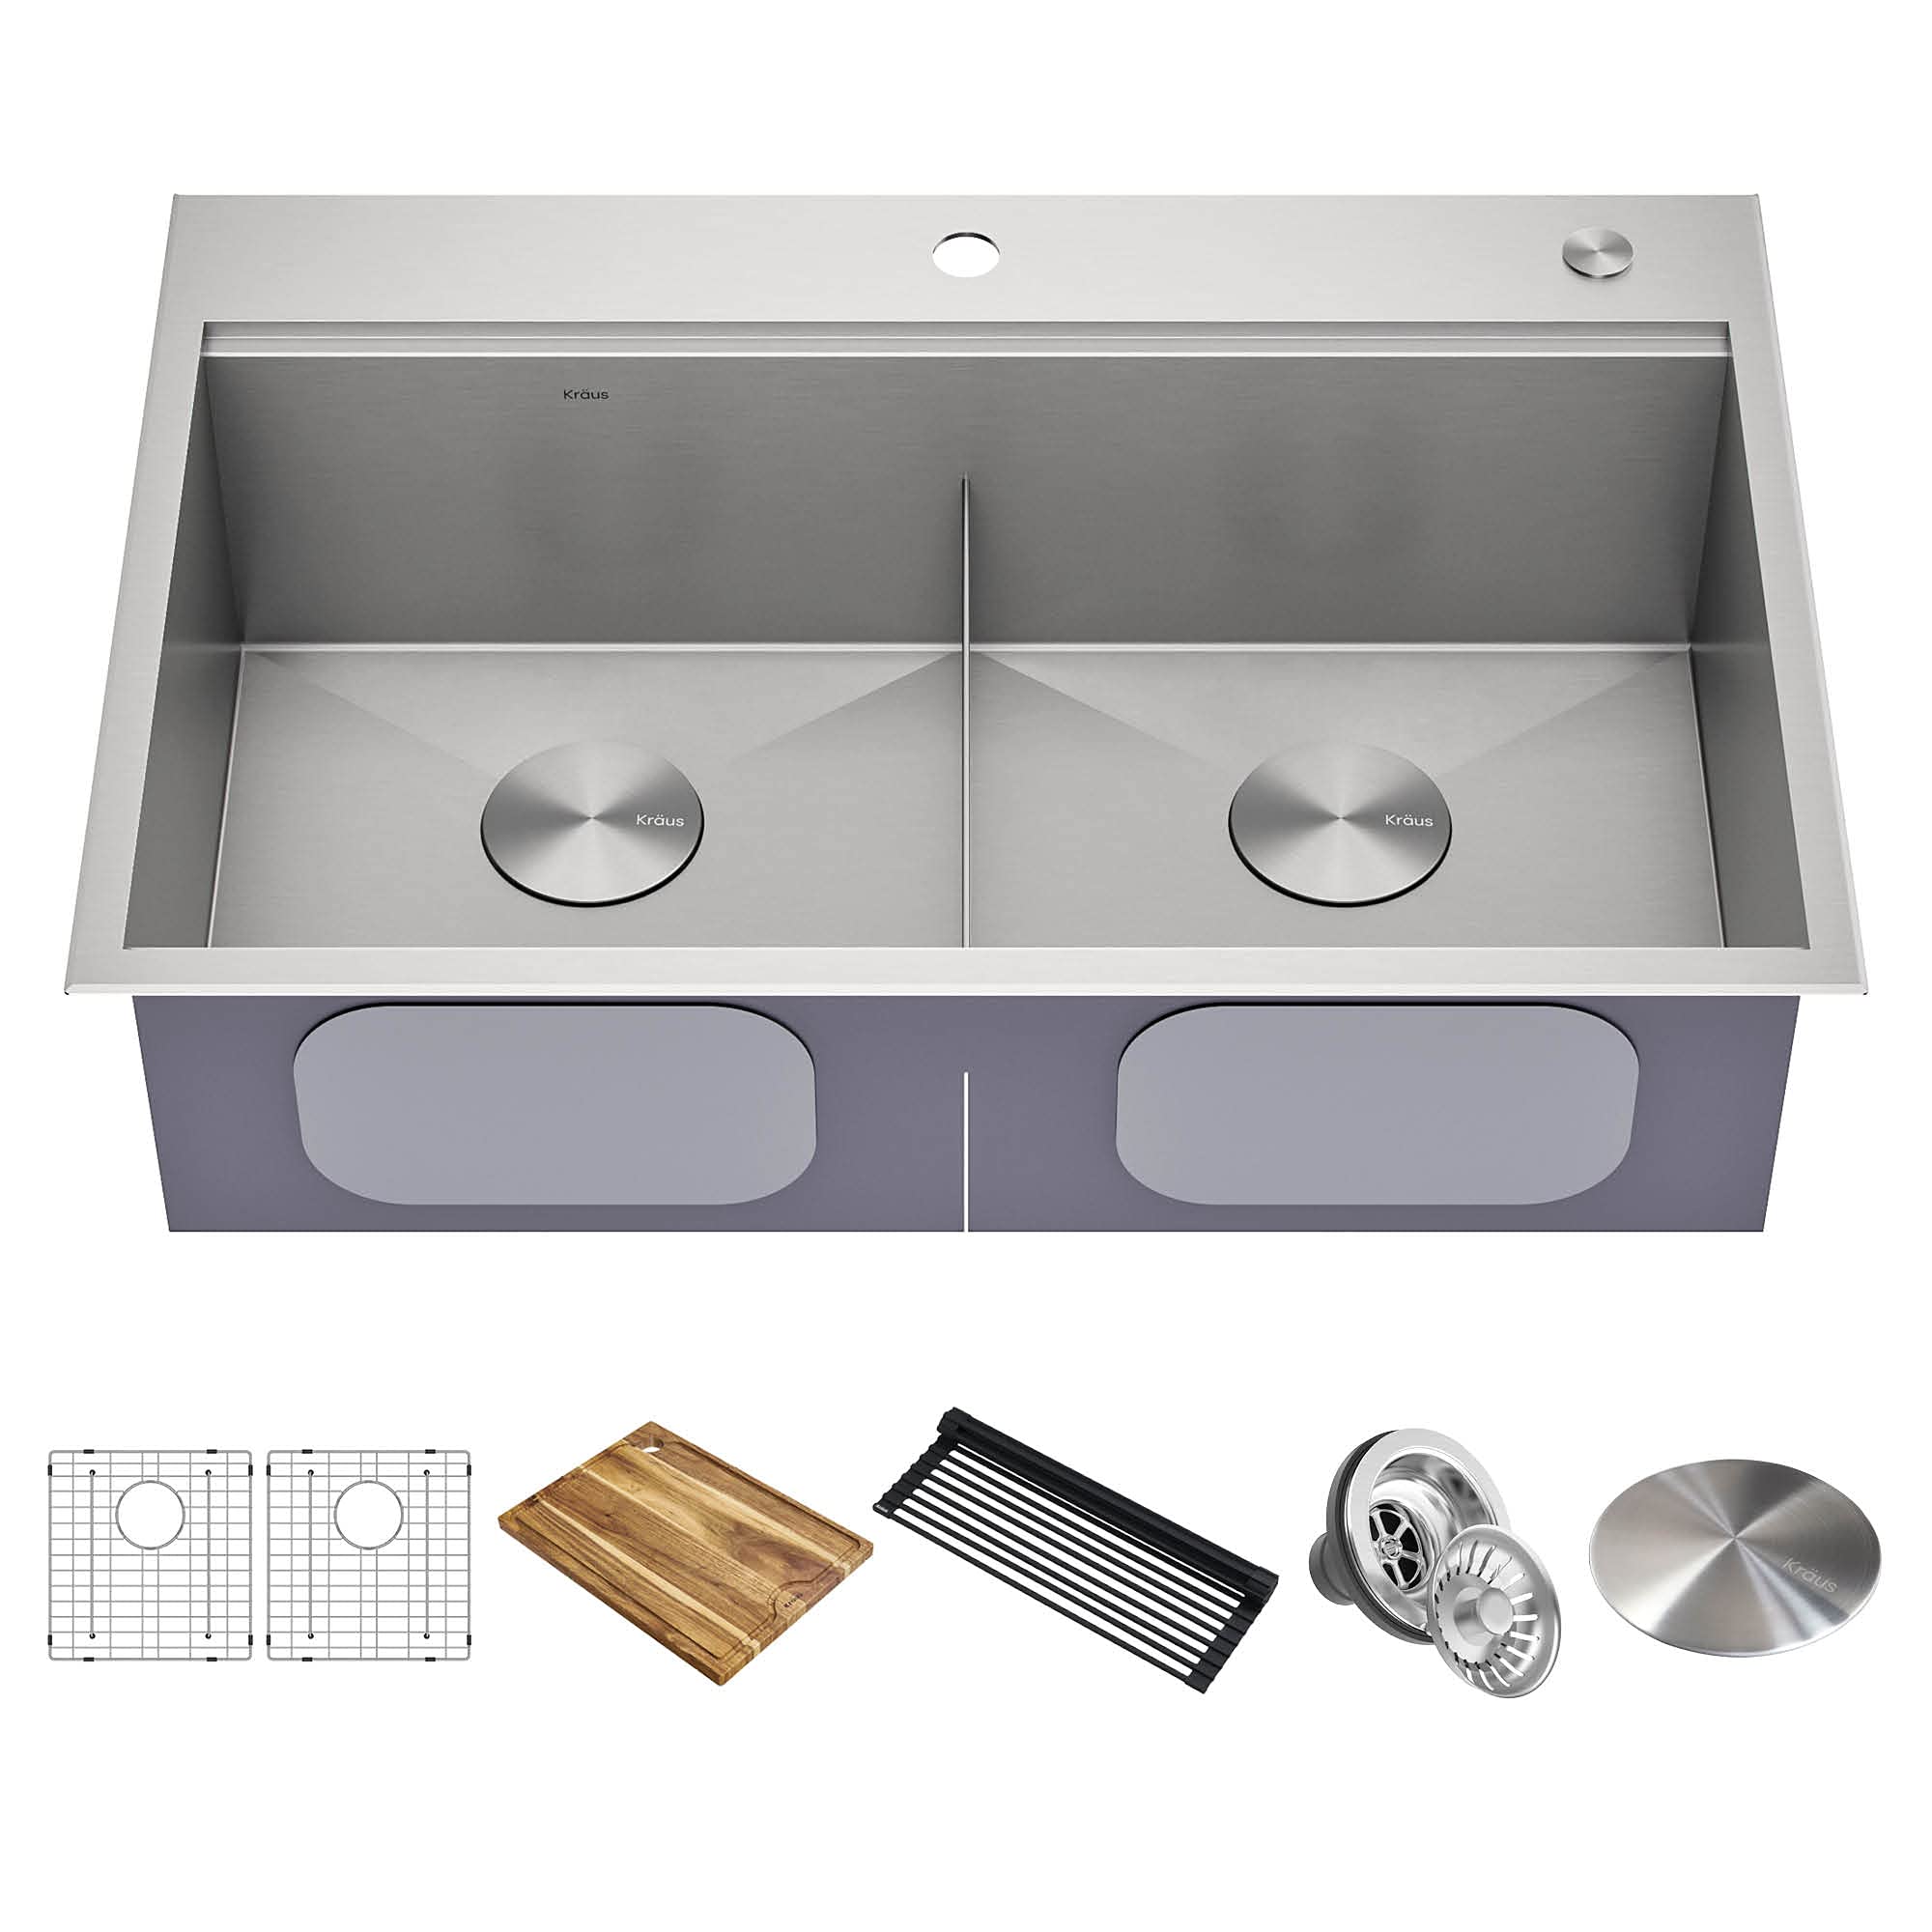
Image 1: Kraus Loften KWT321-25/18 Kitchen Workstation Sink with its various components and accessories. The image displays the stainless steel sink, a bottom grid, a strainer, and other items typically included in the package.
4. Narzędzia wymagane do instalacji
Aby instalacja przebiegła pomyślnie, zalecane jest użycie następujących narzędzi:
- Okulary ochronne
- Rękawice
- Taśma miernicza
- Ołówek
- Jigsaw or Router (for countertop cutout)
- Wiertarka
- Uszczelniacz silikonowy
- Klucz nastawny
- Śrubokręt
- Poziom
5. Konfiguracja i instalacja
5.1 Preparing the Countertop
- Place the provided cutout template on the countertop in the desired location.
- Trace the outline of the template onto the countertop with a pencil.
- For undermount installation, ensure the cutout is slightly smaller than the sink rim for proper support. For drop-in, follow the template precisely.
- Carefully cut along the traced line using a jigsaw or router.
- Clean the edges of the cutout.
5.2 Installing the Sink
- Apply a bead of silicone sealant around the perimeter of the countertop cutout.
- Carefully lower the sink into the cutout (for drop-in) or lift it into place from underneath (for undermount).
- Secure the sink using the provided mounting hardware. Tighten the clips evenly to ensure a tight seal.
- Wipe away any excess silicone sealant immediately.
- Allow the sealant to cure for at least 24 hours before connecting plumbing.
5.3 Connecting Plumbing
- Install the strainer assembly into the sink drain opening according to the manufacturer's instructions.
- Connect the drain pipe to the strainer assembly.
- Connect the faucet and water supply lines (faucet sold separately).
- Otwórz dopływ wody i sprawdź, czy nie ma przecieków.
6. Operating Your Workstation Sink
Your Kraus Loften workstation sink is designed for versatility and efficiency. The integrated ledge allows for various accessories (e.g., cutting board, roll-up dish rack) to slide across the sink, creating a functional workspace.
- Korzystanie z akcesoriów: Place workstation accessories directly on the integrated ledge. Ensure they are properly seated to prevent slipping.
- Dolna siatka: The included bottom grid protects the sink surface from scratches and allows water to drain freely.
- Filtr: The strainer assembly prevents food particles from entering your plumbing. Empty it regularly.
7. Pielęgnacja i konserwacja
Właściwa pielęgnacja zapewni długowieczność i piękny wygląd Twojego zlewu ze stali nierdzewnej.
- Codzienne sprzątanie: Clean daily with a soft cloth or sponge and mild dish soap. Rinse thoroughly and wipe dry to prevent water spots.
- Unikaj materiałów ściernych: Do not use abrasive cleaners, steel wool, or scouring pads, as these can scratch the stainless steel finish.
- Chemikalia: Avoid harsh chemicals, bleach, or cleaners containing chlorides, which can corrode stainless steel.
- Zapobieganie rdzewieniu: Remove any iron-based items (e.g., cast iron pots, steel wool) from the sink immediately to prevent rust stains. If rust spots appear, use a non-abrasive stainless steel cleaner.
- Workstation Accessories: Clean workstation accessories regularly with mild soap and water.
8. Rozwiązywanie Problemów
| Problem | Możliwa przyczyna | Rozwiązanie |
|---|---|---|
| Water spots / Streaks | Hard water deposits; not drying after use. | Wipe sink dry after each use. Use a 50/50 solution of water and white vinegar for stubborn spots, then rinse and dry. |
| Rysy na powierzchni | Abrasive cleaning; heavy objects dropped in sink. | Use non-abrasive cleaners and soft cloths. Use the bottom grid to protect the sink base. Minor scratches can be buffed out with a stainless steel scratch removal kit. |
| Plamy rdzy | Iron particles left on surface; exposure to harsh chemicals. | Remove iron-based items promptly. Clean with a non-abrasive stainless steel cleaner. Avoid cleaners with chlorides. |
| Leaking around drain or faucet | Niewłaściwie uszczelnione połączenia. | Check all plumbing connections. Ensure silicone sealant is properly applied and cured. Tighten connections if necessary. Consult a plumber if leaks persist. |
9. Specyfikacje
| Funkcja | Szczegół |
|---|---|
| Numer modelu | KWT321-25/18 |
| Typ | Drop-in / Undermount Workstation Sink |
| Tworzywo | 18 Gauge T304 Stainless Steel |
| Konfiguracja miski | Pojedyncza miska |
| Wymiary całkowite | 25" L x 22" W x 10" D (Approximate, refer to template for exact cutout) |
| Minimalny rozmiar szafy | 27 cali |
| Otwór spustowy | 3.5 cali |
10. Gwarancja i obsługa klienta
Kraus products are manufactured under the highest standards of quality and workmanship. Kraus offers a limited lifetime warranty on its kitchen sinks. For complete warranty information, please visit our webodwiedź witrynę lub skontaktuj się z obsługą klienta.
Obsługa klienta:
- Webstrona: www.kraususa.com
- E-mail: obsługa klienta@kraususa.com
- Telefon: 1-800-775-0703 (USA/Canada)
Please have your model number (KWT321-25/18) and proof of purchase available when contacting customer service.