
1. Wprowadzenie
This manual provides detailed instructions for the Abovsare Digital Alarm Clock, Model 8810. This device features a large LED display, automatic brightness adjustment, multiple alarm settings, and a memory function to retain time data during power interruptions. It displays time, date, and temperature, making it a versatile addition to various indoor environments.

Figure 1: Abovsare Digital Alarm Clock (Model 8810)
2. Informacje dotyczące bezpieczeństwa
- Zasilanie: Only connect the device with the provided USB port or a 5V/1A or 5V/2A adapter. Using excessive voltage may cause screen damage or malfunction.
- Umieszczenie: Ensure the clock is placed on a stable surface or securely mounted on a wall to prevent falling.
- Środowisko: Unikaj wystawiania urządzenia na działanie ekstremalnych temperatur, bezpośredniego światła słonecznego, wysokiej wilgotności lub zakurzonego środowiska.
- Czyszczenie: Do not use abrasive cleaners or immerse the device in water. Refer to the Maintenance section for proper cleaning instructions.
- Demontaż: Nie próbuj samodzielnie demontować ani naprawiać urządzenia. Skontaktuj się z obsługą klienta, aby uzyskać pomoc.
3. Zawartość opakowania
Sprawdź, czy w opakowaniu znajdują się wszystkie elementy:
- Abovsare Digital Alarm Clock (Model 8810)
- Kabel zasilający USB
- Instrukcja obsługi (ten dokument)
4. Koniec produktuview
The Abovsare Digital Alarm Clock features a large LED display for clear visibility and intuitive controls for easy operation.
4.1 Wyświetlacz przedni
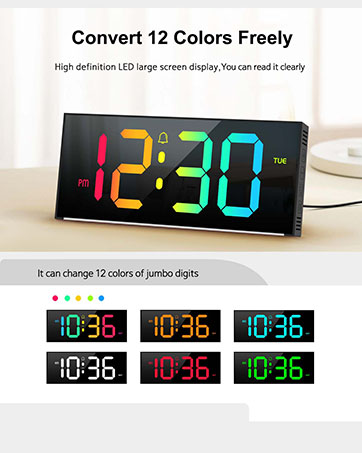
Figure 2: Multifunctional Digital Clock Display
- Wyświetlacz czasu: Large digits show current time (12-hour or 24-hour format).
- Wyświetlanie daty: Pokazuje miesiąc i dzień.
- Wyświetlacz temperatury: Shows ambient temperature in Celsius or Fahrenheit.
- Wskaźniki alarmu: Ikony alarmu 1 i alarmu 2.
- Wskaźnik AM/PM: Dla 12-godzinnego formatu czasu.
4.2 Rear Controls

Figure 3: Rear Control Buttons and Ports
- Przycisk SET: Przechodzi do trybu ustawień czasu, daty i alarmów.
- Przyciski GÓRA/DÓŁ: Adjust values during setting mode or change brightness/volume.
- ALARM 1/ALARM 2 Buttons: Activate/deactivate specific alarms.
- Port zasilania USB: Do podłączenia kabla zasilającego.
- Otwory montażowe na ścianie: For optional wall installation.
5. Konfiguracja
5.1 Połączenie zasilania
- Connect the provided USB power cable to the USB Power Port on the back of the clock.
- Plug the other end of the USB cable into a 5V/1A or 5V/2A USB adapter (not included) or a compatible USB port.
- The display will illuminate, indicating the clock is powered on.
Note: This clock is corded electric and requires continuous power. It is not battery operated for primary function, but has a built-in memory function (CR2032 3V button battery) to retain settings during power outagt.j.

Figure 4: Power Connection and Memory Function
5.2 Początkowe ustawienie czasu i daty
Upon first power-up or after a prolonged power disconnection, you may need to set the time and date.
- Naciśnij i przytrzymaj USTAWIĆ Naciśnij przycisk, aby wejść w tryb ustawiania czasu. Cyfry godzin zaczną migać.
- Użyj UP or W DÓŁ przyciski do regulacji godziny.
- Naciskać USTAWIĆ Naciśnij ponownie, aby potwierdzić godzinę i przejść do ustawiania minut. Cyfry minut zaczną migać.
- Użyj UP or W DÓŁ przyciski, aby ustawić minuty.
- Kontynuuj naciskanie USTAWIĆ aby przełączać się między ustawieniami roku, miesiąca i dnia, dostosowując każde z nich za pomocą UP or W DÓŁ pikolak.
- Naciskać USTAWIĆ po raz ostatni, aby wyjść z trybu ustawień.
Tip: Ensure the clock is set to the correct year before setting the time/date for accurate day-of-week calculations.
6. Instrukcja obsługi
6.1 Regulacja jasności
The clock features 5 levels of brightness adjustment and an automatic dimmer function.
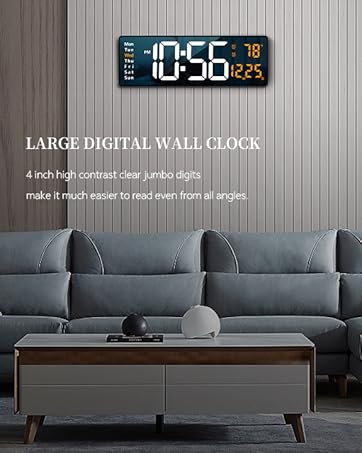
Figure 5: Brightness Adjustment Feature
- Regulacja ręczna: Touch the top button of the alarm clock to cycle through 5 brightness levels.
- Automatic Dimmer: The clock automatically adjusts brightness based on the time period:
- 7:00 - 17:59: Highlight brightness
- 18:00 - 22:59: Medium brightness
- 23:00 - 5:59: Darkest brightness
- 6:00 - 6:59: Medium highlight brightness
- Ręczne nadpisanie: After manual adjustment, the clock will remember your setting for that specific period. However, at the start of a new period, the brightness will revert to the system's preset automatic rules.
6.2 Ustawianie alarmów
Zegar obsługuje dwa niezależne ustawienia alarmu.

Figure 6: Two Alarm Settings Example
- Naciśnij ALARM 1 or ALARM 2 button to activate/deactivate the respective alarm. An alarm icon will appear/disappear on the display.
- To set an alarm time, press and hold the ALARM 1 or ALARM 2 przycisk. Cyfry godziny zaczną migać.
- Użyj UP or W DÓŁ przyciski do regulacji godziny.
- Naciśnij ALARM Naciśnij przycisk ponownie, aby potwierdzić godzinę i przejść do ustawiania minut. Cyfry minut zaczną migać.
- Użyj UP or W DÓŁ przyciski, aby ustawić minuty.
- Naciśnij ALARM button one last time to exit alarm setting mode.
6.3 Ringtones and Volume
The clock offers 40 selectable ringtones and 4 volume levels.
- While in alarm setting mode (after setting the time), press the ALARM button again to enter ringtone selection. Use GÓRA/DÓŁ to cycle through 40 ringtones.
- Naciśnij ALARM button again to enter volume adjustment. Use GÓRA/DÓŁ to select one of 4 volume levels.
- Naciśnij ALARM przycisk, aby zapisać i wyjść.
6.4 Funkcja drzemki
When an alarm sounds, gently tap the top of the clock to activate the snooze function. The alarm will pause and sound again after a set interval (typically 5-9 minutes, refer to specific product documentation for exact duration).
6.5 Opcje montażu
The clock can be placed on a tabletop or mounted on a wall.
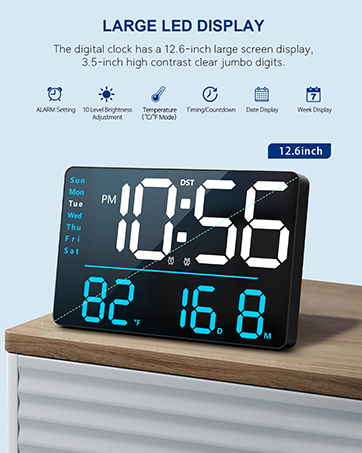
Figure 7: Tabletop and Wall Mounting Options
- Umiejscowienie blatu: Simply place the clock on any flat, stable surface.
- Montaż na ścianie: Use the double wall hanging holes on the back of the clock. Ensure appropriate hardware (screws, anchors) is used for your wall type to securely mount the device.
7. Konserwacja
- Czyszczenie: Przetrzyj powierzchnię zegara miękką, suchą lub lekko wilgotną szmatką.amp ściereczką. Nie używaj silnych środków chemicznych, ściernych środków czyszczących ani rozpuszczalników.
- Usuwanie kurzu: Regularly dust the clock to prevent accumulation, especially around the display and buttons.
- Odłączenie zasilania: If the clock will not be used for an extended period, disconnect it from the power source. The internal memory battery will retain settings.
8. Rozwiązywanie Problemów
| Problem | Możliwa przyczyna | Rozwiązanie |
|---|---|---|
| Display is off or flickering. | No power, incorrect adapter, loose connection. | Ensure the USB cable is securely connected. Use a 5V/1A or 5V/2A adapter. Check power outlet. |
| Nieprawidłowa godzina/data. | Not set correctly, power interruption without memory backup. | Follow instructions in Section 5.2 to reset time and date. The internal memory battery should prevent loss during brief outagt.j. |
| Alarm nie włącza się. | Alarm not activated, volume too low, incorrect time set. | Ensure the alarm icon is visible. Check alarm time. Adjust alarm volume (Section 6.3). |
| Brightness changes unexpectedly. | Automatic dimmer is active. | This is normal behavior for the automatic brightness dimmer. Manual adjustments are temporary for the current period. |
| Przyciski nie reagują. | Temporary software glitch, conflict with touch keys. | Disconnect power for a few seconds and reconnect. Avoid touching the top touch keys while adjusting rear buttons. |
9. Specyfikacje
- Marka: Abovsare
- Numer modelu: 8810
- Kolor: Przewodowo-czarny
- Typ wyświetlacza: Cyfrowa dioda LED
- Wymiary produktu: 10.4" szer. x 2.8" wys.
- Źródło zasilania: Corded Electric (USB-5V Power Supply)
- Tworzywo: Akrylonitryl-butadien-styren (ABS)
- Typ montażu: Na blacie lub na ścianie
- Waga przedmiotu: 9.6 uncji
- Bateria pamięci: 1 CR2032 battery required (for memory function only)
- Cechy szczególne: Large LED display, Automatic Brightness Dimmer, Memory Function, Multiple Ringtones, Dual Alarms, Date, Temperature Display.
10. Gwarancja i wsparcie
For warranty information or technical support, please refer to the retailer's return policy or contact Abovsare customer service through the official brand store or your purchase platform.
Zasady zwrotu: Na zwrot lub wymianę trzeba zazwyczaj czekać 30 dni (sprawdź u sprzedawcy).
Abovsare Brand Store: Visit the Abovsare Store on Amazon