
1. Wprowadzenie
This manual provides detailed instructions for the installation, setup, and operation of your LoraTap 5th Generation Smart Roller Shutter Switch. Please read this manual thoroughly before installation and use to ensure proper function and safety.
2. Informacje dotyczące bezpieczeństwa
- Bezpieczeństwo elektryczne: Installation must be performed by a qualified electrician or a person with a thorough understanding of electrical systems. Always turn off power at the circuit breaker before installation or maintenance.
- Wymagany przewód neutralny: This device requires a neutral wire for operation. Ensure your electrical box has a neutral wire available before attempting installation.
- Objętość operacyjnatage: The switch is designed for 240V AC systems. Do not connect to other voltagsystemy elektroniczne.
- Maksymalne obciążenie: Do not exceed the maximum load of 2400W (10A) for connected devices.
- Tylko do użytku wewnątrz pomieszczeń: This product is intended for indoor use in dry environments. Avoid exposure to moisture or extreme temperatures.
3. Koniec produktuview
The LoraTap 5th Gen Smart Roller Shutter Switch offers advanced control over your roller blinds, curtains, or awnings. It is compatible with electronic or motorized actuators. Key features include:
- Procenttage Sterowanie: Open or close blinds to a specific percentage (0-100%) via the Smart Life app or voice commands.
- Sterowanie głosowe: Kompatybilny z Amazon Alexa i Google Home, co umożliwia obsługę bez użycia rąk.
- Funkcja timera: Schedule automatic opening and closing times through the Smart Life app.
- Zdalne sterowanie: Control your blinds from anywhere using the Smart Life/Tuya app on your smartphone.
- Group Control & Sharing: Control multiple switches as a group and share device access with family members.

Obraz: Ponadview of LoraTap Smart Roller Shutter Switch key features including percentage control, timer, voice control, and app remote control.

Image: The LoraTap Smart Roller Shutter Switch alongside a smartphone displaying the Smart Life app interface, highlighting the percentage control feature for blinds.

Obraz: Byłyamples of compatible window coverings such as Venetian blinds, roller blinds, and awnings. The image includes a note indicating a typical motor wattage of less than 600W for such applications, while the switch itself supports up to 2400W.
4. Specyfikacje
| Numer modelu | SC400W-EU-V5T2 |
| Marka | Lora Tap |
| Objętość operacyjnatage | 240 V AC |
| Obecna ocena | 10 Amptutaj |
| Cotage | 2400 watów (maks.) |
| Protokół połączenia | Wi-Fi |
| Typ montażu | Montaż ścienny |
| Tworzywo | ABS |
| Stopień ochrony IP | IP20 |
| Zgodność | Certyfikat CE |
| Liczba stanowisk | 101 (for 0-100% control) |
| Wymiary opakowania | Wymiary 10.5 x 10.3 x 4.4 cm |
| Waga paczki | 140 gramów |

Image: Front, side, and back dimensions of the switch, along with a wiring diagram showing input L, input N, output N, output L1, and output L2. Note: Earth wire connection is not required.
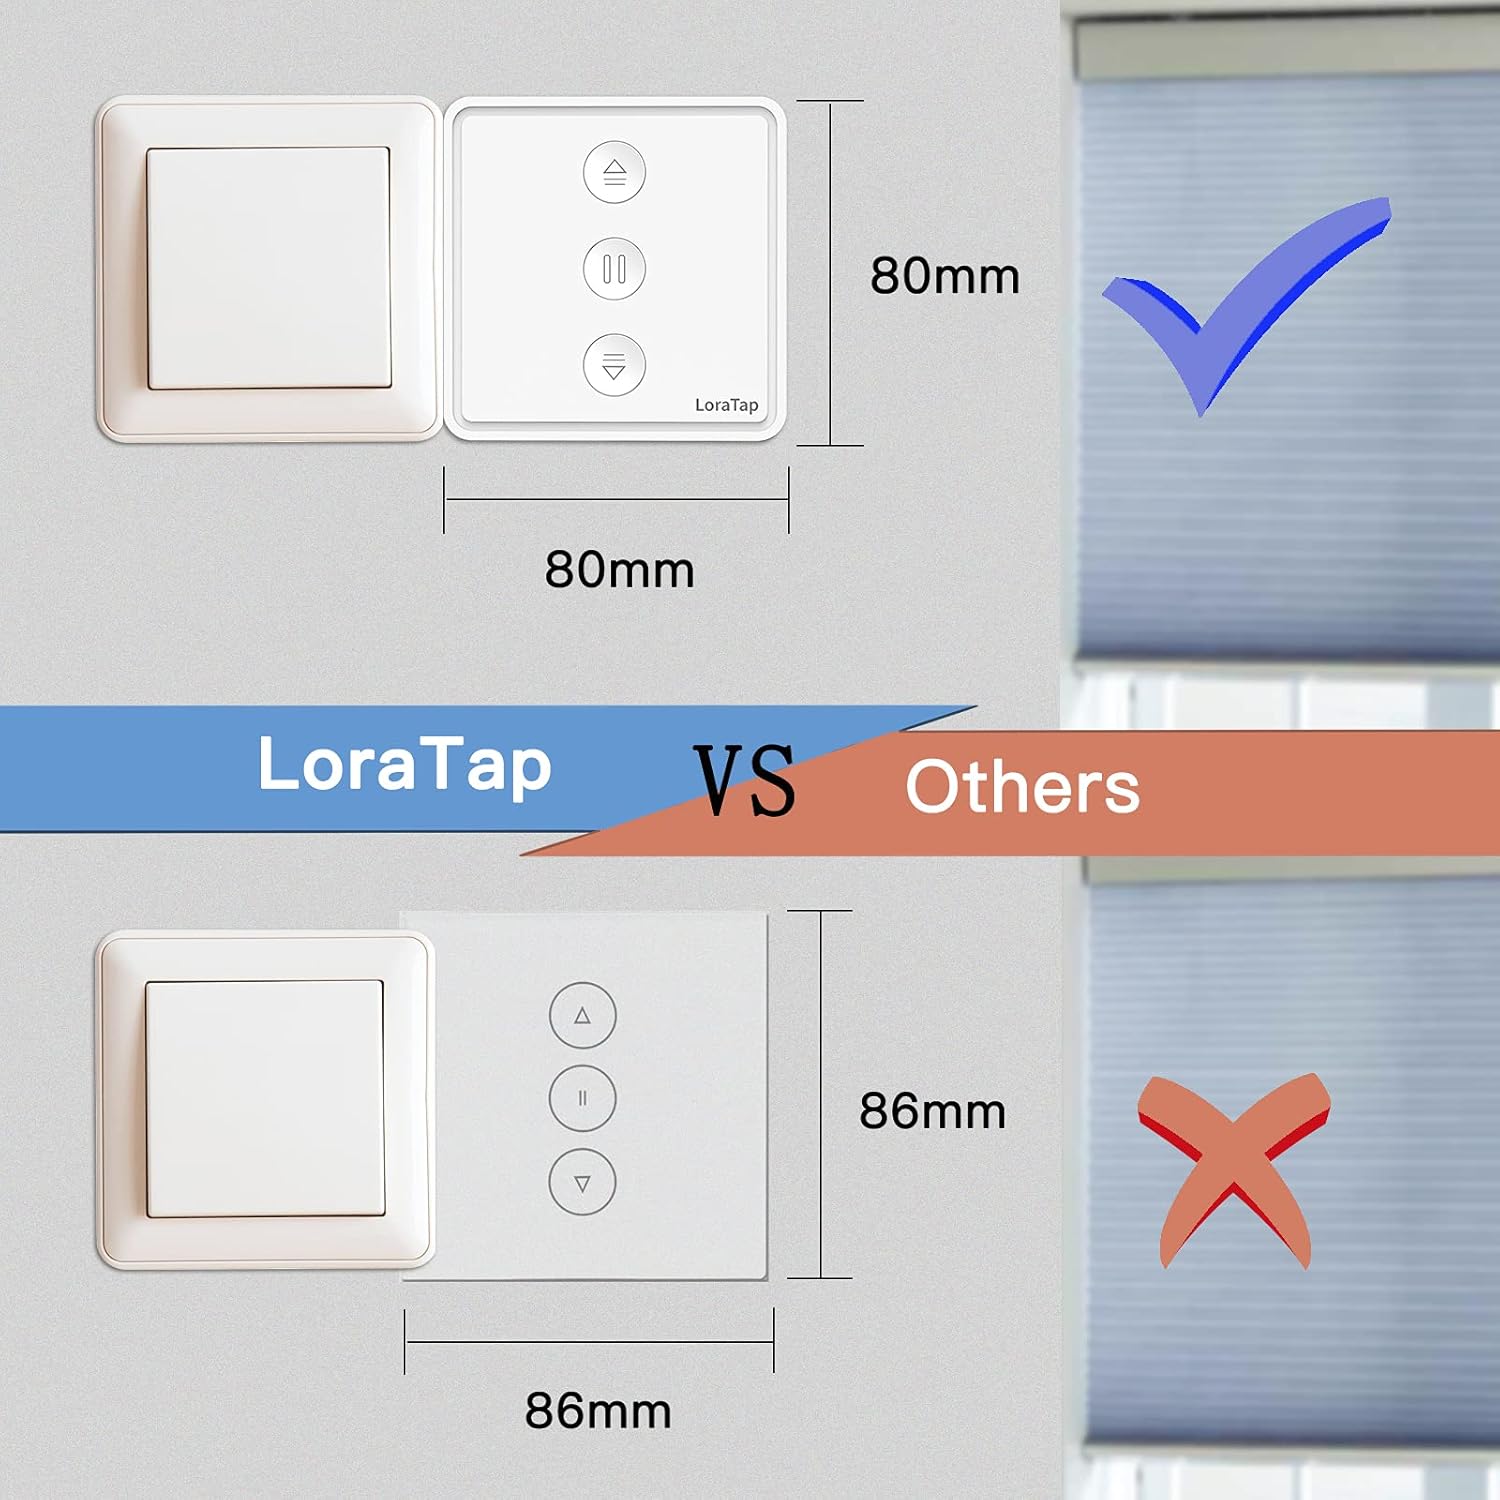
Image: A visual comparison illustrating the compact size of the LoraTap switch (80mm x 80mm) compared to larger standard switches (86mm x 86mm), indicating compatibility with standard wall boxes.
5. Instalacja
Ważny: Ensure power is turned off at the main circuit breaker before beginning installation. If you are unsure about electrical wiring, consult a qualified electrician.
- Przygotuj okablowanie: Identify the Live (L), Neutral (N), and motor wires (Up/Down/Common) from your existing roller shutter system. This switch requires a neutral wire.
- Podłącz przewody: Zapoznaj się z poniższym schematem okablowania.
- Connect the Live wire from your power supply to the 'Input L' terminal on the switch.
- Connect the Neutral wire from your power supply to the 'Input N' terminal on the switch.
- Connect the motor's Common wire to the 'Output N' terminal on the switch.
- Connect the motor's Up wire to the 'Output L1' terminal on the switch.
- Connect the motor's Down wire to the 'Output L2' terminal on the switch.
- Note: An Earth wire connection is not required for this switch.
- Zamontuj przełącznik: Carefully place the wired switch into the wall box and secure it with screws. Attach the faceplate.
- Przywróć zasilanie: Włącz ponownie zasilanie za pomocą wyłącznika obwodu.
Image: Detailed wiring diagram for the LoraTap switch. Ensure correct connection of Input L (Live), Input N (Neutral), Output N (Motor Common), Output L1 (Motor Up), and Output L2 (Motor Down). The diagram explicitly states no need to connect the Earth Wire.
6. Konfiguracja
- Pobierz aplikację: Pobierz aplikację „Smart Life” lub „Tuya Smart” ze sklepu z aplikacjami na swoim smartfonie (iOS lub Android).
- Zarejestruj się/Zaloguj: Utwórz konto lub zaloguj się na istniejące konto.
- Wejdź w tryb parowania: After powering on the switch, the LED indicator should blink rapidly. If not, press and hold the central pause button for approximately 5 seconds until it blinks rapidly to enter pairing mode.
- Dodaj urządzenie: In the app, tap the "+" icon to add a device. The app should automatically discover the switch. If not, manually select "Curtain Switch" or "Roller Shutter Switch" from the device list.
- Połącz się z Wi-Fi: Postępuj zgodnie z instrukcjami w aplikacji, aby połączyć przełącznik z siecią Wi-Fi 2.4 GHz. (Wi-Fi 5 GHz nie jest obsługiwane).
- Kalibrowanie: Once connected, the app will prompt you to calibrate the motor's travel time. This is crucial for accurate percentage kontrola.
- Follow the app's instructions to fully open and fully close your blinds. The switch will record the time taken for each action.
- Accurate calibration ensures precise percentage positioning.
7. Instrukcja obsługi
7.1 Sterowanie ręczne
The switch has three physical buttons:
- Strzałka w górę (▲): Naciśnij, aby otworzyć żaluzje.
- Pause (▮▮): Press to stop the blinds at their current position.
- Strzałka w dół (▼): Naciśnij, aby zamknąć żaluzje.
7.2 Kontrola aplikacji (aplikacja Smart Life/Tuya)
After successful setup, you can control your blinds via the app:
- Otwórz/Zamknij/Pauza: Użyj dedykowanych przycisków w interfejsie aplikacji.
- Procenttage Sterowanie: Use the slider in the app to set the blinds to any desired percentage (np. 50% otwartych).
- Funkcja timera:
- In the app, navigate to the switch's control interface.
- Wybierz opcję „Timer” lub „Harmonogram”.
- Set desired times for opening or closing the blinds. You can also specify the percentage for scheduled actions.
- Zapisz swój harmonogram.
- Kontrola grupy: Create groups of multiple LoraTap switches in the app to control them simultaneously.
- Udostępnianie urządzenia: Share control of the switch with other family members by inviting them through the app.

Image: A smartphone screen displaying the Smart Life app's timer function, allowing users to schedule automatic opening and closing of curtains at specific times, such as 8:00 AM and 10:00 PM.

Image: The LoraTap switch next to an illustration of device sharing, indicating that control of the smart switch can be easily shared with multiple family members via the app.
7.3 Sterowanie głosowe
Zintegruj przełącznik LoraTap z Amazon Alexa lub Google Home, aby móc wydawać polecenia głosowe:
- Połącz konto: In the Alexa or Google Home app, enable the "Smart Life" or "Tuya Smart" skill/action and link your account.
- Odkryj urządzenia: Poproś swojego asystenta głosowego o „Wykrycie urządzeń”.
- Polecenia głosowe: Użyj poleceń takich jak:
- "Alexa, open [Device Name]"
- "Hey Google, close [Device Name]"
- "Alexa, set [Device Name] to 50 percent"
- "Hey Google, pause [Device Name]"
8. Konserwacja
- Czyszczenie: Przetrzyj powierzchnię przełącznika miękką, suchą ściereczką. Nie używaj środków czyszczących ani rozpuszczalników o działaniu ściernym.
- Regularne kontrole: Periodically check the physical condition of the switch and wiring for any signs of damage.
- Aktualizacje oprogramowania: Keep your Smart Life/Tuya app updated to ensure optimal performance and access to new features.
9. Rozwiązywanie Problemów
| Problem | Możliwa przyczyna / rozwiązanie |
|---|---|
| Przełącznik nie odpowiada / Brak zasilania |
|
| Nie można sparować z aplikacją |
|
| Inaccurate percentagKontrola |
|
| Sterowanie głosowe nie działa |
|
10. Gwarancja i wsparcie
LoraTap zapewnia 3-letnia gwarancja for this product. LoraTap has over 10 years of experience in the research, development, and production of radio and smart switches. All LoraTap products are certified according to European standards.
For technical support or warranty claims, please contact LoraTapuk customer service through your purchase platform or visit the official LoraTap webwitryna do informacji kontaktowych.