1. Wprowadzenie
Welcome to the assembly guide for the MiniArt 35302-1/35 Pz.Kpfw.IV Ausf. H Vomag Early Production June 1943 scale model kit. This highly detailed kit is designed for experienced modelers and allows for the creation of an accurate representation of the Panzerkampfwagen IV, a significant medium tank of the Wehrmacht during World War II. The Panzerkampfwagen IV was the most mass-produced tank of the Wehrmacht, with serial production from 1937 to 1945 across various modifications. This kit specifically represents an early production Ausf. H variant from June 1943.
Please read these instructions thoroughly before beginning assembly to ensure a smooth and enjoyable building experience.
2. Koniec produktuview
The MiniArt 35302 kit provides a 1/35 scale replica of the Pz.Kpfw.IV Ausf. H Vomag. This plastic model kit is supplied unpainted and unassembled, offering a high level of detail for an authentic build. The finished model length is approximately 169 mm.

Obraz: Bok view of the Pz.Kpfw.IV Ausf. H Vomag tank model, depicting an Undefined Unit before Operation Citadel, Summer 1943. This image illustrates the overall form and detail of the assembled model.

Obraz: Bok view of the Pz.Kpfw.IV Ausf. H Vomag tank model, showcasing a different camouflage scheme for Pz.Rgt. 35, 4.Pz.Div. Ukraine, Kovel District, Spring 1944. This view highlights the long barrel and side skirts.
3. Zawartość zestawu
Before starting assembly, verify that all components are present in your kit. The MiniArt 35302 kit includes the following:
- Multiple frames with plastic details for the tank components.
- One frame made of transparent plastic for specific parts (e.g., vision blocks).
- A decal sheet (sticker) for markings and insignia.
- Photo-etched parts for fine details, enhancing realism.
- A detailed scheme for coloring the model.
- Step-by-step instruction manual for assembly.
Note: Paints and glue are not included in this kit and must be purchased separately.
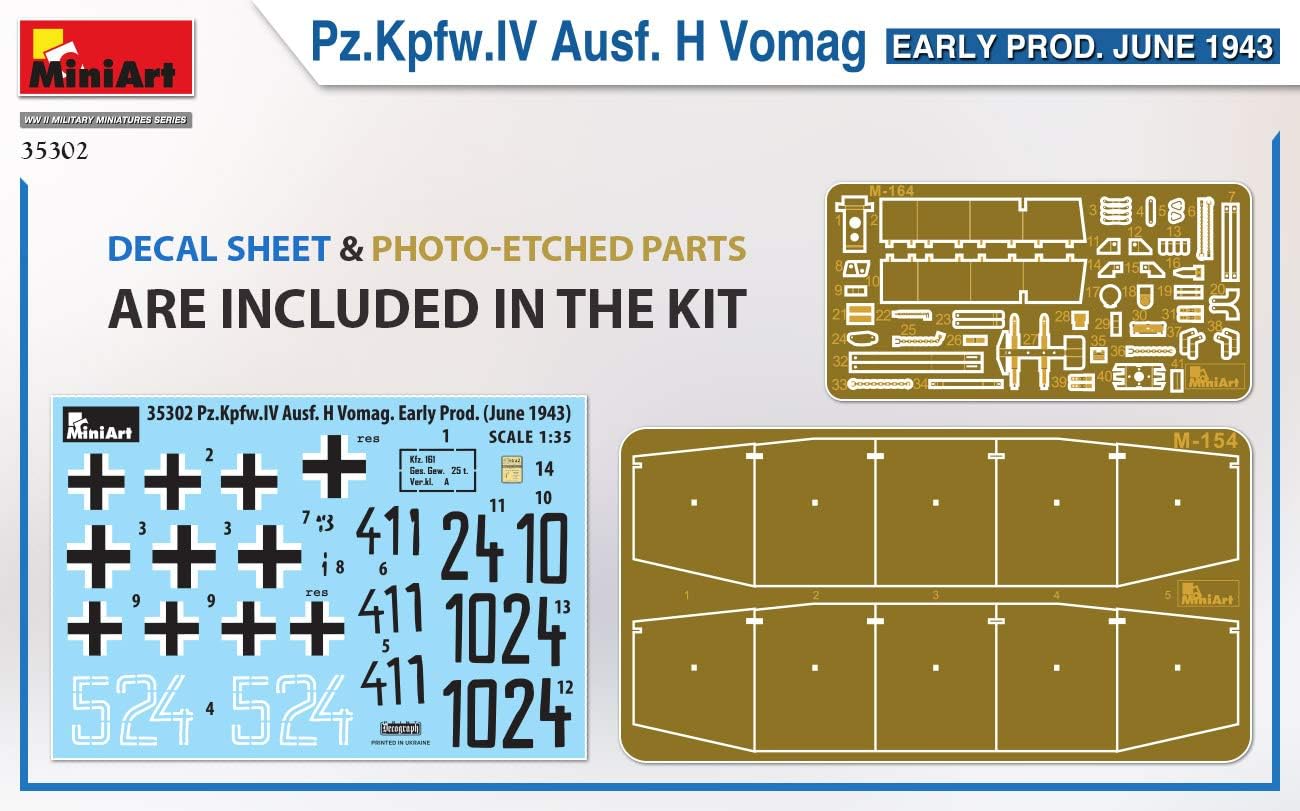
Image: The decal sheet and photo-etched parts included in the kit. The decal sheet provides various unit markings and numbers, while the photo-etched parts offer intricate details for enhanced realism.
4. Instalacja i montaż
Successful model building requires a clean, well-lit workspace and appropriate tools. Ensure you have a hobby knife, plastic cement, tweezers, sanding sticks, and cutting mat before you begin.
4.1 Przygotowanie
- Przeczytaj instrukcję: Familiarize yourself with the entire step-by-step instruction manual provided in the kit before cutting any parts.
- Zorganizuj części: Keep sprues organized. Refer to the parts diagram in the manual to identify components.
- Czyste części: Carefully remove parts from the sprues using a hobby knife or nippers. Clean any mold lines or flash with a sanding stick or hobby knife.
4.2 Proces montażu
Follow the numbered steps in the included instruction manual precisely. The manual provides detailed diagrams for each assembly stage. Pay close attention to:
- Dopasowanie testowe: Always test fit parts before applying glue. This helps identify potential fit issues and allows for adjustments.
- Aplikacja kleju: Use plastic cement sparingly. Apply a small amount to one surface and press parts together firmly. For photo-etched parts, use super glue (cyanoacrylate adhesive).
- Podzespoły: The manual will guide you through building sub-assemblies (e.g., turret, chassis, tracks) before combining them into the final model.
- Delikatne części: Handle small and delicate parts, especially photo-etched components, with care using tweezers.
5. Malowanie i nakładanie naklejek
This kit is unpainted, allowing you to customize the finish. Refer to the included coloring scheme for historical accuracy or apply your preferred camouflage pattern.
5.1 Malarstwo
- Elementarz: Apply a thin coat of primer to all surfaces to ensure paint adhesion and a uniform base.
- Warstwy bazowe: Apply base colors according to your chosen scheme. Multiple thin coats are better than one thick coat.
- Malowanie szczegółów: Paint smaller details such as tools, tracks, and machine guns.
- Zwietrzenie: For a realistic look, consider applying weathering effects like washes, drybrushing, and pigments after the main paint job has dried.
5.2 Decal Application
The kit includes a decal sheet for markings. Follow these steps for best results:
- Warstwa błyszcząca: Apply a clear gloss coat over the areas where decals will be placed. This provides a smooth surface and prevents 'silvering'.
- Cut Decals: Carefully cut out each decal as close to the edge of the image as possible.
- Soak Decals: Dip the decal in lukewarm water for 10-20 seconds until it slides freely on its backing paper.
- Zastosuj naklejki: Gently slide the decal onto the model surface. Position it carefully with a wet brush or cotton swab.
- Setting Solution: Use a decal setting solution to help the decal conform to surface details and eliminate air bubbles.
- Matte Coat: Once decals are dry, apply a clear matte or satin coat over the entire model to seal the decals and unify the finish.
6. Konserwacja
Proper care will preserve the appearance of your finished model for years to come.
- Zasypka: Regularly dust your model with a soft brush or a can of compressed air to prevent dust buildup. Avoid abrasive cloths.
- Czyszczenie: If necessary, gently wipe surfaces with a slightly damp cloth. Avoid harsh chemicals or solvents, as these can damage paint and plastic.
- Wyświetlacz: Display your model in a stable, dust-free environment, away from direct sunlight, extreme temperatures, and high humidity, which can cause fading or warping.
- Obsługiwanie: Handle the model by its sturdy parts (e.g., chassis) to avoid damaging delicate components.
7. Rozwiązywanie Problemów
Even experienced modelers encounter challenges. Here are solutions to common issues:
- Części nie pasujące: Ensure you have the correct parts for the step. Trim excess plastic (flash) or gently sand mating surfaces. If parts are warped, a brief dip in hot water can sometimes allow reshaping.
- Odstępy między częściami: Use plastic putty or filler to fill any noticeable gaps after gluing. Sand smooth once dry.
- Srebrzenie kalkomanii: This occurs when air is trapped under the decal. Ensure a glossy surface before application and use decal setting solutions to help the decal conform. Puncture tiny bubbles with a sharp needle and apply more setting solution.
- Złamane małe części: If a small part breaks, attempt to re-glue it with super glue. For very fine details, consider replacing with stretched sprue or wire if repair is not feasible.
- Problemy z farbą: If paint is too thick, thin it with appropriate thinner. If paint peels, ensure the surface was clean and primed.
8. Specyfikacje
| Marka: | Minisztuka |
| Numer modelu: | 35302 |
| Skala: | 1/35 |
| Temat: | Pz.Kpfw.IV Ausf. H Vomag Early Production June 1943 |
| Tworzywo: | Plastikowy |
| Stan : schorzenie: | New in Box, Unpainted, Unassembled |
| Model Length (approx.): | 169 mm |
9. Gwarancja i wsparcie
MiniArt strives to provide high-quality model kits. As this is a hobby product, specific warranties typically cover manufacturing defects or missing parts upon initial inspection.
- Brakujące lub uszkodzone części: If you discover any missing or significantly damaged parts upon opening the kit, please contact the retailer where you purchased the kit or the manufacturer, MiniArt, directly. Provide proof of purchase and details of the issue.
- Pomoc w montażu: For general assembly tips or advice, many online modeling communities and forums offer valuable resources and support from fellow enthusiasts.
Zawsze zachowaj dowód zakupu na wypadek ewentualnych roszczeń.