
1. Wprowadzenie
Thank you for choosing the HOFTRONIC Esto 2-Light GU10 Black LED Spotlight. This product is designed for indoor use, providing adjustable lighting with two GU10 LED bulbs. Constructed from high-quality aluminum, this spotlight offers a modern aesthetic and reliable performance. Please read this manual carefully before installation and use to ensure safe and optimal operation.
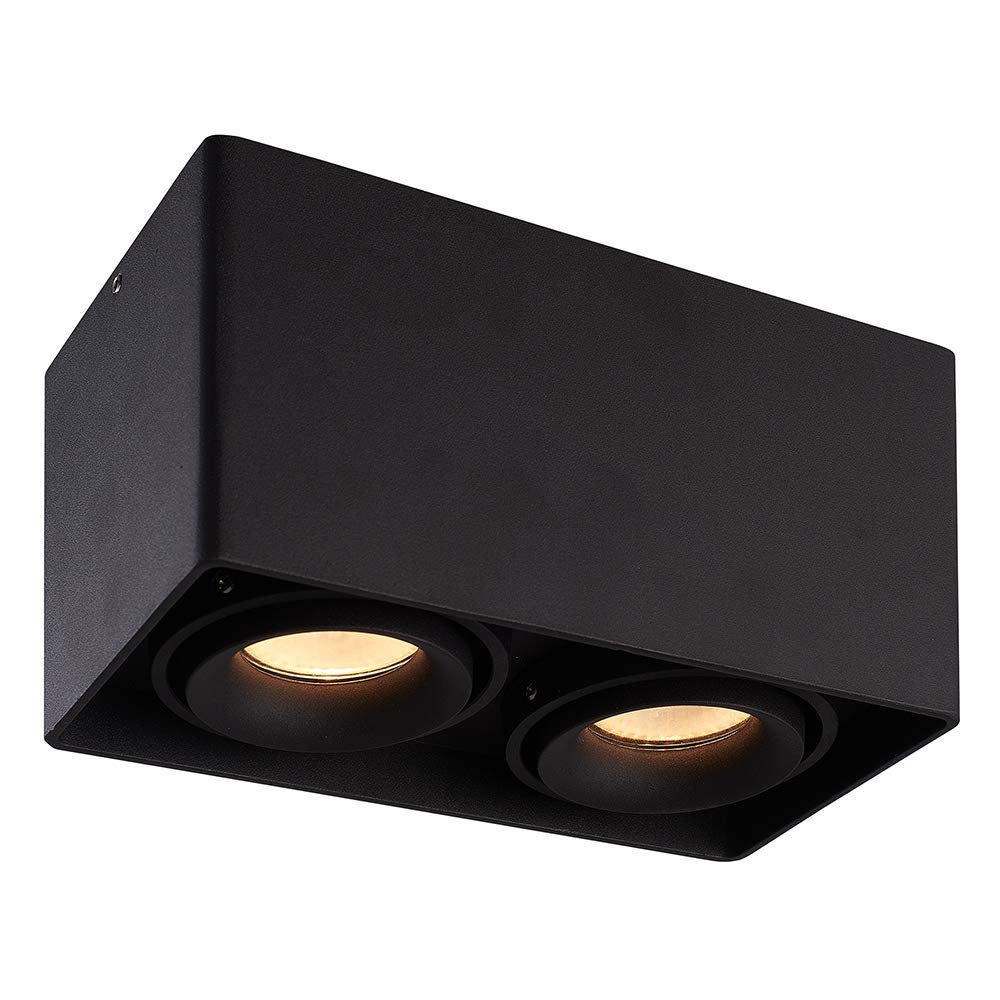
Image: The HOFTRONIC Esto 2-Light GU10 Black LED Spotlight installed on a ceiling, providing illumination in a modern interior setting.
2. Instrukcje bezpieczeństwa
- Always disconnect the main power supply before attempting any installation, maintenance, or bulb replacement.
- Instalację powinien wykonać wykwalifikowany elektryk, aby zagwarantować zgodność z lokalnymi przepisami elektrycznymi i normami bezpieczeństwa.
- This product is rated IP20 and is suitable for tylko do użytku wewnątrz pomieszczeń. Do not expose to moisture or direct water.
- Upewnij się, że objętośćtage supply matches the product's requirements (230V AC).
- Nie przekraczać maksymalnej mocytage of 35 Watts per GU10 LED bulb.
- Aby zapobiec przegrzaniu, należy zapewnić odpowiednią wentylację wokół urządzenia.
- Do not cover the fixture with insulating material unless specifically designed for it.
3. Zawartość pudełka
Przed przystąpieniem do montażu należy sprawdzić, czy wszystkie elementy są obecne i nieuszkodzone.

Image: Contents of the product box, including the spotlight fixture and mounting hardware.
- 1x HOFTRONIC Esto Double Black LED Ceiling Spot Fixture
- Klucz imbusowy 1x
- 4x Śruby
- 4x podkładki
- 4x kołki ścienne
4. Konfiguracja i instalacja
Follow these steps for safe and correct installation of your LED spotlight.
- Przygotuj się do instalacji: Upewnij się, że główne zasilanie w miejscu instalacji jest wyłączone za pomocą wyłącznika automatycznego.
- Zaznacz punkty wiercenia: Position the fixture on the ceiling at the desired location. Use the mounting holes on the base of the fixture to mark the drilling points. Refer to the diagram below for mounting dimensions.
- Wiercenie otworów: Wywierć otwory w zaznaczonych punktach. Włóż dołączone kołki rozporowe w wywiercone otwory.
- Podłącz okablowanie: Open the terminal cover on the fixture. Carefully connect the electrical wires from your ceiling to the terminal block inside the fixture. Ensure correct connections: Live (L), Neutral (N), and Earth (⌀). The cable inlet supports a maximum diameter of 12mm.
- Zamontuj oprawę: Align the fixture's mounting holes with the wall plugs. Secure the fixture to the ceiling using the provided screws and washers. Do not overtighten.
- Włóż żarówki GU10: Włóż dwie żarówki LED GU10 (nie są dołączone) do gniazda lamp holders. Ensure they are securely twisted into place. Do not exceed 35 Watts per bulb.
- Przywróć zasilanie: Once installation is complete and all connections are secure, restore the main power supply.

Image: Detailed diagram of the spotlight's base with mounting hole dimensions (69mm x 69mm spacing, 4mm diameter holes, 13mm edge distance, max 12mm cable inlet).
5. Instrukcja obsługi
The HOFTRONIC Esto spotlight is designed for simple operation.
- Włączanie/wyłączanie: Control the spotlight using your standard wall light switch.
- Dostosuj kierunek światła: The GU10 fittings are tiltable, allowing you to adjust the light direction by up to 30 degrees. Gently pivot the inner lamp holders to direct the light as desired.

Image: Illustration of the adjustable light direction, demonstrating the 30-degree tilt capability of the GU10 fittings.
6. Konserwacja
Regular maintenance will help prolong the life and appearance of your spotlight.
- Czyszczenie: Ensure the power is off and the fixture is cool before cleaning. Wipe the exterior of the spotlight with a soft, dry, or slightly damp ściereczką. Nie używaj środków czyszczących o działaniu ściernym, rozpuszczalników ani silnych środków chemicznych, ponieważ mogą one uszkodzić wykończenie.
- Wymiana żarówki:
- Wyłącz zasilanie oprawy.
- Jeśli żarówka była niedawno używana, odczekaj, aż całkowicie ostygnie.
- Gently push the GU10 bulb into its fitting and twist it counter-clockwise to remove.
- Insert a new GU10 LED bulb (max 35W) by pushing it into the fitting and twisting clockwise until secure.
- Przywróć zasilanie.
7. Rozwiązywanie Problemów
If you encounter issues with your spotlight, refer to the following common problems and solutions:
- Światło się nie włącza:
- Sprawdź czy główne zasilanie jest włączone.
- Ensure the wall switch is in the 'on' position.
- Verify that the GU10 bulbs are correctly inserted and not faulty.
- Inspect wiring connections for looseness or damage (ensure power is off before inspection).
- Migotanie światła:
- Ensure GU10 bulbs are fully seated in their sockets.
- Try replacing the bulb to rule out a faulty bulb.
- Sprawdź połączenia przewodów pod kątem luźnych połączeń (przy wyłączonym zasilaniu).
- Fixture feels hot:
- Confirm that the installed GU10 bulbs do not exceed the maximum wattage o mocy 35W.
- Ensure there is no obstruction preventing proper heat dissipation.
Jeśli problem nadal występuje, skontaktuj się z obsługą klienta lub wykwalifikowanym elektrykiem.
8. Specyfikacje
| Marka | HOFTRONIC |
| Numer modelu | 446496 |
| Kolor | Czarny |
| Tworzywo | Aluminium |
| Styl | Nowoczesny |
| Konkretne zastosowania | Tylko do użytku wewnątrz pomieszczeń |
| Źródło zasilania | Prąd zmienny 230 V |
| Typ żarówki | PROWADZONY |
| Tomtage | 230 V (prąd przemienny) |
| Maksymalna moctage (na żarówkę) | 35 watów |
| Podstawa żarówki | GU10 |
| Etykieta efektywności energetycznej | A+ |
| Typ montażu | Montaż sufitowy |
| Waga produktu | 5 gram |
| Wymiary (dł. x szer. x wys.) | 187mm x 94mm x 105mm |
| Stopień ochrony IP | IP20 |

Image: Overall dimensions of the HOFTRONIC Esto 2-Light GU10 Black LED Spotlight.
9. Gwarancja
This HOFTRONIC product comes with a 3-letnia gwarancja, reflecting our commitment to quality and durable construction. The robust aluminum enclosure ensures a long lifespan for your ceiling light.

Image: Warranty information, indicating a 3-year warranty and durable build quality.
10. Wsparcie
For further assistance, technical support, or warranty claims, please contact your retailer or the HOFTRONIC customer service department. Refer to your purchase documentation for contact details.