
1. Koniec produktuview
The KUIDAMOS DSO FNIRSI PRO is a portable digital oscilloscope designed for various measurement tasks. It features a 2.4-inch LCD display, a real-time sampling rate of up to 20MS/s, and an analog bandwidth of 5MHz. This device is equipped with a built-in 1200mAh rechargeable lithium battery, offering approximately 3 hours of continuous operation. It supports waveform storage and management, making it suitable for both maintenance and research and development applications.
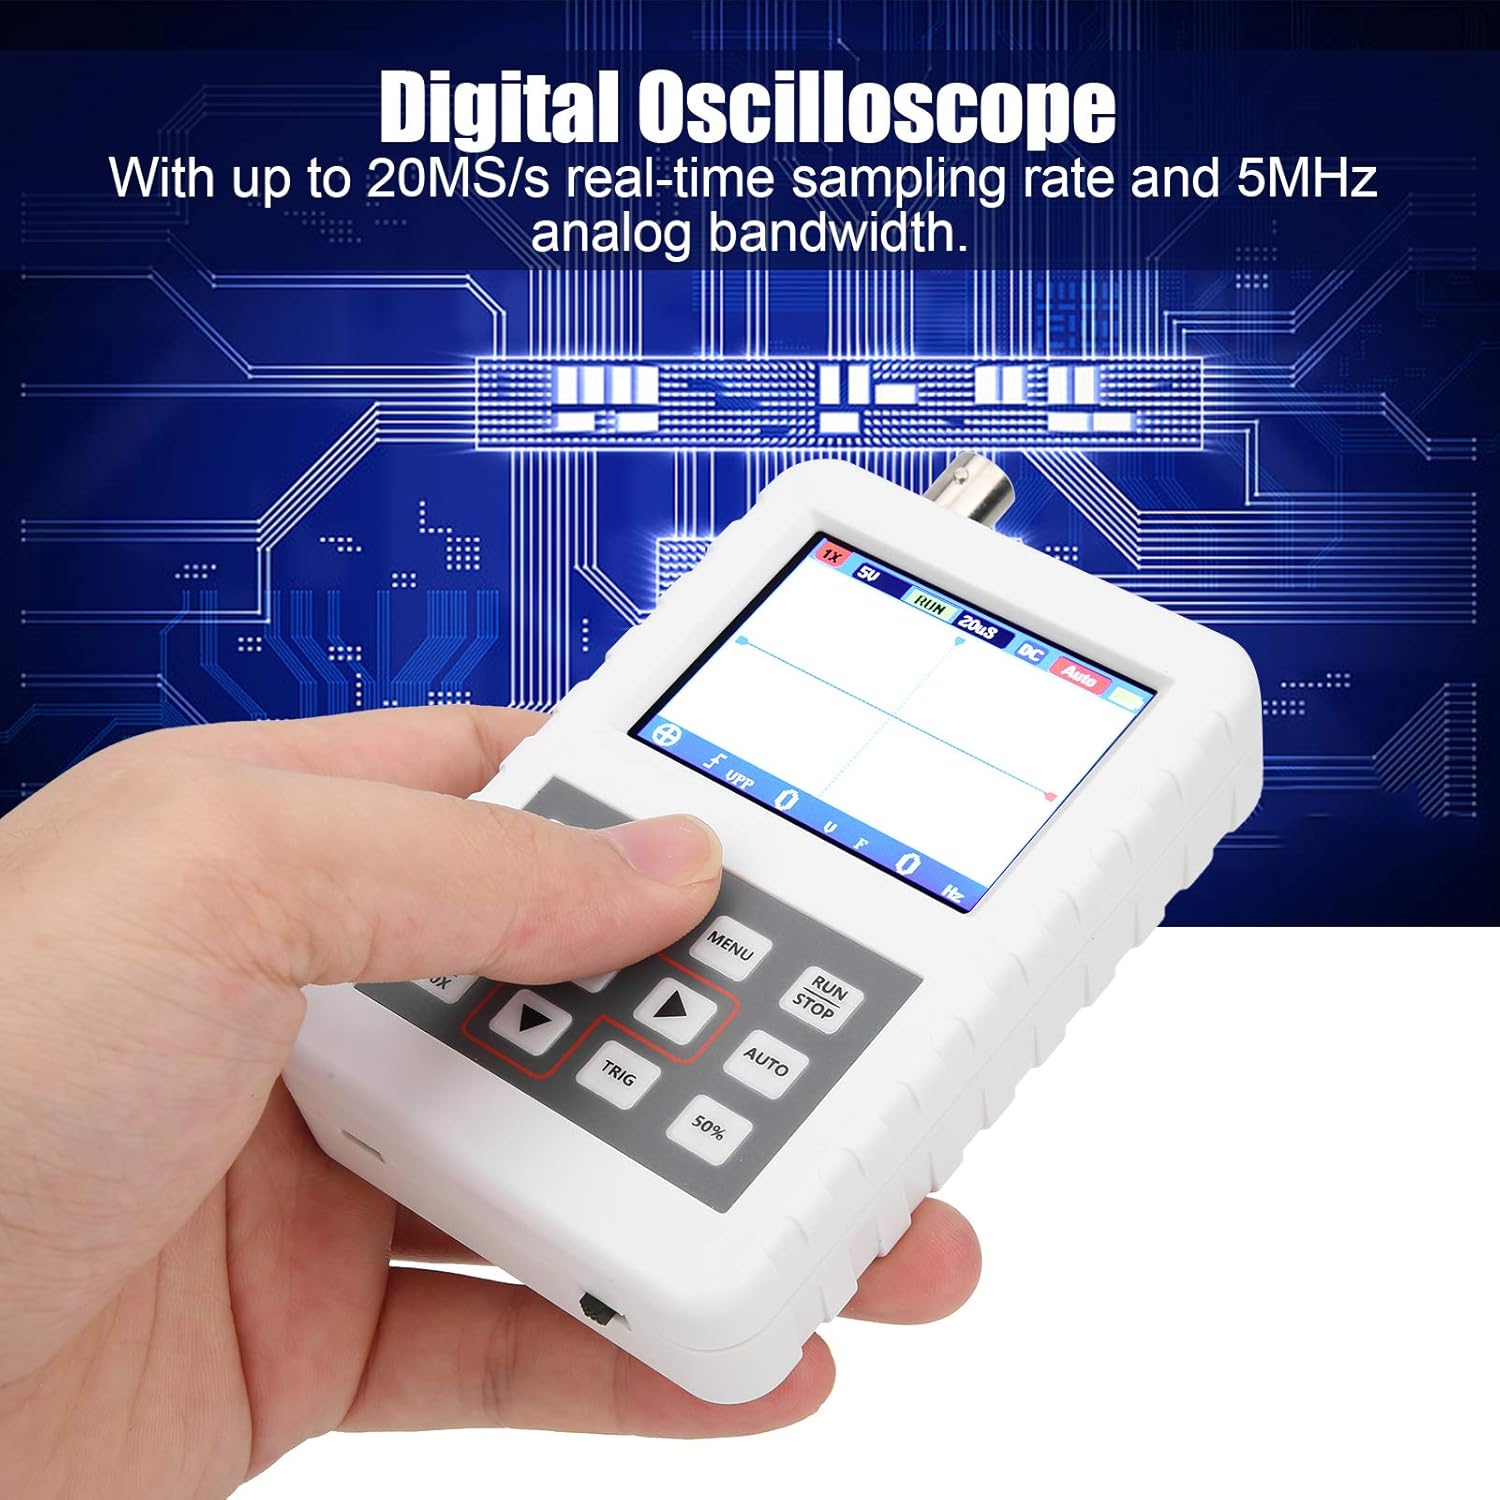
Image 1.1: The DSO FNIRSI PRO Digital Oscilloscope, highlighting its 20MS/s sampszybkość transmisji i pasmo analogowe 5MHz.

Image 1.2: The oscilloscope's 2.4-inch HD LCD screen with 320 x 240 resolution for clear waveform display.

Ilustracja 1.3: Przód i tył views of the DSO FNIRSI PRO, illustrating its physical layout.
2. Zawartość opakowania
Sprawdź, czy w przesyłce znajdują się wszystkie elementy wymienione poniżej:
- 1 x DSO FNIRSI PRO Digital Oscilloscope
- 1 x Matching Probe
- 1 x linia danych USB
- 1 x Instrukcja obsługi (ten dokument)
3. Konfiguracja początkowa
3.1 Ładowanie urządzenia
Before first use, fully charge the oscilloscope. Connect the provided USB data line to the device's charging port and to a 5V/1A, 2A, 3A, or 4A USB power adapter. The built-in 1200mAh lithium battery can be charged continuously for approximately 3 hours.
3.2 Podłączenie sondy
Connect the matching probe to the BNC connector on the top of the oscilloscope. Ensure a secure connection by twisting the probe connector clockwise until it locks into place.
3.3 Włączanie/wyłączanie
To power on the device, press and hold the power button (usually located on the side or bottom) for a few seconds until the screen illuminates. To power off, press and hold the power button again until the device shuts down.
4. Instrukcja obsługi
4.1 Sterowanie i interfejs
The oscilloscope features a user-friendly interface with several buttons for navigation and function control.

Image 4.1: Operating the DSO FNIRSI PRO, showing the placement of control buttons.
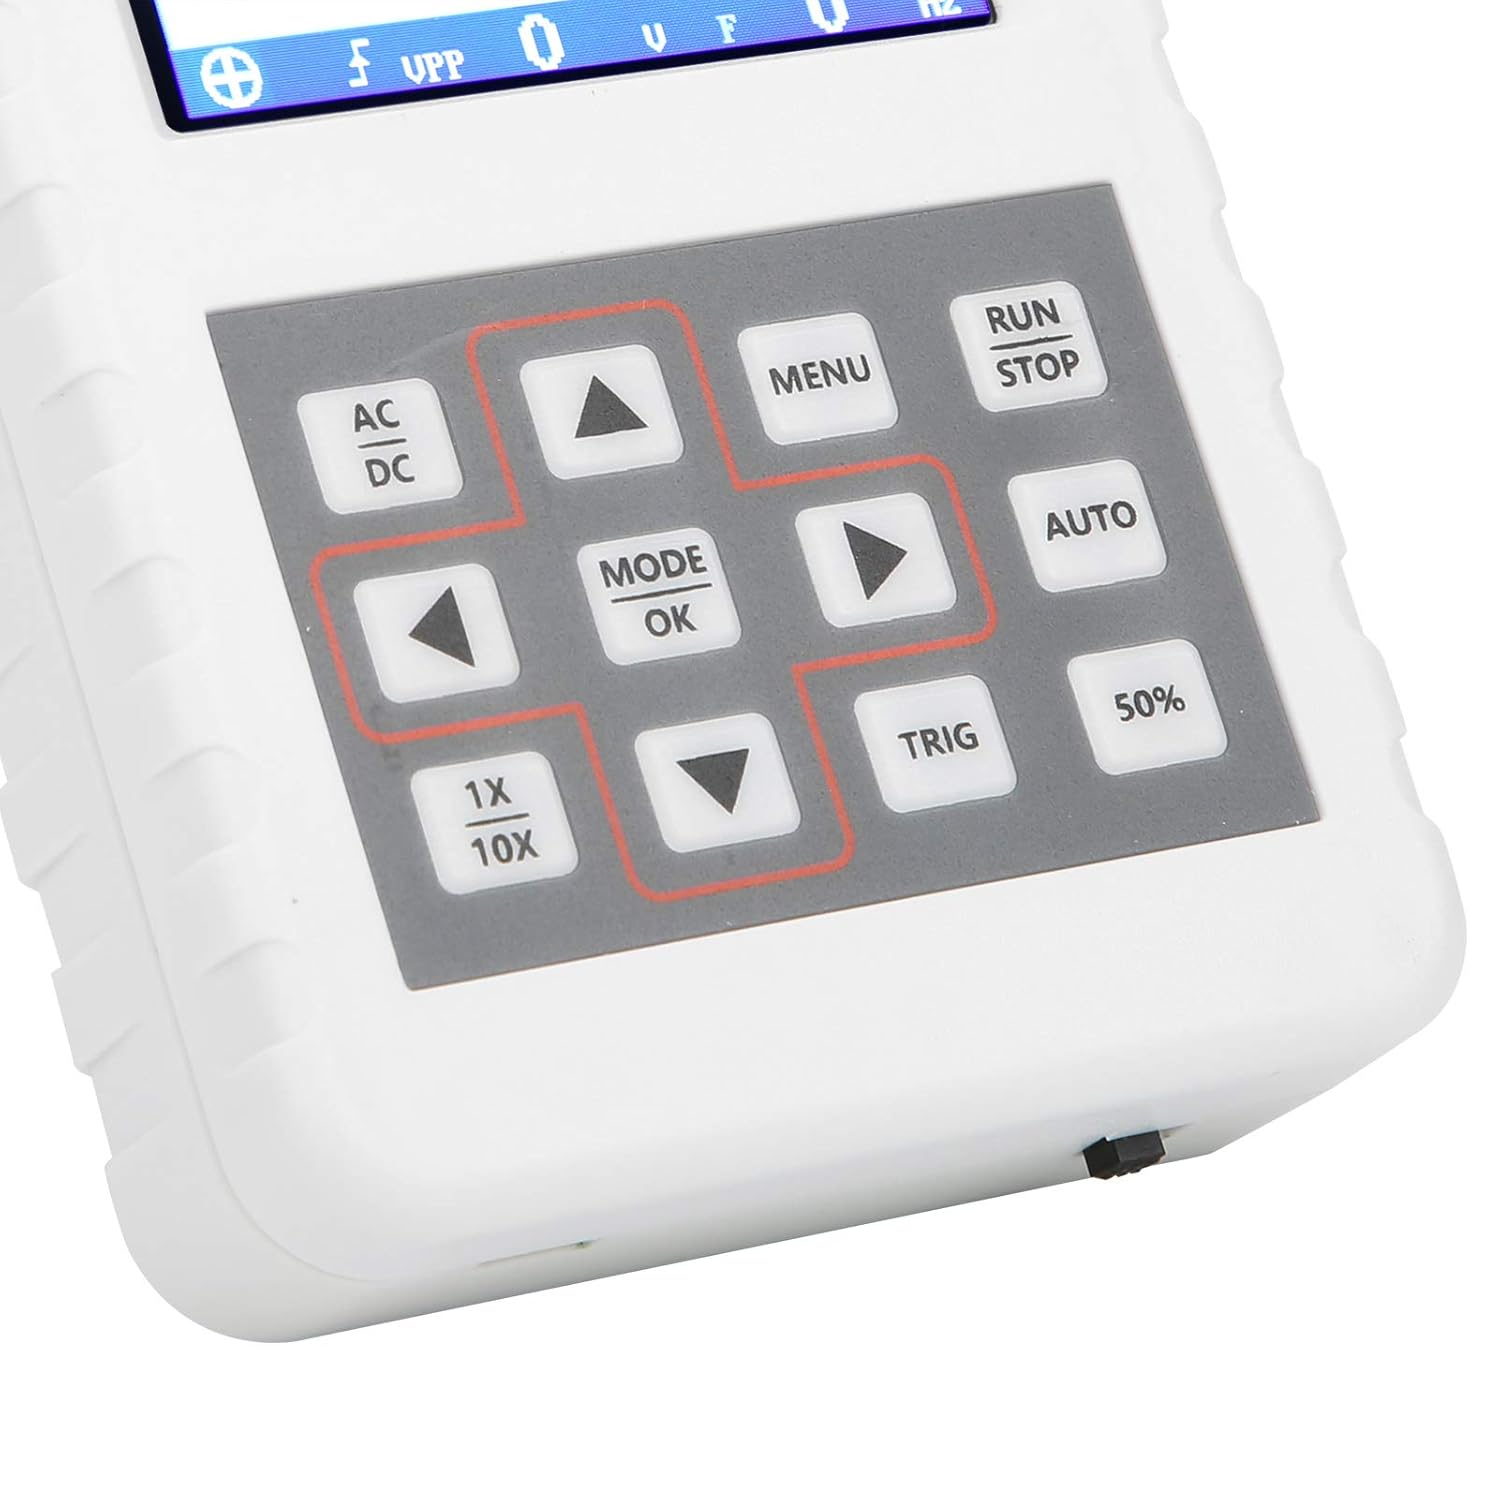
Rysunek 4.2: Szczegółowy view of the oscilloscope's control panel.
- MENU: Dostęp do menu głównego w celu uzyskania dostępu do ustawień i funkcji.
- URUCHOM/ZATRZYMAJ: Starts or pauses waveform acquisition.
- AUTOMATYCZNY: Automatically adjusts settings for optimal waveform display.
- WYMUSKANY: Dostosowuje poziom wyzwalania.
- 50%: Sets the trigger level to 50% of the waveform amplitość.
- AC/DC: Toggles between AC and DC coupling modes.
- 1X/10X: Sets the oscilloscope's input attenuation to match the probe's setting.
- TRYB/OK: Confirms selections or changes modes.
- Przyciski strzałek (w górę, w dół, w lewo, w prawo): Poruszaj się po menu i dostosowuj parametry.
4.2 Probe Attenuation Settings
It is critical to match the probe's attenuation setting with the oscilloscope's input setting to ensure accurate measurements.
- Dla 1X measurement (0-40V): Set both the physical switch on the probe and the 1X/10X button on the oscilloscope to the 1X pozycja.
- Dla 10X measurement (40-800V): Set both the physical switch on the probe and the 1X/10X button on the oscilloscope to the 10X pozycja.
4.3 Measurement Modes and Triggering
The oscilloscope supports various trigger modes to stabilize waveform display:
- Pojedynczy: Captures a single waveform event and then stops.
- Normalna: Captures a waveform only when a trigger condition is met.
- Automatyczny: Continuously acquires waveforms, even without a trigger, but will trigger if a signal is present.
Użyj WYMUSKANY button and arrow keys to adjust the trigger level, which determines the voltage point at which the oscilloscope begins to acquire data.
4.4 Przechowywanie i zarządzanie przebiegami
The device includes 16MB of built-in storage, capable of storing up to 500 waveform images. Use the file manager function to browse, view, and manage saved waveforms. This includes viewing detailed information, flipping through images, and deleting unwanted files.

Obraz 4.3: Examples of sine wave measurements at various frequencies.

Obraz 4.4: Examples of square, triangular, and sawtooth wave measurements.
5. Pielęgnacja i konserwacja
5.1 Czyszczenie
Przetrzyj urządzenie miękką, suchą ściereczką. Nie używaj środków czyszczących ani rozpuszczalników o działaniu ściernym, ponieważ mogą one uszkodzić urządzenie.asing lub ekran. Przed czyszczeniem upewnij się, że urządzenie jest wyłączone i odłączone od źródła zasilania.
5.2 Pielęgnacja baterii
Aby przedłużyć żywotność baterii, unikaj częstego całkowitego rozładowywania. Jeśli przechowujesz urządzenie przez dłuższy czas, naładuj je do około 50% i doładowuj co kilka miesięcy.
5.3 Przechowywanie
Store the oscilloscope in a cool, dry place, away from direct sunlight, extreme temperatures, and high humidity. Keep it protected from dust and physical impact.
6. Rozwiązywanie Problemów
- Issue: Abnormal measured data.
Rozwiązanie: Check the probe's attenuation switch (1X or 10X) and ensure it matches the setting on the oscilloscope (using the 1X/10X button). If the probe is set to 10X and the oscilloscope is set to 1X, the device will not be damaged, but the data displayed will be incorrect. - Issue: Device does not power on.
Rozwiązanie: Ensure the battery is sufficiently charged. Connect the device to a power source using the USB data line and allow it to charge for at least 30 minutes before attempting to power it on again. - Issue: Screen is blank or frozen.
Rozwiązanie: Try performing a soft reset by pressing and holding the power button for an extended period (e.g., 10-15 seconds) until the device powers off, then power it back on. If the issue persists, ensure the battery is charged.
7. Specyfikacje techniczne
| Funkcja | Specyfikacja |
|---|---|
| Model produktu | DSO FNIRSI PRO |
| Materiał produktu | ABS |
| Liczba kanałów | 1 |
| Rozmiar ekranu | Około 6.1 cm / 2.4 cala |
| Rozdzielczość ekranu | 320x240 |
| Typ wyświetlacza | Ekran LCD |
| Pasmo analogowe | 5MHz |
| Maksymalna Sampling Oceń | 20 MSps |
| Tryb wyzwalania | Pojedynczy/Normalny/Automatyczny |
| Przechowywanie przebiegów | 16MB (up to 500 waveform pictures) |
| Wbudowana bateria | Bateria litowa 1200mAh |
| Czas czuwania | 3 godziny |
| Wejście ładowania | 5V/1A/2A/3A/4A |
| Producent | KUIDAMOS |
| Kraj pochodzenia | USA |
| Numer części przedmiotu | KUIDAMOStgaix9hwck |
8. Gwarancja i obsługa klienta
Aby uzyskać informacje dotyczące gwarancji, wsparcia technicznego lub serwisu, zapoznaj się z dokumentacją dołączoną do zakupu lub skontaktuj się bezpośrednio ze sprzedawcą. Zachowaj paragon jako dowód zakupu na wypadek roszczeń gwarancyjnych.