1. Wprowadzenie
The DollaTek GM328A is a versatile LCD Transistor Tester designed for the automatic detection and measurement of various electronic components. This device can identify NPN and PNP transistors, N-channel and P-channel MOSFETs, JFETs, diodes, double diodes, and thyristors, automatically determining their pinout. Beyond component identification, it also functions as an ESR meter, PWM signal generator, and frequency meter, making it an essential tool for electronics enthusiasts and professionals.

Figure 1: Assembled DollaTek GM328A LCD Transistor Tester module.
2. Funkcje
- Wyświetlacz: 1.8-inch 160x128 pixel LCD color display, showing 8x20 characters and graphical component symbols.
- Edytor: High-performance ATMEGA328P DIP-28 microcontroller.
- Kontrola: Rotary encoder switch for one-button measurement and automatic shutdown.
- Automatic Component Detection: Identifies NPN and PNP transistors, FETs (N-channel, P-channel MOSFETs, JFETs), diodes, double diodes, and thyristors.
- Pinout Identification: Automatically determines the pin configuration of detected components.
- Transistor Measurement: Tests current amplification factor (hFE), base-emitter threshold voltage, and collector-emitter leakage current for NPN/PNP triodes.
- Darlington Transistor Identification: Recognizes Darlington transistors based on base-emitter threshold voltage i wysoki prąd ampwspółczynnik lifikacji.
- Diode Detection: Detects power diodes and integrated protection diodes in FETs.
- FET Measurement: Measures gate-source turn-on threshold voltage, drain-source on-state resistance, and gate-source capacitance.
- Pomiar rezystancji: Measures up to two resistors simultaneously, including adjustable resistors. Range: Max. 50 MΩ, Resolution: 0.01Ω.
- Pomiar pojemności: Range: 25pF to 100mF, Resolution: 1pF.
- Pomiar indukcyjności: Range: 0.01 mH to 20 H.
- Funkcje dodatkowe: Frequency measurement and PWM signal generation.
- Zasilanie: Operates on DC 6.8V-12V, typically a 9V battery or external AC adapter.
3. Konfiguracja
3.1 Połączenie zasilania
The GM328A module requires a DC input voltage between 6.8V and 12V. It can be powered by a 9V battery or an external AC adapter. Connect the power source to the DC jack or the designated power terminals on the board.
3.2 Acrylic Case Assembly (Optional)
If your GM328A module came with an unassembled acrylic case, follow these steps to assemble it. The case provides protection for the circuit board.
- Carefully peel off the protective film from both sides of all acrylic pieces.
- Identify the base plate, top plate, and side panels.
- Mount the GM328A circuit board onto the base plate using the provided standoffs and screws. Ensure the board is securely fastened and aligned with the cutouts.
- Attach the side panels around the circuit board, interlocking them as designed.
- Place the top plate, aligning the cutouts for the LCD screen, ZIF socket, rotary encoder, and power jack.
- Secure the top plate with the remaining screws. Do not overtighten to avoid cracking the acrylic.

Rysunek 2: Eksplodowany view of the acrylic case components.
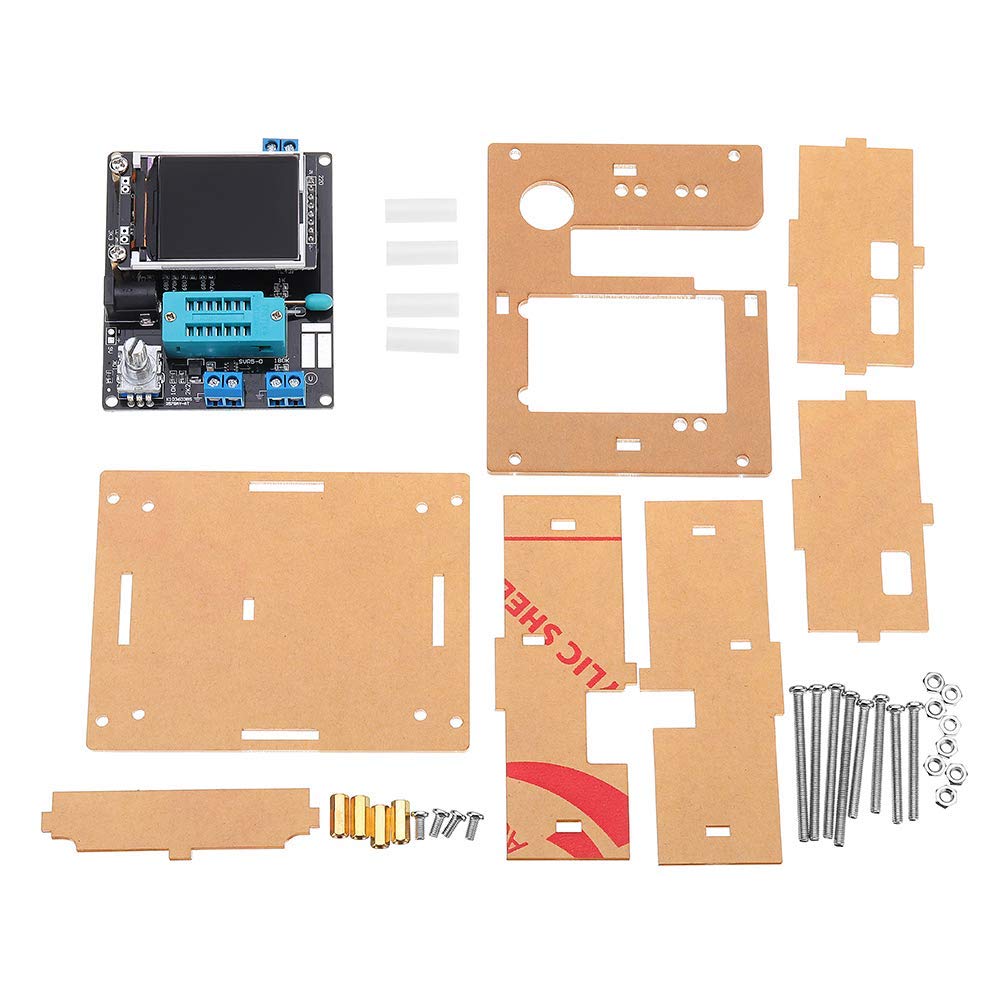
Figure 3: GM328A module alongside its unassembled acrylic case parts.
4. Instrukcja obsługi
4.1 Podstawowe testowanie komponentów
- Włączanie: Connect the power supply. The LCD screen will light up.
- Umieszczenie komponentów: Insert the component to be tested into the ZIF (Zero Insertion Force) socket. Ensure good contact between the component leads and the socket terminals. For 3-pin components like transistors, use terminals 1, 2, and 3. For 2-pin components like diodes or resistors, you can use any two of the 1, 2, 3 terminals.
- Rozpocznij test: Press the rotary encoder button. The tester will automatically detect the component type and measure its parameters.
- Przeczytaj wyniki: The results will be displayed on the LCD screen, including component type, pinout, and measured values (e.g., hFE for transistors, capacitance for capacitors, resistance for resistors, ESR for electrolytic capacitors).
- Automatyczne wyłączanie: The device will automatically shut down after a period of inactivity to conserve power.

Rysunek 4: Example of measurement results displayed on the LCD screen.
4.2 Advanced Functions (PWM and Frequency)
The GM328A also offers PWM signal generation and frequency measurement capabilities. Navigate through the menu using the rotary encoder to access these functions. Refer to the on-screen prompts for specific operation details.
5. Specyfikacje
| Parametr | Wartość |
|---|---|
| Wyświetlacz | 1.8-inch 160x128 LCD Color |
| Wejście Voltage | Prąd stały 6.8 V - 12 V |
| Prąd roboczy | Approx. 30 mA (at 7.5V DC input) |
| Pomiar rezystancji | Max. 50 MΩ, Resolution: 0.01Ω |
| Pomiar pojemności | 25pF - 100mF, Resolution: 1pF |
| Pomiar indukcyjności | 0.01 mH - 20 H |
| Edytor | ATMEGA328P DIP-28 |
| Rozmiar PCB | 7.5 x 6 cm (2.95 x 2.36 cala) |
| Waga produktu | 50g |
| min. Objętość operacyjnatage | 6.8 wolty |
| Górna temperatura znamionowa | 40 stopni Celsjusza |
| Typ pomiaru | RLC Meter |
6. Rozwiązywanie Problemów
- Brak wyświetlacza/zasilania: Ensure the power supply is connected correctly and provides the specified voltage (DC 6.8V-12V). Check battery charge if using a 9V battery.
- Niedokładne odczyty: Ensure the component leads are clean and make good contact with the ZIF socket terminals. For best accuracy, especially with capacitance, perform a self-calibration if available in the device's menu.
- Komponent nie został wykryty: Verify the component is inserted correctly into the ZIF socket. Ensure it is not damaged. Some very small or very large components might be outside the measurement range.
- Urządzenie zawiesza się: Disconnect and reconnect power. If the issue persists, ensure the power supply is stable.
7. Konserwacja
- Czyszczenie: Do czyszczenia urządzenia należy używać miękkiej, suchej ściereczki. Unikaj stosowania płynów i środków czyszczących o właściwościach ściernych.
- Składowanie: Store the tester in a dry, dust-free environment when not in use. If storing for extended periods, remove the battery to prevent leakage.
- Wymiana baterii: If using a 9V battery, replace it when the low battery indicator appears or if the device fails to power on.
- Zachowaj ostrożność: Avoid dropping the device or subjecting it to strong impacts, especially if using the acrylic case.
8. Gwarancja i wsparcie
For warranty information, technical support, or service inquiries, please refer to the retailer where the product was purchased or visit the official DollaTek webZachowaj paragon jako dowód zakupu.