
InFocus IN119BB
Instrukcja obsługi projektora multimedialnego InFocus IN119BB
Model: IN119BB
Wstęp
This manual provides comprehensive instructions for the safe and efficient operation of your InFocus IN119BB Multimedia Projector. Please read this manual thoroughly before using the projector and retain it for future reference.
The InFocus IN119BB projector is designed for versatile use, offering a very long lamp life, high brightness, and extensive connectivity options. Its compact and lightweight design ensures ease of portability and installation.
Informacje dotyczące bezpieczeństwa
Aby zapobiec pożarowi, porażeniu prądem elektrycznym lub obrażeniom ciała, należy zawsze przestrzegać następujących środków ostrożności:
- Nie blokuj otworów wentylacyjnych.
- Nie wystawiaj projektora na działanie deszczu i wilgoci.
- Wszelkie prace serwisowe należy powierzać wykwalifikowanemu personelowi.
- Unikaj patrzenia bezpośrednio w obiektyw projektora, gdyamp jest włączony.
- Upewnij się, że przewód zasilający jest prawidłowo uziemiony.
Produkt ponadview
Komponenty i elementy sterujące
Familiarize yourself with the main components and controls of your InFocus IN119BB projector.

Rysunek 1: Kątowy view of the InFocus IN119BB projector, showing the lens, ventilation grilles, and top panel controls.

Rysunek 2: Przód view of the InFocus IN119BB projector, highlighting the main projection lens.

Rysunek 3: Od góry do dołu pod kątem view of the InFocus IN119BB projector, showing the control panel layout.

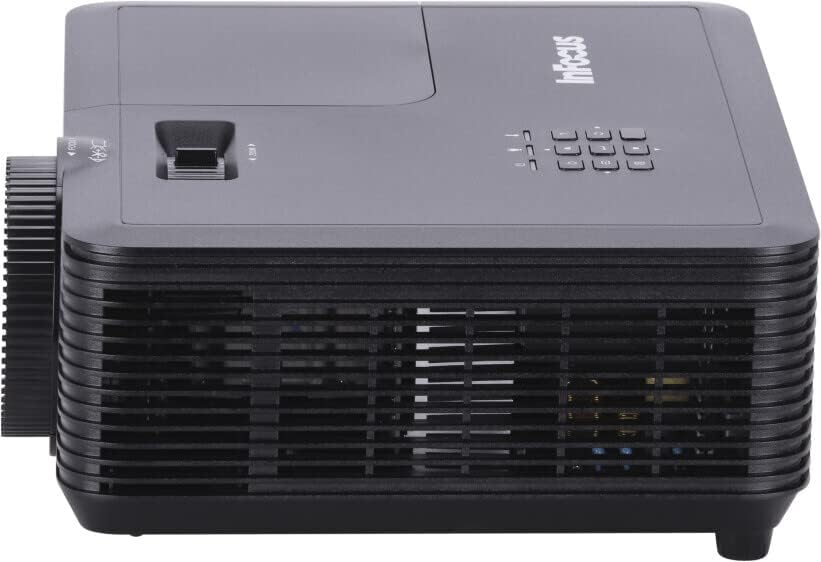
Rysunek 4: Strona view of the InFocus IN119BB projector, illustrating its compact profile.
Rysunek 5: Tył view of the InFocus IN119BB projector, displaying all available input and output ports including HDMI, VGA, S-Video, and audio connections.
Organizować coś
Umieszczenie
Choose a stable, flat surface for the projector. Ensure adequate ventilation around the unit. For optimal image quality, position the projector perpendicular to the projection surface.
Podłączanie zasilania
- Podłącz przewód zasilający do gniazda zasilania projektora.
- Plug the other end of the power cord into a grounded electrical outlet (240V recommended).
Podłączanie źródeł wejściowych
The IN119BB projector supports multiple input sources:
- HDMI: Use an HDMI cable to connect your computer, Blu-ray player, or other HDMI-enabled device to either HDMI 1 or HDMI 2 port.
- VGA: Connect your computer's VGA output to the VGA IN port using a VGA cable.
- S-wideo: For older video sources, connect an S-Video cable to the S-VIDEO port.
- Audio: Connect external audio devices to the AUDIO IN port. Audio output is available via the AUDIO OUT port.
Instrukcja obsługi
Włączanie/wyłączanie
- To power on, press the Power button on the projector or remote control. The power indicator light will turn blue.
- To power off, press the Power button twice. The projector will enter a cooling down cycle before shutting down completely.
Regulacja obrazu
- Centrum: Obróć pierścień ostrości na obiektywie, aż obraz będzie ostry i wyraźny.
- Brzęczenie: Adjust the zoom lever next to the lens to change the image size.
- Korekcja Keystone'a: Jeśli obraz wydaje się trapezoidalny, użyj funkcji korekcji zniekształcenia trapezowego w menu OSD, aby nadać obrazowi kształt kwadratu.
Wybór źródła wejścia
Press the "Source" button on the projector's control panel or remote control to cycle through available input sources (HDMI 1, HDMI 2, VGA, S-Video).
Menu ekranowe (OSD)
Press the "Menu" button to access the OSD menu. Use the arrow keys to navigate and the "Enter" button to select options. Adjust settings such as brightness, contrast, color, and aspect ratio.
Konserwacja
Lamp Wymiana
Lamp life of the IN119BB is very long, but eventually, it will need replacement. When the lamp jeśli wskaźnik się zaświeci lub obraz stanie się przyciemniony, czas wymienić lampę błyskowąamp. Zapoznaj się ze szczegółowym lamp replacement guide in the full user manual for specific steps.
Czyszczenie projektora
- Obiektyw: Używaj miękkiej, niepozostawiającej włókien ściereczki przeznaczonej specjalnie do soczewek optycznych. Nie używaj środków ściernych.
- Casing: Wytrzyj projektor casing z miękkim, damp płótno. Unikaj używania ostrych środków chemicznych.
- Filtry powietrza: Regularly check and clean the air filters to ensure proper ventilation and prevent overheating.
Rozwiązywanie problemów
| Problem | Możliwa przyczyna | Rozwiązanie |
|---|---|---|
| Obraz nie jest wyświetlany | Power cord disconnected; Incorrect input source selected; Lamp wydanie. | Check power connection; Select correct input source; Replace lamp w razie potrzeby. |
| Obraz jest rozmazany | Obiektyw nie jest ostry; Projektor znajduje się zbyt blisko/daleko od ekranu. | Adjust focus ring; Reposition projector. |
| Projektor się przegrzewa | Blocked ventilation; Dirty air filter. | Ensure clear ventilation; Clean air filter. |
Specyfikacje
| Funkcja | Szczegół |
|---|---|
| Numer modelu | IN119BB |
| Technologia wyświetlania | DLP |
| Rozdzielczość natywna | 1280 x 800 (WUXGA) |
| Jasność | 3500 lumenów |
| Łączność | HDMI (x2), VGA In, VGA Out, S-Video, Audio In, Audio Out, RS232 |
| Zasilacz | 240V, 267W |
| Wymiary produktu (dł. x szer. x wys.) | Wymiary 23.62 x 31.24 x 10.67 cm |
| Waga produktu | 2.6 kg (5.5 funta) |
| Współczynnik kształtu | Przenośny |
| Zalecane zastosowanie | Kino domowe |
Gwarancja i wsparcie
For warranty information and technical support, please visit the official InFocus webOdwiedź stronę internetową lub skontaktuj się z działem obsługi klienta. Zachowaj paragon jako dowód zakupu.
Wsparcie online: www.infocus.com/support
Ask a question about this manual
Ask about setup, troubleshooting, compatibility, parts, safety, or missing instructions. Manuals+ will review the question and use this page’s manual context to help answer it.