
1. Wprowadzenie
This manual provides comprehensive instructions for the safe and efficient operation of your Caso Design Hot Brew 10-Cup Coffee Maker, Model 11858. Please read all instructions carefully before first use and retain this manual for future reference.
The Caso Design Hot Brew coffee maker is designed to brew up to 10 cups of hot coffee. Key features include a programmable timer for scheduled brewing, a permanent removable filter for convenience, and a warming plate to keep coffee warm for up to 35 minutes. The filter lid features 17 holes for even water distribution, optimizing coffee extraction.
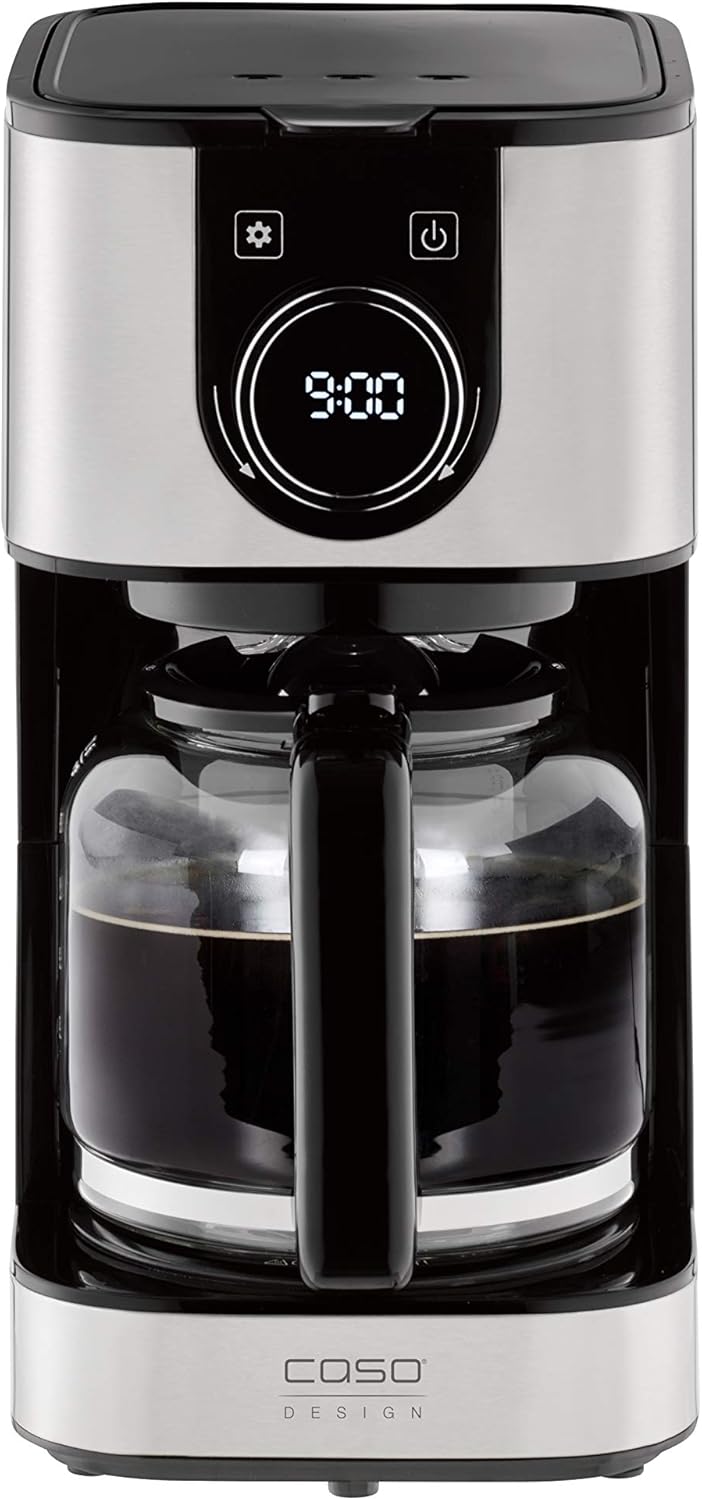
Obraz 1.1: Przód view of the Caso Design Hot Brew 10-Cup Coffee Maker.
2. Instrukcje bezpieczeństwa
To prevent personal injury or damage to your appliance, always follow these basic safety precautions:
- Przed użyciem ekspresu do kawy należy przeczytać całą instrukcję.
- Nie dotykaj gorących powierzchni. Używaj uchwytów lub gałek.
- Aby zapobiec pożarowi, porażeniu prądem elektrycznym i obrażeniom ciała, nie zanurzaj przewodu, wtyczek ani urządzenia w wodzie ani innej cieczy.
- Należy zachować ścisły nadzór, jeżeli z urządzenia korzystają dzieci lub w ich pobliżu.
- Odłącz od gniazdka, gdy nie jest używane i przed czyszczeniem. Pozostaw do ostygnięcia przed założeniem lub zdjęciem części oraz przed czyszczeniem urządzenia.
- Nie używaj żadnego urządzenia, jeśli przewód lub wtyczka są uszkodzone, ani po awarii urządzenia lub po jego uszkodzeniu w jakikolwiek sposób.
- Użycie akcesoriów niezalecanych przez producenta urządzenia może spowodować pożar, porażenie prądem lub obrażenia ciała.
- Nie stosować na zewnątrz.
- Nie pozwól, aby przewód zwisał z krawędzi stołu lub blatu i dotykał gorących powierzchni.
- Nie umieszczać na gorącym palniku gazowym lub elektrycznym ani w jego pobliżu, a także w nagrzanym piekarniku.
- Zawsze najpierw podłącz wtyczkę do urządzenia, a następnie podłącz przewód do gniazdka ściennego. Aby odłączyć, przestaw dowolne pokrętło w położenie „off”, a następnie wyjmij wtyczkę z gniazdka ściennego.
- Nie używaj urządzenia niezgodnie z jego przeznaczeniem.
3. Składniki produktu
Familiarize yourself with the parts of your Caso Design Hot Brew Coffee Maker:
- Main Coffeemaker Unit
- Szklana karafka
- Permanent Removable Filter
- Łyżka do kawy
- Zbiornik na wodę ze wskaźnikiem poziomu
- Control Panel with Display and Rotary Knob
- Talerz rozgrzewający

Obraz 3.1: Koniecview of coffee maker features, including water tank, timer, and permanent filter.
4. Konfiguracja
- Rozpakowywanie: Ostrożnie usuń wszystkie materiały opakowaniowe i sprawdź, czy ekspres do kawy nie jest uszkodzony.
- Czyszczenie wstępne: Before first use, wash the glass carafe and permanent filter in warm, soapy water. Rinse thoroughly and dry. Wipe the exterior of the coffee maker with a damp płótno.
- Umieszczenie: Umieść ekspres do kawy na płaskiej, stabilnej i odpornej na ciepło powierzchni, z dala od krawędzi blatu. Zapewnij odpowiednią wentylację wokół urządzenia.
- Pierwszy cykl parzenia (czyszczenie): Fill the water reservoir to the MAX (10-cup) level with cold water. Do not add coffee grounds. Run a full brew cycle to clean the internal components. Discard the water from the carafe. Repeat this process once more.

Image 4.1: Water level indicator showing up to 10 cups capacity.
5. Instrukcja obsługi
5.1. Parzenie kawy
- Napełnij zbiornik na wodę: Open the top lid and fill the water reservoir with cold, fresh water up to the desired number of cups, indicated by the water level markings. The maximum capacity is 10 cups.
- Dodaj fusy z kawy: Place the permanent filter into the filter basket. Add the desired amount of ground coffee using the provided scoop. A general guideline is one scoop per cup, but adjust to your taste. Close the top lid securely.
- Umieść karafkę: Upewnij się, że szklany dzbanek jest prawidłowo umieszczony na płycie grzewczej.
- Rozpocznij parzenie: Wciśnij przycisk zasilania (U) on the control panel. The coffee maker will begin brewing. The brewing temperature is approximately 200°F.
- Drip Stop Feature: The drip stop feature allows you to temporarily remove the carafe during brewing to pour a cup of coffee. Replace the carafe within 20 seconds to prevent overflow.
- Funkcja utrzymywania ciepła: After brewing, the warming plate will automatically activate and keep the coffee warm for 35 minutes. The display will show the remaining time in keep warm mode. After 35 minutes, the coffee maker will automatically shut off.

Image 5.1: Adding coffee grounds to the permanent filter.

Image 5.2: Display indicating the 'Keep Warm' function is active.
5.2. Setting the Programmable Timer
Programowalny timer umożliwia ustawienie konkretnej godziny, o której ekspres do kawy automatycznie rozpocznie parzenie.
- Ustaw aktualny czas: Naciśnij przycisk ustawień (⚙️). The clock icon will appear. Rotate the knob to set the current hour and press the knob to confirm. Rotate the knob again to set the minutes and press to confirm.
- Set Programmed Time: Naciśnij przycisk ustawień (⚙️) again until the timer icon appears. Rotate the knob to set the desired brewing start time (hour) and press to confirm. Rotate the knob again to set the minutes and press to confirm.
- Aktywuj timer: After setting the programmed time, ensure the coffee maker is prepared with water and coffee grounds. Press the power button (U) once. The display will show the current time, and a small timer icon will illuminate, indicating the timer is active. The coffee maker will start brewing at the set time.

Image 5.3: Setting the programmable timer for automatic brewing.
5.3. Aroma Plus Function
The Aroma Plus function allows you to adjust the coffee intensity. Refer to the display and rotary knob for selecting your preferred intensity level. This function ensures optimal taste by adjusting the brewing process.
6. Konserwacja i czyszczenie
Regularne czyszczenie zapewnia optymalną wydajność i wydłuża żywotność ekspresu do kawy.
- Zawsze odłączaj: Before cleaning, always unplug the coffee maker from the power outlet and allow it to cool completely.
- Dzbanek i filtr: The glass carafe and permanent filter can be washed in warm, soapy water. Rinse thoroughly and dry. These parts are also dishwasher safe (top rack recommended).
- Zewnętrzny: Przetrzyj zewnętrzne powierzchnie ekspresu do kawy miękką,amp płótno. Nie używaj ściernych środków czyszczących ani szorstkich gąbek.
- Talerz rozgrzewający: Wytrzyj płytę grzewczą czystą,amp ściereczką. Nie używaj materiałów ściernych, które mogłyby zarysować powierzchnię.
- Odwapnianie: Over time, mineral deposits (limescale) can build up in your coffee maker, affecting performance. Descale your coffee maker regularly (e.g., every 2-3 months, or more often in hard water areas) using a commercial descaling solution or a mixture of white vinegar and water (1:2 ratio). Follow the descaling product's instructions or run a brew cycle with the vinegar solution, then two cycles with fresh water to rinse.
7. Rozwiązywanie Problemów
Jeśli masz problemy z ekspresem do kawy, zapoznaj się z poniższymi typowymi problemami i ich rozwiązaniami:
| Problem | Możliwa przyczyna | Rozwiązanie |
|---|---|---|
| Ekspres do kawy nie włącza się. | Niepodłączony; zasilanie wyłączonetage; uszkodzone gniazdko. | Upewnij się, że przewód zasilający jest prawidłowo podłączony do sprawnego gniazdka. Sprawdź wyłącznik automatyczny. |
| Kawa się nie zaparza. | Timer not set correctly; insufficient water; filter basket not properly seated. | Check if the programmable timer is active. Ensure enough water is in the reservoir. Verify the filter basket is correctly in place. |
| Kawa jest za słaba lub za mocna. | Incorrect coffee-to-water ratio; Aroma Plus setting. | Adjust the amount of coffee grounds. Experiment with the Aroma Plus function for desired strength. |
| Woda przelewa się z koszyka filtrującego. | Zbyt dużo zmielonej kawy; zatkany filtr; dzbanek nieprawidłowo umieszczony. | Reduce coffee grounds. Clean the permanent filter. Ensure carafe is centered on the warming plate. |
| Kawa nie jest wystarczająco gorąca. | Mineral buildup; warming plate issue. | Perform a descaling cycle. Ensure the warming plate is clean and functioning. |
8. Specyfikacje
| Funkcja | Szczegół |
|---|---|
| Marka | Projekt Case |
| Nazwa modelu | Hot Brew 10 cup Coffee Maker |
| Numer modelu przedmiotu | 11858 |
| Kolor | Nierdzewny |
| Pojemność | 10 filiżanki |
| Wymiary produktu | 12.95" gł. x 9.65" szer. x 6.61" wys. |
| Waga przedmiotu | 4.43 funta |
| Typ ekspresu do kawy | Kroplowy ekspres do kawy |
| Tryb działania | Całkowicie automatyczny |
| Funkcja specjalna | Programmable Timer, Permanent Filter, Warming Plate, Drip Stop |
| Zawarte komponenty | Coffeemaker, Carafe, Manual, Warranty |

Image 8.1: Product dimensions for the Caso Design Hot Brew Coffee Maker.
9. Funkcje produktu Wideo
Video 9.1: Official product features video demonstrating the Caso Design Hot Brew 10-cup Coffee Maker.
10. Gwarancja i wsparcie
Your Caso Design Hot Brew 10-Cup Coffee Maker comes with a manufacturer's warranty. Please refer to the warranty card included in your product packaging for specific terms and conditions. For technical support, service, or warranty claims, please contact Caso Design customer service through their official webwitrynę lub dane kontaktowe podane w dokumentacji produktu.