
1. Wprowadzenie
Thank you for choosing the ZOKOP BCD60 Portable Car Refrigerator. This appliance is designed to provide efficient cooling and freezing for various items, suitable for both vehicle and home use. It operates on DC 12V/24V and AC 100-240V power sources, making it ideal for camping, road trips, and general outdoor or indoor use. Please read this manual thoroughly before operation to ensure proper use and maintenance.
2. Instrukcje bezpieczeństwa
Aby zmniejszyć ryzyko pożaru, porażenia prądem lub obrażeń ciała, zawsze należy przestrzegać poniższych podstawowych środków ostrożności:
- Upewnij się, że napięcie zasilaniatage jest zgodne ze specyfikacją lodówki.
- Do not operate the refrigerator with a damaged cord or plug. If damaged, contact customer support.
- Unikaj umieszczania lodówki w bezpośrednim świetle słonecznym lub w pobliżu źródeł ciepła.
- Zapewnij odpowiednią wentylację wokół urządzenia. Nie blokuj otworów wentylacyjnych.
- Nie zanurzaj lodówki w wodzie i nie wystawiaj jej na działanie ulewnego deszczu.
- Trzymaj dzieci z dala od lodówki, szczególnie gdy jest włączona.
- W tym urządzeniu nie należy przechowywać substancji wybuchowych, takich jak puszki aerozolowe z łatwopalnym paliwem.
- Przed czyszczeniem lub konserwacją należy zawsze odłączyć zasilanie.
3. Funkcje produktu
- Technologia chłodzenia sprężarkowego: Provides fast and deep cooling performance, ranging from -20°C to 10°C (-4°F to 50°F).
- Podwójne wejście zasilania: Compatible with DC 12V/24V for vehicles and AC 100-240V for home use.
- Panel sterowania LCD: Features temperature display and ECO/MAX mode selection.
- Tryb ochrony baterii: Three levels (H1, H2, H3) to prevent vehicle battery discharge.
- Przenośna konstrukcja: Equipped with handles on both sides for easy transport.
- Odporny na wibracje: Designed to operate safely on angles up to 45° from horizontal, suitable for off-road use.
- Automatyczny system rozmrażania: Ułatwia konserwację.

Image: The ZOKOP BCD60 refrigerator showcasing its capacity to store a variety of items like ice cream, fruits, meats, and drinks, highlighting its versatility.
4. Zawartość opakowania
Sprawdź, czy w opakowaniu znajdują się wszystkie elementy:
- 1 x Lodówka ZOKOP BCD60
- 1 x kosz do przechowywania
- 1 x przewód zasilający prądu stałego (12 V/24 V)
- 1 x zasilacz sieciowy
- 1 x Instruction Book (This Manual)

Image: The included accessories: AC power adapter, DC power cord, and the user manual, alongside the ZOKOP logo.
5. Konfiguracja i instalacja
5.1 Umieszczenie
Place the refrigerator on a flat, stable surface. Ensure there is sufficient space around the unit for proper ventilation (at least 10 cm or 4 inches on all sides). Avoid placing it in enclosed spaces or where airflow is restricted.
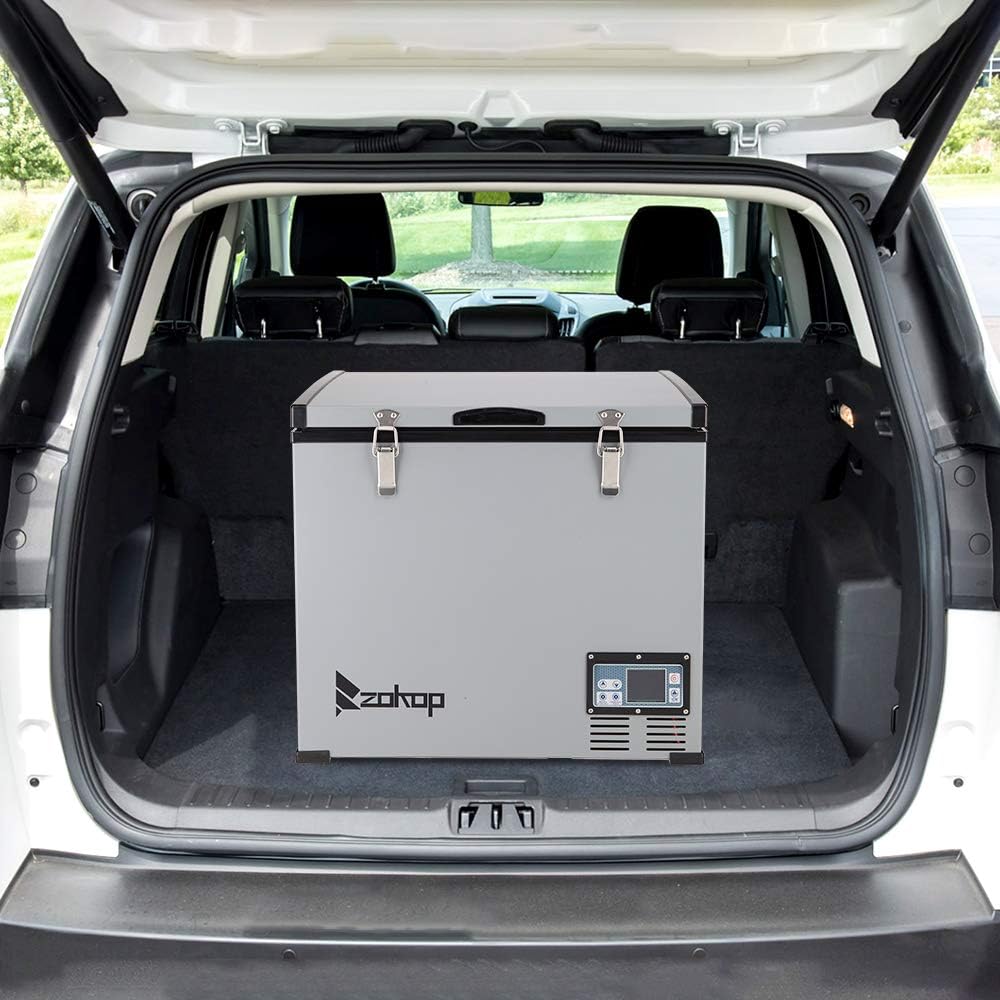
Image: The ZOKOP BCD60 refrigerator positioned in the trunk of a vehicle, demonstrating its portability and suitability for automotive use.
5.2 Połączenie zasilania
Connect the appropriate power cord to the refrigerator's power input port. Use the DC power cord for vehicle use (12V/24V socket) or the AC adapter with the AC power cord for home use (100-240V wall outlet).

Image: A close-up showing the DC 12V/24V and AC 100-240V power input ports on the refrigerator, indicating where to connect the power cables.
6. Działanie
6.1 Panel sterowania ponadview
The control panel allows you to manage the refrigerator's settings. Refer to the image below for button identification.

Obraz: szczegółowy view of the control panel, showing buttons for temperature adjustment (up/down arrows), power ON/OFF, battery protection settings, compressor speed mode, and internal light control.
6.2 Podstawowe funkcje
- Włączanie/wyłączanie zasilania: Naciśnij Przycisk WŁ./WYŁ. aby włączyć lub wyłączyć urządzenie.
- Regulacja temperatury: Użyj Increase °C I Reduce °C buttons to set the desired temperature. The display will show the current temperature and the set temperature.
- Tryb ECO/MAX: Naciśnij Prędkość sprężarki button to switch between ECO (energy-saving) and MAX (fast cooling) modes.
- Światło wewnętrzne: Naciśnij Włącz światło button to illuminate the interior.
7. Ustawienia temperatury
The refrigerator can be set to various temperatures to suit different storage needs:
- Red Wine Storage: Około 10°C (50°F)
- Owoc: 4°C - 6°C (39°F - 43°F)
- Napoje: 2°C - 5°C (36°F - 41°F)
- Mięso: Approximately -10°C (14°F)
- Lody: Approximately -15°C (5°F)
8. Tryb ochrony baterii
The refrigerator features three battery protection functions to safeguard both the appliance and your vehicle's battery from excessive discharge. These settings are adjustable via the control panel:
- H3 (Wysoki): Zapewnia najwyższy poziom ochrony baterii, odcinając zasilanie przy wyższym poziomie głośnościtage.
- H2 (średni): A balanced protection level, recommended for general vehicle use.
- H1 (Niski): Offers the least battery protection, allowing the refrigerator to run longer before cutoff.
It is recommended to set the battery protection to H2 (Medium) when using the refrigerator in a car to ensure optimal performance and battery longevity.
9. Konserwacja i pielęgnacja
9.1 Czyszczenie
- Zawsze odłączaj zasilanie przed czyszczeniem.
- Wyczyść powierzchnie wewnętrzne i zewnętrzne za pomocąamp szmatką i łagodnym detergentem.
- Nie używaj ściernych środków czyszczących ani żrących środków chemicznych.
- Przed ponownym podłączeniem zasilania należy upewnić się, że urządzenie jest suche.
9.2 Rozmrażanie
The ZOKOP BCD60 features an automatic defrost system. If ice buildup occurs, simply turn off the unit and allow the ice to melt naturally. Wipe away any melted water with a clean cloth.
10. Rozwiązywanie Problemów
Jeśli masz problemy z lodówką, zapoznaj się z poniższymi typowymi problemami i ich rozwiązaniami:
- Urządzenie nie włącza się:
- Sprawdź, czy przewód zasilający jest prawidłowo podłączony.
- Verify the power source is active (vehicle socket, wall outlet).
- Ensure the vehicle battery has sufficient charge if using DC power.
- Cooling performance is poor:
- Sprawdź czy ustawienia temperatury są właściwe.
- Upewnij się, że otwory wentylacyjne nie są zablokowane.
- Avoid frequent opening of the lid.
- Verify the ambient temperature is not excessively high.
- Kody błędów na wyświetlaczu:
- Consult the specific error code in the detailed instruction book for resolution.
Jeśli problemy będą się powtarzać, skontaktuj się z obsługą klienta.
11. Specyfikacje
| Funkcja | Specyfikacja |
|---|---|
| Marka | ZOKOP |
| Numer modelu | BCD60 |
| Pojemność | 60 litra (64 kwarty) |
| Metoda chłodzenia | Kompresor |
| Zakres temperatur | -20°C do 10°C (-4°F do 50°F) |
| Moc wejściowa | DC 12 V/24 V, AC 100-240 V |
| System rozmrażania | Automatyczny |
| Liczba drzwi | 1 |
| Liczba półek | 1 (Basket) |
| Typ zamka | Klawisz |
| Producent | Shanghai Cross Boder Ecommerce Co.,Ltd |
| UPC | 713719747998 |

Image: Dimensional drawing of the ZOKOP BCD60 refrigerator, including external measurements and internal basket dimensions.
12. Gwarancja i wsparcie
For any questions, support, or warranty claims, please contact ZOKOP customer service. Please have your model number and purchase information ready when contacting support.
E-mail: support@groviva.com
Telefon: 1-800-682-7292
Szczegółowe warunki gwarancji można znaleźć w oryginalnej dokumentacji zakupu.