
Codnida COD-CD320
Codnida Security Camera Outdoor User Manual
Model: COD-CD320
1. Wprowadzenie
This manual provides detailed instructions for the installation, operation, and maintenance of your Codnida 2K PTZ Outdoor Security Camera. Designed for comprehensive surveillance, this camera offers 360° pan and tilt capabilities, 2K (3MP) video resolution, motion detection with smart siren, two-way audio, and color night vision, ensuring robust security for your property.
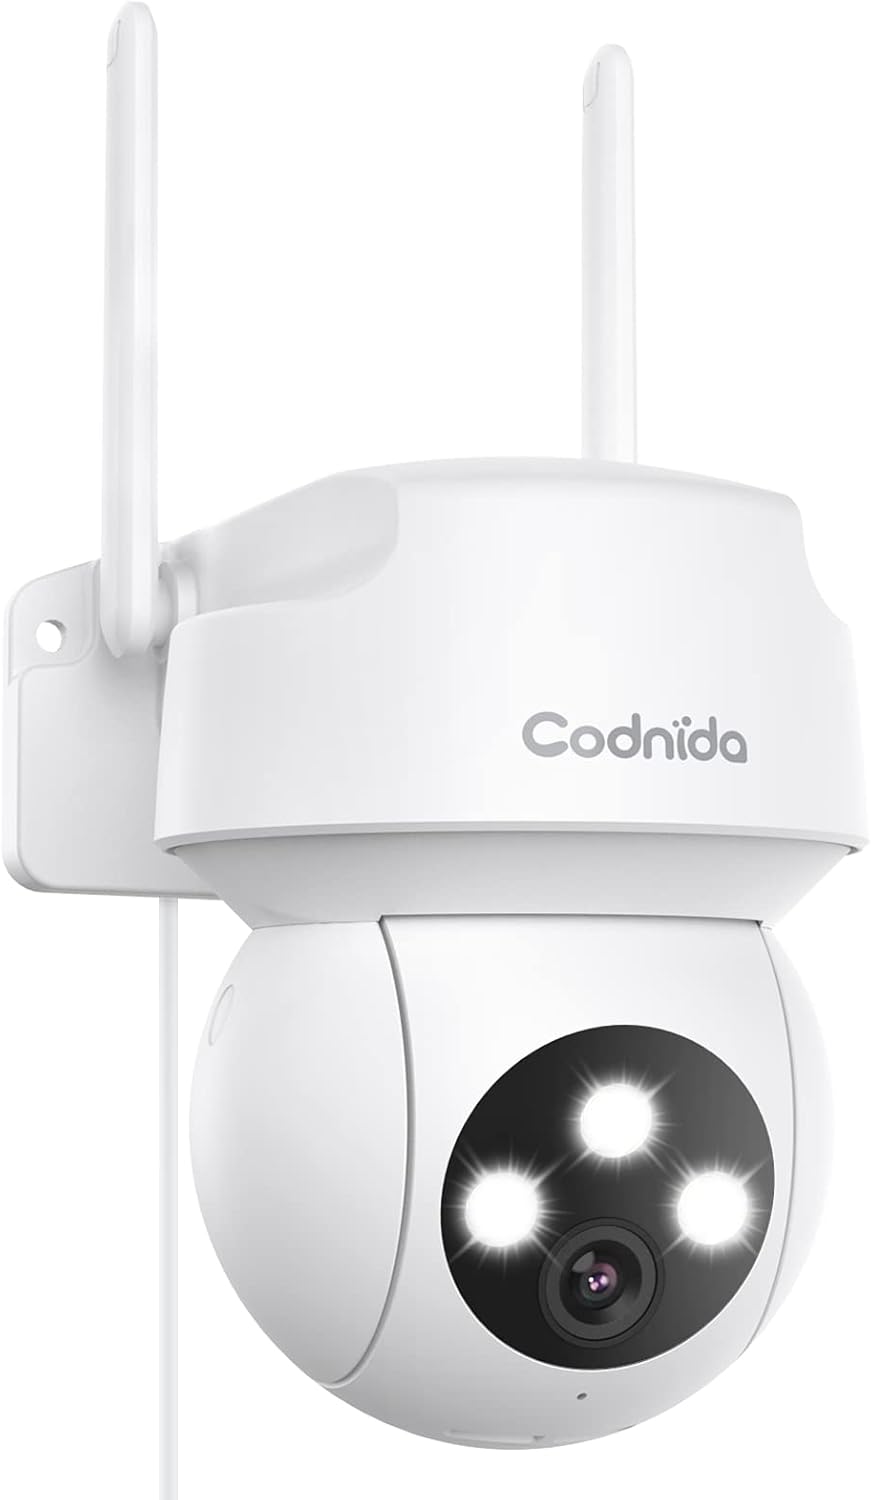
Figure 1.1: Codnida 2K PTZ Outdoor Security Camera, showcasing its sleek white design with dual antennas and three prominent LED lights on the camera head.
2. Zawartość opakowania
Sprawdź, czy w przesyłce znajdują się wszystkie elementy wymienione poniżej:
- 1 x Security Camera with cable (approx. 10ft)
- 1 x zasilacz
- 1 x naklejka pozycyjna
- 1 x Pakiet śrub
- 1 x Instrukcja obsługi

Figure 2.1: Diagram illustrating the camera's components including antennas, indicator light, LED lights, camera lens, microphone, power cable, reset button, and TF card slot.
3. Główne cechy
- 360° View PTZ: Pan 340° and tilt 110° for comprehensive coverage without blind spots.
- 2K (3MP) Video & Image: Captures 2304x1296 resolution for clear, sharp visuals.
- Smart Siren Alarm: Automatic activation of floodlight and siren upon motion detection at night.
- Detekcja ruchu i automatyczne śledzenie: Real-time alarm pushes to your phone and automatic tracking of human activity.
- Wyraźna wizja nocna: Features infrared and full-color night vision modes.
- Dostęp zdalny: View live video and control the camera via the "CloudEdge" app (iOS & Android).
- Dwukierunkowy dźwięk: Wbudowany mikrofon i głośnik umożliwiające komunikację w czasie rzeczywistym.
- Odporność na warunki atmosferyczne IP66: Designed to withstand harsh weather conditions (-4℉ to +140℉).
- Obsługa pamięci masowej: Supports SD card (up to 128GB, not included) and cloud service for recording storage.
4. Przewodnik konfiguracji
4.1 Włączanie
Connect the camera to the provided power adapter and plug it into a standard electrical outlet. The camera will perform a self-test, indicated by LED lights and a voice prompt.
4.2 Pobieranie aplikacji i tworzenie konta
Download the "CloudEdge" app from your device's app store (available for iOS and Android). Follow the in-app instructions to create a new account or log in if you already have one.
4.3 Połączenie Wi-Fi
The Codnida camera connects only to 2.4GHz Wi-Fi networks. Ensure your router is broadcasting a 2.4GHz signal. If you have a dual-band router, you may need to separate the 2.4GHz and 5GHz networks or ensure your device is connected to the 2.4GHz band during setup.
Within the CloudEdge app, select 'Add Device' and follow the prompts to connect your camera to your Wi-Fi network. This typically involves scanning a QR code displayed on your phone with the camera lens.
Video 4.1: Instructions on how to change your Xfinity router settings to enable a 2.4GHz Wi-Fi network, which is required for the camera's connection.
4.4 Montaż kamery
Choose a suitable outdoor location for mounting, ensuring a clear view and proximity to a power source. Use the included position sticker to mark drill holes, then secure the camera using the provided screws. The camera's IP66 weatherproof rating ensures durability against rain and snow.

Rysunek 4.1: Byłyample of the camera mounted outdoors on a wall, demonstrating its placement for optimal surveillance.

Figure 4.2: Visual representation of the camera's IP66 weatherproof capability, showing it enduring rain, snow, and sunshine.
5. Działanie
5.1 Na żywo View i sterowanie PTZ
Otwórz aplikację CloudEdge i wybierz kamerę, aby uzyskać dostęp do transmisji na żywo view. Use the on-screen joystick or swipe gestures to control the camera's pan (340°) and tilt (110°) movements, allowing you to adjust the viewzdalnie pod kątem.

Figure 5.1: A smartphone screen displaying the live camera feed with an overlay of PTZ control arrows, indicating the ability to remotely adjust the camera's pan and tilt.

Figure 5.2: An outdoor scene with a house and garage, showing the camera mounted on the wall with arrows indicating its 340° pan and 110° tilt capabilities for a 360° view.
5.2 Detekcja ruchu i alerty
Enable motion detection in the app settings. When motion is detected, the camera will automatically push real-time alarm information to your phone. The auto-tracking feature allows the camera to follow detected human activity, ensuring important moments are recorded.

Figure 5.3: An illustration depicting the camera's human motion tracking feature, showing a person walking and the camera's field of view adjusting to follow them.

Figure 5.4: A night scene showing the camera's spotlight illuminating an intruder and a siren icon, with a phone displaying an alarm message, demonstrating the smart siren and spotlight function.
5.3 Dźwięk dwukierunkowy
Wykorzystaj wbudowany mikrofon i głośnik do komunikacji dwukierunkowej. Dotknij ikony mikrofonu w transmisji na żywo. view mówić przez kamerę i słuchać dźwięków z otoczenia kamery.

Figure 5.5: A person interacting with the camera via a smartphone app, showing a microphone icon for speaking and text bubbles indicating a two-way conversation, such as with a delivery person.
5.4 Tryby widzenia nocnego
The camera offers two night vision modes: infrared night vision for clear black-and-white images in low light, and full-color night vision which uses the integrated floodlight to provide color images at night.

Figure 5.6: Comparison of color night vision (top) showing a brightly lit house and infrared night vision (bottom) showing a black and white view, both captured by the camera at night.
5.5 Nagrywanie i odtwarzanie
The camera supports 24/7 recording. Recordings can be stored on a local SD card (not included, up to 128GB) or via cloud service (subscription may be required). Access recorded footage and playback through the CloudEdge app.

Figure 5.7: A visual comparison demonstrating the superior clarity of 2K (3MP) video resolution compared to 1080p, highlighting the enhanced detail captured by the camera.
6. Konserwacja
6.1 Czyszczenie aparatu
Okresowo czyść obiektyw i obudowę aparatu miękką,amp Ściereczką usuń kurz i zanieczyszczenia. Nie używaj silnych środków chemicznych ani ściernych środków czyszczących.
6.2 aktualizacji oprogramowania sprzętowego
Check the CloudEdge app regularly for available firmware updates. Keeping your camera's firmware up-to-date ensures optimal performance, security, and access to new features.
6.3 Sprawdzanie połączeń
Ensure the power cable and any network cables (if used) are securely connected and free from damage. Verify Wi-Fi signal strength in the app to maintain a stable connection.
7. Specyfikacje
| Funkcja | Szczegół |
|---|---|
| Marka | Kodnida |
| Numer modelu | COD-CD320 |
| Technologia łączności | Bezprzewodowy (Wi-Fi) |
| Częstotliwość Wi-Fi | 2.4 GHz (Does not support 5G Wi-Fi) |
| Rozdzielczość przechwytywania wideo | 2K (3 MP, 2304x1296p) |
| Pan Range | 340° |
| Zakres pochylenia | 110° |
| Zakres noktowizora | 33 stóp |
| Tryby noktowizyjne | Infrared, Full Color |
| Audio | Dwukierunkowa transmisja dźwięku (wbudowany mikrofon i głośnik) |
| Odporność na warunki atmosferyczne | Wodoodporność IP66 |
| Temperatura pracy | -4℉ do +140℉ (-20℃ do +60℃) |
| Opcje przechowywania | SD Card (up to 128GB), Cloud Service |
| Źródło zasilania | Przewodowy elektryczny (5 V, 12 W) |
| Wymiary (dł. x szer. x wys.) | 1 x 1 x 1 cala |
| Waga przedmiotu | 1.08 funta |
| Zawarte komponenty | Camera, Power Adapter, Position Sticker, Screw Package, User Manual |
8. Rozwiązywanie Problemów
8.1 Kamera nie łączy się z siecią Wi-Fi
- Upewnij się, że Twoja sieć Wi-Fi obsługuje częstotliwość 2.4 GHz. Kamera nie obsługuje Wi-Fi 5 GHz.
- Sprawdź poprawność swojego hasła Wi-Fi.
- Aby poprawić siłę sygnału, przesuń kamerę bliżej routera Wi-Fi.
- If using a dual-band router, temporarily disable the 5GHz band during setup or ensure your phone is connected to the 2.4GHz band.
- Reset the camera by holding the reset button (located near the TF card slot) for 6-10 seconds until you hear a prompt. Then, attempt to reconnect.
8.2 Blurry or Pixelated Images
- Sprawdź, czy obiektyw aparatu jest czysty i nie ma na nim smug ani brudu.
- Check your internet connection speed. A slow connection can result in lower quality streaming.
- Verify the camera's resolution setting in the CloudEdge app is set to 2K (3MP) or FHD.
8.3 Detekcja ruchu nie działa lub jest zbyt czuła
- Adjust the motion detection sensitivity settings within the CloudEdge app.
- Define specific detection zones to reduce false alarms from irrelevant areas.
- Upewnij się, że nie ma żadnych przeszkód blokujących kamerę. view w obszarze detekcji.
9. Gwarancja i wsparcie
For any issues with your order or product, please contact customer support. You can typically find support by logging into your account, choosing 'your order', finding the order ID, and clicking 'contact seller'.
For the most up-to-date warranty information, please refer to the product listing or contact Codnida customer service directly.
Ask a question about this manual
Ask about setup, troubleshooting, compatibility, parts, safety, or missing instructions. Manuals+ will review the question and use this page’s manual context to help answer it.