1. Koniec produktuview
Thank you for choosing the Lepro 10W LED Outdoor Floodlight. This manual provides essential information for the safe installation, operation, and maintenance of your new floodlight. Please read it thoroughly before use and retain it for future reference.
This product is a high-efficiency, IP65 waterproof LED floodlight designed for outdoor and indoor lighting applications such as gardens, yards, garages, and security lighting.
2. Informacje dotyczące bezpieczeństwa
- Zawsze odłączaj zasilanie przed instalacją lub konserwacją.
- Jeśli nie masz pewności, instalację powinien wykonać wykwalifikowany elektryk.
- Upewnij się, że napięcie zasilaniatage odpowiada wymaganiom produktu (220 V).
- Nie należy patrzeć bezpośrednio na źródło światła LED, gdy jest ono włączone.
- Trzymaj produkt z dala od materiałów łatwopalnych.
- Nie wolno modyfikować produktu w żaden sposób.
- Ensure all connections are secure and properly insulated to maintain IP65 rating.
3. Zawartość opakowania
Pakiet zazwyczaj zawiera:
- 2 x Lepro 10W LED Outdoor Floodlights
- Elementy montażowe (śruby, kotwy)
- Instrukcja obsługi
4. Funkcje produktu
- Wysoka jasność: 10W LED chip provides 850 lumens of 5000K cool white light, equivalent to a 70W incandescent bulb.
- Trwała konstrukcja: Constructed from die-cast aluminum and ultra-thin tempered glass, offering rust-proof and high-quality electrostatic adsorption surface treatment.
- Łatwa instalacja: Features a bracket that can be easily mounted to ceilings, walls, or floors using two self-locking screws. Includes a 1-meter cable for connection.
- Efektywne odprowadzanie ciepła: Ultra-thin body design with an integrated heat sink ensures optimal thermal performance and extends product lifespan.
- IP65 Waterproof & Wide Application: Rated IP65 for protection against dust and water jets, suitable for various indoor and outdoor lighting projects including gardens, squares, billboards, factories, docks, stadiums, patios, warehouses, courtyards, garages, driveways, and entrances.
5. Specyfikacje
| Specyfikacja | Wartość |
|---|---|
| Numer modelu | PR340010-DW-EU-2 |
| Pobór mocy | 10 watów |
| Strumień świetlny | 850 lumenów |
| Temperatura barwowa | 5000K (zimna biel) |
| Tomtage | 220 V AC |
| Stopień ochrony IP | IP65 (wodoodporne) |
| Tworzywo | Aluminium, szkło hartowane |
| Wymiary produktu (dł. x szer. x wys.) | Wymiary 9 x 2.4 x 7.8 cm |
| Waga | 200 gram |
| Kąt wiązki | 110 stopnia |
| Długość kabla | 1 metr |
| Typ montażu | Wall-mounted, Ceiling-mounted, Ground-mounted |
Szczegółowe informacje na temat efektywności energetycznej można znaleźć w bazie danych EPREL:
6. Konfiguracja i instalacja
Aby zapewnić bezpieczną i prawidłową instalację, wykonaj następujące czynności:
- Przygotuj się do instalacji:
- Przed rozpoczęciem jakichkolwiek prac elektrycznych należy wyłączyć główne zasilanie wyłącznikiem automatycznym.
- Gather necessary tools: drill, screwdriver, wire strippers, electrical tape, and a pencil.
- Wybierz miejsce montażu:
Select a suitable location on a wall, ceiling, or ground that provides the desired illumination area. The floodlight can be adjusted to direct light as needed.
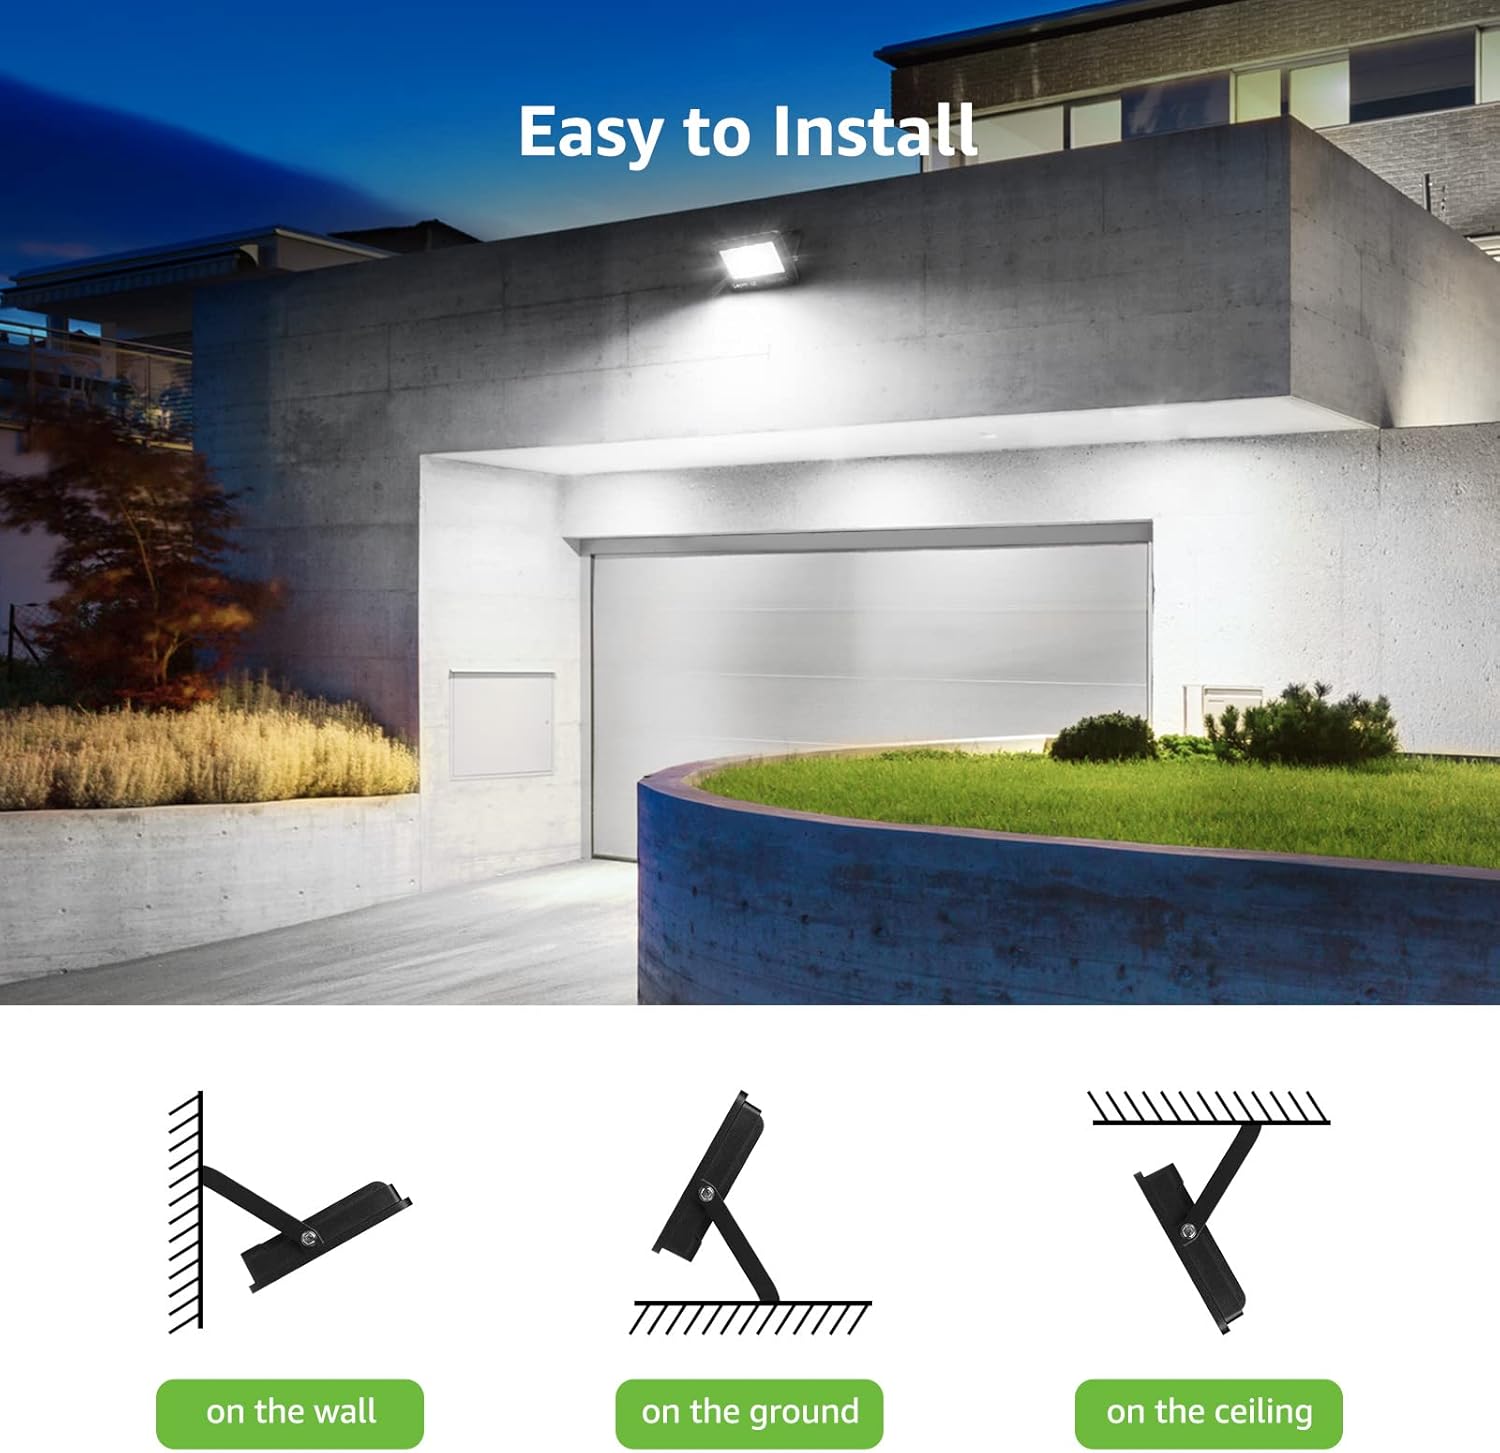
Image: Illustration of various mounting positions for the floodlight (wall, ground, ceiling).
- Zaznacz i wywierć otwory:
Use the floodlight's mounting bracket as a template to mark the drilling points on the chosen surface. Drill appropriate holes for the included mounting hardware.
- Zabezpiecz wspornik:
Attach the mounting bracket securely to the surface using the provided screws and anchors. Ensure it is firm and stable.
- Połączenie okablowania:
Connect the floodlight's cable to your main power supply. Observe the standard wiring color codes:
- Przewód brązowy: Przewód pod napięciem
- Yellow & Green Wire: Linia naziemna
- Niebieski przewód: Przewód neutralny

Obraz: Szczegółowy view of the floodlight's heat sink and wiring color codes for electrical connection.
Ensure all connections are tight and insulated with appropriate waterproof connectors or electrical tape to maintain the IP65 rating, especially for outdoor installations.
- Zamontuj reflektor:
Mount the floodlight unit onto the secured bracket using the self-locking screws. Adjust the angle of the floodlight to your desired position.
- Przywróć zasilanie:
Po zakończeniu instalacji i zabezpieczeniu wszystkich połączeń należy przywrócić zasilanie za pomocą wyłącznika automatycznego.

Image: The floodlight installed above a garage, demonstrating its wide beam angle and bright illumination.

Image: An outdoor floodlight illuminating a garden area from a height, showing its coverage.
7. Instrukcja obsługi
The Lepro 10W LED Outdoor Floodlight operates by direct electrical connection. Once properly installed and connected to a power source, it can be controlled via a standard wall switch or an external timer/sensor system (not included).
- Włączyć: Activate the connected wall switch or power source.
- Wyłączyć: Deactivate the connected wall switch or power source.
The floodlight provides instant full brightness upon activation.
8. Konserwacja
Regularna konserwacja zapewnia optymalną wydajność i długowieczność reflektora:
- Czyszczenie: Periodically clean the glass surface with a soft, damp Ściereczką usuń kurz i zanieczyszczenia. Nie używaj środków czyszczących ani rozpuszczalników o działaniu ściernym. Przed czyszczeniem upewnij się, że urządzenie jest odłączone od zasilania.
- Kontrola: Regularly check the mounting bracket and wiring for any signs of damage, corrosion, or loose connections. Tighten screws if necessary.
- Trwałość środowiskowa: The IP65 rating ensures resistance to water and dust. The floodlight is designed to withstand various weather conditions, including heat and frost.

Image: Visual representation of the floodlight's IP65 waterproof, heat resistance, and frost resistance features.
9. Rozwiązywanie Problemów
Jeśli masz problemy z reflektorem, zapoznaj się z poniższymi typowymi problemami i rozwiązaniami:
| Problem | Możliwa przyczyna | Rozwiązanie |
|---|---|---|
| Światło się nie włącza. | Brak zasilania. Luźne połączenie okablowania. Wadliwy przełącznik. | Sprawdź czy wyłącznik obwodu jest pod napięciem. Sprawdź, czy wszystkie połączenia okablowania są bezpieczne. Test the switch with another device or replace it. |
| Światło migocze. | Niestabilne zasilanie. Luźne połączenie. | Ensure stable power. Check for loose wiring and tighten connections. |
| Zmniejszona jasność. | Brudna soczewka. Aging LED components. | Clean the glass surface of the floodlight. If the product is old, reduced brightness may indicate end of lifespan. |
Jeśli po wypróbowaniu tych rozwiązań problem nadal występuje, skontaktuj się z obsługą klienta Lepro.
10. Gwarancja i wsparcie
Lepro products are designed for quality and durability. This product is covered by a standard return policy of 30 days from the date of purchase. For specific warranty terms and conditions, please refer to your purchase documentation or contact Lepro customer support.
For technical assistance, troubleshooting, or warranty claims, please visit the official Lepro website or contact their customer service department. You can often find support information on the product packaging or the retailer's webstrona.
Zasoby internetowe: