
1. Wprowadzenie
This manual provides comprehensive instructions for the safe and effective operation, maintenance, and troubleshooting of the BAOSHISHAN Digital Force Gauge 100N, Model WLS-ZMF100. This device is designed for precise measurement of tension and compression forces in various applications, including destructive tests. Please read this manual thoroughly before using the device to ensure proper functionality and to prevent damage or injury.
2. Informacje dotyczące bezpieczeństwa
Observe the following safety precautions to ensure safe operation and to prevent damage to the device or injury to personnel:
- Do not exceed the maximum load capacity of 100N (10kg/22Lb/360Oz). Overloading can damage the sensor.
- Unikaj upuszczania i narażania urządzenia na silne uderzenia.
- Nie próbuj demontować ani modyfikować urządzenia. Wszelkie prace serwisowe zlecaj wykwalifikowanemu personelowi.
- Trzymaj urządzenie z dala od wody, nadmiernej wilgoci i ekstremalnych temperatur.
- Ensure proper attachment of test accessories to prevent them from detaching during measurement.
3. Zawartość opakowania
Sprawdź, czy w przesyłce znajdują się wszystkie elementy wymienione poniżej:
- 1 x Digital Force Gauge (WLS-ZMF100)
- 2 baterie AAA 1.5 V
- 5 x Test Parts (various attachments)
- 1 x przedłużacz
- 1 x Trigger Pull Arm
- 4 x Screw M4*8
- 4 x Screw M4*10
- 2 x Nakrętka M6
- 1 x Instrukcja obsługi
- 1 x certyfikat kalibracji
- 1 x After-Sale Service Card
- 1 x przenośna obudowa do przechowywania

Image: Contents of the BAOSHISHAN Digital Force Gauge package, showing the gauge, test parts, batteries, manual, and storage case.
4. Koniec produktuview
The BAOSHISHAN Digital Force Gauge is a compact and portable device designed for accurate force measurements. It features a backlit LCD display and intuitive button controls.
4.1 Komponenty urządzenia

Obraz: Przód view of the Digital Force Gauge, highlighting the LCD screen and control buttons.
- Wyświetlacz LCD: Shows measurement values, units, battery status, and mode indicators.
- Przycisk SET: Used for entering and confirming settings.
- Przycisk zasilania: Włącza/wyłącza urządzenie.
- Przycisk ZERO: Resets the current reading to zero.
- Przycisk SZCZYT: Toggles between Real-time, PEAK, and First-PEAK modes.
- Przycisk JEDNOSTKA: Cycles through available measurement units (N, kg, Lb, Oz).
- Measurement Hook/Adapter Port: Located at the top, for attaching various test parts.
4.2 Elementy wyświetlacza

Obraz: Szczegółowy view of the LCD display, showing battery indicator, mode indicators (P, T, MEM), unit indicators (K, N, kg, lb, Oz), and measurement value.
4.3 Test Parts and Accessories
The gauge comes with various test parts to accommodate different measurement scenarios.

Image: A selection of interchangeable test parts for the force gauge, designed for diverse applications.
5. Konfiguracja
5.1 Instalacja baterii
- Znajdź komorę baterii z tyłu urządzenia.
- Odsuń pokrywę komory baterii.
- Włóż dwie (2) baterie AAA, zwracając uwagę na prawidłową biegunowość (+/-).
- Dokładnie zamknij pokrywę komory baterii.

Obraz: Tył view of the force gauge with the battery cover removed, showing the two AAA batteries inside.
5.2 Attaching Test Parts
Select the appropriate test part for your application and screw it firmly into the measurement port at the top of the gauge.
6. Instrukcja obsługi
6.1 Włączanie/wyłączanie zasilania
- Aby włączyć, naciśnij MOC przycisk.
- Aby wyłączyć, naciśnij i przytrzymaj MOC Naciśnij przycisk i przytrzymaj przez około 3 sekundy.
6.2 Konwersja jednostek
The device supports four units: Newtons (N), kilograms (kg), pounds (Lb), and ounces (Oz).
- Po włączeniu urządzenia naciśnij przycisk JEDNOSTKA przycisk.
- Each press will cycle through the available units on the display.
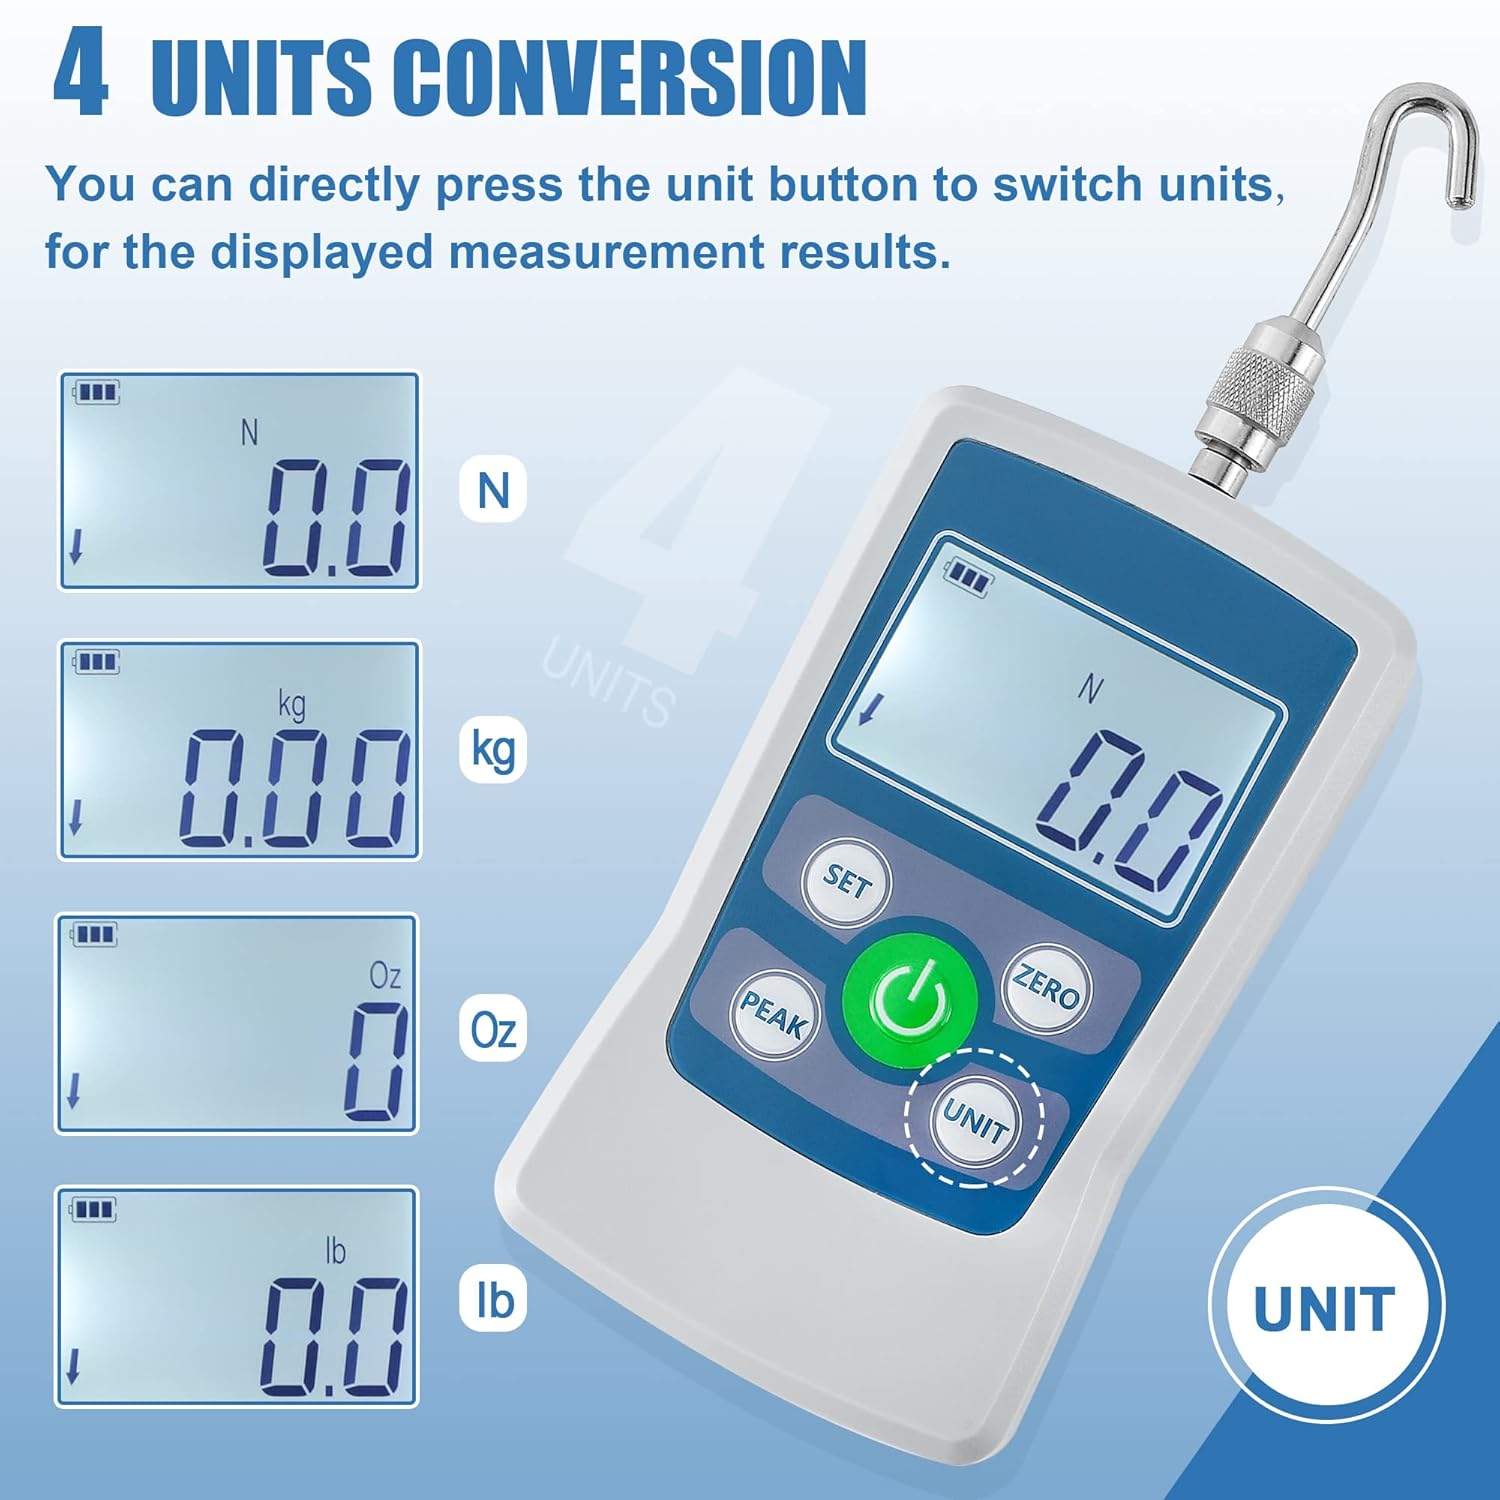
Image: The force gauge display cycling through Newtons (N), kilograms (kg), ounces (Oz), and pounds (Lb).
6.3 Tryby pomiaru
The gauge offers three measurement modes: Real-time, PEAK, and First-PEAK.
- Naciśnij SZCZYT przycisk, aby przełączać tryby.
- Tryb czasu rzeczywistego: Wyświetla aktualnie przyłożoną siłę.
- Tryb szczytowy: Holds and displays the maximum force applied during a measurement cycle.
- First-PEAK Mode: Captures and displays the first peak force detected, useful for initial break-away force measurements.
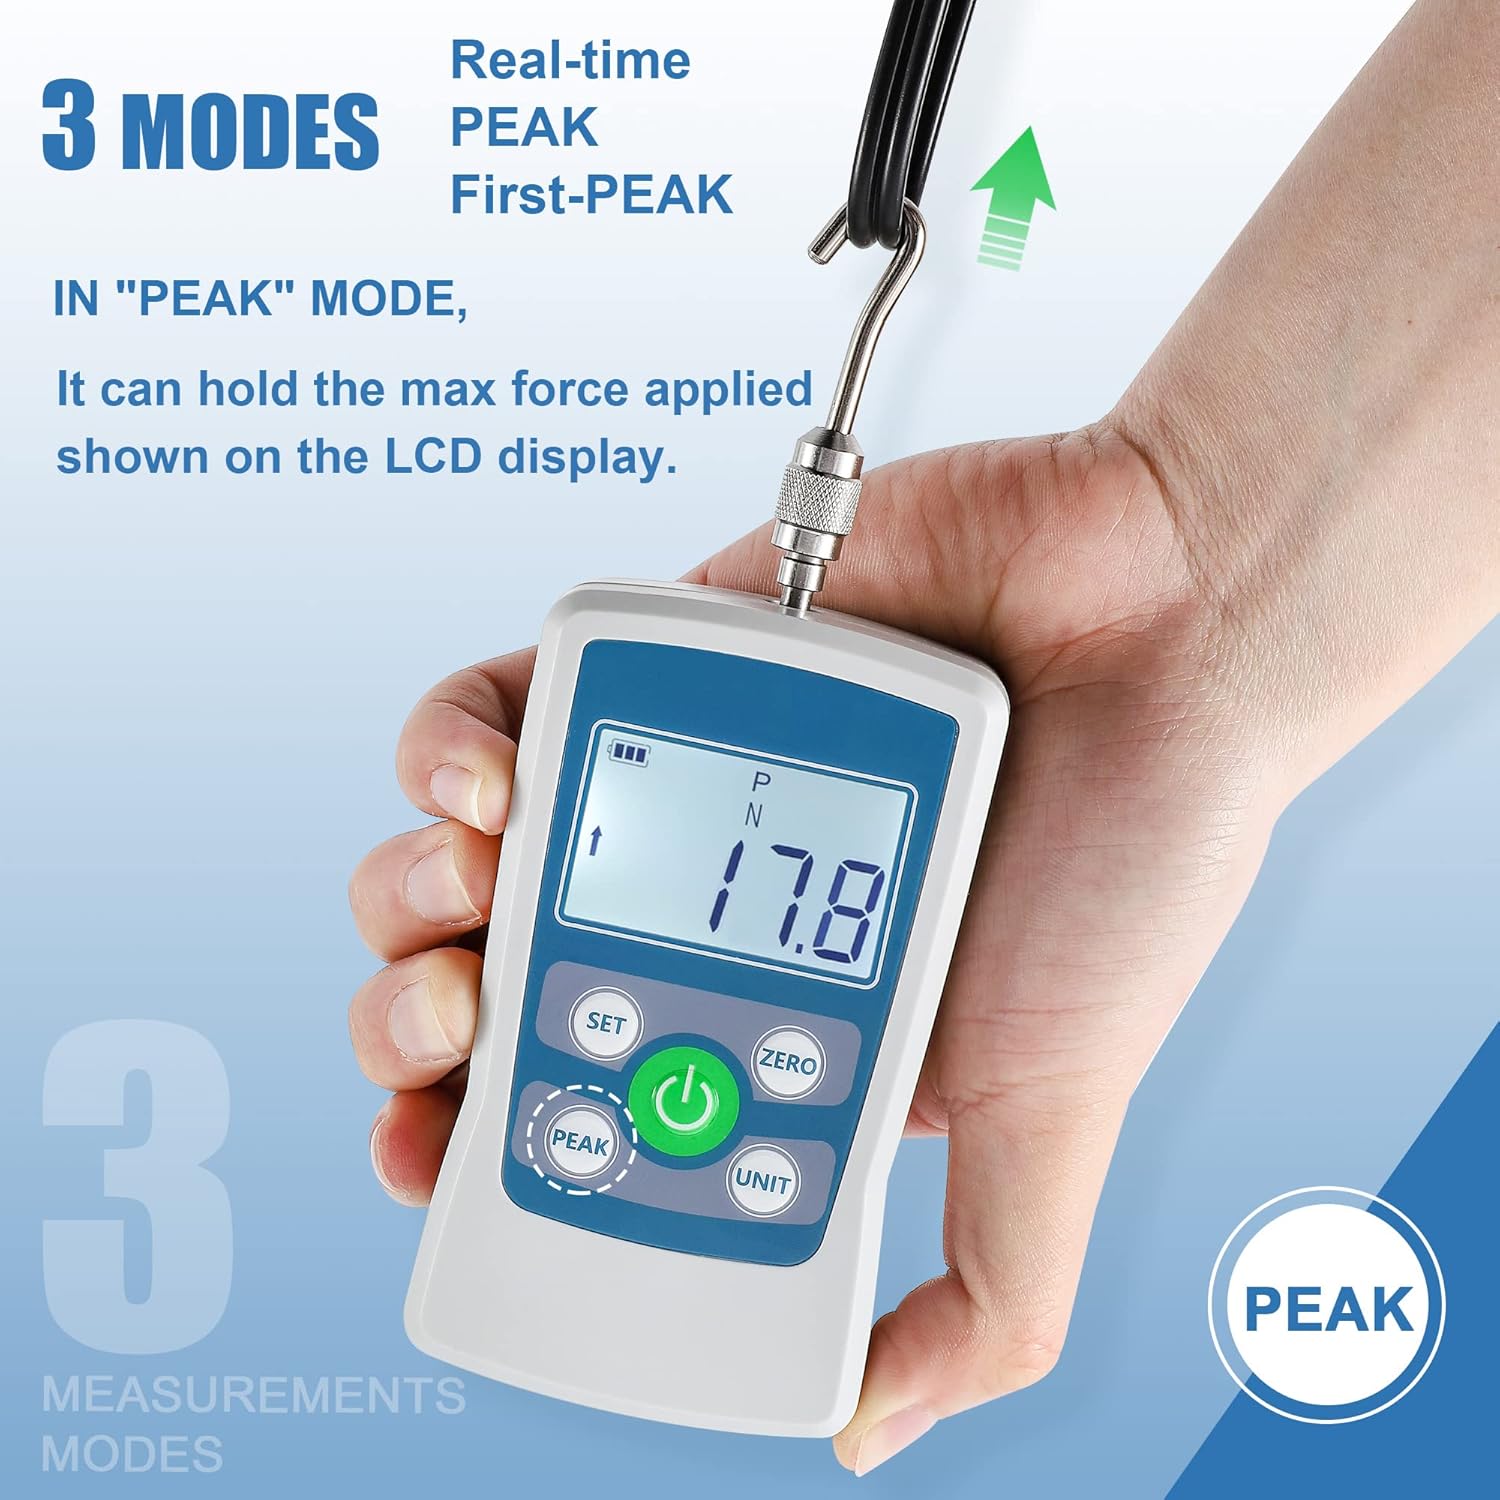
Image: The force gauge displaying a peak measurement in PEAK mode.
6.4 Zerowanie wskaźnika
To ensure accurate measurements, zero the gauge before each test or when the display shows a non-zero reading without any load.
- Ensure no load is applied to the gauge.
- Naciśnij ZERO button. The display should show "0.0".
6.5 Limit Alarm Setting
You can set upper and lower force limits. If the measured force exceeds these limits, an audible alarm will sound.
- Naciśnij USTAWIĆ aby wejść do menu ustawień.
- Navigate to the limit setting option (refer to the on-screen prompts or full manual for specific navigation).
- Adjust the upper and lower limit values using the appropriate buttons.
- Potwierdź ustawienia naciskając USTAWIĆ Ponownie.
6.6 Minimum Force Shielding
This function allows the gauge to ignore and not display data below 0.5% of the full scale, preventing minor fluctuations from being shown. This function is enabled by default.
- To disable or re-enable this function, access the settings menu via the USTAWIĆ button and locate the 'Minimum Force Shielding' option.
NIE WYŁĄCZAJ automatycznie
The device can be configured to automatically power off after a period of inactivity to conserve battery life. The default auto-off time is 10 minutes, adjustable from 0 to 15 minutes.
- To adjust the auto shutdown time, enter the settings menu using the USTAWIĆ przycisk.
- Set the desired inactivity duration. Setting it to 0 minutes disables auto shutdown.
6.8 Performing a Push/Pull Test
- Attach the appropriate test part to the gauge.
- Power on the gauge and select the desired measurement unit and mode (Real-time, PEAK, or First-PEAK).
- Zero the gauge by pressing the ZERO przycisk.
- Apply force to the object being tested, ensuring the force is applied axially to the gauge's sensor.
- Read the measurement on the LCD display. If in PEAK mode, the maximum value will be held.
- Release the force and record the reading if necessary.

Image: Demonstrations of the force gauge performing both push and pull tests.

Image: The force gauge being used with a trigger pull arm for precise measurement.
7. Konserwacja
7.1 Czyszczenie
- Przetrzyj urządzenie miękką, suchą ściereczką.
- Nie należy używać środków czyszczących o właściwościach ściernych ani rozpuszczalników.
7.2 Przechowywanie
- Store the device in its portable storage case when not in use to protect it from dust and physical damage.
- Aby zapobiec wyciekowi baterii, wyjmij je, jeśli urządzenie nie będzie używane przez dłuższy czas.
- Przechowywać w chłodnym i suchym miejscu, z dala od bezpośredniego światła słonecznego.
8. Rozwiązywanie Problemów
| Problem | Możliwa przyczyna | Rozwiązanie |
|---|---|---|
| Urządzenie nie włącza się. | Rozładowane lub nieprawidłowo zainstalowane baterie. | Wymień baterie na nowe baterie AAA, zwracając uwagę na prawidłową biegunowość. |
| Niedokładne odczyty. | Gauge not zeroed; Overload; Damaged sensor. | Press the ZERO button before measurement. Do not exceed max load. If problem persists, contact support. |
| Display shows "OL" or similar error. | Stan przeciążenia. | Remove load immediately. Do not exceed the maximum capacity. |
| No alarm sound when limits are exceeded. | Alarm function disabled or volume too low. | Check limit alarm settings in the menu and ensure the buzzer is enabled. |
9. Specyfikacje
| Parametr | Wartość |
|---|---|
| Max. Load Value | 100N / 10kg / 22Lb / 360Oz |
| Wartość obciążenia (rozdzielczość) | 0.1N / 0.01kg / 0.01Lb / 1Oz |
| Dokładność | ±1% |
| Źródło zasilania | Baterie 2 x AAA (w zestawie) |
| Wymiary produktu (dł. x szer. x wys.) | Wymiary 12.4 x 6 x 2.2 cm |
| Waga przedmiotu | 0.4 kg (400 g) |
| Czas automatycznego wyłączania | Adjustable 0-15 minutes (Default: 10 minutes) |
| Tworzywo | Akrylonitryl-butadien-styren (ABS) |
| Numer modelu | WLS-ZMF100 |

Image: Dimensional drawing of the force gauge, indicating key measurements.
10. Gwarancja i wsparcie
The BAOSHISHAN Digital Force Gauge 100N (Model WLS-ZMF100) comes with a 1-letnia gwarancja od daty zakupu. Niniejsza gwarancja obejmuje wady produkcyjne i usterki powstałe podczas normalnego użytkowania.
For technical support, warranty claims, or service inquiries, please refer to the After-Sale Service Card included in your package or contact BAOSHISHAN customer service through their official channels.